Create a Fun Summer BBQ Invitation

Ladybug-Greens-1-600

By Alison Heikkila

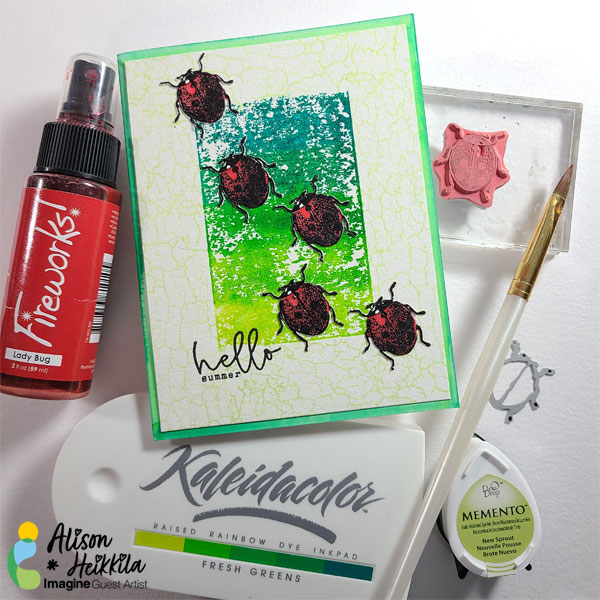
Summer is fast approaching and that means it’s almost barbecue season! After many of us spent last year at home, isolated, I know a lot of folks are looking forward to spending summer with friends and family again. Today, I have a simple tutorial to help you make sweet invitations (or just regular greeting cards) using some of my favorite products from Imagine, like Kaleidacolor inks and Fireworks! Spray.

Skill Level: Beginner

Time: Approx. 20 Minutes, plus drying time

Directions:

Ladybug-Greens-5

Step 1

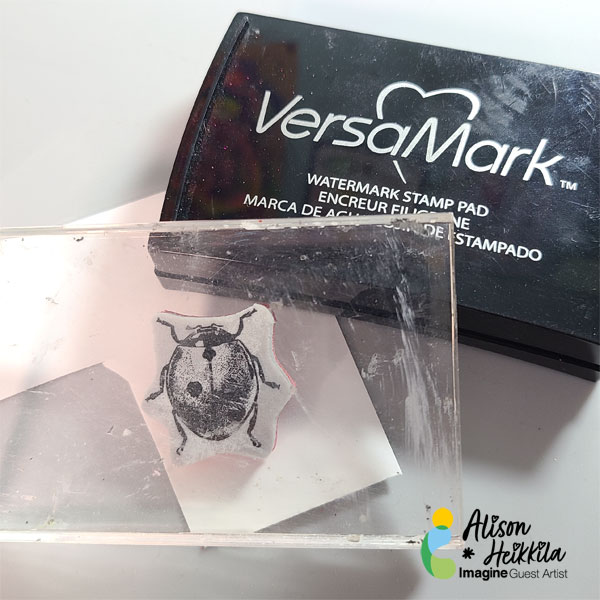
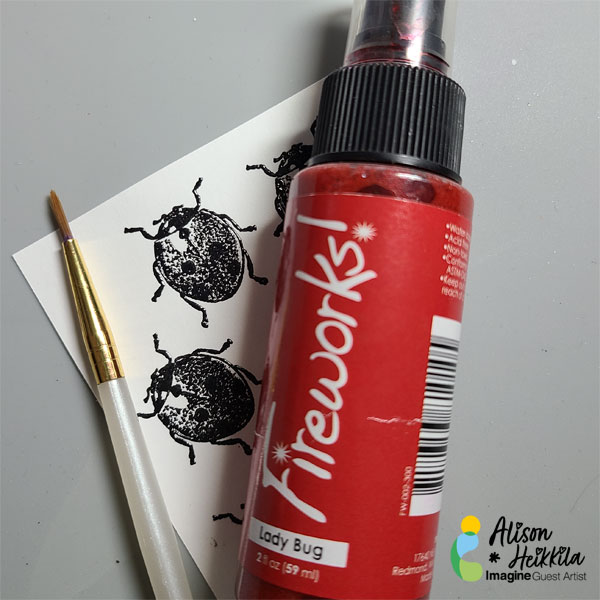
Stamp the ladybug from the Entomology stamp set 5 times on to Smooth Bristol cardstock with VersaMark Ink.

Ladybug-Greens-6

Step 2

Sprinkle Black Embossing Powder on to the ladybugs, shake off the excess, and heat set.

Ladybug-Greens-7

Step 3:

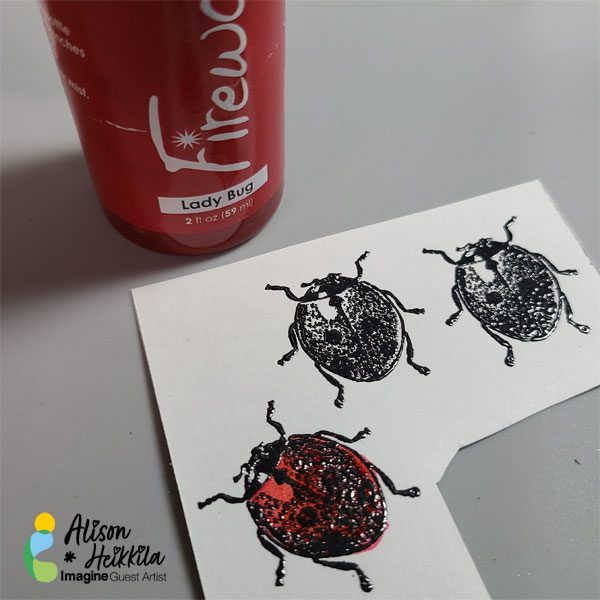
Using Lady Bug Fireworks! Shimmery Craft Spray and a brush, paint the ladybugs. Once the color is dry on the paper, you should wipe the embossed areas with a cloth, to remove any excess.

Ladybug-Greens-8

Step 4

Die cut the ladybugs with the coordinating die.

Ladybug-Greens-9

Step 5

Cut a piece of watercolor paper to 4″ x 5 1/4.”

Step 6

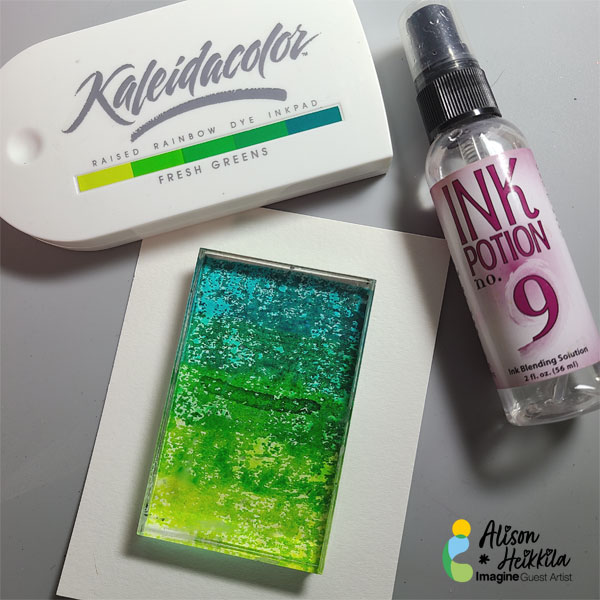
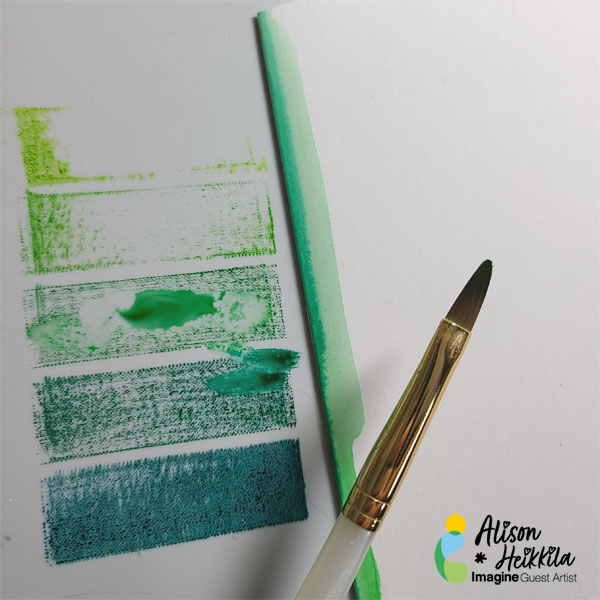
Swipe the Fresh Greens Kaleidacolor Inks across an acrylic block, and then spray with Ink Potion No. 9 a few times to get the colors to blend and move.

Step 7

Place the inked acrylic block in the center of the watercolor panel, put something heavy on top (I used a tape dispenser), and leave for a few minutes. The texture of the watercolor paper allows for imperfect color transfer, which I happen to love. If you prefer a smoother look, use paper with less tooth, or texture.

Ladybug-Greens-10

Step 8

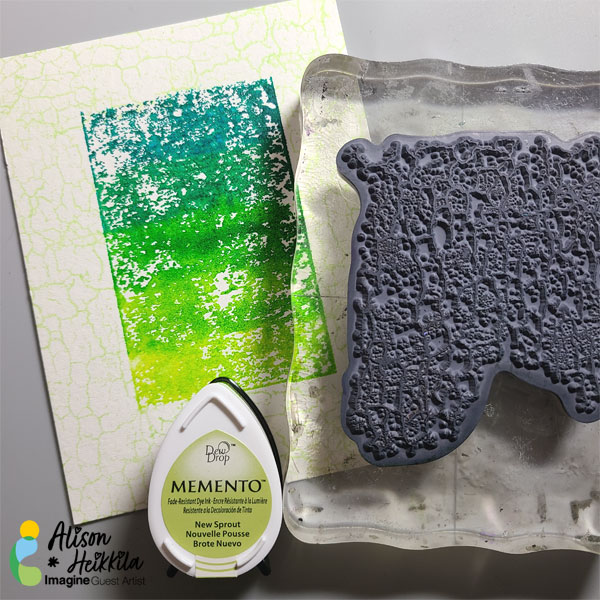
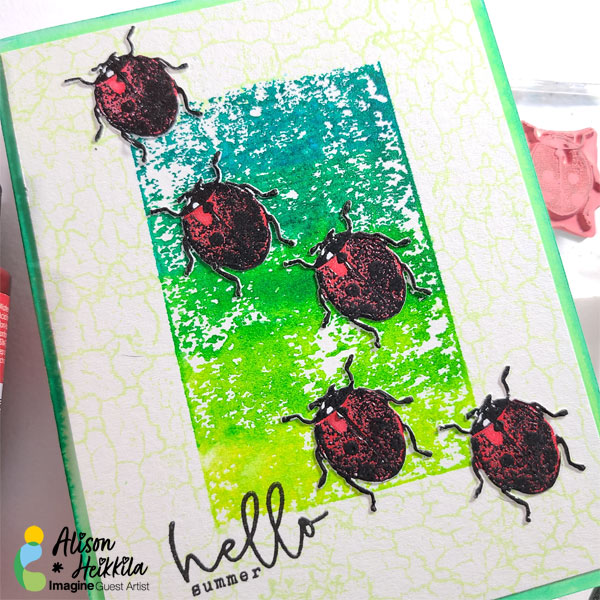
Once you removed the acrylic block, stamp a subtle pattern around the edges with New Sprout ink. I used a crackle stamp from Stampendous.

Ladybug-Greens-11

Step 9

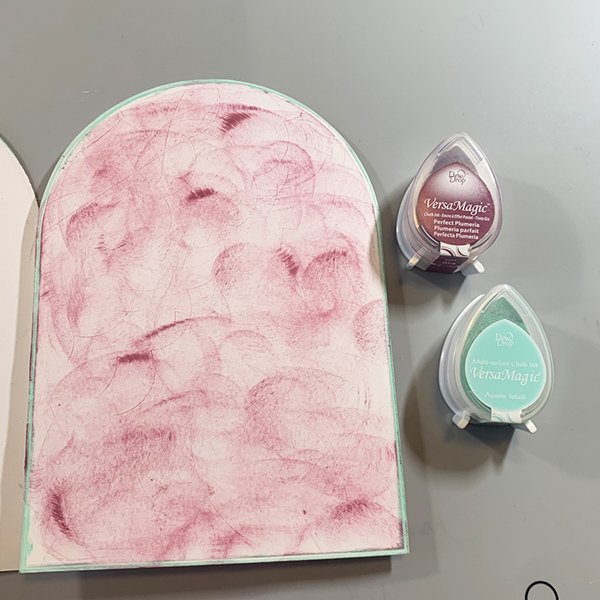
To add color to my white card base, I pressed my Fresh Greens Kaleidacolor inks into my Craft Mat, wet my brush, and applied the 3 center colors to the edges. I kept the colors soft and slightly blended. Using the same inks for the border as we did in the center of the card allows us to have perfectly matched elements, but since they’re applied differently, you create interest on your card.

Ladybug-Greens-2jpg

Step 10

Stamp a sentiment on the card with VersaFine Ink in Onyx Black. I combined a stamp from Erin Lee Creative with a stamp from Recollections to get the sentiment I wanted.

Step 11

Adhere your ladybugs to the card front, and your card front to the base when it’s dry.

Art Supplies

Imagine

VersaMark Ink
Black Embossing Powder
VersaFine Ink in Onyx Black
Fireworks! Spray in Lady Bug
Kaleidacolor Inks in Fresh Greens
Memento Ink in New Sprout
Ink Potion No. 9

Other

Stampers Anonymous/Tim Holtz: Entomology Stamp Set and Entomology Die Set
Erin Lee Creative: Winter Magic Stamp Set
Recollections: Sentiment set
Acrylic Blocks
Small paint brushes
Strathmore Smooth Bristol Cardstock
Canson Watercolor Paper
White A2 card base

Learn How to Make a Quick Father’s Day Card


By Neva Cole 

Today I will be demonstrating how to make a quick multi-layered card using three stamps and VersaColor and StazOn inks.  This tone on tone card is a simple way to create a wonderful card for the Father in you life.


Skill: Beginner

Time: 30 Minutes


2021-May-Neva-FathersDay-Card


Directions:


2021-May-Neva-FathersDay-Card-1

Step 1

Stamp the sentiment in VersaMark Mountain Lake and heat emboss with Sparkle Embossing Powder.  Then die cut the sentiment with Lawn Fawn Everyday Sentiment Banners.


2021-May-Neva-FathersDay-Card-2
Step 2

Use VersaColor Mountain Lake and stamp the “Tape Measure” and the “Love Beyond Measure” around the perimeter of an A-2 card base.  Ink the edges of a 3 1/2″ x 4 5/8″.  Stamp the Tape Measure in StazOn Ink in in Jet Black, die cut with matching die.


2021-May-Neva-FathersDay-Card-3

Step 3

Pressure emboss the 3 1/2″ x 4 5/8″ with Spellbinders Maze Embossing Folder.  Lightly ink with Seafoam.  Stamp the the Love Beyond Measure on card front.


2021-May-Neva-FathersDay-Card-4

Step 4

Assemble the card with dimensional foam adhesive and enjoy!


Art Supplies

Imagine

VersaMark: Mountain Lake, Seafoam

StazOn-Jet Black

Embossing Powder-Sparkle


Other

Hero Arts CL1498 Holiday Sentiments

Technique Tuesday What a Guy Stamp and Die

Lawn Fawn Everyday Sentient Banner

Spellbinders Maze Embossing Folder


Learn How To Make Elegant Flowers For A Spectacular Mother’s Day Card


By Neva Cole 

In today’s crafting tutoring I will share how to make absolutely gorgeous flowers from foam paper and StazOn On Trend inks that hold their shape beautifully. Create a very special card to give to a Mother for Mother’s Day. 


Skill: Advanced

Time: 3 hours plus time to dry ink on foam paper


2021-April-MothersDay-Card


Directions:


2021-April-MothersDay-Card-step1

Step 1

Stamp Calla Lily image in StazOn Bordeaux.  Stamp Calla Lily Leaves image in StazOn Forest Green.  Set aside while working on the rest of the card.  The ink will take time to dry, otherwise it will smear or come off on your fingers.


2021-April-MothersDay-Card-step2
Step 2

Trim a sheet of Strathmore Bristol Vellum Finish 100 lb paper to 7″ x 15″.  My pad comes in 14″ x 17″ so it will make two cards of this style from one sheet.  Score at 5″ from each end and accordion fold sheet using bone folder to crease folds. 


2021-April-MothersDay-Card-step3

Step 3

Place folded cardstock into Largest die from the Teardrop Lattice Gateway die by Heartfelt Creations.  Run through die cut machine.  Remove curved corners once they are cut, to allow all layers to cut through.


2021-April-MothersDay-Card-step4

Step 4

Die cut decorative card front from white cardstock.  It is from the Heartfelt Creations Lattice Swirl Gateway die.  Die cut lower portion of Heartfelt Creations Lattice Flourish Gateway die (shown below).


2021-April-MothersDay-Card-step5

Step 5

Use an ink blusher and Delicata Rose Gold to color die cuts.


2021-April-MothersDay-Card-step6

Step 6

Use Versa Magic Aqua Splash Dew Drop to ink all outside edges of the tri-fold card.  Front is shown.


2021-April-MothersDay-Card-step7

Step 7

Using direct to paper method ink the front panel and back panel of the tri-fold card.  Shown is the back panel.   


2021-April-MothersDay-Card-step8

Step 8

Die cut scalloped edge die from the Heartfelt Creations Scalloped Flourish Gateway die.  Ink the edge with VersaMagic Perfect Plumeria.  Using direct to paper method ink the center of the panel.


2021-April-MothersDay-Card-step9

Step 9

Stamp the sentiment from Heartfelt Creations Fancy Special Day Stamp in StazOn Bordeaux at the top of the panel from step 8.


2021-April-MothersDay-Card-step10

Step 10

Center Lattice Flourish Gateway die below the sentiment and trim to fit.  Adhere with On Point glue. 


2021-April-MothersDay-Card-step11

Step 11

Die cut the third from the largest Heartfelt Creations Eyelet Frame Gateway from white cardstock.  Ink the edges and the center of the panel with VersaMagic Aqua Splash.  Die cut center panel form Heartfelt Creations Regal Lattice Gateway die from white cardstock.  Use an ink blusher to color the die cut.


2021-April-MothersDay-Card-step12

Step 12

Die cut two smallest Eyelet Frame Gateway dies from white cardstock.  Ink smallest with Versa Magic Aqua Splash around the edges and lightly in the center.  Stamp with Inspire Me Sentiment Stamp in Caribbean Green StazOn ink.  Ink the larger die with Perfect Plumeria around the edges and lightly in the center.  Stamp “Happy Mother’s Day” from the Heartfelt Thank You Sentiments in StazOn Caribbean Green. 


2021-April-MothersDay-Card-step13

Step 13

Apply Tear It tape to the back of prepared panels from Steps 9, 10, and 11.  (Notice that I decided to change color used for the sentiments  for step 12 and simply used the opposite side of the die cut.)


2021-April-MothersDay-Card-step14


Step 14

Use and ink dauber to color the leaves and Calla Lily images with StazOn ink in Caribbean Green and Bordeaux.  Set aside for the ink to dry, I let mine dry over-night to keep from staining my fingers in the next step and smudging the ink.


2021-April-MothersDay-Card-step15

Step 15

Die cut the Calla Lily and leaves.  Prep space to create flowers.  Heat glue, glue gun, die cuts and Heartfelt Creations Pastel Pollen Stamens.  (Note I colored the back of the die cuts as well, but turns out it is not necessary because the back of the images do not show on the finished card.)


2021-April-MothersDay-Card-step16

Step 16

Holding the Cally Lily die cut with a pair of tweezers and heat the back of foam paper until it just begins to curl.  The foam paper will curve towards the heat.  While the foam paper is still warm gently add a small dab of hot glue at the very base of the Cally Lily.  Place stamen and pinch closed, hold for a moment until hot glue cools and flower will hold it’s shape.  Repeat with remaining five flowers.


2021-April-MothersDay-Card-step17

Step 17

Heat the back of the leaf image until it curls.  While it is still warm pinch into shape until the foam paper has cooled and it will hold its shape. 


2021-April-MothersDay-Card-step18

Step 18

Using small dots of On Point glue adhere the Lattice Swirl Gateway die cut from Steps 4 and 5 to the front panel of the card. 


2021-April-MothersDay-Card-step19

Step 19

Apply Scalloped panel to middle of section of the tri-fold card. 


2021-April-MothersDay-Card-step20

Step 20

Use hot glue to adhere foam flowers to the front of the card as shown above.


2021-April-MothersDay-Card-step21

Step 21

Continue to adhere flowers and leaves to the card front as shown.  Adhere the sentiment over the trimmed wires from the stamens.


2021-April-MothersDay-Card-step22

Step 22

Adhere die cuts from Step 11 to the back panel of the card.  Adhere flower and leaf and the sentiment panel in place as shown.  


Art Supplies

Imagine

StazOn Ink Pad-Bordeaux, Caribbean Green, Forest Green

VersaMagic Ink Pad-Perfect Plumeria, Aqua Splash

Delicata Ink Pad-Rose Gold

Ink Blushers

Sponge Daubers

On Point Glue

Tear It! Tape


Other

Strathmore Bristol Vellum Finish 100 lb cardstock

Bone folder

Heartfelt Creations Art Foam Paper

Heartfelt Creations Calla Lily stamp and die

Heartfelt Creations Inspire Me Sentiment stamp

Heartfelt Creations Fancy Special Day stamp

Heartfelt Creations Thank You Sentiments stamp

Heartfelt Creations Scalloped Flourish Gateway die

Heartfelt Creations Lattice Swirl Gateway die

Heartfelt Creations Lattice Flourish Gateway die

Heartfelt Creations Regal Lattice Gateway die

Heartfelt Creations Eyelet Frame Gateway die

Heartfelt Creations Pastel Pollen Stamens

Tweezers

Heat Gun

Hot Glue Gun and hot glue sticks

Learn How to Make a Multi-Colored Easter Card


By Neva Cole 

In today’s crafting tutorial, I will show you how to use a single stamp image and stamp each line with a different ink color. I will also share how to blend VersaMagic inks for a background and take it up a notch by dry embossing.  


Skill: Intermediate

Time: 1 hour


Directions:

Step 1

Place image on stamp positioner and use a post-it to cover the bottom three lines of the image.  I used a sentiment stamp from Unity Stamp Co. titled “Everything Easter” with four lines of text.  Use a paper piercer to tuck the post-it securely in place. Ink the top line with VersaMagic in Aloe Vera.  Remove post-it and stamp image on cardstock. Clean ink off of the post-it so you can use it for subsequent steps.  Clean image after stamping and moving to Step 2. Repeat this after each step through Step 4.


Step 2

Use two post-its to cover lines 1,3 and 4 and ink image with VersaMagic in Spring Pansy. 


Step 3

Use two post-its to cover lines 1,2, and 4 and ink image in VersaMagic Sea Breeze.


Step 4

Use a post-it to cover lines 1,2, and 3 and ink image in VersaMagic in Spring Pansy.


Step 5

Clean the entire image and ink in VersaMark and stamp image over the colored lines.  Heat emboss with Iridescent Embossing Powder.


Step 6

Using ink blushers ink a section of 4″ x 5.25″ cardstock in VersaMagic Aloe Vera, Spring Pansy, and Sea Breeze and blend into each color.  Use an ink blusher to ink over the heat embossed sentiment image with VersaMagic Pixie Dust.


Step 7

Pressure emboss 4″ x 5.25″ blended color cardstock with Lifestyle Crafts Tide embossing folder.


Step 8

Use a sanding block or sandpaper to gently remove the color from the raised areas of the embossed cardstock.  The white color of the cardstock will show through.


Step 9

Die-cut sentiment image and use and ink blusher to in the edges in VersaMagic Spring Pansy.


Step 10 

Ink the edges of an A-2 (4.25″ x 5.5″) card base in VersaMagic Spring Pansy.


Step 11

Adhere layers together with foam adhesive.  Adhere pearl embellishments in curly- ques of the embossed background.  Adhere pearl embellishments to the center of small flower sequins and adhere with On Point Glue.  Tie a triple looped bow from sheer ribbon and adhere with On Point Glue.


Art Supplies

Imagine
Other
  • Unity Stamp Co.  Everything Easter
  • Post-it notes
  • Paper piercer
  • Lifestyle Crafts Tide embossing folder
  • Sanding block
  • SpiegelmomScraps 50’s Sock Hop sequins
  • Foam adhesive

All About You!!! An Emboss Resist How To

By LeeAnn McKinney

LeeAnn here with a fun project I made for a friend’s birthday. While looking at my stamps and thinking about what I wanted to do for this project it popped into my mind, and then a happy accident happened while making this mini slimline card that just “Sealed it” for me.


Skill: Beginner

Time: 30 Minutes


Art Supplies

Imagine:

• Imagine Craft Mat

• Clear MBoss

• Memento Rose Bud Dye Ink

• Memento Tangelo Dye Ink

• Memento Dandelion Dye Ink

• Memento Grape Jelly Dye Ink

• Imagine Tear It Tape

• VersaMark

• Memento Dew Drop Bahama Blue

• Memento Dew Drop Bamboo Leaves

• StaZon Stamp Cleaner

• Memento Dew Drop Love Letter

Other Products Used:

• Scrapbook Adhesives Foam Squares

• Recollections 110 lb Cardstock

• Recollections 65 lb Cardstock

• Darice Heat Tool

• Picket Fence Studios- Spotlight On You Stamp

Watercolor and Ink Blending Spring Cards with VersaMagic

By Jessica Lin

Hi everyone, it’s Jessica here and today I have two spring cards to share with you. They feature some cute critters watercolored by VersaMagic ink pads. Those ink pads are my favorite when it comes to creating pastel-themed cards. I hope you like these Easter projects!

Skill level: Medium


Art Supplies:

Imagine

• VersaFine Clair – Nocturne

• VersaMagic:

Squirrel: Sahara Sand, Jumbo Java, Thatched Straw, Ocean Depth, Pink Grapefruit, Tea Leaves

Rabbit: Sea Breeze, Ocean Depth, Wheat, Pumpkin Spice, Pink Grapefruit (Pixie Dust, Spring Pansy)

• VersaMark Dazzle – Champagne

• Mboss – Clear

• Brilliance Dew Drop Ink Pad – Galaxy Gold

• Tear-It Tape

• Craft Mat

Other

Stampin’ Up Fable Friends stamp set

Stamping tool (Stamparatus)

Ranger watercolor cardstock

Waterbrush

EK Success anti-static powder tool

Stampin’ Up A Wish for Everything bundle