Learn How to Create a Quick and Easy Sour Cream Container Craft

by Martha Lucia Gomez

Hello friends! Today I have a quick package, normally called ‘Sour Cream Container’ shape. I created it with designer paper and added an extra special touch with Versa Magic Inks. I selected a two-step stamp from Altenew, the Leaf Canopy stamp set. It includes the lineal and solid images but this idea can be made with any type of stamps.

Skill: Intermediate
Time: 15 minutes

Directions


Step 1

Stamp, with Memento Tuxedo Black Ink, the lineal stamp using a stamping tool over a yellow piece of designer paper of 6″x 6″ size.


Step 2

Remove the lineal stamp and place the solid stamp over the lineal stamp and pick up with the acrylic door. Ink the solid images entirely with Mango Madness VersaMagic Ink and stamp. Ink up a few touches on the insides of the leaves with Red Magic VersaMagic Ink and stamp. I used the DewDrop inkpads in VersaMagic because with the teardrop shape it is very easy to add the selective color to the images without getting the second color accidentally over the whole image.


Step 4

Add double-sided Tear It Tape to one entire inside border and paste it over the opposite side to create a tube. Add double-sided tape to one end to close by pinching it together. Place the candy or gifts into the tube. Add the tape to the other end and close, pinching in opposite (90 degrees) direction.


Step 5

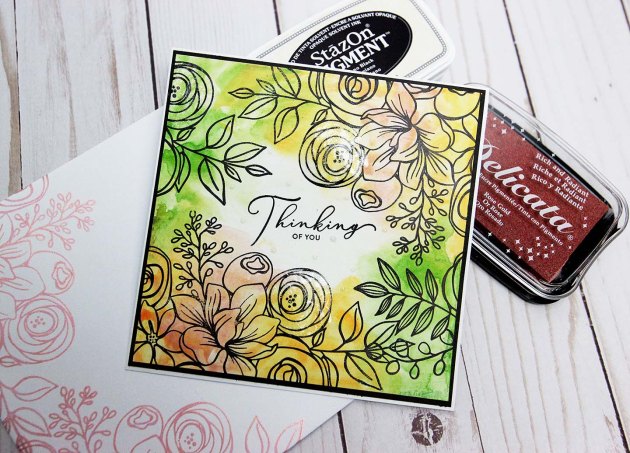
As a final touch, I added a tiny sentiment that I created with a die-cut and adhered with On Point Glue.

Supplies

Imagine
Other
  • Designer Paper
  • Stamping Tool
  • Altenew – Leaf Canopy Stamp Set
  • “Thank You” die cut

Create a Wonderful Mixed Media Best Wishes Card with Lace Texture

by Lori Warren

Create a wonderful mixed media “Best Wishes” card that is full of texture, layers, and dimension. Start with a stenciled layer using Creative Medium, add a lace focal point and finish it up with a saying strip mounted with dimensional tape.

Skill: Advanced
Time: 1 hour

Directions


Step 1

Apply VersaMagic inks to the Craft Mat, spray with water, and lay cardstock into the wet ink. Trim to size.


Step 2

Mix White Neon Amplify with Iridescent Creative Medium and apply over the stencil using a palette knife. Allow to fully dry.


Step 3

Cut out a rose from a panel of lace and then apply various VersaMagic ink colors to the rose with a Brushstix.


Step 4

Spray lace rose with Shimmer Sheer Craft Spray and allow to dry.


Step 5

Once dry, apply VersaMagic ink in Cloud White to lace rose with Brushstix if you want to soften any of the tones.


Step 6

On a scrap strip of paper trimmed from panel in Step 1, stamp with a script stamp.


Step 7

On the same strip of paper, stamp flower image. Here I used VersaMagic in Mango Madness.


Step 8

Add ink splatters from VersaMagic Ink in Pink Grapefruit by rubbing ink directly to the craft mat and spraying with water. Pick up with a brush and flick onto the card.


Step 9

Edge all elements with VersaMagic in Pink Grapefruit.


Step 10

Stamp script pattern randomly onto the panel.


Step 11

Adhere lace rose to stenciled panel with On Point Glue.


Step 12

Adhere paper strip saying onto the card panel and then highlight rose with irRESISTible Pico Embellisher.

Supplies

Imagine
Other
  • White Cardstock
  • Mixed Media Paper
  • Lace
  • TCW Stencil – Damask
  • Hot off the Press Stamps

Learn How to Make a Watercolor Thinking of You Card with Pigment Ink

by Kassy Tousignant

Learn How to Make a Watercolor Thinking of You Card with Pigment Ink

When creative inspiration hits me, I am usually creating layers of mixed media designs on frames or cards. But today, I decided to go a different route. Here is my attempt at a clean and simple Thinking of You card. I love using a mix of Tsukineko inks to create a watercolor effect. They are pigment-rich and blend like a dream. See how I made this card!

Skill: Intermediate
Time: 20 minutes per card

Directions

Supplies

Imagine

Other

  • Simon Says Stamp – Sketched Flowers
  • Clear Gesso
  • Cardstock – White, Black
  • Paintbrush
  • Acrylic Block

Learn How to Create a Cute Woodland Creatures Card with Masking and Watercoloring

by Arjita Singh

See how I use a simple masking technique and water coloring to create a cute and simple woodland creatures card. This stamping and coloring tutorial is a perfect activity for a Sunday afternoon of paper crafting and art-making. Enjoy!

Skill: Intermediate/Advanced
Time: 30-45 minutes

Directions

Supplies

Imagine
Other
  • Cardstock – brown
  • Watercolor paper
  • Watercolor brush
  • MISTI Stamping tool (or acrylic block)
  • White Gel Pen
  • Post-It Note
  • Waffle Flower – Be Her Stamp Set

Learn How to Upcycle an Old Jar into a Mystical Fairy Lantern

by Roni Johnson

I don’t know any little girl that didn’t want to be a fairy when they were little…some of us have never forgotten that dream and love fairy’s to this very day. Here’s a way to sprinkle a little fairy dust in your home with this upcycled DIY Fairy Lantern craft!

Skill: Intermediate
Time: 1 Hour

Directions


Step 1

Wash and dry a glass jar that you will use to create the lantern. Cut a fairy silhouette or cut out from black cardstock. Apply a layer of On Point Glue to the paper die-cut. Apply a layer of On Point Glue to the die-cut.


Step 2

Press the fairy to the inside of the jar front. Note: If you have a fairy stamp you can exchange that for the fairy die cut and stamp it on the outside of the jar with StazOn Pigment Ink.


Step 3

Glue a bit of moss to the bottom of the jar so that when the lantern is lit it will look like she is standing in a bit of foliage or plant life.


Step 4

Stamp flowers images on the other 3 sides of the jar using StazOn Pigment Ink. Silhouette flowers work best but use what you have.


Step 5

Sponge Blue Hawaii StazOn Studio Glaze to the corners, top and bottom areas of each side with an Ink Blusher sponge and let dry.


Step 6

Sponge on a coat of Wedding Dress (white – dries frosty) StazOn Studio Glaze over the entire jar and let it dry.


Step 7

Sponge on a second coat of the Wedding Dress Studio Glaze on one side of the jar and immediately sprinkle with Mboss Sparkle embossing powder. Shake off the excess and reserve for the next side.


Step 8

Set the jar on the craft mat and heat the embossing powder to melt. Let it cool! Note: the jar will become very hot during this process. Do not try to pick it up as you will burn your fingers.


Step 9

Repeat steps 9 and 10 on the rest of the jar. When the jar is fully covered it is now time to move on to the lid. Sponge Piano Black StazOn Pigment Ink over the writing on the lid.


Step 10

Add desired embellishments to the lid and top of the jar. Wrap wire around an LED flicker light so you can insert it into the jar with ease.


You now have an amazing little fairy lantern to light your way! Use this tutorial to create decorations for a summer party, birthday or any fun outdoor event!

Supplies

Imagine
Other
  • Mason Jar
  • Posh Paper Supplies – Fairy die cut
  • Hobby Lobby – Pearl Trim, Garland
  • Prima – Flowers
  • Heat Tool
  • Battery Operated Candle

Learn How to Color Metal for a Jewelry Making Project

by Kyriakos Pachadiroglou

Learn How to Color Metal for a Jewelry Making Project

The sun turned into a square! Capture the colors of the sun on faux enamel jewelry piece with a marbled pattern. Decorate the Imagine’s Sheet Metal in the squares shapes with a mix of irRESISTible colors and create a marble design that is covered with clear Mboss embossing powder to protect and give the impression of enamel.

Skill: Beginner
Time: 1 hour

Directions


Step 1

Cover the square Sheet Metal shapes with the irRESISTible in Gold, mixing the gel with a bamboo skewer or toothpick.


Step 2

Add drops of the irRESISTible in Tangelo and mix in circular motions with a bamboo skewer. Let the paint dry well.


Step 3

Press the square shapes on the VersaMark inkpad, cover with Mboss embossing powder and heat set.


Step 4

Turn over to the other side of the Sheet Metal shapes, cover with StazOn Sunflower Yellow.


Step 5

Cover with GlazOn Vintage to secure the color. This is very important to use GlazOn in between uses because StazOn solvent qualities react with other layers of StazOn. In other words, you will erase or lift the color you just laid down.


Step 6

Cut 20-inch long cord pieces, pass it through a jump ring and inside the Sheet Metal shape hole. Add a gold colored bead.


Step 7

Continue with the rest of the pieces and secure all the cords together with a jump ring creating a stop.


Step 8

Cut 20-inch long cord pieces, pass them between the shapes and the previous stop jump ring. Braid the cords and secure all the edges with jewelry caps and clasps.

Supplies

Imagine
Other
  • Bamboo skewers
  • Heat tool
  • Black waxed cord
  • Jewelry clasps, jump rings, lobster locks