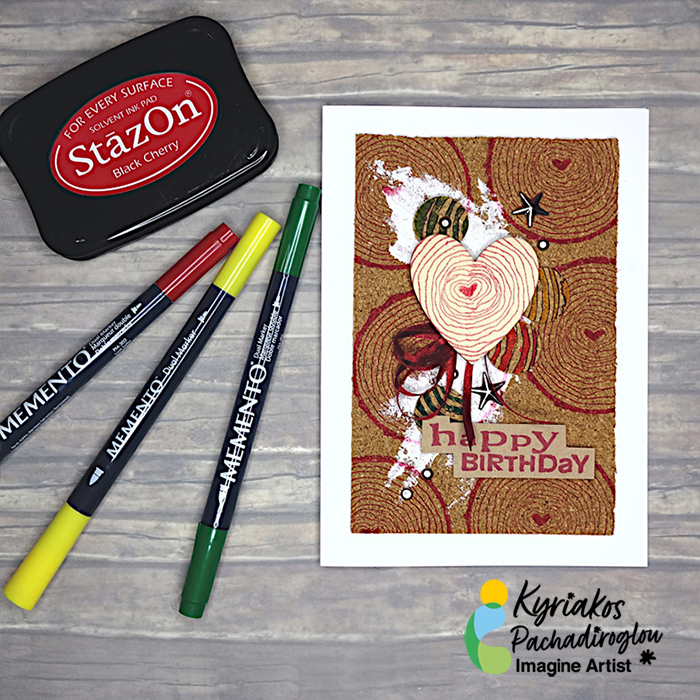
Let’s Get Inky! Mother’s Day Card Featuring Different Inking Techniques

By LV Handcrafted

Skill: Advance

Time: 25 minutes

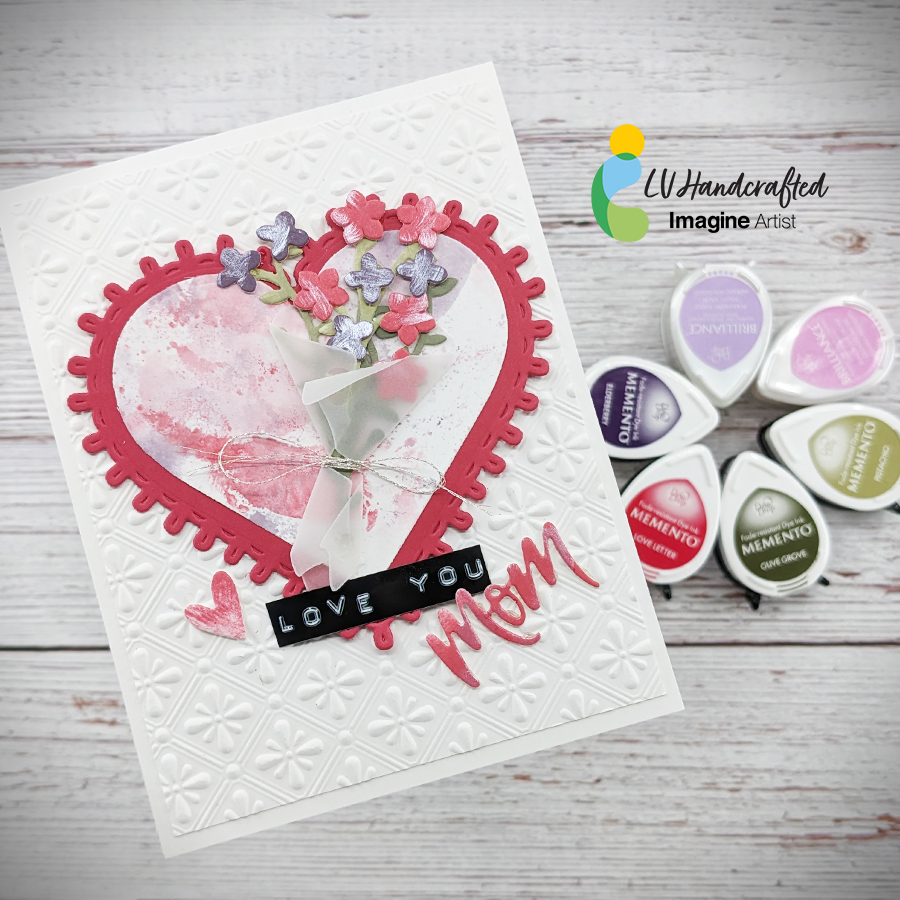
Hello friends! This is Linh (or LV Handcrafted on all the socials). Do you feel like doing something a little abstract?  Try these techniques out for creating some fun backgrounds you can use as panels or die cut out of like I’ve done here.  In my video, I’ll show you 3 techniques for using Imagine inks to turn plain ol’ white cardstock into beautiful, abstract papers. All the techniques are super easy but I’ll list them below in order of what I think is simplest to the most elaborate.

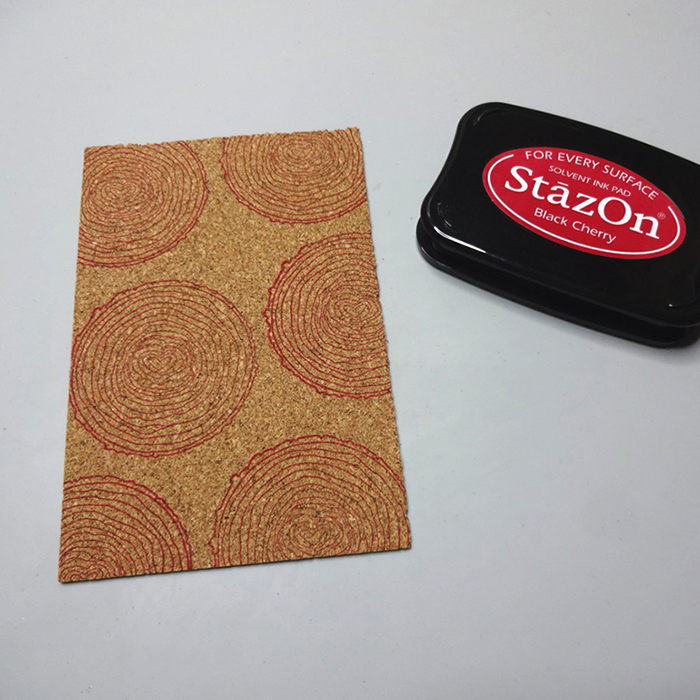
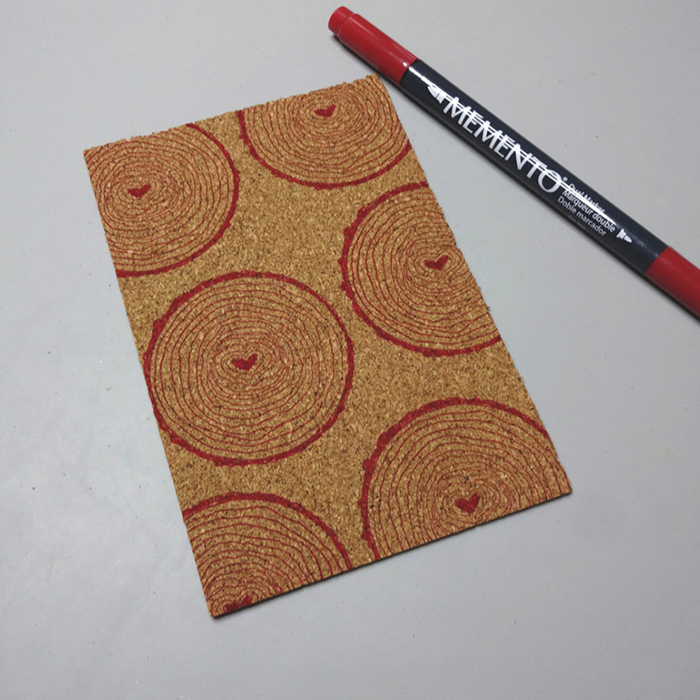
Technique #1 – Swipe your Memento Dew Drop ink pad directly onto your white cardstock. you can create a solid block of color or use a lighter touch to create a more stripy, imperfect effect. Instantly, you’ll have a panel of color cardstock! The benefit to making your own cardstock this way is if you use that ink pad to stamp with, you now have paper that perfectly coordinates with it. 

[Note: I used this technique for the flowers — stems and flower blooms]

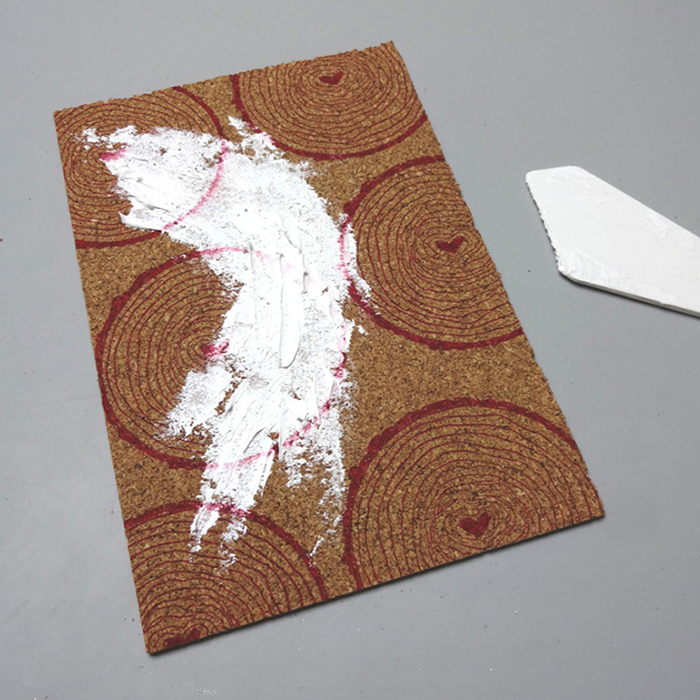
Technique #2 – Smear some ink onto a piece of acetate or clear plastic packaging. Spritz with water — more water will dilute the color more, less water will keep the colors strong and vibrant. Smoosh the watered down ink onto a white cardstock panel. Repeat with a single or multiple colors until you have the desired effect.  Tip – if you are using plain cardstock and not watercolor paper, the more water you use, the more your paper will warp.  Try less water or put your panel under a stack of books to flatten it out. 

[Note: I used this technique for the inner heart die cut behind the bouquet of flowers.]

Technique #3 – Start with Technique #1 to lay down a solid block of color. Then, using a Brilliance Dew Drop in Pearlescent finish, make random swipes, swirls, streaks, etc. across your panel.  Brilliance ink is a pigment ink, so it will take a little bit of time to dry, but you can also take a heat gun to the panel or cover with clear Mboss powder and melt it for a lovely shine.  The result is a panel that has some lovely streaks of pearlescent shine.

[Note: I used this technique on the flower blooms to give them an abstract look. I also die cut the word “Mom” and the heart from this panel too.]

Supplies Used

Imagine

Other Products :

How to Create a Lovely Friend Card

2022-Annie-March-700x700

By Annie Collins

 – Hello Crafty Friends – Annie here with a friend card using some Creative Medium and Memento Inks.

Directions:

Art Supplies:

Imagine

• Creative Medium Iridescent: Green

• Creative Medium Iridescent: Pink

• Creative Medium Metallic: Gold

• Memento Inks: Rose Bud, Bamboo Leaves, Pear Tart

• Tear It! Tape

• On Point Glue

• Palette Knives

• Craft Mat 

Other:

• Memory Box Die: Lovely

• Poppystamp Die: Folksy Script Friend

• Recollections Brand 110# Cardstock: White

• Recollections Brand 80# Foil Cardstock: Gold

• Gems: Gold and Pink

Make a Valentine’s Day Card for Him

2022-Annie_Collins-Feb_IG

By Annie Collins

 – Hello Crafty Friends – Annie here with a masculine Valentine’s Day card.

Directions:

Art Supplies:

Imagine

• Memento Inks: Dandelion, Cantaloupe, New Sprout, Pear Tart, Summer Sky and Teal Zeal 

• Tear It! Tape

• Sheer Shimmer Craft Spray: Gold

• On Point Glue

• Sponge Daubers 

• Craft Mat 

Other:

• Recollections Brand 110# Cardstock: White

• Recollections Brand 65# Cardstock: Teal

• Strathmore Bristol Smooth Cardstock

• Heidi Swapp Stencil: Heart

• Amazon Brand Stencil: Tye Dye Heart

• Heart Faceted Heart Teal

• Tiny Gold Hearts

Stamp and Color on Cork to Make a Birthday Card


2021-sep-kyriakos-cork-birthday-card-700

By Kyriakos Pachadiroglou

– Use a piece of cork sheet as a base to stamp with StazOn inks and color with MEMENTO markers to create a Birthday greeting card. Add cork round shapes and a wooden heart to embellish the card.


Skill: Beginner

Time: 30 Minutes


Directions:

2021-sep-kyriakos-cork-birthday-card-step1

Step 1

Cut a 4x5in piece of the cork sheet. Stamp with the wood slice stamp and the StazOn Black Cherry to cover the surface.


2021-sep-kyriakos-cork-birthday-card-step2

Step 2

Color the heart in the center of the stamp design with the MEMENTO Love Letter marker.


2021-sep-kyriakos-cork-birthday-card-step3

Step 3

Use a palette knife to spread some structure paste and let it set.


2021-sep-kyriakos-cork-birthday-card-step4

Step 4

Cut thin slices of the wine cork and stamp them with the wood slice stamp and the StazOn Timber Brown ink pad.


2021-sep-kyriakos-cork-birthday-card-step5
Step 5

Color the lines of the stamped cork slices with the MEMENTO markers


2021-sep-kyriakos-cork-birthday-card-step6
Step 6

Stamp and color the wooden heart with the StazOn Black Cherry ink pad and the MEMENTO Love Letter marker.


2021-sep-kyriakos-cork-birthday-card-step7

Step 7

Stamp with the StazOn BlackCherry ink pad the happy birthday stamp and cut around.


2021-sep-kyriakos-cork-birthday-card-step_8

Step 8

Glue the colored cork slices on the card first to work as a base for the wooden heart.


2021-sep-kyriakos-cork-birthday-card-step9

Step 9

Continue by adding the rest of the embellishments.


Art Supplies:

Imagine

StazOn – Timber Brown, Black Cherry

MEMENTO Markers – Love letter,  Dandelion, Cottage Ivy, Pine

Palette Knife


Other

Card base

Cork sheet

Wine cork

Wooden heart shape

Structure paste

Crackerbox and Suzy stamps – wood slice

Happy birthday stamp


Learn How to Make Decorative Tea Light Candle Holders

By Kyriakos Pachadiroglou


Skill: Beginner, Intermediate, Advanced

Time: 45 min

Directions:

Cover glasses with All-Purpose ink and StazOn Studio Glaze to create frost and smoke effects. Die-cut and emboss SHEET metal to make embellishments that are covered with StazOn colors.


Step 1

Cover the glass surface with All-Purpose Ink white using a Sponge Dauber and lightly pressing on it creating a frost effect. Let it dry. (Use a heat tool to speed up the process)


Step 2

With a Sponge Dauber repeat the above using the StazOn Studio Glaze Cloudy sky.


Step 3

Place Tear It! Tape around the mid section of the glasses.


Step 4

Place the jute cord over the Tear It! Tape and wrap around to cover.


Step 5

Die-cut heart shapes of the SHEET metal in two different sizes. (If you don’t have a die cutting machine, use scissors to easily cut heart shapes of the SHEET metal).


Step 6

Cover with the StazOn Black Cherry using a Sponge Dauber.


Step 7

Continue with the StazOn Studio Glaze Claret.


Step 8

Lightly sand the SHEET metal hearts to reveal the silver color.


Step 9

Make some loops with the jute cord, glue them on the glasses and add the hearts.

Art Supplies

Imagine

SHEET Metal – ATC card 

All-Purpose Ink – White

StazOn Studio Glaze – Cloudy Sky, Claret 

StazOn – Black Cherry

Sponge Daubers

Tear It! Tape


Other

Heart Dies and die-cutting machine

Embossing folder

Glasses

Sanding paper

Jute cord

Hot glue

Create a Shimmery Valentine’s Card Using Brilliance Inker

By Jowilna Nolte

Today I am showing you how to create a gorgeous shimmering background for your Valentine cards using a few tricks. First I used a piece of shimmering faux leather paper, added some Brilliance Rocket Red inker to it, and then used a unique rich metallic raspberry MBoss powder for added texture. For the focal point, I embossed a heart and then added some finishing touches for a quick and shiny card – perfect for friends. In just a few steps I created this card with loads of elegance, shine, and personality.


Skill: Intermediate

Time: 25 minutes


Art Supplies:

Imagine

• Brilliance Rocket Red Inker

• MBoss Metallic Berry Embossing Powder

• VersaMark Dazzle Champagne

• VersaFine Clair Nocturne

• Imagine Craft Mat

• Tear It Tape

• Inkblushers

• StazOn Stamp Cleaner

Other:

• Heat Gun

• Couture Creations Stamp Press

• Couture Creations Mini Guillotine

• Stamps – Joy Clair, Carabelle

• Cardstock – American Crafts

• Embellishments