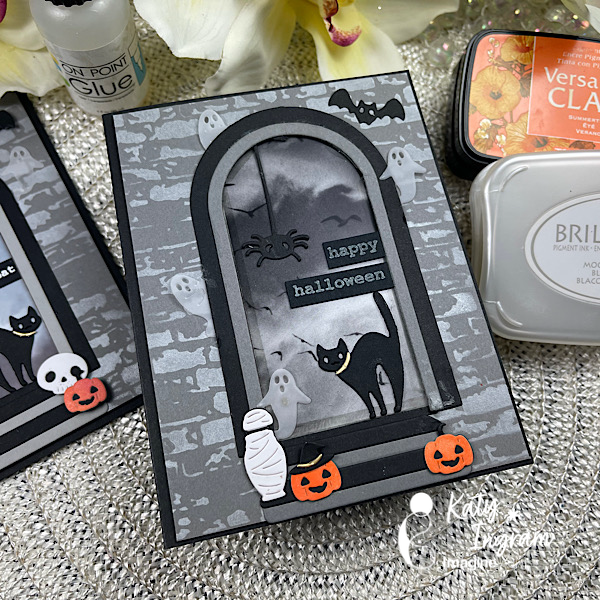
Hello Friends! Katy here with another quick project. In today’s video I create a simple Halloween card. I had some printed spooky printed acetate in my stash and paired it with a brick stencil and some Brilliance Moonlight White ink. I just love this white ink more than any others and so I like to showcase it any time I can.
I’ve been really enjoying Halloween cards lately and it was so fun to use a bunch of sprays to make this one.
Skill: Intermediate Time: 1.5 hours
Directions:
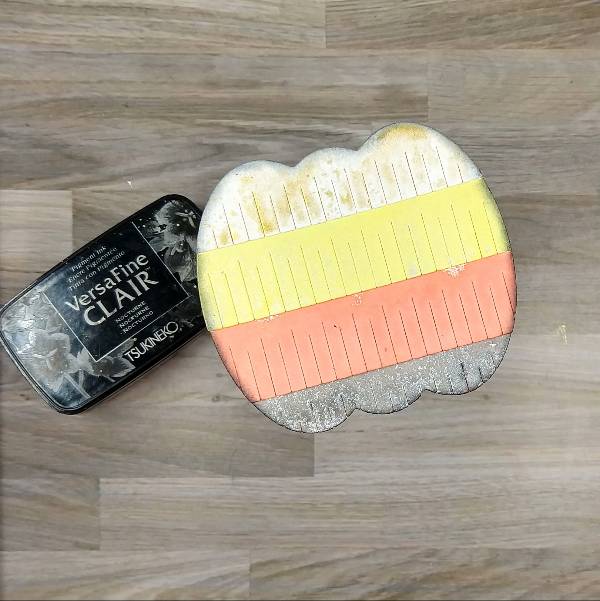
Step 1: Die cut all of the pieces for the die cut pumpkin out of watercolor paper and then spray the two bottom pieces with Rich Cocoa Fireworks! Craft Spray (bottom-most layer) and Tangelo! Craft Spray (second-largest layer) and let dry.
Step 2: Spray the other three die cut pieces: Dandelion Fireworks! Craft Spray on the middle die cut, Gold Sheer Shimmer Craft Spray on the upper part of the pumpkin’s body, and Bamboo Leaves Fireworks! Craft Spray for the pumpkin stem. Allow all the layers to dry.
Step 3: Glue the layers of the pumpkin together and then ink blend the edges of the pumpkin with Nocturne VersaFine Clair ink and a sponge dauber.
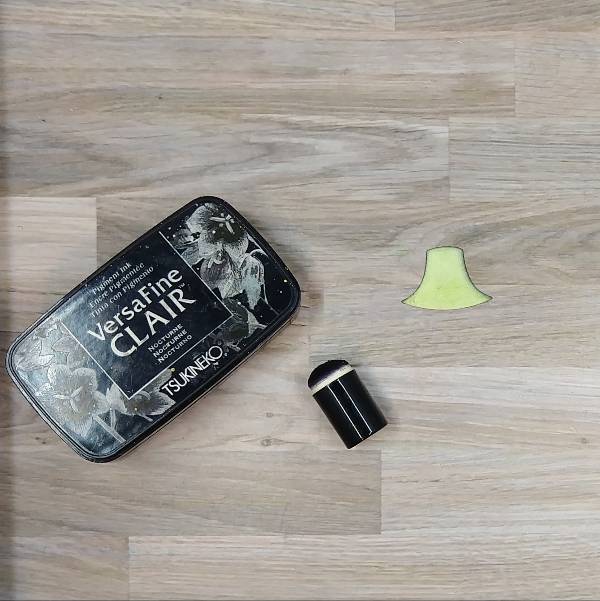
Step 4: Ink blend the pumpkin stem die cut with Nocturne VersaFine Clair ink and a sponge dauber.
Step 5: Spray the whole pumpkin die cut with more Gold Sheer Shimmer Craft Spray and set aside to dry.
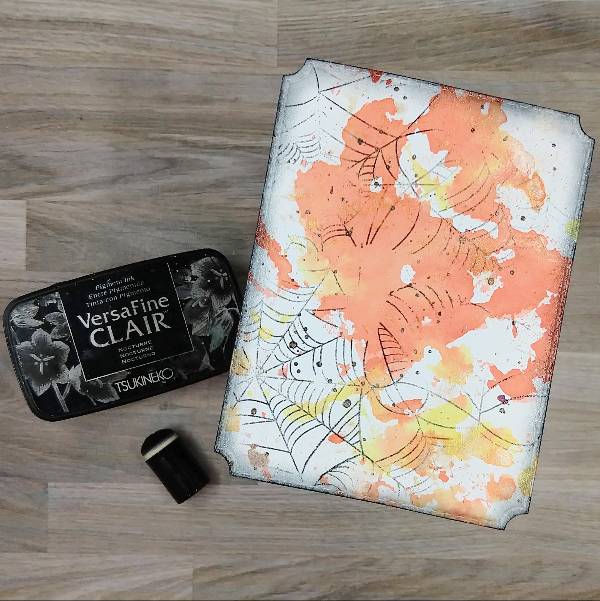
Step 6: Spray the Dandelion and Tangelo Fireworks! Craft Spray onto a piece of acetate packaging and use it to watercolor smoosh a panel of watercolor paper. After the spray dries, die cut it with an A2-sized die cut.
Step 7: Splatter Rich Cocoa Fireworks! Craft Spray onto the background panel with the stick from the bottle’s spray nozzle. Then use a Nocturne VersaFine Clair ink to partially stamp the panel as well as ink blend the edges. Heat emboss the cobwebs and ink blended edges with clear embossing powder
Step 8: Press the Nocturne VersaFine Clair ink pad onto a small piece of watercolor paper to color it black.
Step 9: Die cut the now black piece of watercolor paper to create the sentiment and spray it with Gold Sheer Shimmer Craft Spray.
Step 10: Die cut a piece of vellum with the sentiment’s shadow and glue both layers together.
Step 11: Assemble the card. Glue the pumpkin’s stem and the rest of the pumpkin together and glue it approximately in the center of the panel. Glue the sentiment on the right side of the pumpkin. Then add orange and yellow sequins onto the card. To finish the card, glue the whole card panel onto an orange A2-sized card base.
Pink and Main – die set – Notched Corners Pretty Pink Posh – die set – Fringe Pumpkin Simon Says Stamp – die cut – Trick or Treat 2 Simon Says Stamp – sequin mix – Autumn Leaves (retired) Tailored Expressions – stamp – Spiderweb Cling & Clear Combo A2-sized orange card base Clear Embossing Powder Watercolor paper Die cutting machine Scissors Glue
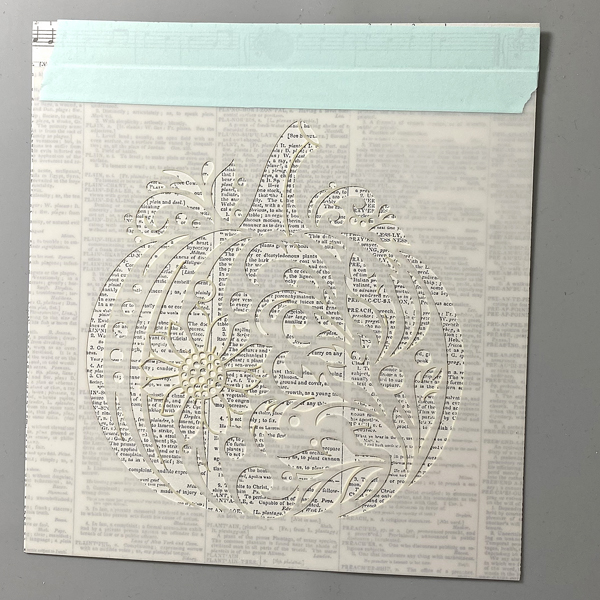
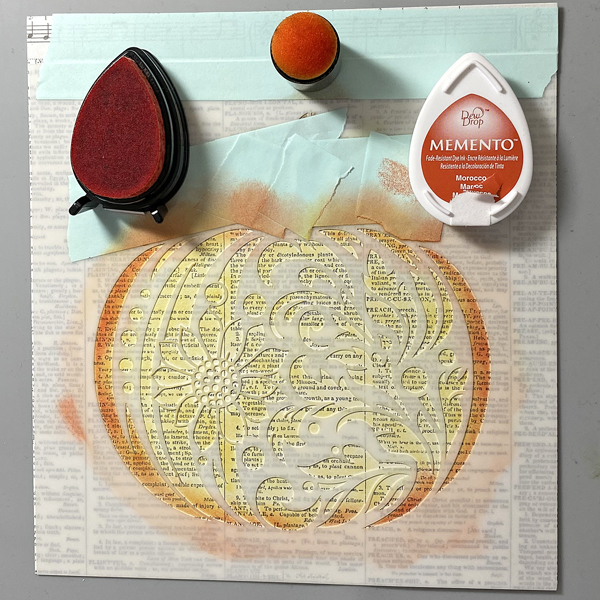
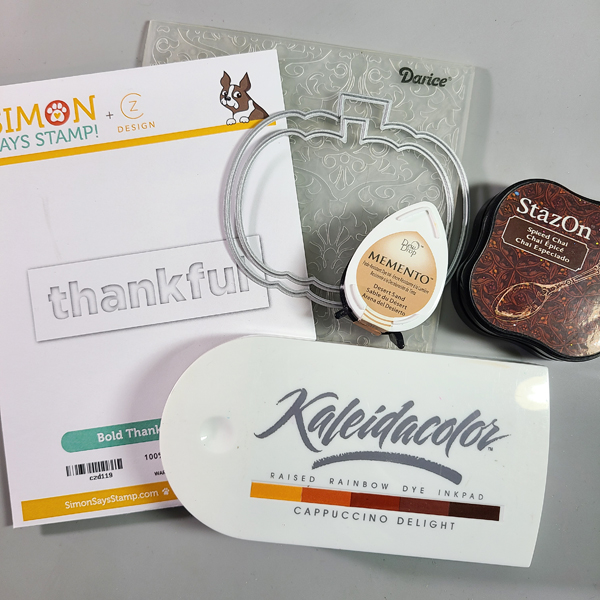
Here’s a quick and easy Thanksgiving card using a beautiful pumpkin stencil, Memento Dew Drop Inks, and a sticker!
Skill Level: Beginner Time: 45 minutes
Instructions:
Step 1: Use low-tack tape to adhere the Pumpkin Flourish stencil to the top of a piece of text cardstock and the craft mat. Run a stylus tool along the tape seam between the stencil and the cardstock to create a hinge so that you can pick up the stencil to check out ink coverage.
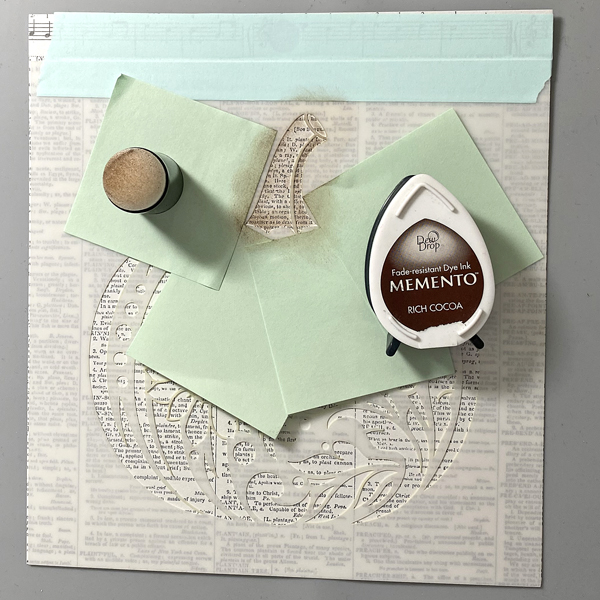
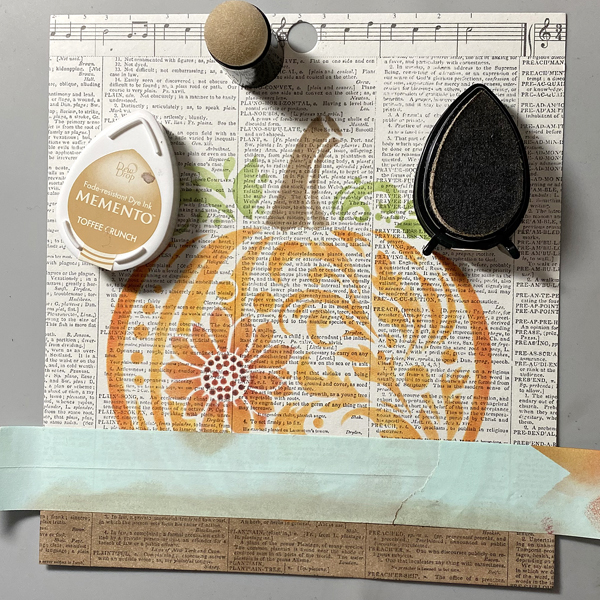
Step 2: Use Post-It Notes to cover the leaves and the pumpkin on the Pumpkin Flourish stencil. Use a Sponge Dauber to apply Rich Cocoa Memento Ink along the edges of the pumpkin’s stem onto the text paper. Use another Sponge Dauber to apply Toffee Crunch Memento Ink over the Rich Cocoa Ink and onto the rest of the stem.
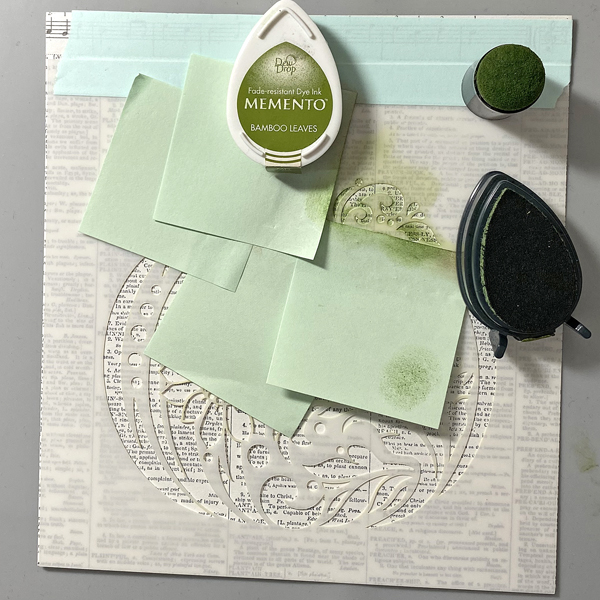
Step 3: Use Post-It Notes to cover the stem and the pumpkin on the Pumpkin Flourish stencil. Use a Sponge Dauber to apply Bamboo Leaves Memento Ink around the outside of the leaf flourishes on the stencil onto the text paper. Use another Sponge Dauber to apply New Sprout Memento Ink fill in the open areas of the leaf flourishes on the stencil.
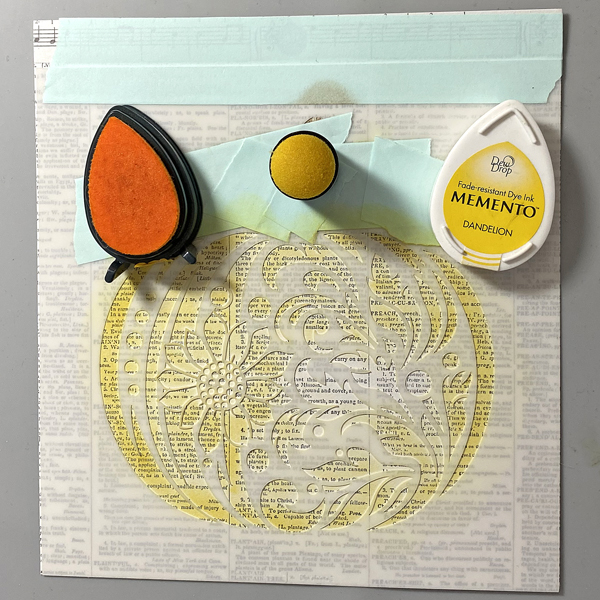
Step 4: Use Post-It Notes to cover the stem and the stem on the Pumpkin Flourish stencil. Use a Sponge Dauber to apply Dandelion Memento Ink over the pumpkin area of the stencil onto the text paper.
Step 5: Use a Sponge Dauber to apply Morocco Memento Ink over the outside edges of the pumpkin stencil onto the text paper. Working from the outside of the pumpkin stencil towards the center of the pumpkin stencil, use separate Sponge Daubers to apply Tangelo Memento Ink, then Canteloupe Memento Ink over the stencil onto the text paper.
Step 6: Use a Fantastix to apply Rhubarb Stalk Memento Ink over the flower on the stencil onto the text paper. Apply the ink more heavily on the outer and inner edges of the flower stencil. Apply the Rhubarb Stalk Memento Ink very heavily on the center of the flower. Use a second Fantastix to apply Elderberry Memento Ink to the outer dot circle in the center of the flower stencil.
Step 7: Remove the low-tack tape and the stencil from the panel. Position a piece of low-tack tape horizontally across the bottom of the image panel right below the stenciled pumpkin. Use Sponge Daubers to apply Rich Cocoa and Toffee Crunch Memento Inks over the tape and onto the text paper.
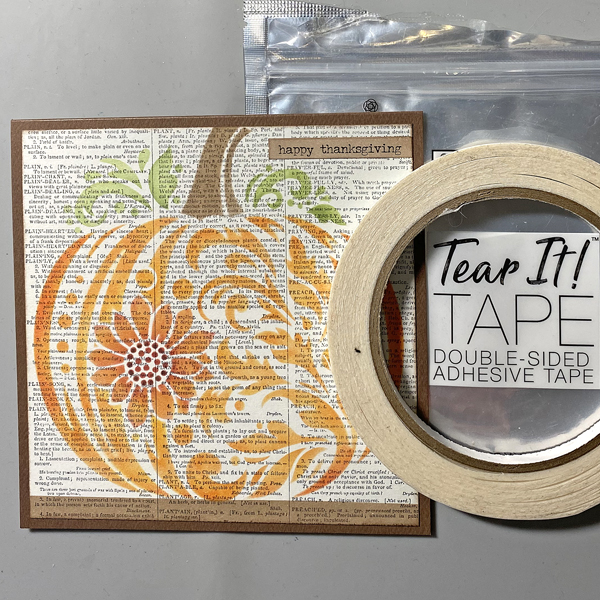
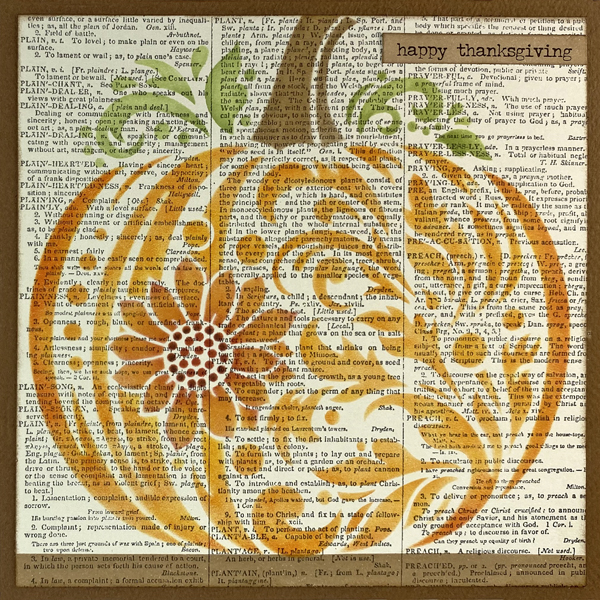
Use the Rich Cocoa Memento Ink and its Sponge Dauber to tint a “Happy Thanksgiving” Idea-ology Small Talk-Occasion sticker. Trim the image panel to 4.75” square, edge with the Rich Cocoa Memento Ink, and adhere the sentiment sticker to the upper right of the image panel.
Step 8: Use Tear It! Tape to adhere the layers of the card.
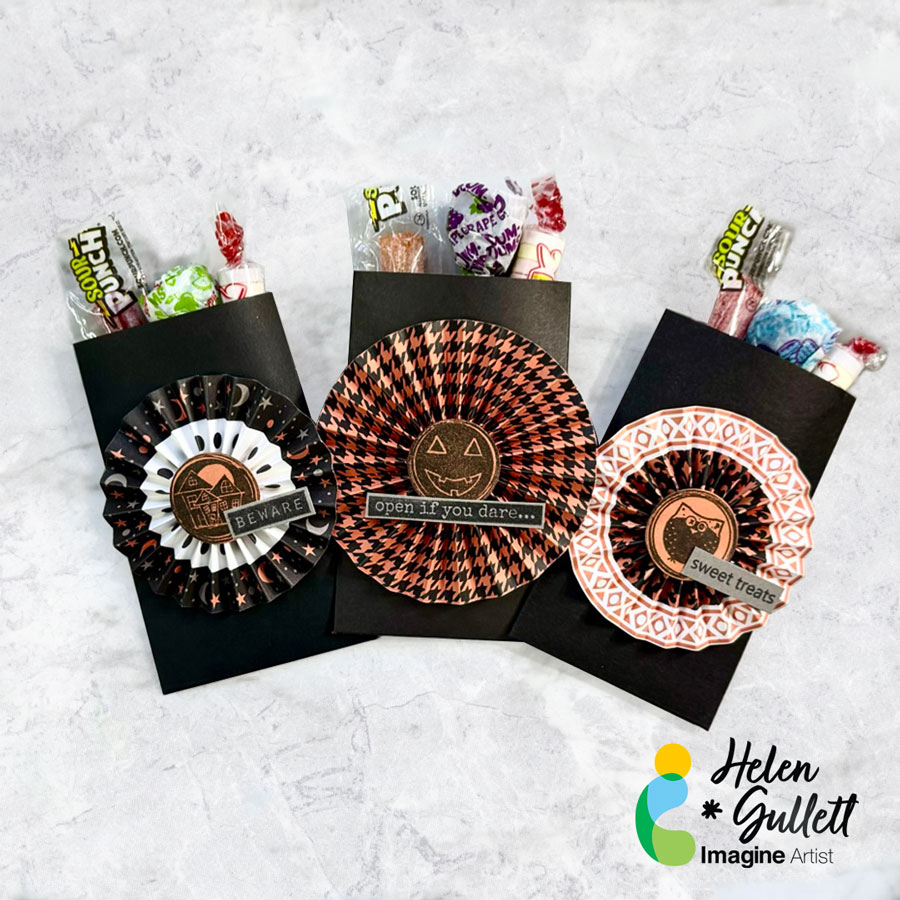
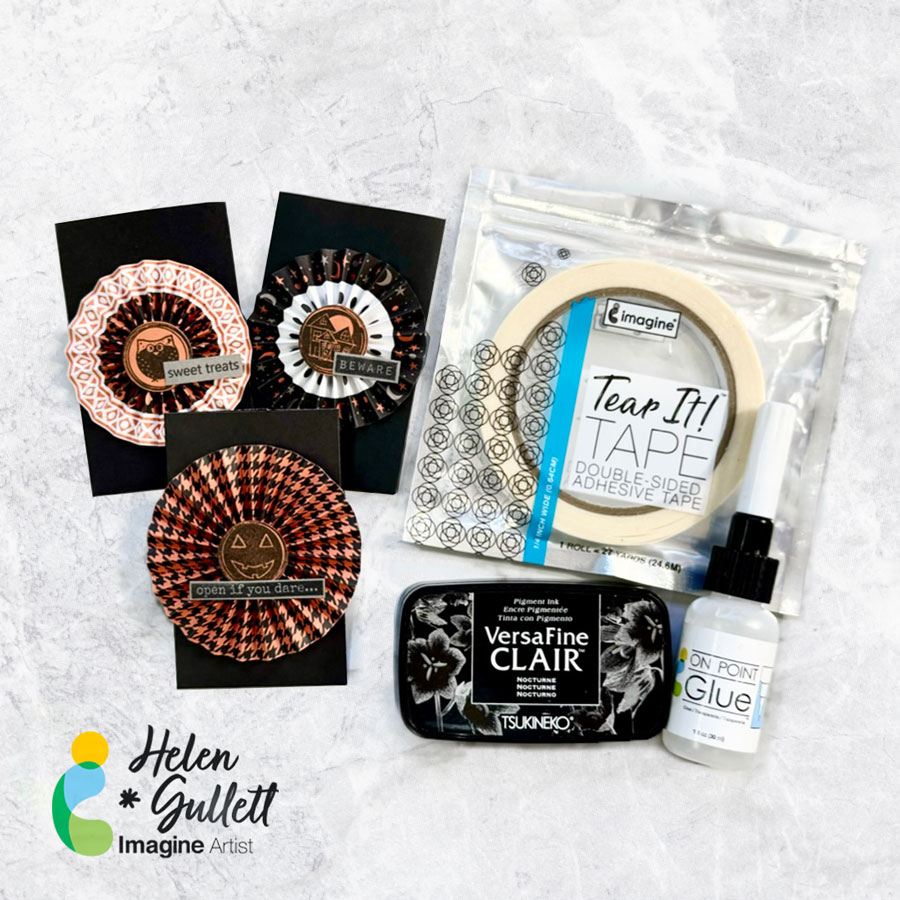
Hello crafty friends! October is here and Halloween is just right around the corner. Today, we are going to make these Halloween treat bags. It is easy and fun to make for giving away treats on Trick-or-Treat day.
Let’s get crafting!
Skill: Intermediate Time: 15 minutes
Direction:
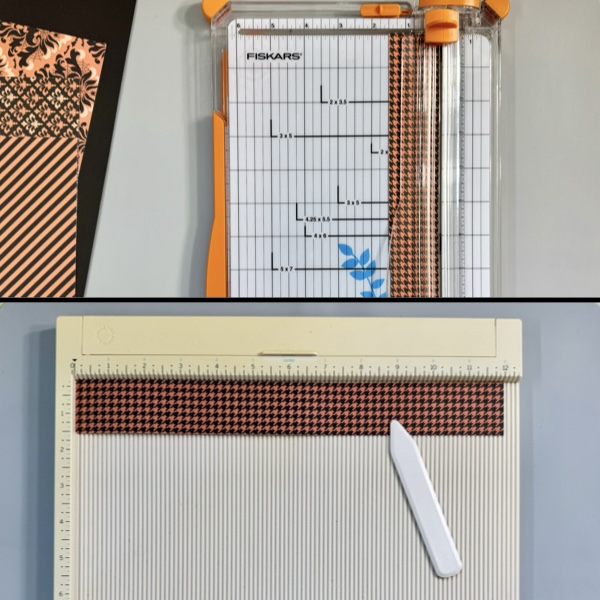
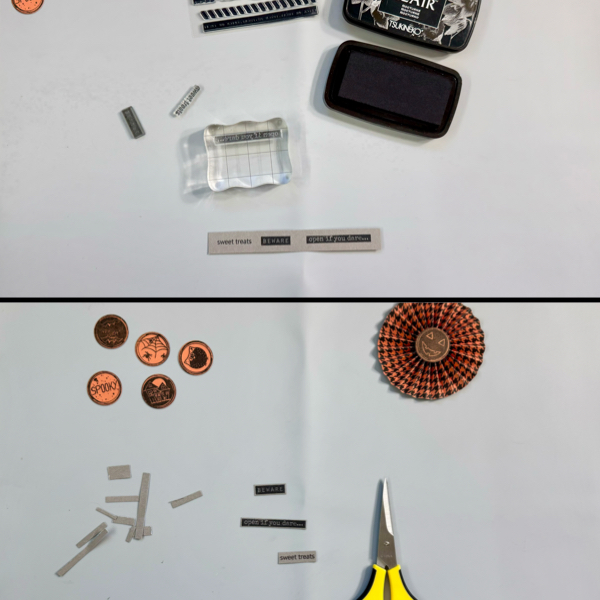
Step 1 We are going to make the paper ribbon pinwheel. It is better using double-sided pattern scrapbook paper, but one-sided paper will work too. First, cut out some pattern papers into 1.25 inch x 12 inch paper strips. For a smaller size, you can cut your paper into 1 inch x 12 inch.
After cutting your paper strips, score the paper in ½ inch using the scoring board.
Step 2 Fold the paper strips following the scoring lines. You can use a scoring folder tool to make the folded part crisper.
Snip off the last folded strip (one of the ends is okay).
Added a piece of Tear It! Tape on the last folded strip and connect it to the other end of the paper.
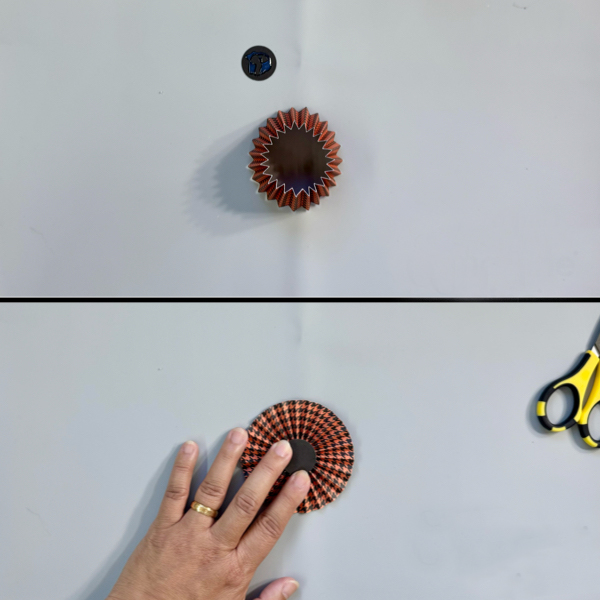
Step 3 Punch a black cardstock (or any matching color cardstock) using a 1 inch punch tool or you can cut using any circle die set.
Add some of the On Point Glue on the circle cardstock and add it to one of the sides of the pinwheel. Firmly press it down for a few seconds to make sure the glue dries well. Or you can put a couple stamping blocks on it while you are working on the next one. This is the back of the pinwheel.
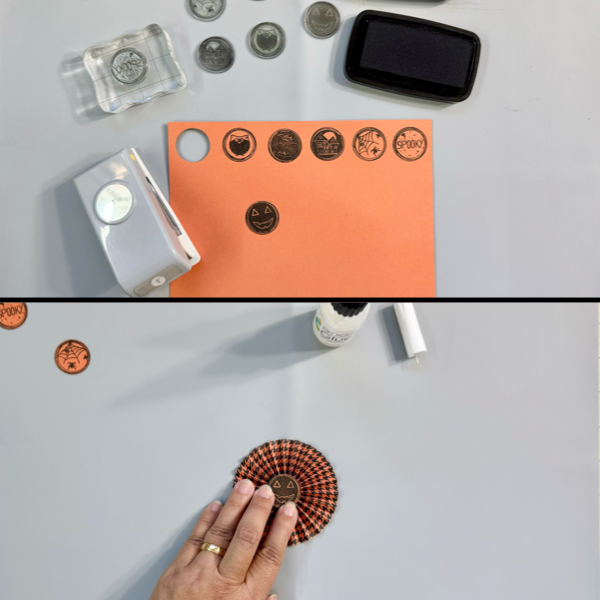
Step 4 On a piece of orange cardstock (or any matching color cardstock to your patterned paper), stamp the images.
Use the 1 inch punch to punch each of those stamped images.
Add some of the On Point Glue on the back of the circle and add it to the front of the pinwheel in the middle. Firmly press it down for a few seconds to make sure the glue dries well. Or you can put a couple stamping blocks on it, then do the same thing to the other pinwheels.
Step 5 On a piece of gray cardstock (or any matching color cardstock to your patterned paper), stamp the sentiments with VersaFine Clair Nocturne ink pad.
Use the scissors to trim the sentiments.
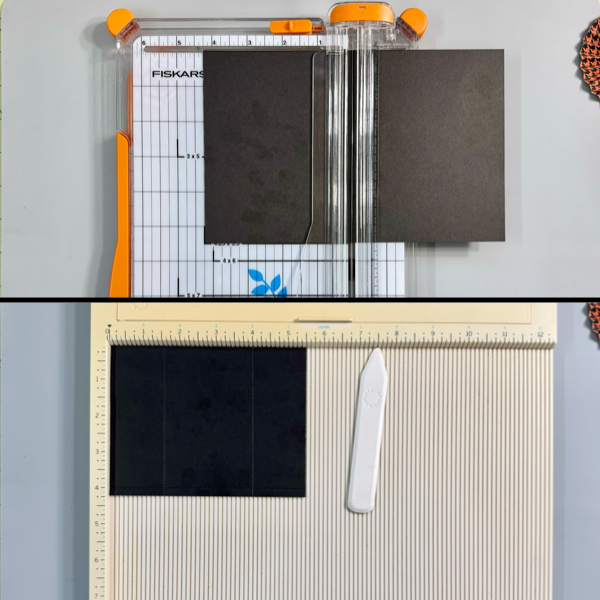
Step 6 Cut a couple of black cardstocks into 4.25 inch x 5.5 inch
Using the scoring board, score the cardstock at 1.5 inch and 4 inch, and then score the bottom at ¼ inch.
Step 7 Use the scoring bone folder to fold the cardstock.
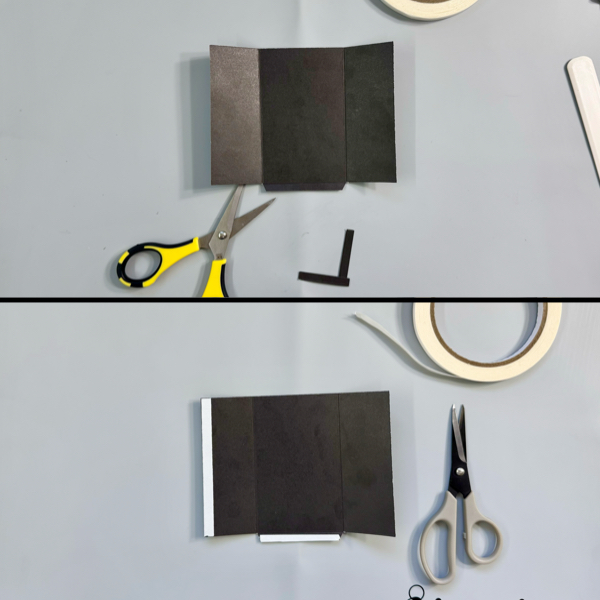
Cut on the scoring line at the bottom of the 2 sides only, leave the center, and fold the bottom flap.
Add some of the Tear It! Tape at the left side and also at the bottom flap. Remove the tape backing off.
Fold the right side first, and then the left side, press firmly to make sure the tape adheres well. And then fold up the bottom flap to close the bottom, press firmly.
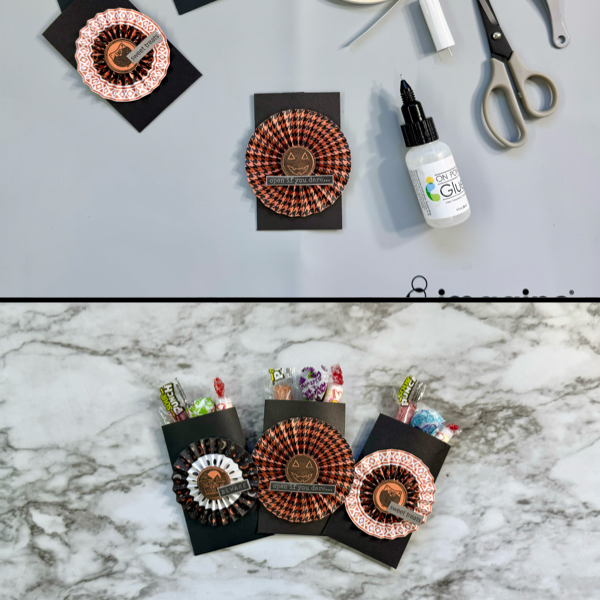
Step 8 Add some of the On Point Glue on the back of the sentiment strips and then add them to the pinwheels.
And then add some of the On Point Glue on the back of the pinwheels and add them to the front of those treat bags. Wait a few minutes until the glue to dry well before you fill them up with candies.
Aren’t those treat bags cute for giving away some candies on Trick-or-Treat Day? You can make them for your kids’ classmates also. They are big enough for 3 or 4 candies. Thank you for stopping by our blog today. Have a fabulous day!
Hello crafty friends! It’s Ceal, here. Today I am sharing a fun technique using stencils. It’s called Double Stenciling or Double Trouble fitting for Halloween, right?
Skill Level: Beginner Time: 30 Minutes
Directions:
Gather your supplies. You will need two stencils, a Halloween stamp set and a word die cut. You will also need two or three inks. I used one of the newest VersaFine Clair colors along with two of the original ones. A sticky mat, tape or something to hold your stencil in place would be useful as well.
Step 1: Lay your panel on a sicky mat of tape it down to hold it in place. Lay your first stencil on top and ink it up with VersaFine Clair Monarch. (As you can see, I don’t usually clean my stencils)
Step 2: Remove the first stencil and replace it with the second stencil. Ink it up with VersaFine Clair Verdant.
Step 3: Remove the second stencil and go over the entire panel with VersaFine Clair Lilac Bloom one of our gorgeous new colors.
Afterwards cut the panel down to 5 x 3 3/4
This background reminds me of that old wallpaper you would see in a haunted house.
Step 4: Stamp, color and fussy cut out the image and word die.
Finish the card by adding the panel to an A2 sized card base and adding the elements placed where you would like them.
Other Supplies: Neenah Classic Crest Solar White 120lb CS – CutCardStock Neenah Classic Crest Solar White 80lb – CutCardStock Jack of All Faces Stamp Set – The Rabbit Hole Designs Boo Word Die – Lil Inker Stencils – A Colorful Life Designs Misti 2.0 – My Sweet Petunia Grip Mat – Waffle Flower
Greetings! Alison here and today my latest tutorial for Imagine is a textured, fall-themed thank you card. I can see making a bunch of these to put as place setting on your Thanksgiving table, as a thank you to your guests for celebrating the holidays with you. I used several simple techniques on this card that when combined, look really fancy and festive.
Skill Level: Beginner to Intermediate Time: 45 minutes- 1 Hour
Directions:
Step 1:
Using a piece of metallic cardstock, run it through your die cutting machine with an embossing folder.
Step 2:
Using a sanding block, a piece of sandpaper, or even a nail file, sand the raised areas of the embossed cardstock. This will give it an aged or distressed look.
Step 3:
Gently rub Spiced Chai StazOn ink across the surface to add more interest to the piece of cardstock.
Step 4:
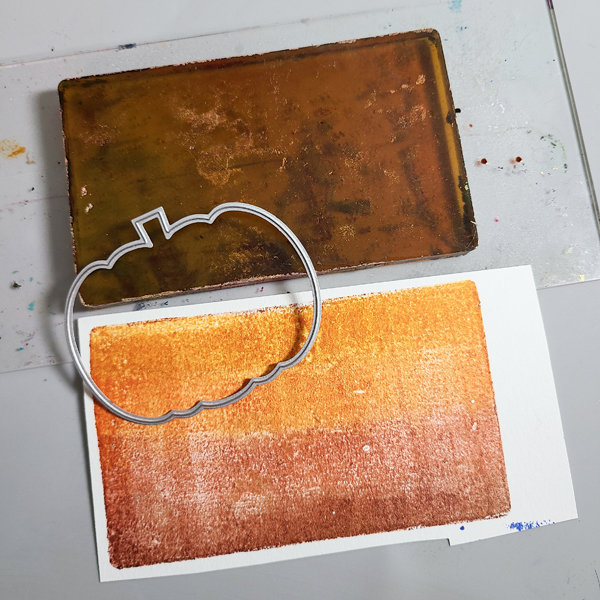
On a Gel Press Plate, gently tap the Cappuccino Delight Kaleidacolor Inks across the surface. You can use a brayer to blend the colors, as well as a few spritzes of water or Ink Potion No. 9.
Step 5:
Lay white cardstock on to the Gel Press Plate and rub to get the ink to transfer. Pull the print and let it dry. I pulled a couple of prints and then chose my favorite to use for this card.
Step 6:
Die cut a pumpkin out of the monoprint.
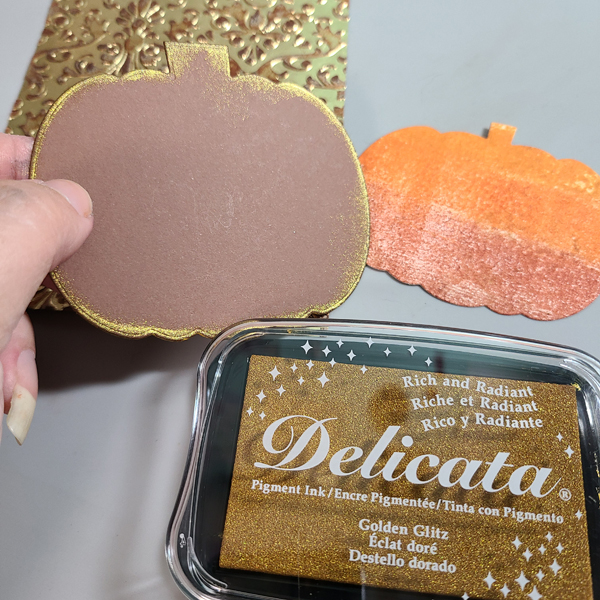
Step 7:
Die cut a bigger pumpkin out of brown cardstock and ink the edges with Golden Glitz Delicata Ink.
Step 8:
Die cut the sentiment out of cream colored cardstock and ink the edges with Desert Sand Memento Ink.
Step 9:
Add Tear It Tape to the back of the embossed panel. I like to use this adhesive when I am working with a piece that has a lot of texture. It holds everything in place really well, and you don’t need to worry about liquid adhesive getting “stuck” in the wells.
Step 10:
Assemble the rest of the card. I used On Point Glue to attach the rhinestones.
Isn’t it pretty?
I love all of the shine from the embossed panel. I also really like seeing all the colors on the pumpkin through the die cut. I hope you’ll give some of these techniques a try!