See How to Make a Beautiful Purple Elephant Greeting Card with Rinea Foil

by Kassy Tousignant

See How to Make a Beautiful Purple Elephant Greeting Card with Rinea Foil

The sparkle of the Delicata ink on the patterned paper background helps to make the Rinea foiled paper die-cut pieces really pop off the card! See how I make this purple elephant themed card.

Skill: Intermediate
Time: 45 minutes

Directions

Supplies

Imagine 
Other 
  • Rinea Foil Paper – Ebony, Jade, Lavender, Gold
  • Anna Griffin – cutting dies
  • Die cutting machine
  • Acrylic ‘Hello’ stamp
  • Patterned paper

Create a Woodgrain Theme Friendship Card with Rinea Foil

by Martha Lucia Gomez

Create a Woodgrain Theme Friendship Card with Rinea Foil

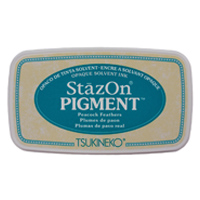
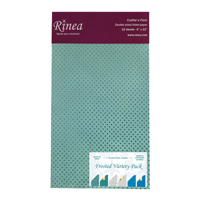
Hi there, Martha Lucia here! Today, I have a fun card making project to share with you. I used the stamp piecing with foiled paper as a technique to create this card. To make this stamp piecing card, I used Rinea Foiled paper in pink, green and gold colors with StazOn Pigment Ink Piano Black to create a dynamic look. A single stamp with flowers coming out of an envelope suddenly takes on a new life.

Skill: Beginner
Time: 30 minutes

Directions


Step 1

Prepare your card by cutting the base of your card to 4-1/4″x11″ with a score in 5-1/2″. Cut the second layer using Mocha/Gold Glossy Rinea Foiled Paper. I cut this layer using the Stitched Woodgrain Cover Up Die from Lil’Inker Designs. Stamp the image of the stamp set Gift Enclosures from Catherine Scanlon Stamps using one single color of Rinea foiled paper and StazOn Pigment Piano Black Ink.
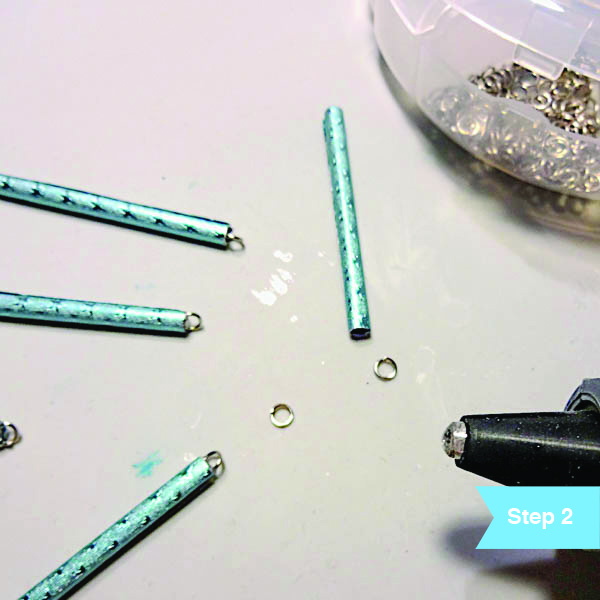

Step 2

Stamp the same image using different colors and textures of Rinea Foiled paper. I used gold/gold glossy for the envelope, blush starstruck for the flowers and emerald starstruck for the leaves. With scissors cut the different parts of the stamped image and paste them over the image stamped using On Point Glue and Double-sided Foam Tape.


Step 3

Resize and paste the Mocha Woodgrain layer over the card base.
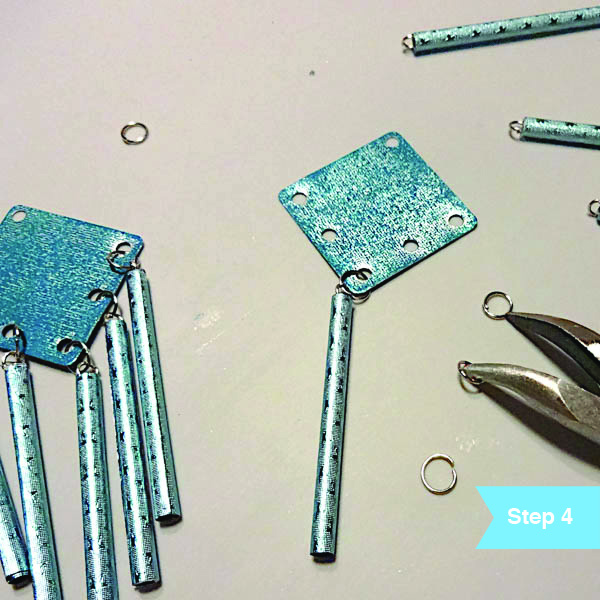

Step 4

Create the sentiment for your card using a layered die set. I used the word “friend” that I cut from Gold/Gold Glossy Rinea Foiled Paper for the word mat and Fuchsia/Gold Glossy for the detailed word. Paste the two parts of the die with On Point Glue and then paste it over the decorated card base.


Step 5

Paste the gift envelope stamp over your decorated card using Double-sided Foam Tape. 

Supplies

Imagine
Other
  • Rinea Foiled Paper – Mocha Gold Glossy, Gold/Gold Glossy, Fuchsia/Gold Glossy, Blush and Emerald Starstruck
  • Card Stock
  • Catherine Scanlon Stamps – Stamp Set Gift Enclosures
  • Lil’Inker Designs – Stitched Woodgrain Cover Die
  • Simon Says Stamp – Word Die Cut Friend

Quick & Easy: How to Make Earrings

by Kyriakos Pachadiroglou

Having a quick look at your craft supplies, you can always find something more to make than papercrafts. Jewelry is one of the best things and you can make them any day and according to your fashion requirements each time.

These Wind Charm earrings are very easy to make and you can follow the same steps to make a necklace just by replacing the earring hooks with a jump ring and passing a cord to it. You only need basic supplies and no special techniques.

StazOn Pigment
in Peacock Feathers

Inkblushers

Sheet Metal
in Diamond 1.25 in

GlazOn


Jewelry Kit 

Rinea Foil Paper

Tear It Tape

Jewelry Punch

Glue Gun

Jewelry Pliers

Directions

Cut 2 x 1 ½ inch pieces of the Rinea Turquoise starstruck paper, 5 for each earring or more if you are planning to make a necklace too. An alternative can be to use two matching color papers and have a result that goes with more outfits. When you have the papers cut, place Tear It Tape at one of the long edges and use a bamboo skewer starting from the opposite edge tightly roll the paper. Secure with the pre-set Tear It! Tape to create the pipes. Using the double-sided tape is easy and does not create a mess.

Place a drop of hot glue on one of the pipes ends and set a small jump ring inside. Continue with all of the small pipes and only at one side. If you do not have a glue gun then a strong liquid adhesive glue such as On Point Glue should work as well.

Punch small holes on two sides of the SHEET Metal in a diamond shape. You can use a hole punch or a piercing tool, but make sure that the openings allow the jump rings to pass. Then, remove the protective film and just press them on the StazOn Pigment in Peacock Feathers ink pad. Allow a few minutes the ink to dry. You can seal the result with GlazOn. This liquid sealant is formulated to work with StazOn inks.

Add a bit larger jump rings to set the pipes on the SHEET Metal diamond shapes and finish by adding an earring hook.

How To Create A Shimmery Winter Background

by Nadine Carlier

Winter Wishes Card by Nadine Carlier IC

The metallic shimmer in Delicata inks is perfect to create a shimmery winter background. Watch my video below to see exactly how I did it.  Enjoy!

Skill: Intermediate
Time: 30 minutes

Supplies

Imagine
Other

Visit our YouTube Channel for more inspirational videos and subscribe to get updates when we post new videos.

Learn How to Create a Christmas Card with Rinea Foil Paper!

by Melissa Andrew

Learn How to Create a Christmas Card with Rinea Foil Paper!

Today, I show you how to create a simple overlay background with Rinea foil paper over a Fireworks Shimmer Spray background for a Christmas card. In addition, I teach you how to use a simple masking technique to double your stamping effect as well as Memento markers to create dimension. Enjoy!

Skill: Advanced
Time: 1 hour +

Directions

Supplies

Imagine

• Fireworks Shimmery Craft Spray – Tangelo, Dandelion
• VersaFine Clair – Nocturne
• Memento Markers – Cottage Ivy, New Sprout, London Fog, Tuxedo Black
Irresistible Pico Embellisher – Gold Shimmer, Wedding Dress White
• On Point Glue
• Tear It! Tape

Other

• Rinea Ebony Foil Paper – http://bit.ly/2zZa308
• Little Darlings Rubber Stamps – Tree line http://bit.ly/2PyzMHs and Mountains http://bit.ly/2ORquRI
• Whimsy Stamps – Everyday Scripted Sentiments http://bit.ly/2Ke3Sub
• Whimsy Stamps – Penguins Winter Adventure http://bit.ly/2A2uEku
• Paper Trimmer
• Scissors
• Masking Paper
• Watercolor Paper
• White Card Stock
• Heat Tool

Create Beautiful Designs with Gold Rinea Foil and StazOn Ink

by Iris Rodriguez

This month we have the fun challenge to make projects using Rinea foils. There are so many fun things you can do with these foils; you can stamp on it, paint, use with mediums or create 3D decorative projects. I like how the gold foil and black look together. For my card, I used Imagine’s GlazOn to seal the foil; it protects the foil and acts as a primer, which allows the ink to better adhere. I stenciled in my design with StazOn ink.

Skill: Beginner
Time: 30 minutes

Directions


Step 1

Seal the Gold Rinea foil with Light Gloss or Glossy GlazOn. It protects the foil and acts as a primer, which allows the ink to better adhere. Allow the GlazOn to dry, it dries very fast.


Step 2

Determine the size of your sentiment. I stamped the sentiment with individual alphabet stamps. If you’re doing the same, stamp the whole on a scratch piece of paper to determine the size. Rip apart a scratch piece of paper to a size that will fit the height of the sentiment, plus a little space above and below it. Place the paper about 2/3 down from the top of the foil. The paper will protect the area where the sentiment will be stamped.


Step 3

Using an InkBlusher and Jet Black StazOn ink, stencil the design onto the foil.


Step 4

Stamp the sentiment. Assemble the card. I hope you enjoyed this project and will give it a try. You can count on us to keep bringing you card making and mixed media project ideas, keep visiting the Imagine blog.

Supplies

Imagine
Other
  • Rinea Foils – Glossy Ebony and Gold Pack
  • Cardstock paper-Black
  • Crafter’s Workshop stencils- Numbers – (6×6 inches)
  • Alphabet stamps