Quick & Easy: How to Make Earrings

by Kyriakos Pachadiroglou

Having a quick look at your craft supplies, you can always find something more to make than papercrafts. Jewelry is one of the best things and you can make them any day and according to your fashion requirements each time.

These Wind Charm earrings are very easy to make and you can follow the same steps to make a necklace just by replacing the earring hooks with a jump ring and passing a cord to it. You only need basic supplies and no special techniques.
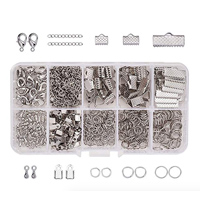
StazOn Pigment
in Peacock Feathers

Inkblushers

Sheet Metal
in Diamond 1.25 in

GlazOn


Jewelry Kit 

Rinea Foil Paper

Tear It Tape

Jewelry Punch

Glue Gun

Jewelry Pliers

Directions

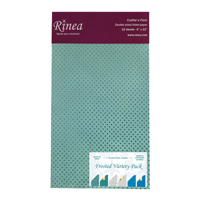
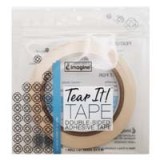
Cut 2 x 1 ½ inch pieces of the Rinea Turquoise starstruck paper, 5 for each earring or more if you are planning to make a necklace too. An alternative can be to use two matching color papers and have a result that goes with more outfits. When you have the papers cut, place Tear It Tape at one of the long edges and use a bamboo skewer starting from the opposite edge tightly roll the paper. Secure with the pre-set Tear It! Tape to create the pipes. Using the double-sided tape is easy and does not create a mess.

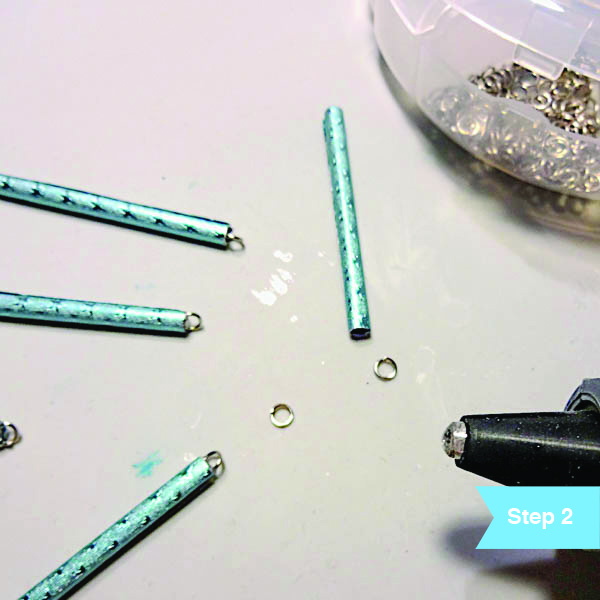
Place a drop of hot glue on one of the pipes ends and set a small jump ring inside. Continue with all of the small pipes and only at one side. If you do not have a glue gun then a strong liquid adhesive glue such as On Point Glue should work as well.

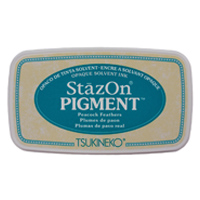
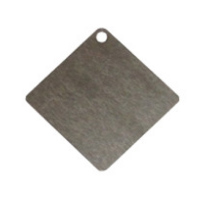
Punch small holes on two sides of the SHEET Metal in a diamond shape. You can use a hole punch or a piercing tool, but make sure that the openings allow the jump rings to pass. Then, remove the protective film and just press them on the StazOn Pigment in Peacock Feathers ink pad. Allow a few minutes the ink to dry. You can seal the result with GlazOn. This liquid sealant is formulated to work with StazOn inks.

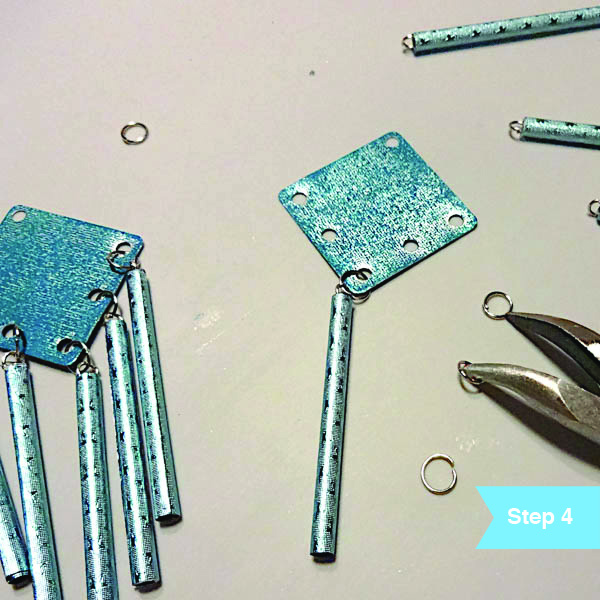
Add a bit larger jump rings to set the pipes on the SHEET Metal diamond shapes and finish by adding an earring hook.

Create a Fun Mermaid Scale Friendship Card

by Roni Johnson

Create a Fun Mermaid Scale Friendship Card

This month Imagine and Rinea Foil are teaming up to bring you some amazing projects for the month of August and today I have a fun mermaid scales card for your most Mer-Mazing friend!

Skill: Intermediate
Time: 1 hour

Directions


Step 1

Place a piece of white cardstock in a stamping aid and place the stamp over the cardstock in the desired position. Close the lid of the stamping aid to affix the stamp to the lid. Pounce VersaFine Nocturne ink over the stamp; close the lid to stamp the image onto the cardstock. Repeat this step if necessary to get a good impression. Leave the stamp affixed to the stamping aid.


Step 2

Use an Exacto knife to cut away several scales from the image.


Step 3

Use sponge daubers to apply Verdant, Paradise and Fantasia inks to the cardstock. Blend the inks where they meet.


Step 4

Use a white gel pen to color in the dots on the scales.


Step 5

Swipe the piece of cardstock with a Stamping Buddy or other anti-static tool. Place the piece of cardstock back into the stamping aid; apply VersaMark ink to the rubber stamp and close the lid to stamp the image over the first.


Step 6

Sprinkle the image with Mboss Sparkle Embossing Powder, shake off excess and return to the pouch. Use a heat tool to melt the embossing powder.


Step 7

Trim several colors of Rinea Foiled Paper to fit the openings in the scale pattern.


Step 8

Affix these pieces to the backside of the card panel. Stamp sentiment onto a piece of vellum using Piano Black StazOn Pigment Ink. Tear away excess paper and affix this to the card using On Point Glue. Affix the card panel to a blue card base using Tear It! Tape.

Supplies

Imagine
Other
  • Joy Clair – Mermaid Tail
  • Unity – Mer-mazing (sentiment)
  • White & Blue Cardstock
  • Exacto Knife
  • Rinea Foiled Paper – Jade/Gold Glossy, Emerald/Gold Glossy, Turquoise/Gold Glossy, Sapphire/Gold Glossy, Lavender/Gold Glossy, Violet/Gold Glossy
  • Uni-Ball Signo White Gel Pen

Color of the Month for August is Desert Sand

Color of the Month for August is Desert Sand. This light cream color is a beautiful way to express warm soft earthy tones. Not only is it a great compliment to chocolate browns but it looks great with a shimmery element. If you are looking for a soft shimmery gold that is not bright yellow then we highly recommend inks such as Delicata Champagne or Fireworks Shimmery Craft Spray in Desert Sand. If you are looking for a dye ink to blend with brown colors then Memento Desert Sand is also a great choice.

August also brings a collaboration with Rinea Foil Paper. Look out for how unique and versatile these foil papers are in paper crafting and jewelry making projects.

Here is a Sneak Peek of what we have to offer.

Watercolored Card by Iris Rodriguez

Espresso Card by Kyriakos Pachadiroglou

Beginner Technique by Roni Johnson

Learn How to Transform Paper Flowers with Mboss, Ink, and Shimmer Sprays

by Jessica Lin

Hi everyone! Have you been enjoying the 3D projects for this month so far? I hope you are! Today I have a floral wreath project to share with you. Besides showing how you can assemble your own paper flowers, I’m also teaching you 3 ways to transform your die cuts! The before and after is as different as night and day and the extra steps definitely bring the flowers to life. Be sure to check out the video and see it for yourself!

Skill: Intermediate
Time: 1 hour (depending on the number of flowers)

Directions

Supplies

Imagine
Other
  • Wreath
  • Glue Gun
  • EK Success Anti-static Powder Tool
  • Stampin’ Up – Flower Frenzy Bigz L Die, Bouquet Bigz L Die
  • Cardstock – pink, teal, purple, green, yellow, white

See How to Make a Moon and Stars Art Canvas with Fireworks Spray

by Jowilna Nolte

See How to Make a Moon and Stars Art Canvas with Fireworks Spray

Create a beautiful dimensional Moon and Stars home decor element using resin embellishments and Fireworks Shimmery Craft Spray. Combine warm rich colors to compliment your yellow and the end result is simply stunning. A quick and easy project with lots of colors showcasing the amazing shimmer and shine by using Fireworks.

Skill: Intermediate/Advanced
Time: 30 – 45 minutes

Directions


Step 1

Add stenciling to a piece of wood using texture paste and leave to dry. Adhere resin elements to the block over the stenciling and leave to dry.


Step 2

Paint the entire block with the dimensional elements on using black gesso. Make sure you cover all the pieces and the sides too. Leave to dry.


Step 3

Use 3 to 4 colors of Fireworks Shimmery Craft Spray and mist over the entire design. Layer the colors over each other. Use a heat gun to dry layers in between and then add more color until you are happy with the look.


Step 4

Once the colored layers are dry, give it one last misting of Sheer Shimmer Spray in Sparkle for extra shine. I also added some Delicata Gold inker and rubbed it over the resin elements with a sponge to highlight the details and dimension.

Supplies

Imagine
Other
  • Wooden block
  • Jowilna Nolte stencil
  • Prima Moulds Resin
  • Texture Paste: Little Birdie

See How to Create a Sunburst with a Stenciling Technique

by Elina Stromberg

See How to Create a Sunburst with a Stenciling Technique

Fun stamped characters and bright ink colors are a joyful combination. I placed my cute dog image on a bright yellow background that was inspired by our warm July color of ‘Tuscan Sun’. I inked the background pattern directly on the folded card base: First, I stenciled a large yellow circle on the card and then inked another patterned layer on top. This double stenciling technique is super easy and using just a part of your stencil pattern makes your old stencil look cool and fresh again! If you don’t have a circle stencil you can cut it from paper or a piece of film/plastic sheet. And instead of a circle, you can use any shape you wish: an oval, a heart, a triangle, a hexagon…the possibilities are endless!

Skill: Beginner
Time: 1 hour

Directions


Step 1

Place card base folded on your craft mat. Place a circle stencil on the card, secure with masking tape. Ink the circle with yellow Cantaloupe Memento ink; dab the ink on the card with a Jumbo Dauber. Remove stencil.


Step 2

Place a pattern stencil on the inked card front and layer the circle stencil on top in its original position. Ink the circle area with orange Tangelo Memento ink. Remove both stencils. TIP: For the second inked layer, any patterned stencil can be used. For catching all the details of the stencil pattern use the smaller Sponge Dauber for inking.


Step 3

Attach a piece of masking tape on the bottom of the card. Cut a paper strip of a matching color and stamp the sentiment on it. Glue strip on the card.


Step 4

Stamp, color and cut out the main image. When coloring with alcohol markers, use Memento ink for stamping. When coloring with watercolors or watercolor pencils, use VersaFine Clair or VersaFine ink.


Step 5

Glue the main image on the card front. Decorate sentiment strip with two white gel pen dots (optional). Finished!

Supplies

Imagine

Other

  • White folded card base
  • Cardstock – Orange
  • Stencils: circle, sunray
  • Katzelkraft – Holmy
  • Ink Blog Shop – Sentiment Label Blocks
  • Alcohol markers of choice
  • White gel pen (optional)
  • Masking tape
  • Glue