Learn How to Stamp Clay to Make a Jewelry Charm

2021-apr-kyriakos-stamped-clay-charm-main-wm

By Kyriakos Pachadiroglou

Metallic frames, usually used for epoxy, can work nicely to form clay and make jewelry pieces. Mix Walnut ink for a soft, pale shade to create a marble effect ink to the clay. Then stamp with any design using StazOn ink pads that will quickly dry, won’t bleed and give a sharp outcome. StazOn will also allow you to use markers and won’t mix with them. Add some sparkle with SHIMMER Spritz and secure the result with a coating of GlazOn. Use the charm as a jewelry piece or to decorate your cards and crafts.


Skill: Beginner

Time: 30 minutes plus drying time


Directions:

2021-apr-kyriakos-stamped-clay-charm-step1

Step 1

Separate two pieces of clay and color the one with Walnut Ink. Mix together.


2021-apr-kyriakos-stamped-clay-charm-step2

Step 2

Lay flat  the clay and place the frame. Remove the excess and let it dry.


2021-apr-kyriakos-stamped-clay-charm-step3

Step 3

Remove the clay from the frame and stamp with StazOn ink pad.


2021-apr-kyriakos-stamped-clay-charm-step4

Step 4

Add some color with a MEMENTO marker (or none, if you want to leave it just with the stamped image).


2021-apr-kyriakos-stamped-clay-charm-step5
Step 5

Spray with the SHIMMER Spritz Sparkle and let it dry.


2021-apr-kyriakos-stamped-clay-charm-step6
Step 6

Secure the result and add some shine with GlazOn.


2021-apr-kyriakos-stamped-clay-charm-step7

Step 7

Place On Point Glue to the inner sides of the metal frame. Let it sit for a few minutes and place the stamped clay. Add cord or chain according to your style.


Art Supplies:


Imagine

Walnut Ink – Lilac

StazOn – Royal Purple 

MEMENTO Marker – Lulu Lavender

SHIMMER Spritz – Sparkle

GlazOn – Clear

On Point Glue

InkBlushers


Other

Jewelry Metal Frame

Air Dry Clay

Rubber Stamps of your Choice

  •  


Stamping on Soap for Kids and Grown Ups

By Baerbel Born


In this video guest designer, Baerbel Born shows you how you can customize your favorite soap. It’s also a great project for kids crafting.

With a few materials everyone can find in his or her stash you can create stunning effects on many surfaces. Today we will stamp on soap bars. Fun!


Art Supplies

Imagine :

Memento Luxe Pigment Pad, Tuxedo Black (or any other color of your choice)

Other supplies:

• German stamps: Kulricke (Bärbel Born Design)

• Tissue or paper napkin (look for sturdy ones)

• Colored pencils (soft and blunt)

• White glue

• Soft bristle brush

Learn How to Make a Spring Color Blocking Card

By Jowilna Nolte 

Celebrating Spring with an easy to create color blocker card using stamps and inks only – such a quick way of creating a fun effect without a lot of effort. Anyone can create this with only a few supplies.


Skill Level: Beginner

Time: 20 minutes


Directions:

Step 1

Ink a large floral background stamp using 3 ink colors. I am using ink pads from Imagine’s latest StazOn On Trend Collection in Cherry Blossom, Plum and Caribbean Green. Swipe the lightest color across your stamp in a straight line. Then use your second color and your third color and swipe over your stamp as well.


Step 2

Immediately stamp the image onto smooth white cardstock. Trim your image to fit into the front of a card panel. Keep a small piece of the edge that you cut off.


Step 3

Use Tear It! Tape and adhere the thin strip to the bottom edge of the stamped panel and adhere to your card base.


Step 4

Stamp your sentiment onto your card panel using VersaFine Clair and finish off with diamante and embellishments.


Art Supplies

Imagine

StazOn full-size inkpad Cherry Blossom
StazOn full-size inkpad Caribbean Green
StazOn full-size inkpad Plum
VersaFine Clair Full-size Inkpad Nocturne (black)
Tear It! Tape

Other

Stamp: Stampers Anonymous, Joy Clair
Smooth white cardstock
Enamel dot and diamante


All About You!!! An Emboss Resist How To

By LeeAnn McKinney

LeeAnn here with a fun project I made for a friend’s birthday. While looking at my stamps and thinking about what I wanted to do for this project it popped into my mind, and then a happy accident happened while making this mini slimline card that just “Sealed it” for me.


Skill: Beginner

Time: 30 Minutes


Art Supplies

Imagine:

• Imagine Craft Mat

• Clear MBoss

• Memento Rose Bud Dye Ink

• Memento Tangelo Dye Ink

• Memento Dandelion Dye Ink

• Memento Grape Jelly Dye Ink

• Imagine Tear It Tape

• VersaMark

• Memento Dew Drop Bahama Blue

• Memento Dew Drop Bamboo Leaves

• StaZon Stamp Cleaner

• Memento Dew Drop Love Letter

Other Products Used:

• Scrapbook Adhesives Foam Squares

• Recollections 110 lb Cardstock

• Recollections 65 lb Cardstock

• Darice Heat Tool

• Picket Fence Studios- Spotlight On You Stamp

Learn How to Make a Faux Blue Delft Bunny Rabbit

By Roni Johnson

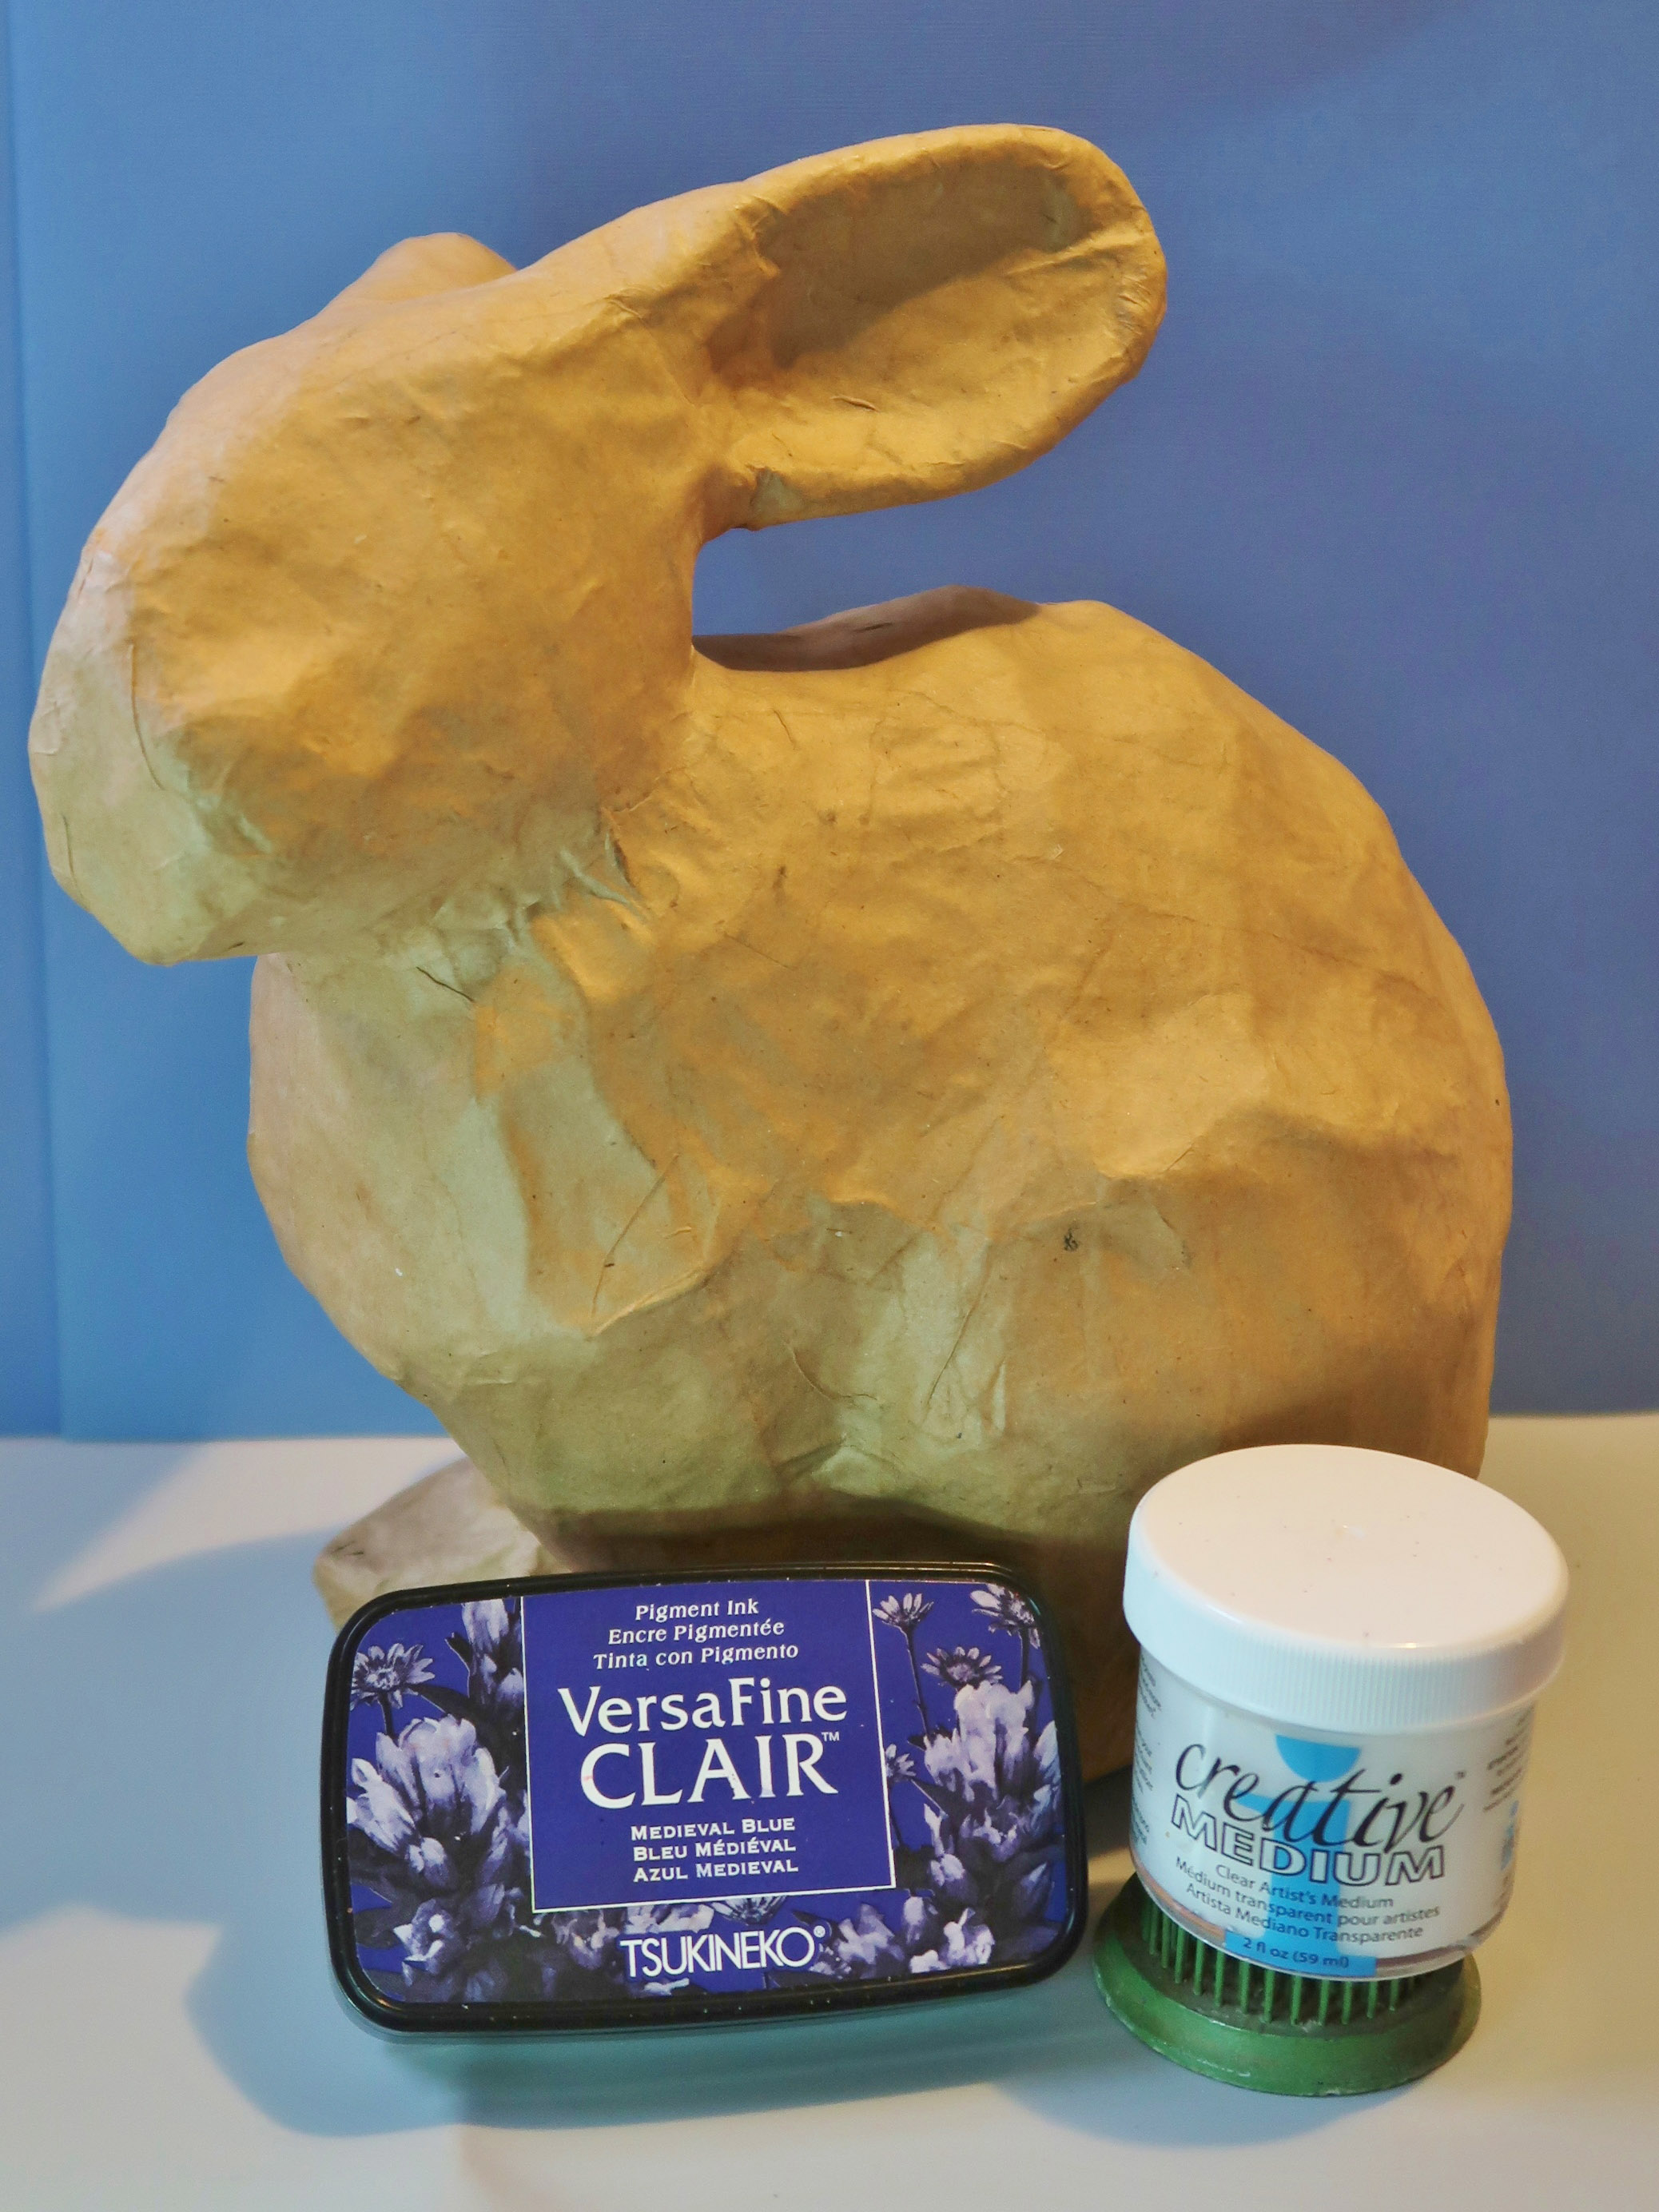
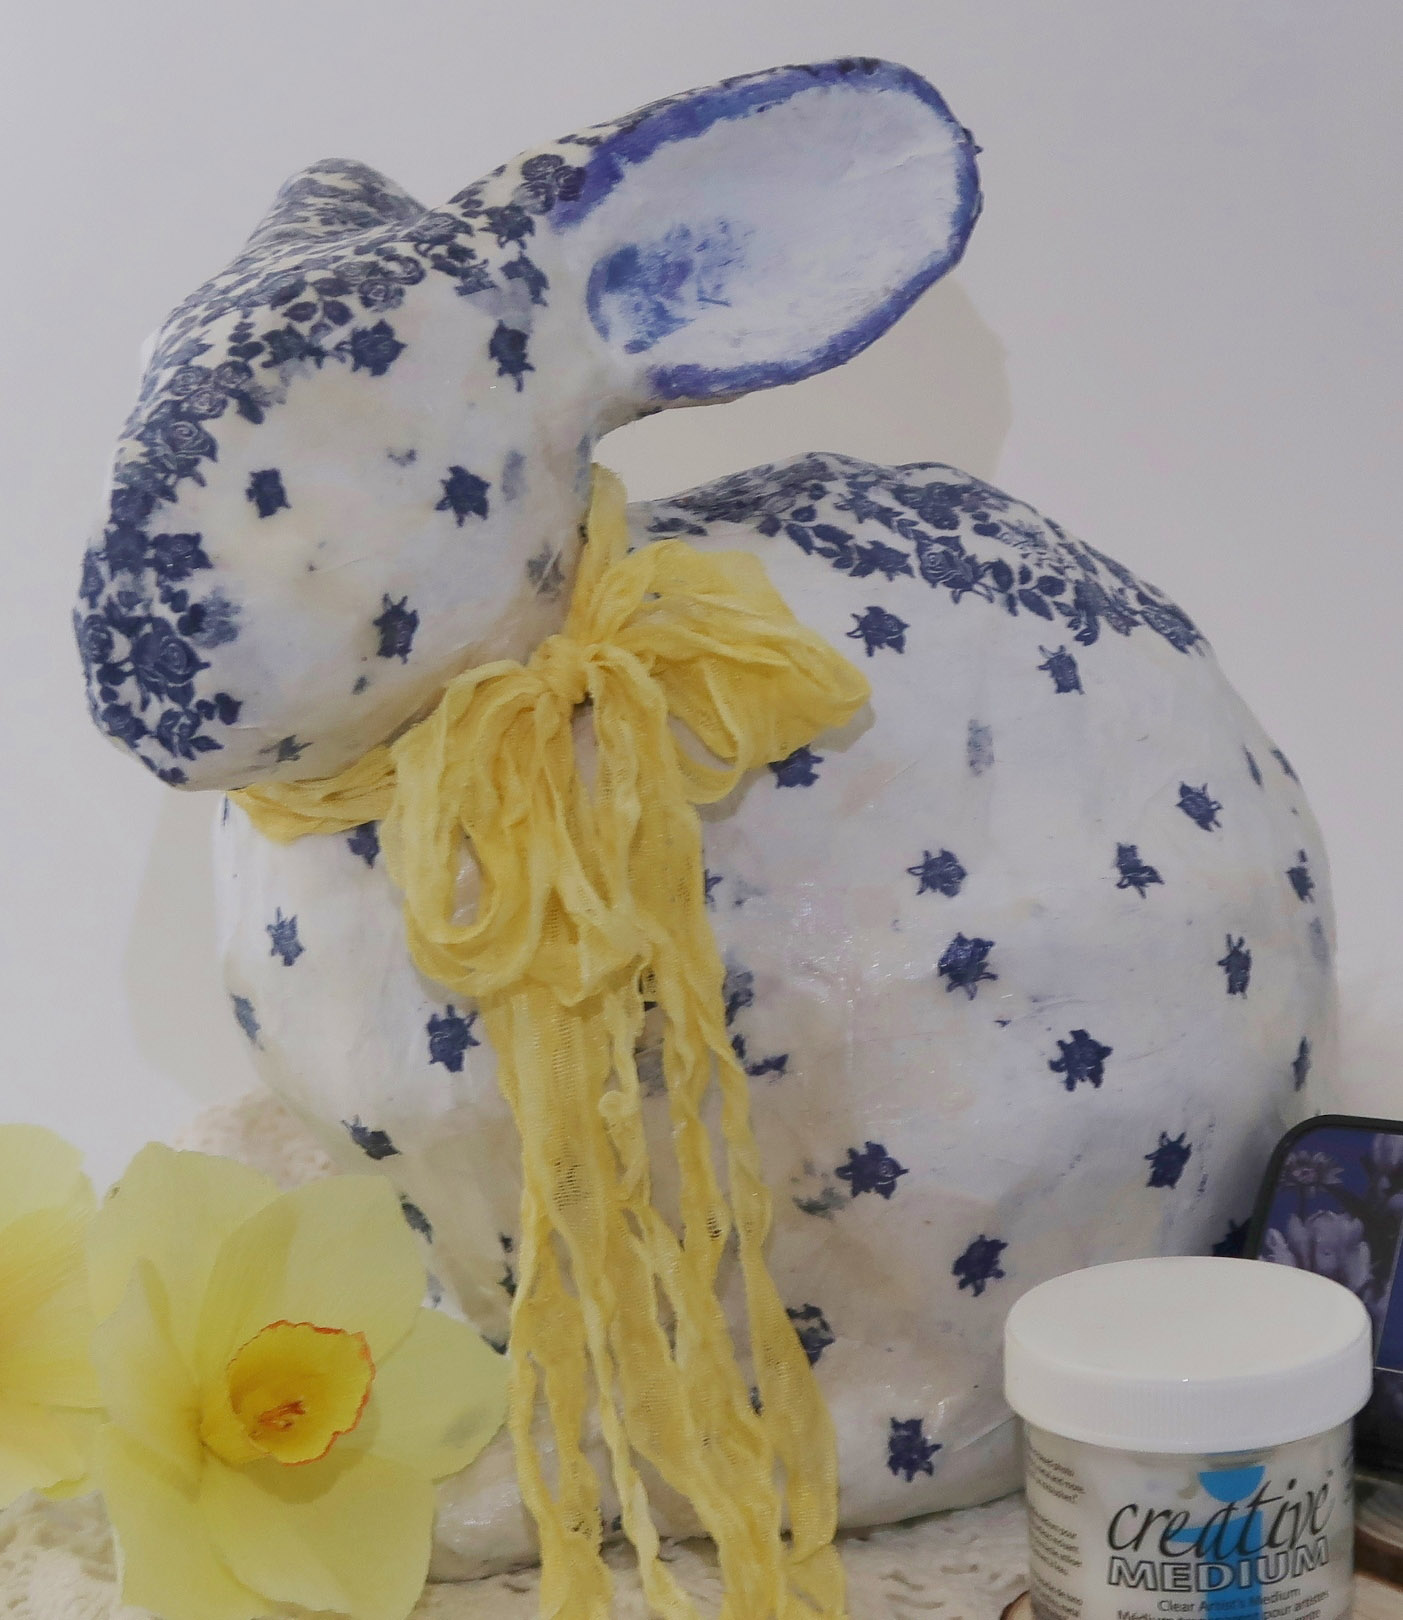
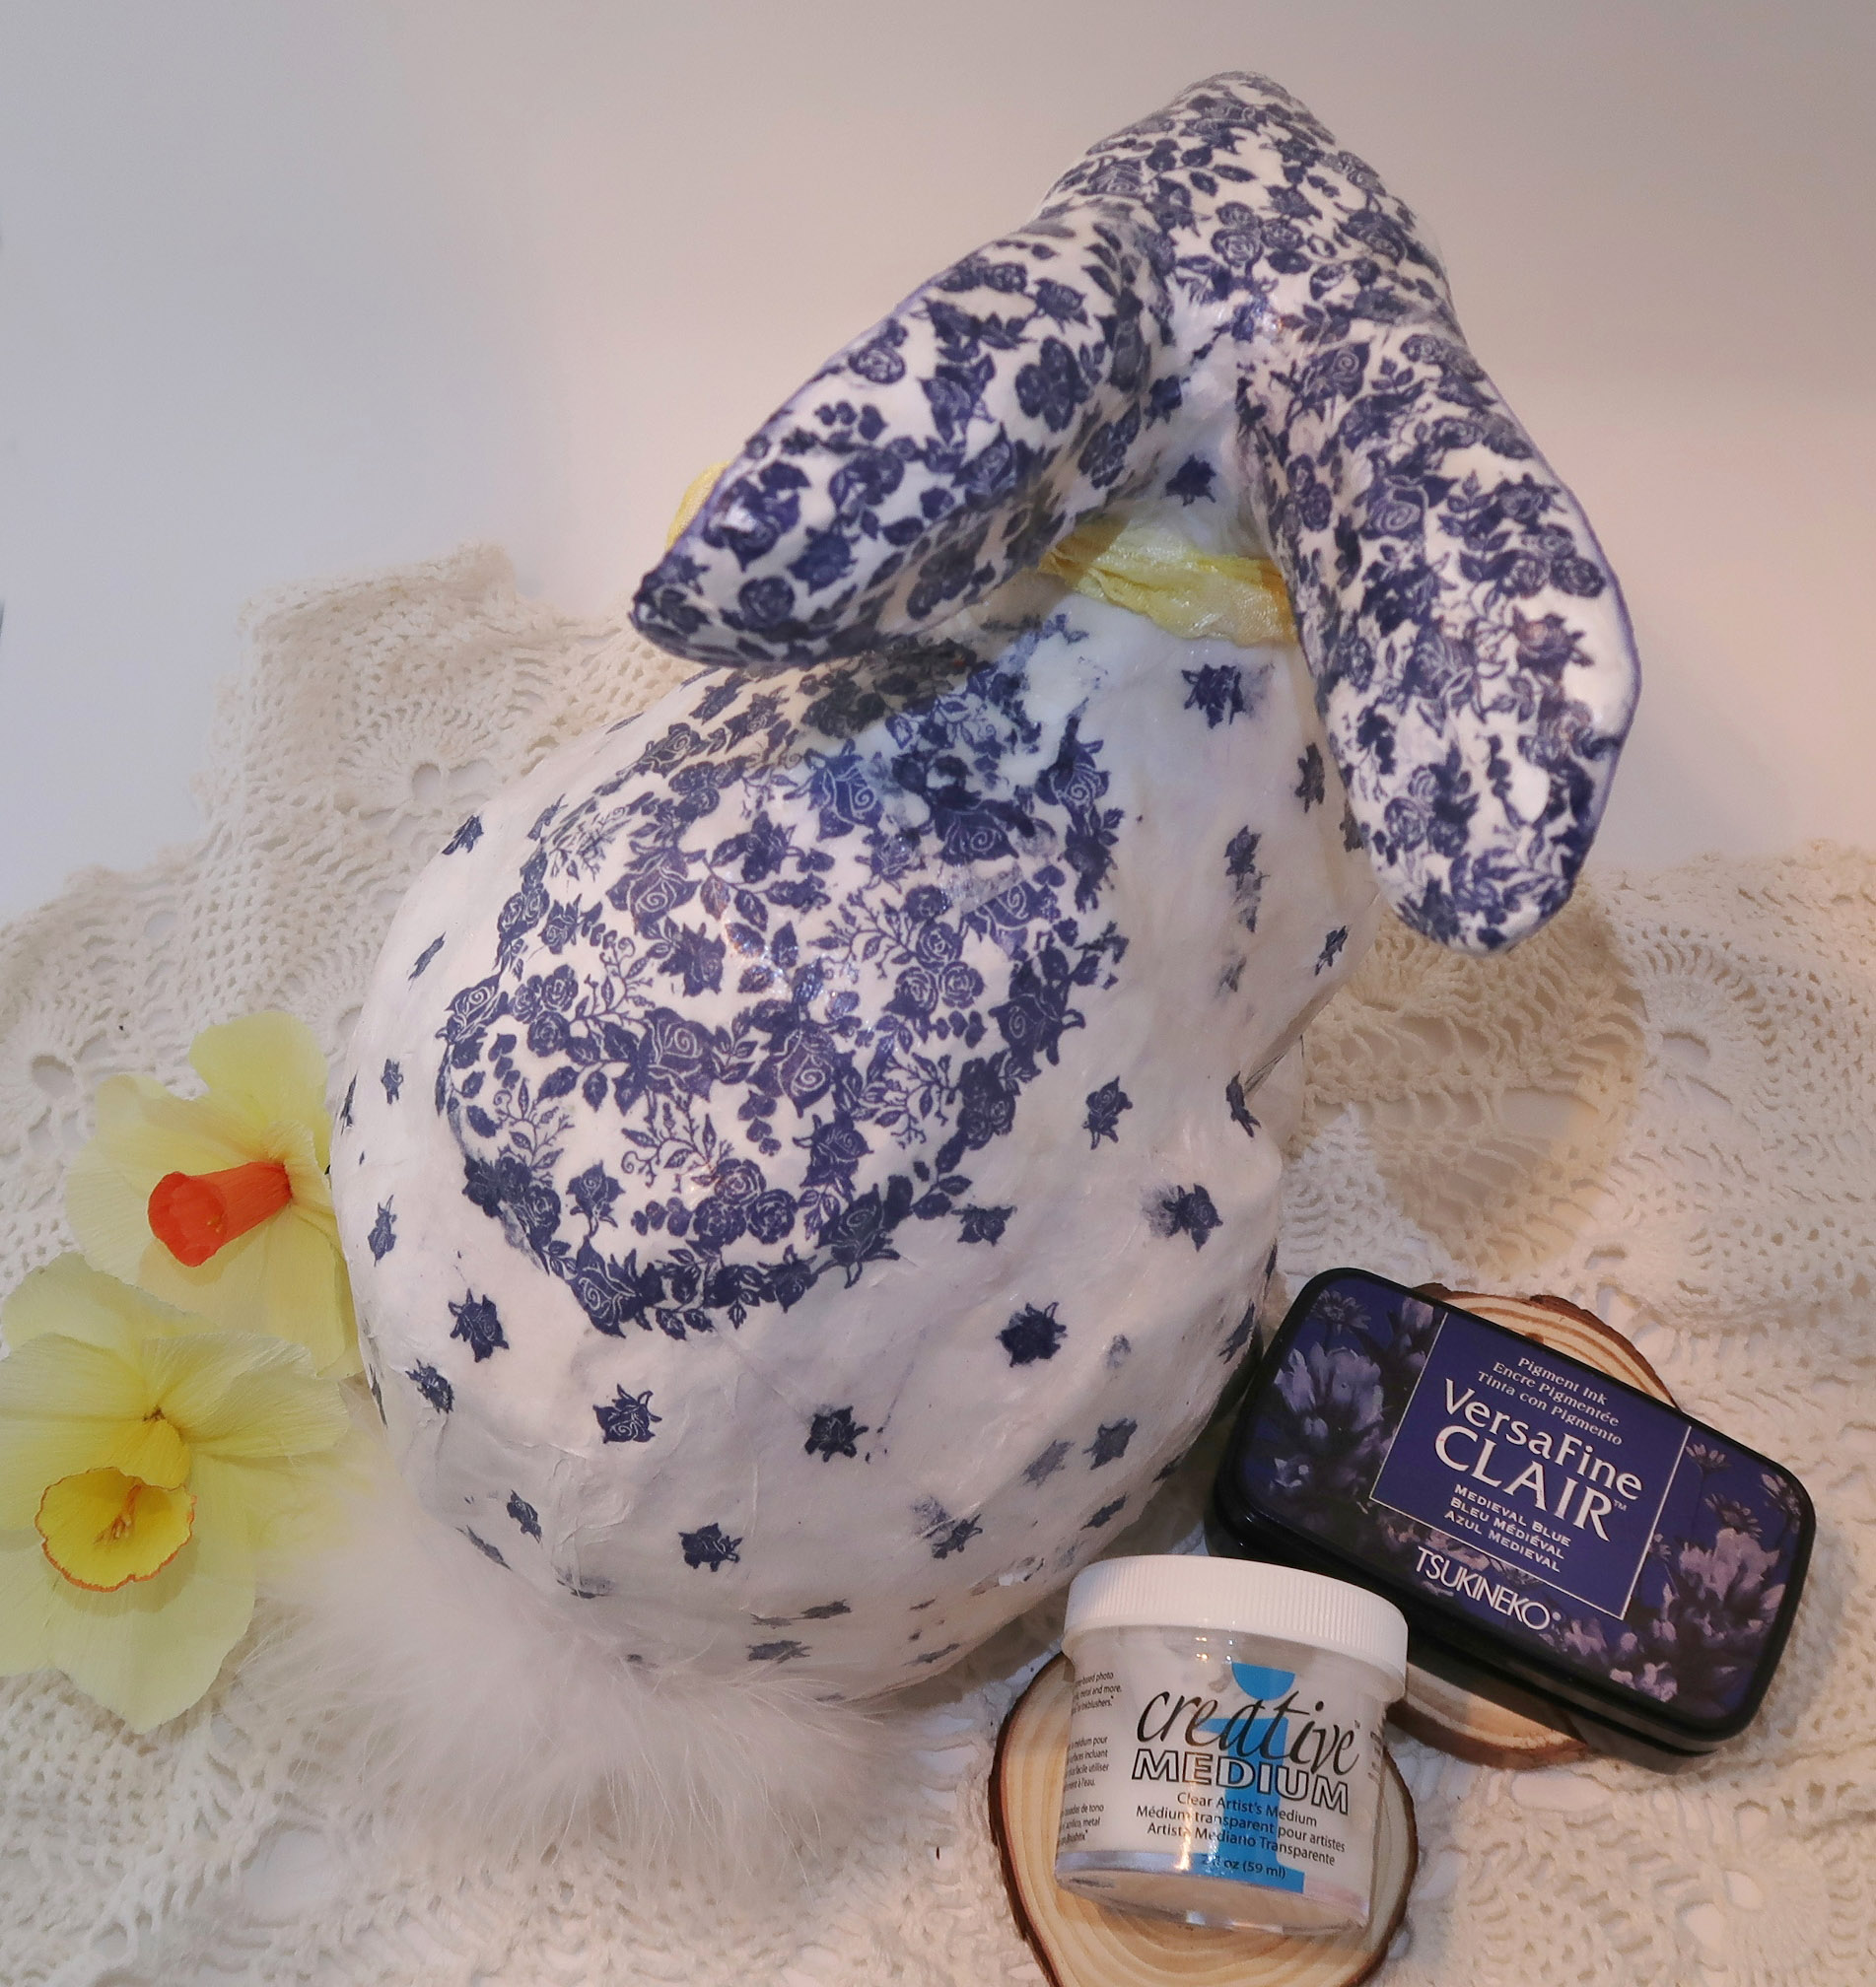
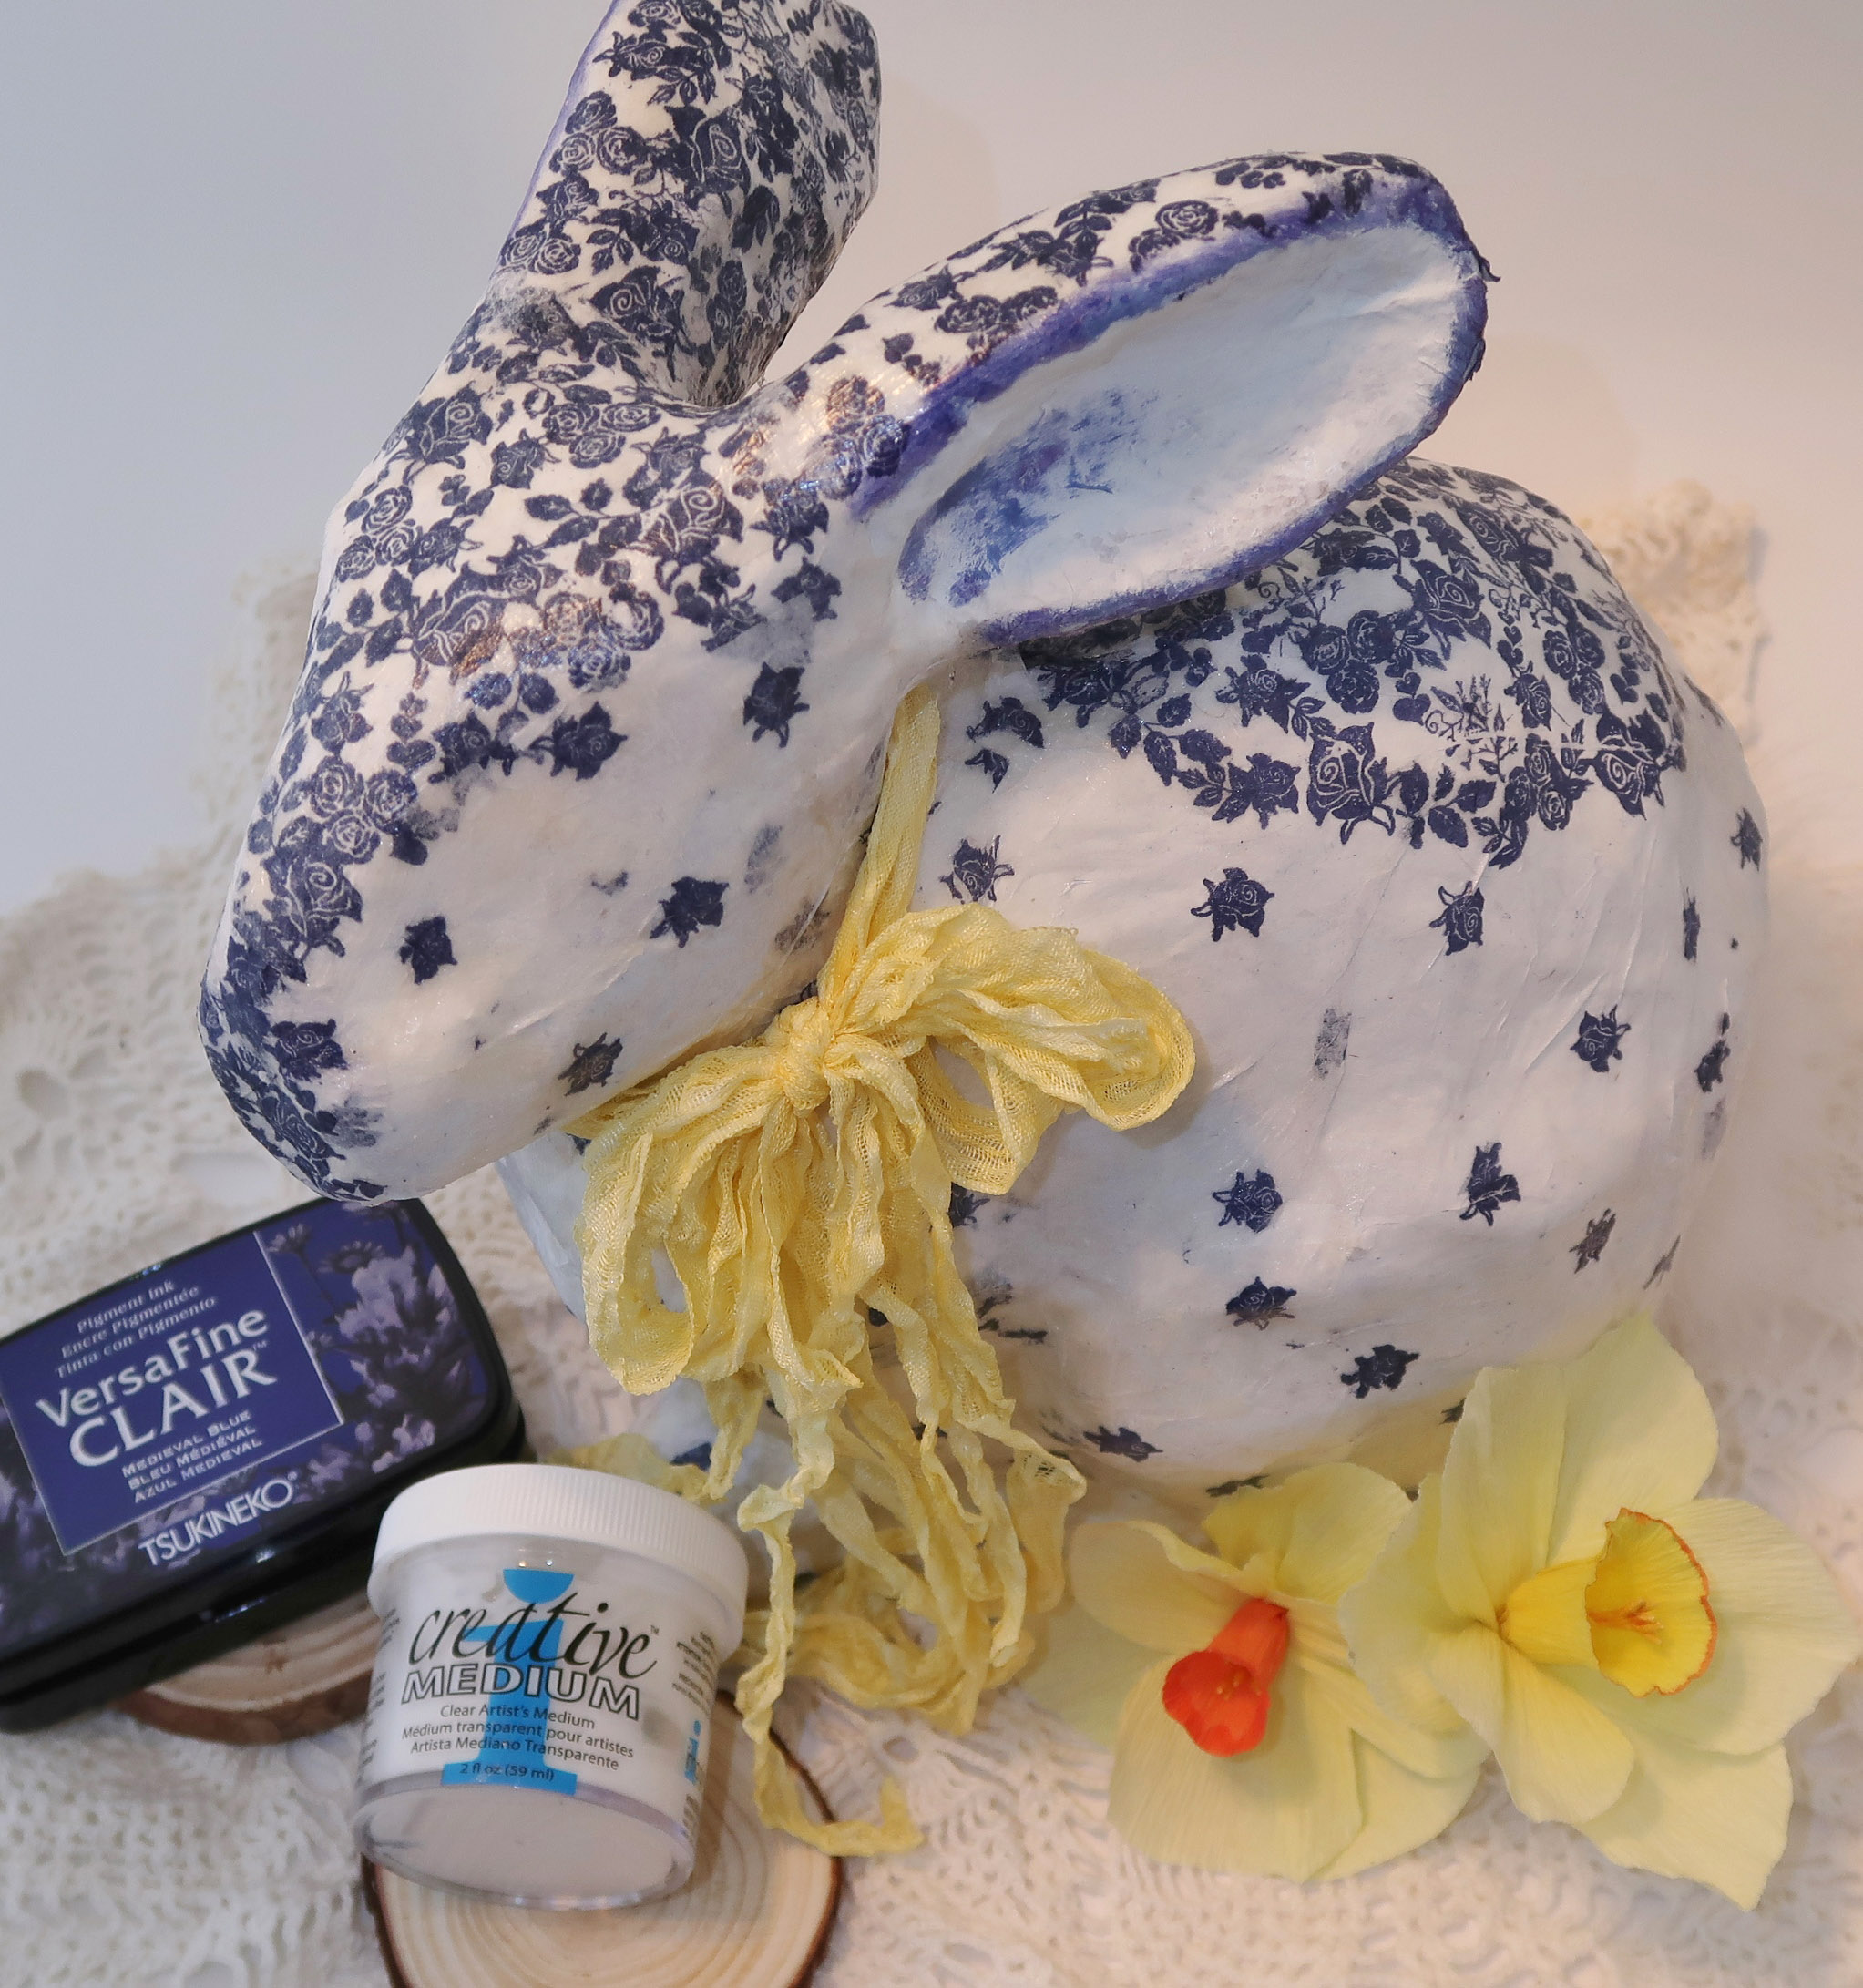
Welcome in Spring with this lovely Faux Blue Delft Bunny Rabbit to brighten up your home. Originating in the city of Delft in the Netherlands in the 1600s, this pottery which consists of blue decoration over a white background is a breath of fresh air and the perfect start of this season of renewal. This technique looks daunting but once you break it down into easy-to-follow steps it’s fun and rewarding. The finished project looks stunning and will delight everyone who comes in contact with it.

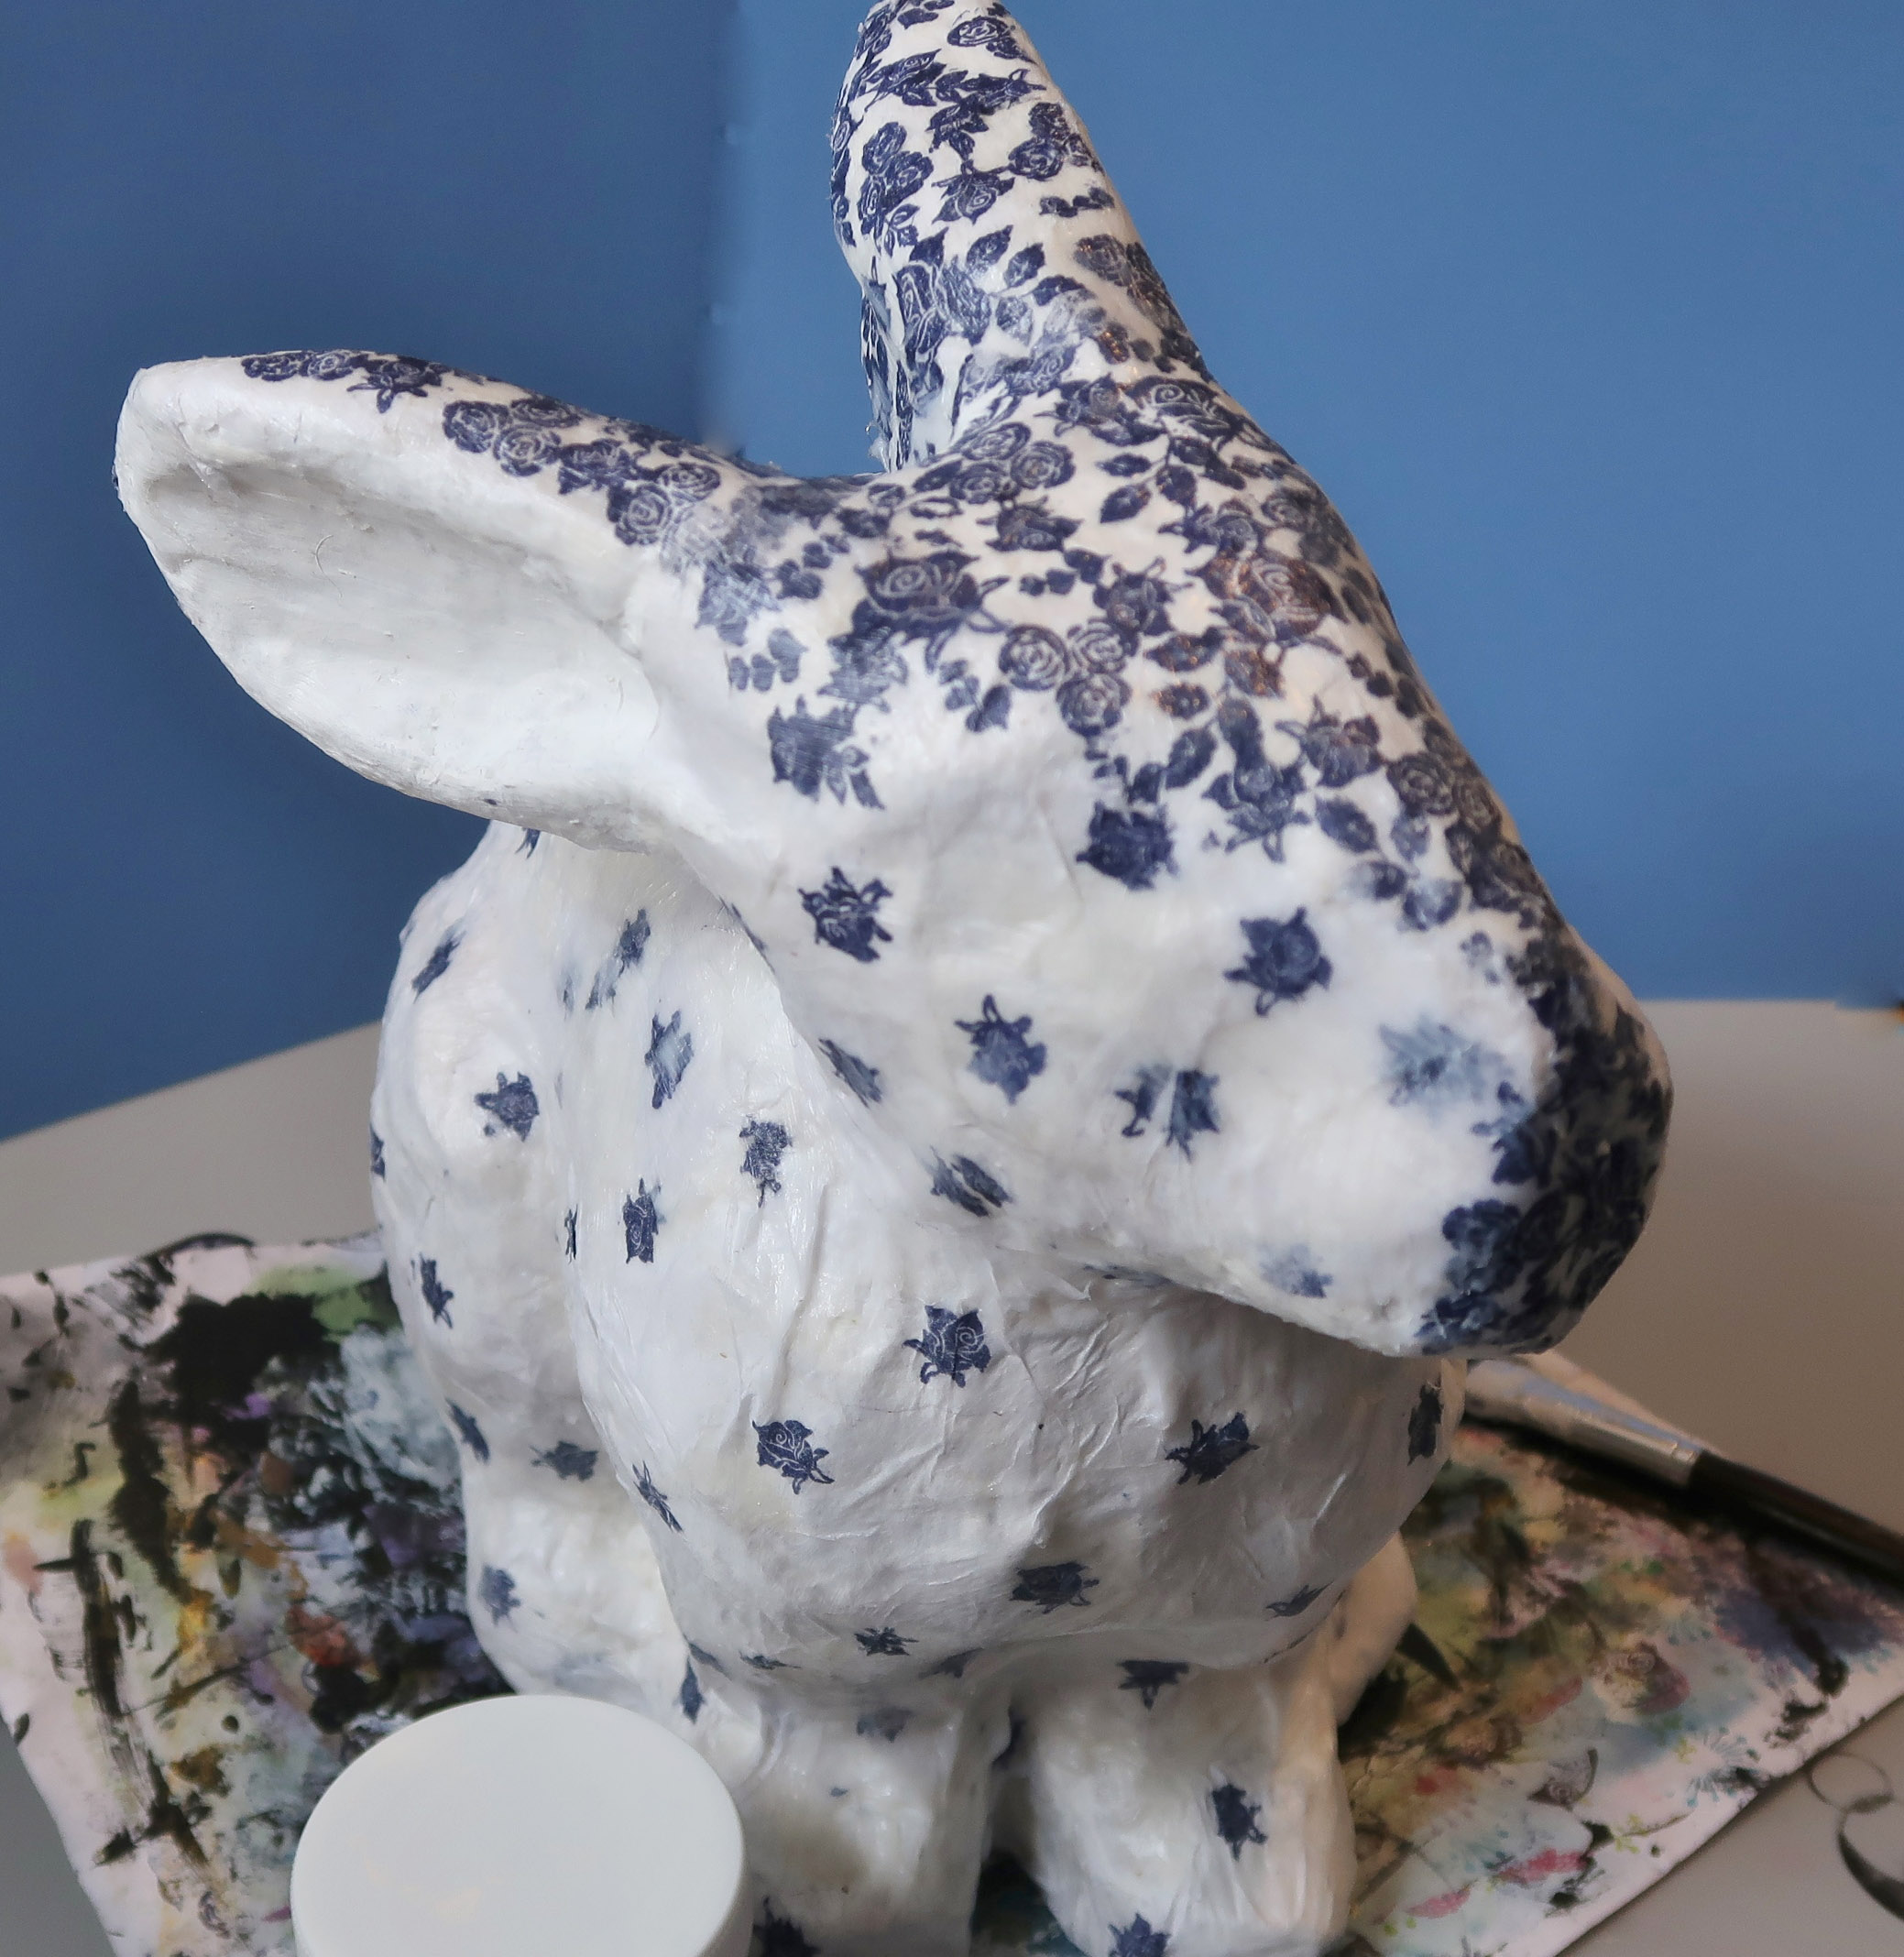
This technique combines wide-open geometric stamped patterns with areas of saturation to give the piece defined areas to enhance and highlight certain areas of the animal. For this example, I used the more concentrated stamping on the face, ears and a medallion of sorts on its back. You will come to see how this turns a plain paper mache rabbit into a beautiful Blue Delft Bunny sure to please.

Skill: Intermediate
Time: 2 hours + dry time


Directions:

Step 1

Gather up your supplies, you will need a paper mache animal – I choose a rabbit for Spring, tissue paper, Medieval Blue VersaFine Clair ink and Creative Medium (Clear or Shimmer).


Step 2

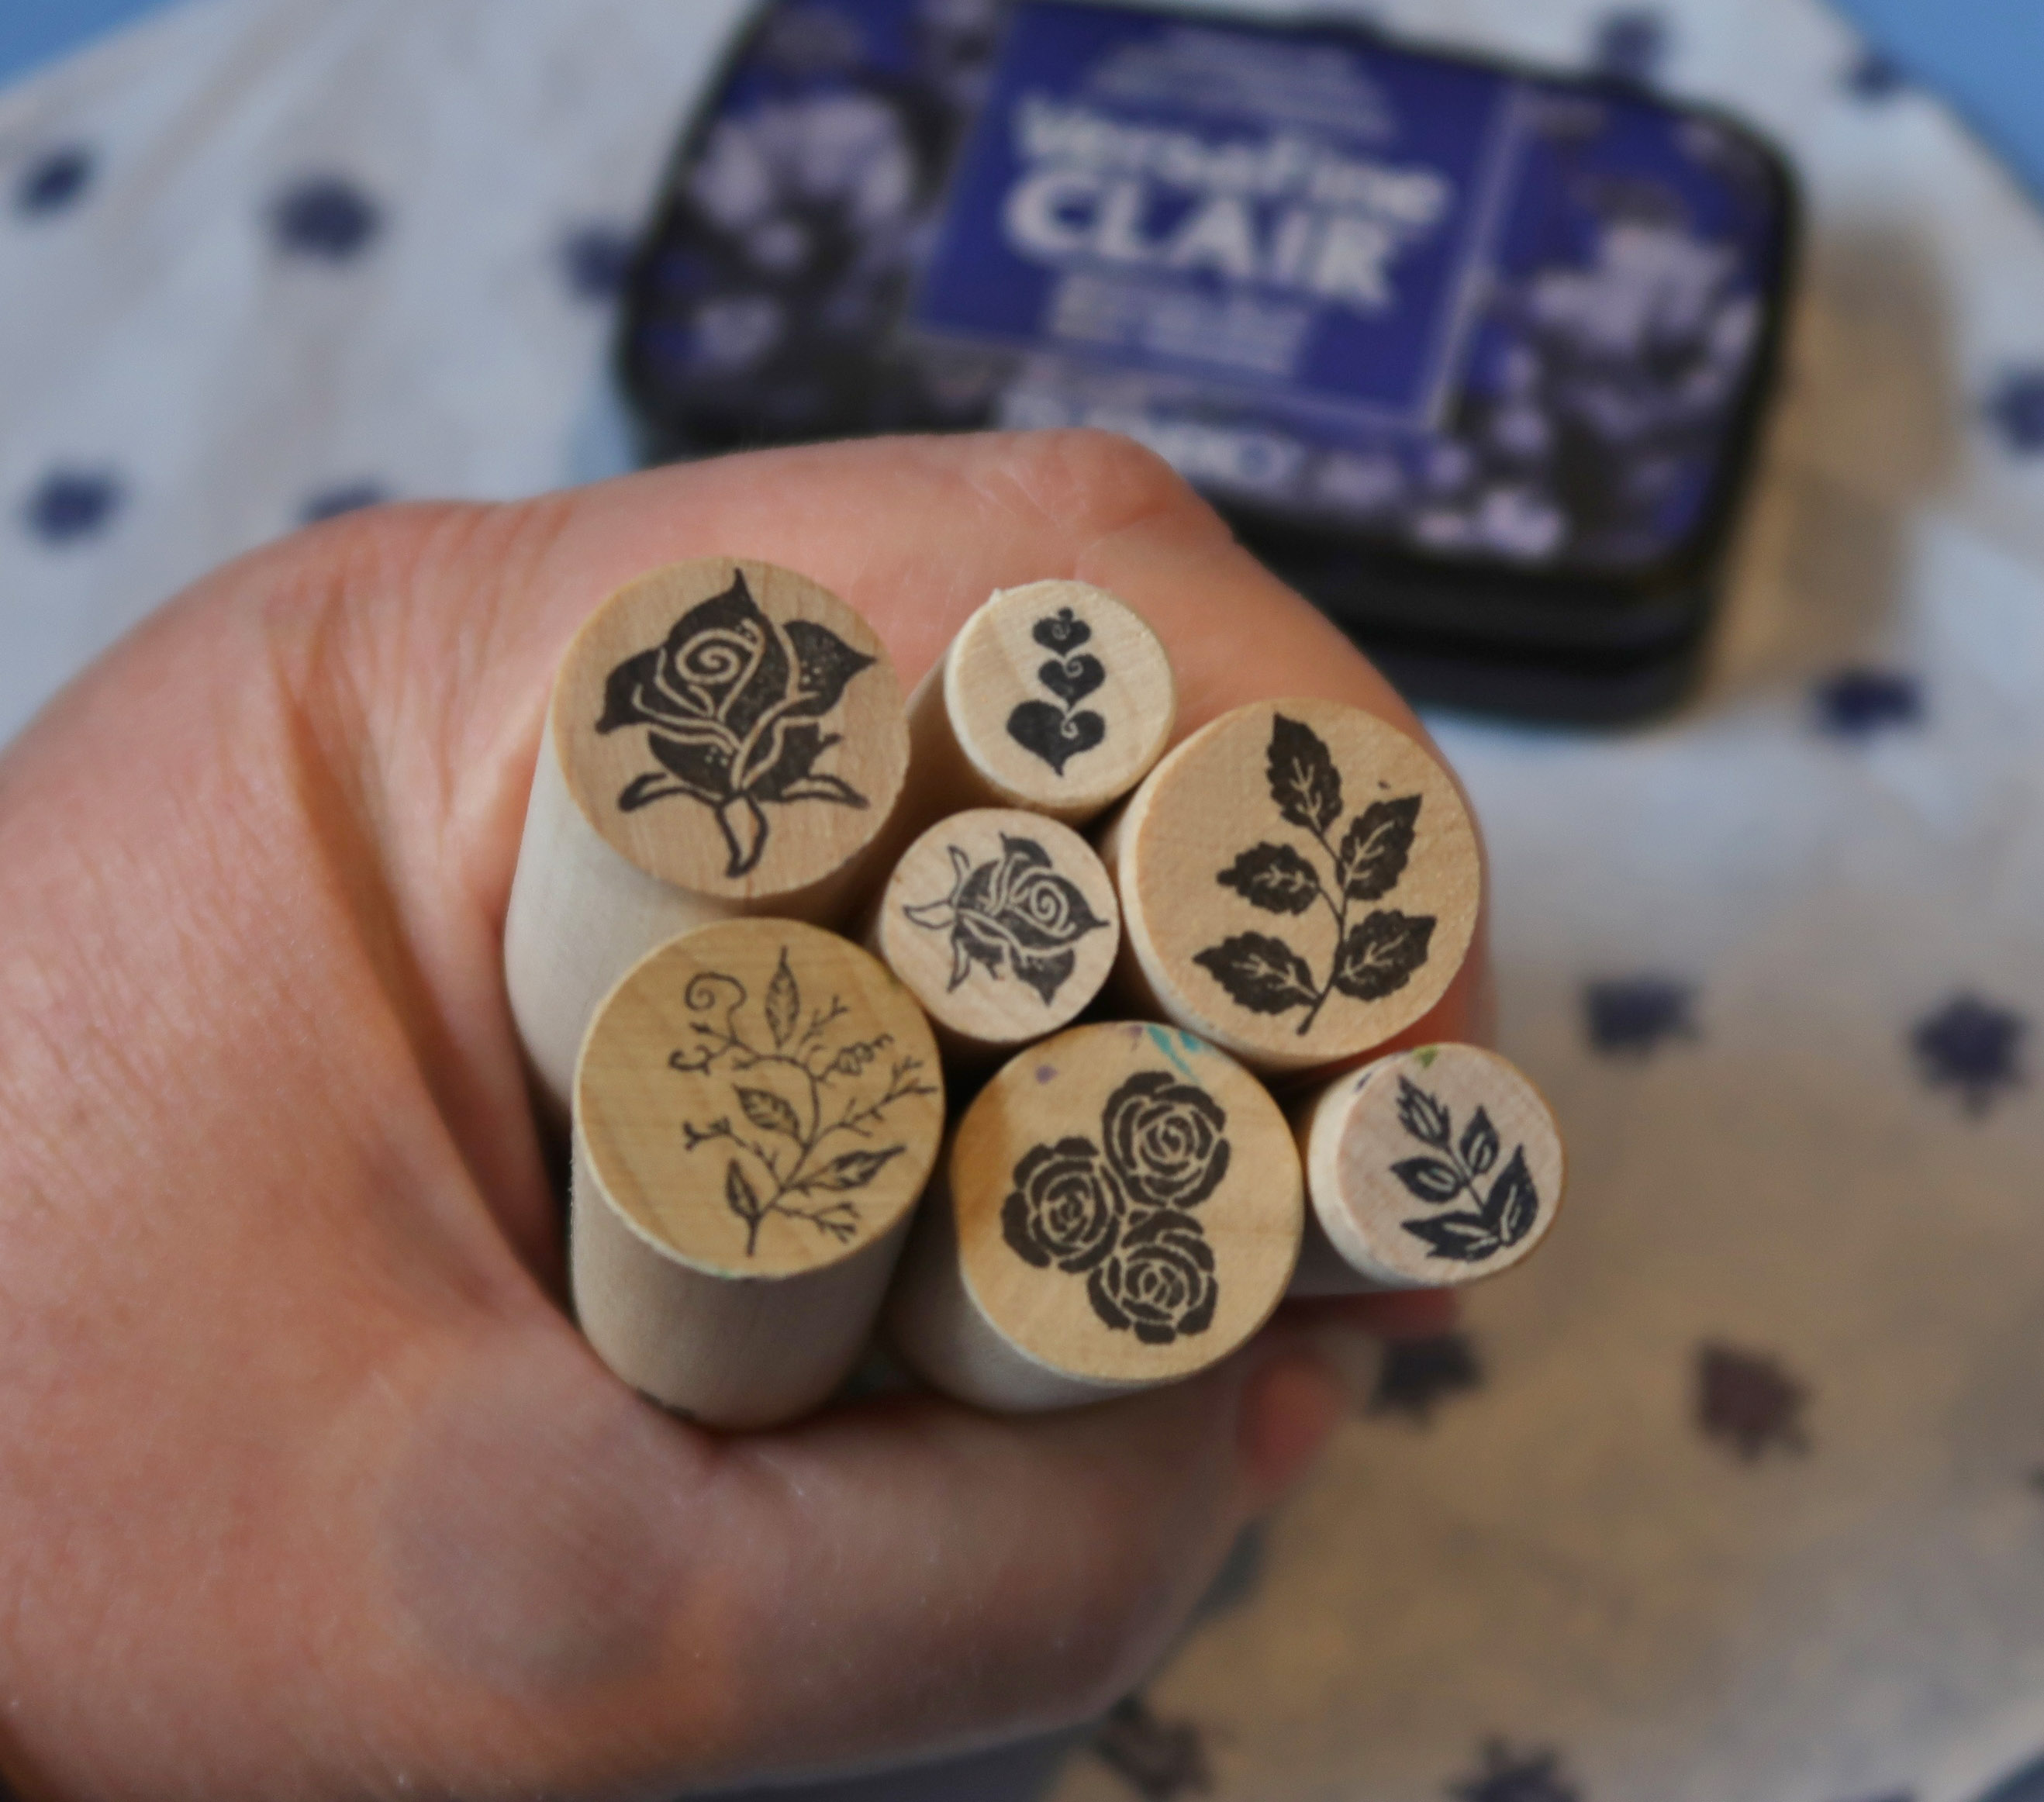
You will also need to gather a few small stamps. For this project I am using roses, leaves and vine peg stamps from Rubber Stamp Tapestry.


Step 3

Prepare the paper mache animal by painting it with white acrylic paint. Set it aside to dry.


Step 4

To create the concentrated stamped sections place a sheet of tissue paper over the desired area, in this case the back and trace the shape you wish to create. For this example I wanted a nice sized oval medallion over the back. You can see the faint pencil marking on the tissue paper in the photo.


Step 5

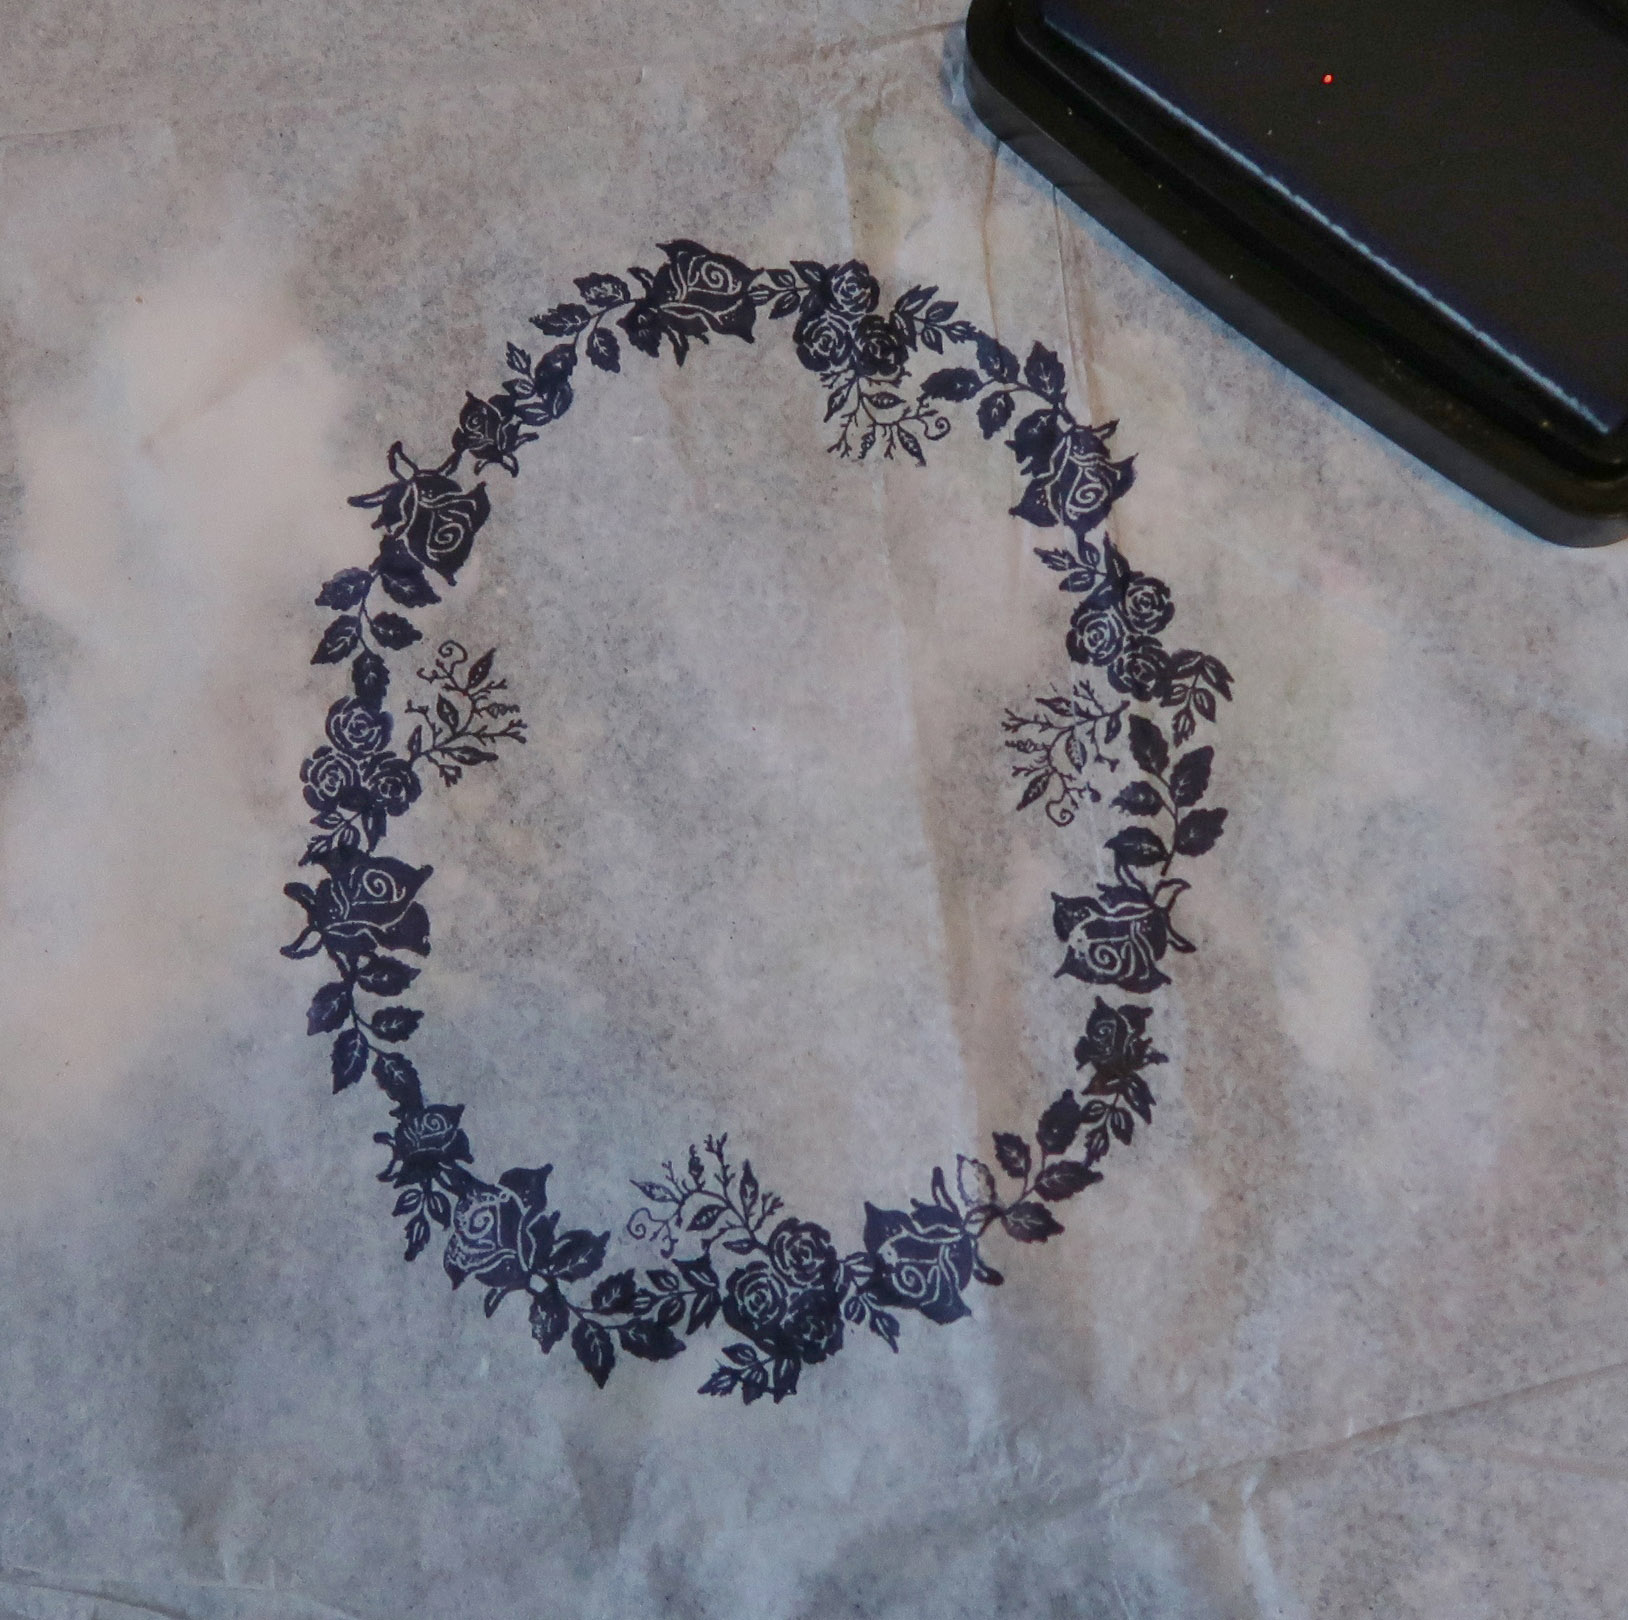
Create the medallion by stamping the border along the pencil line from the previous step.


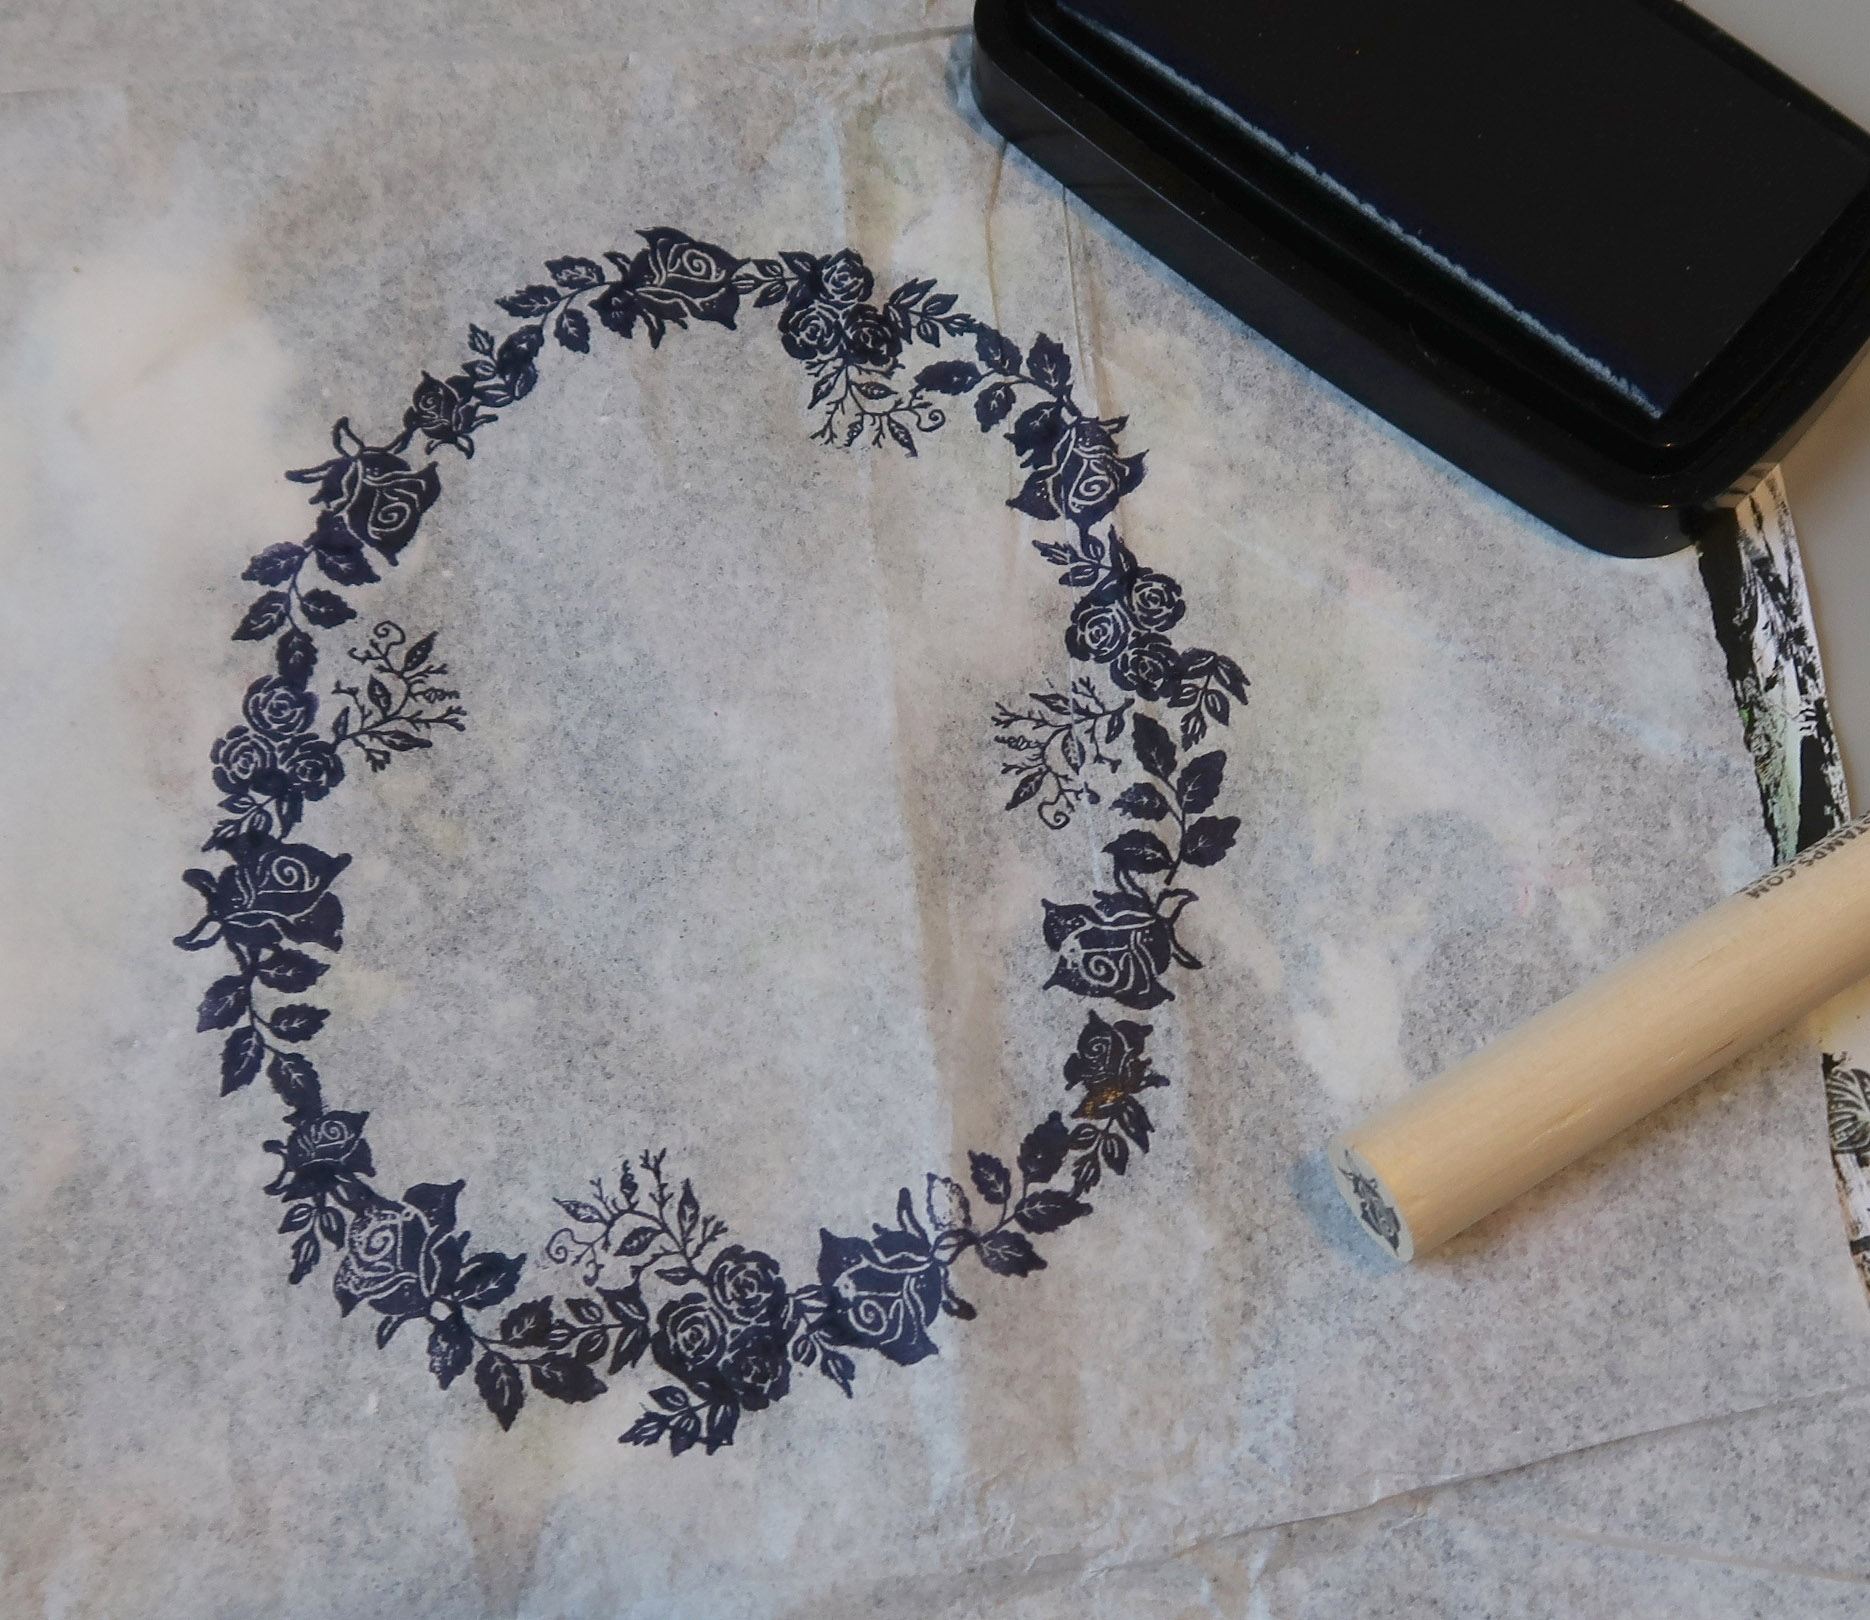
Step 6 – Stamp additional images to fill in the medallion.


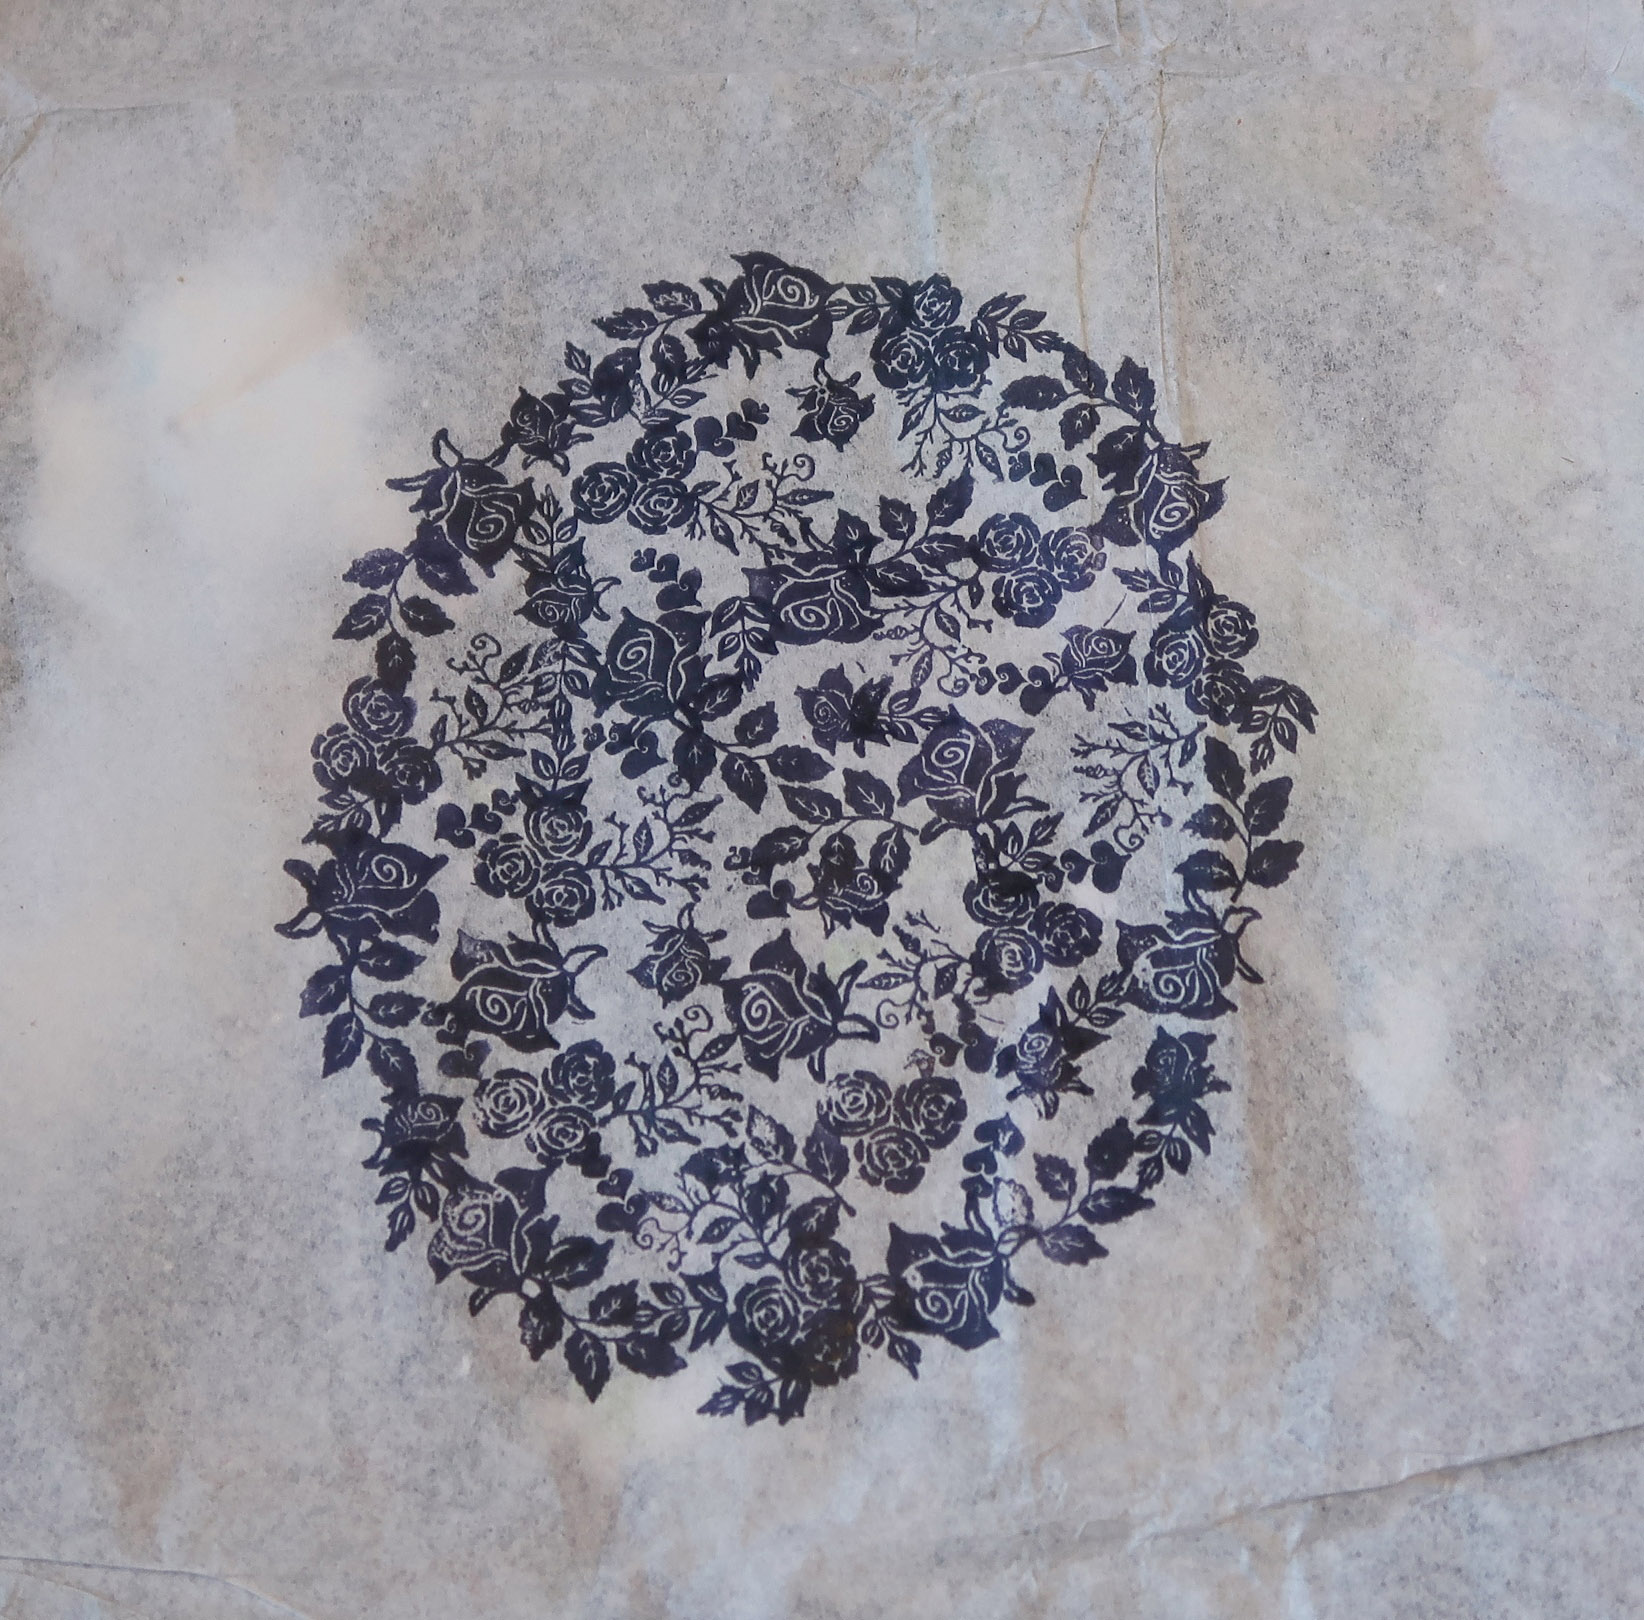
Step 7 – Once the medallion has been completed let the ink dry completely.


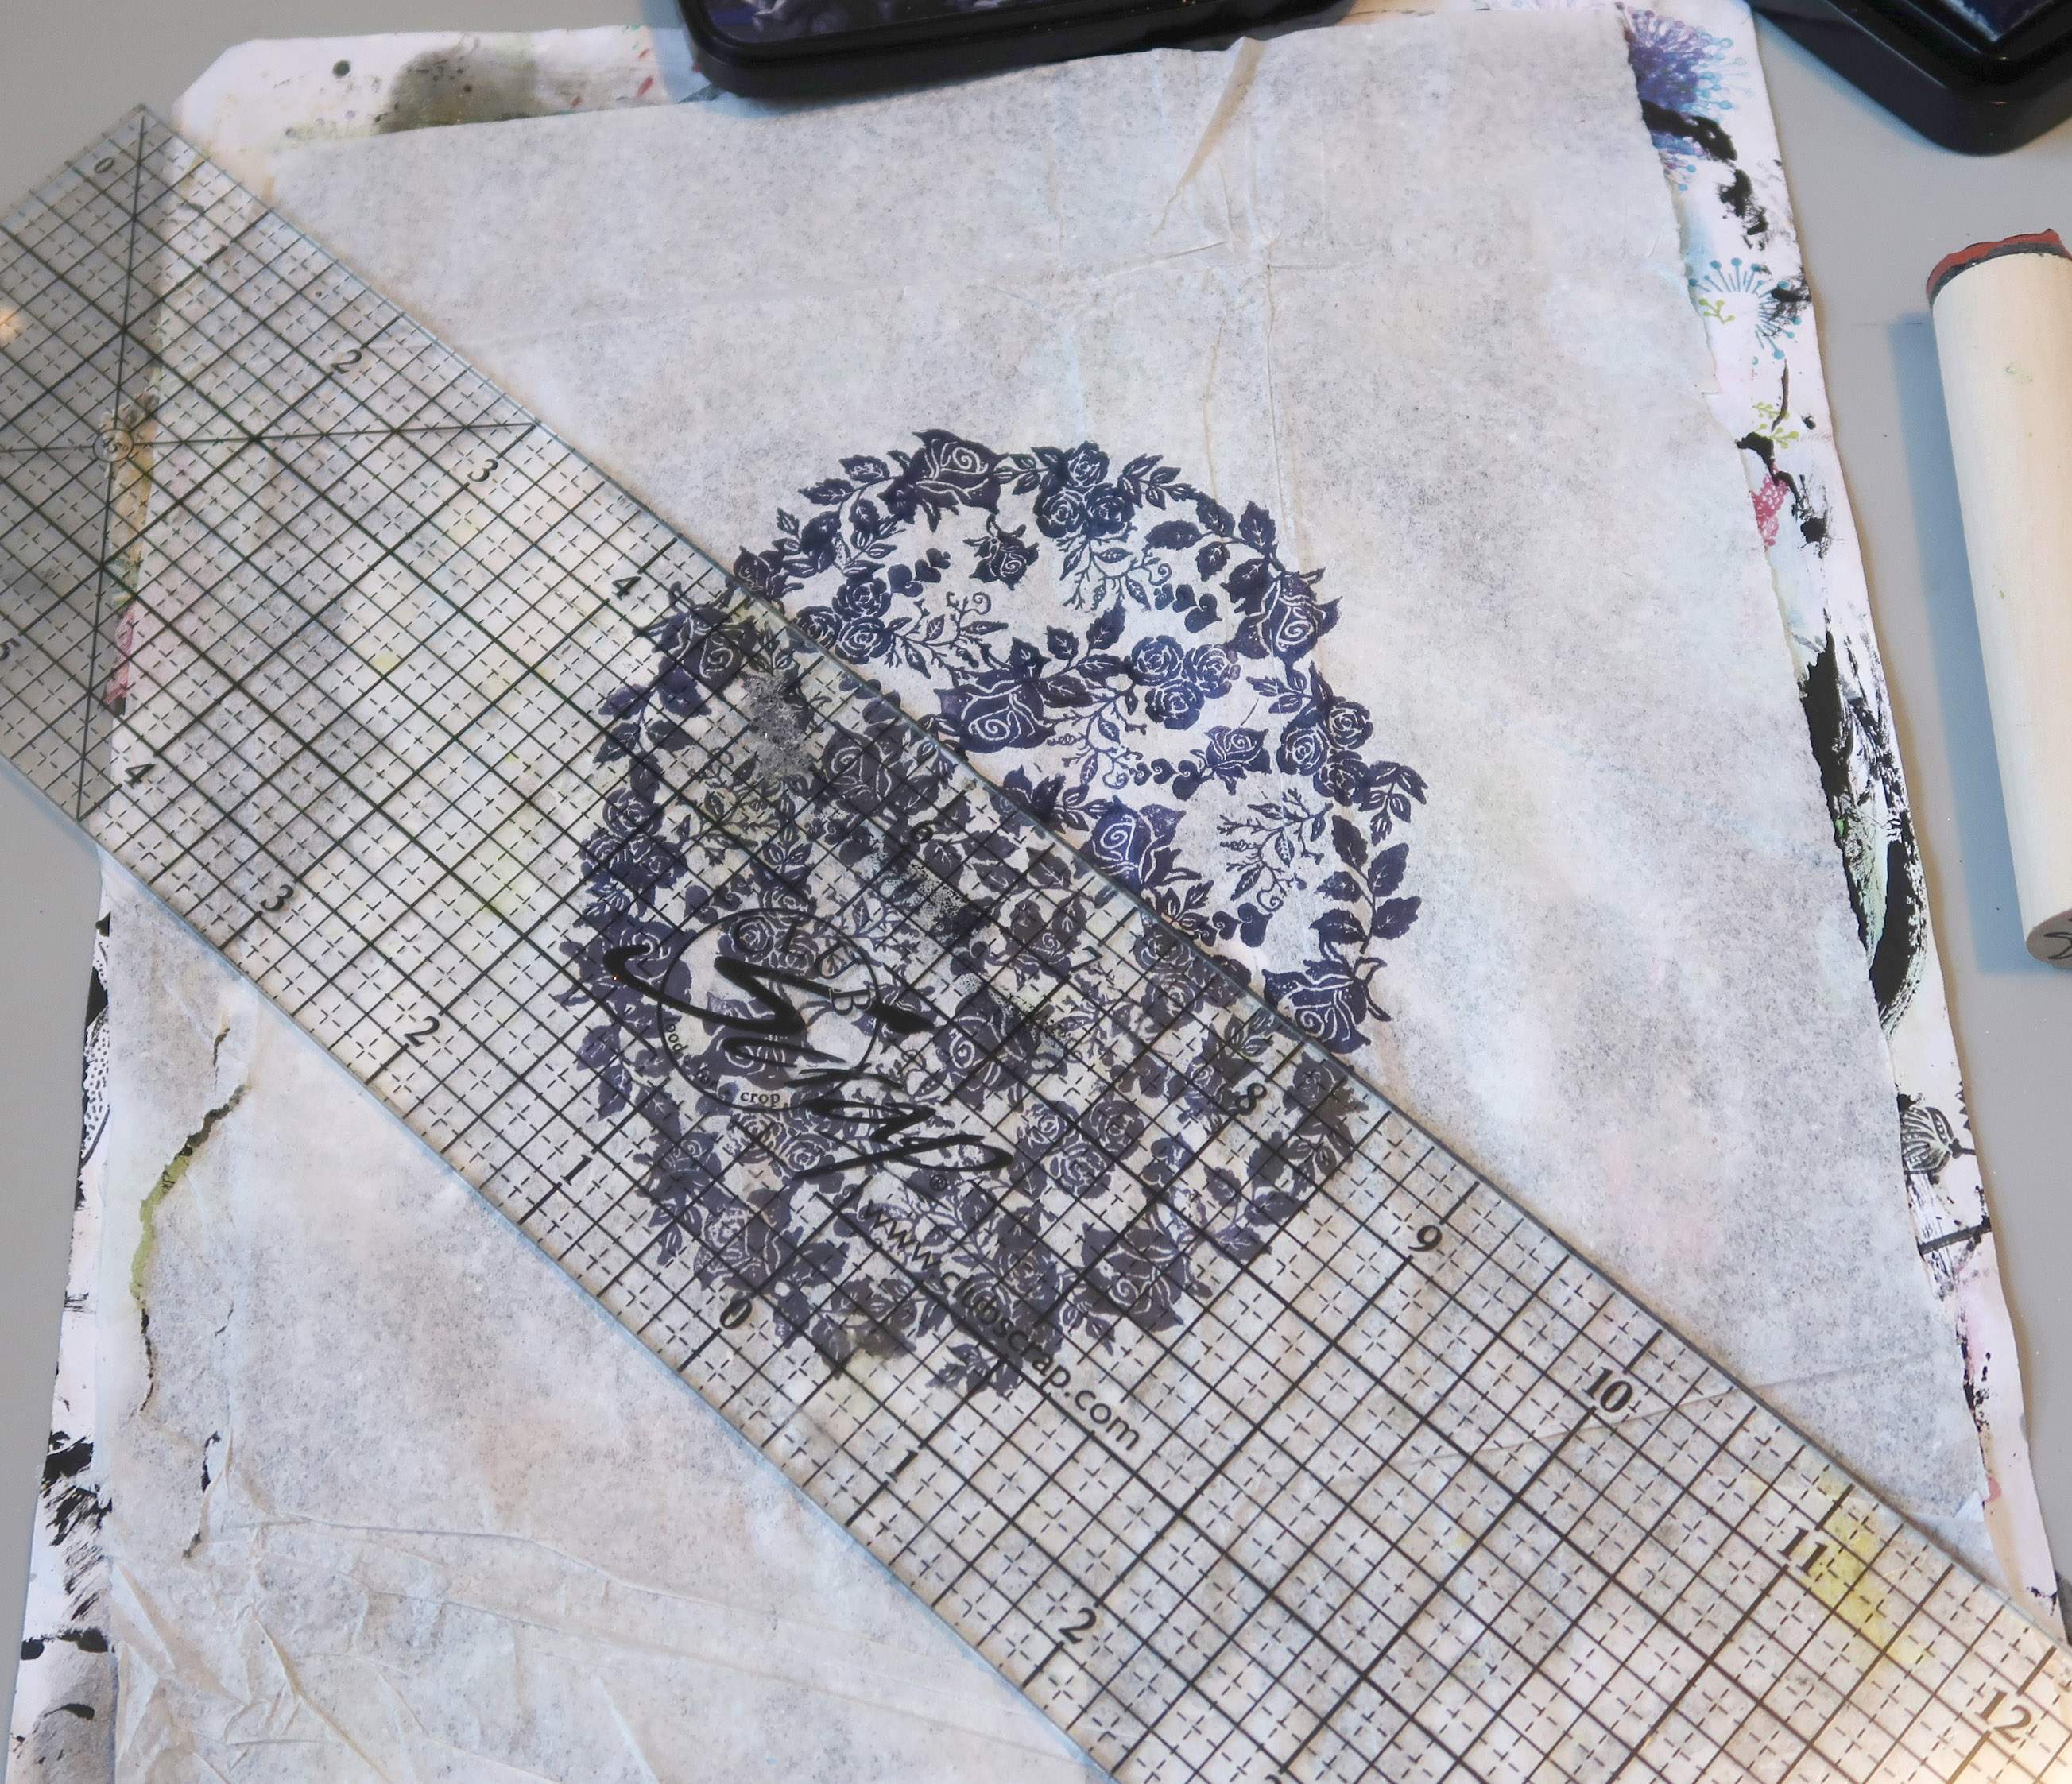
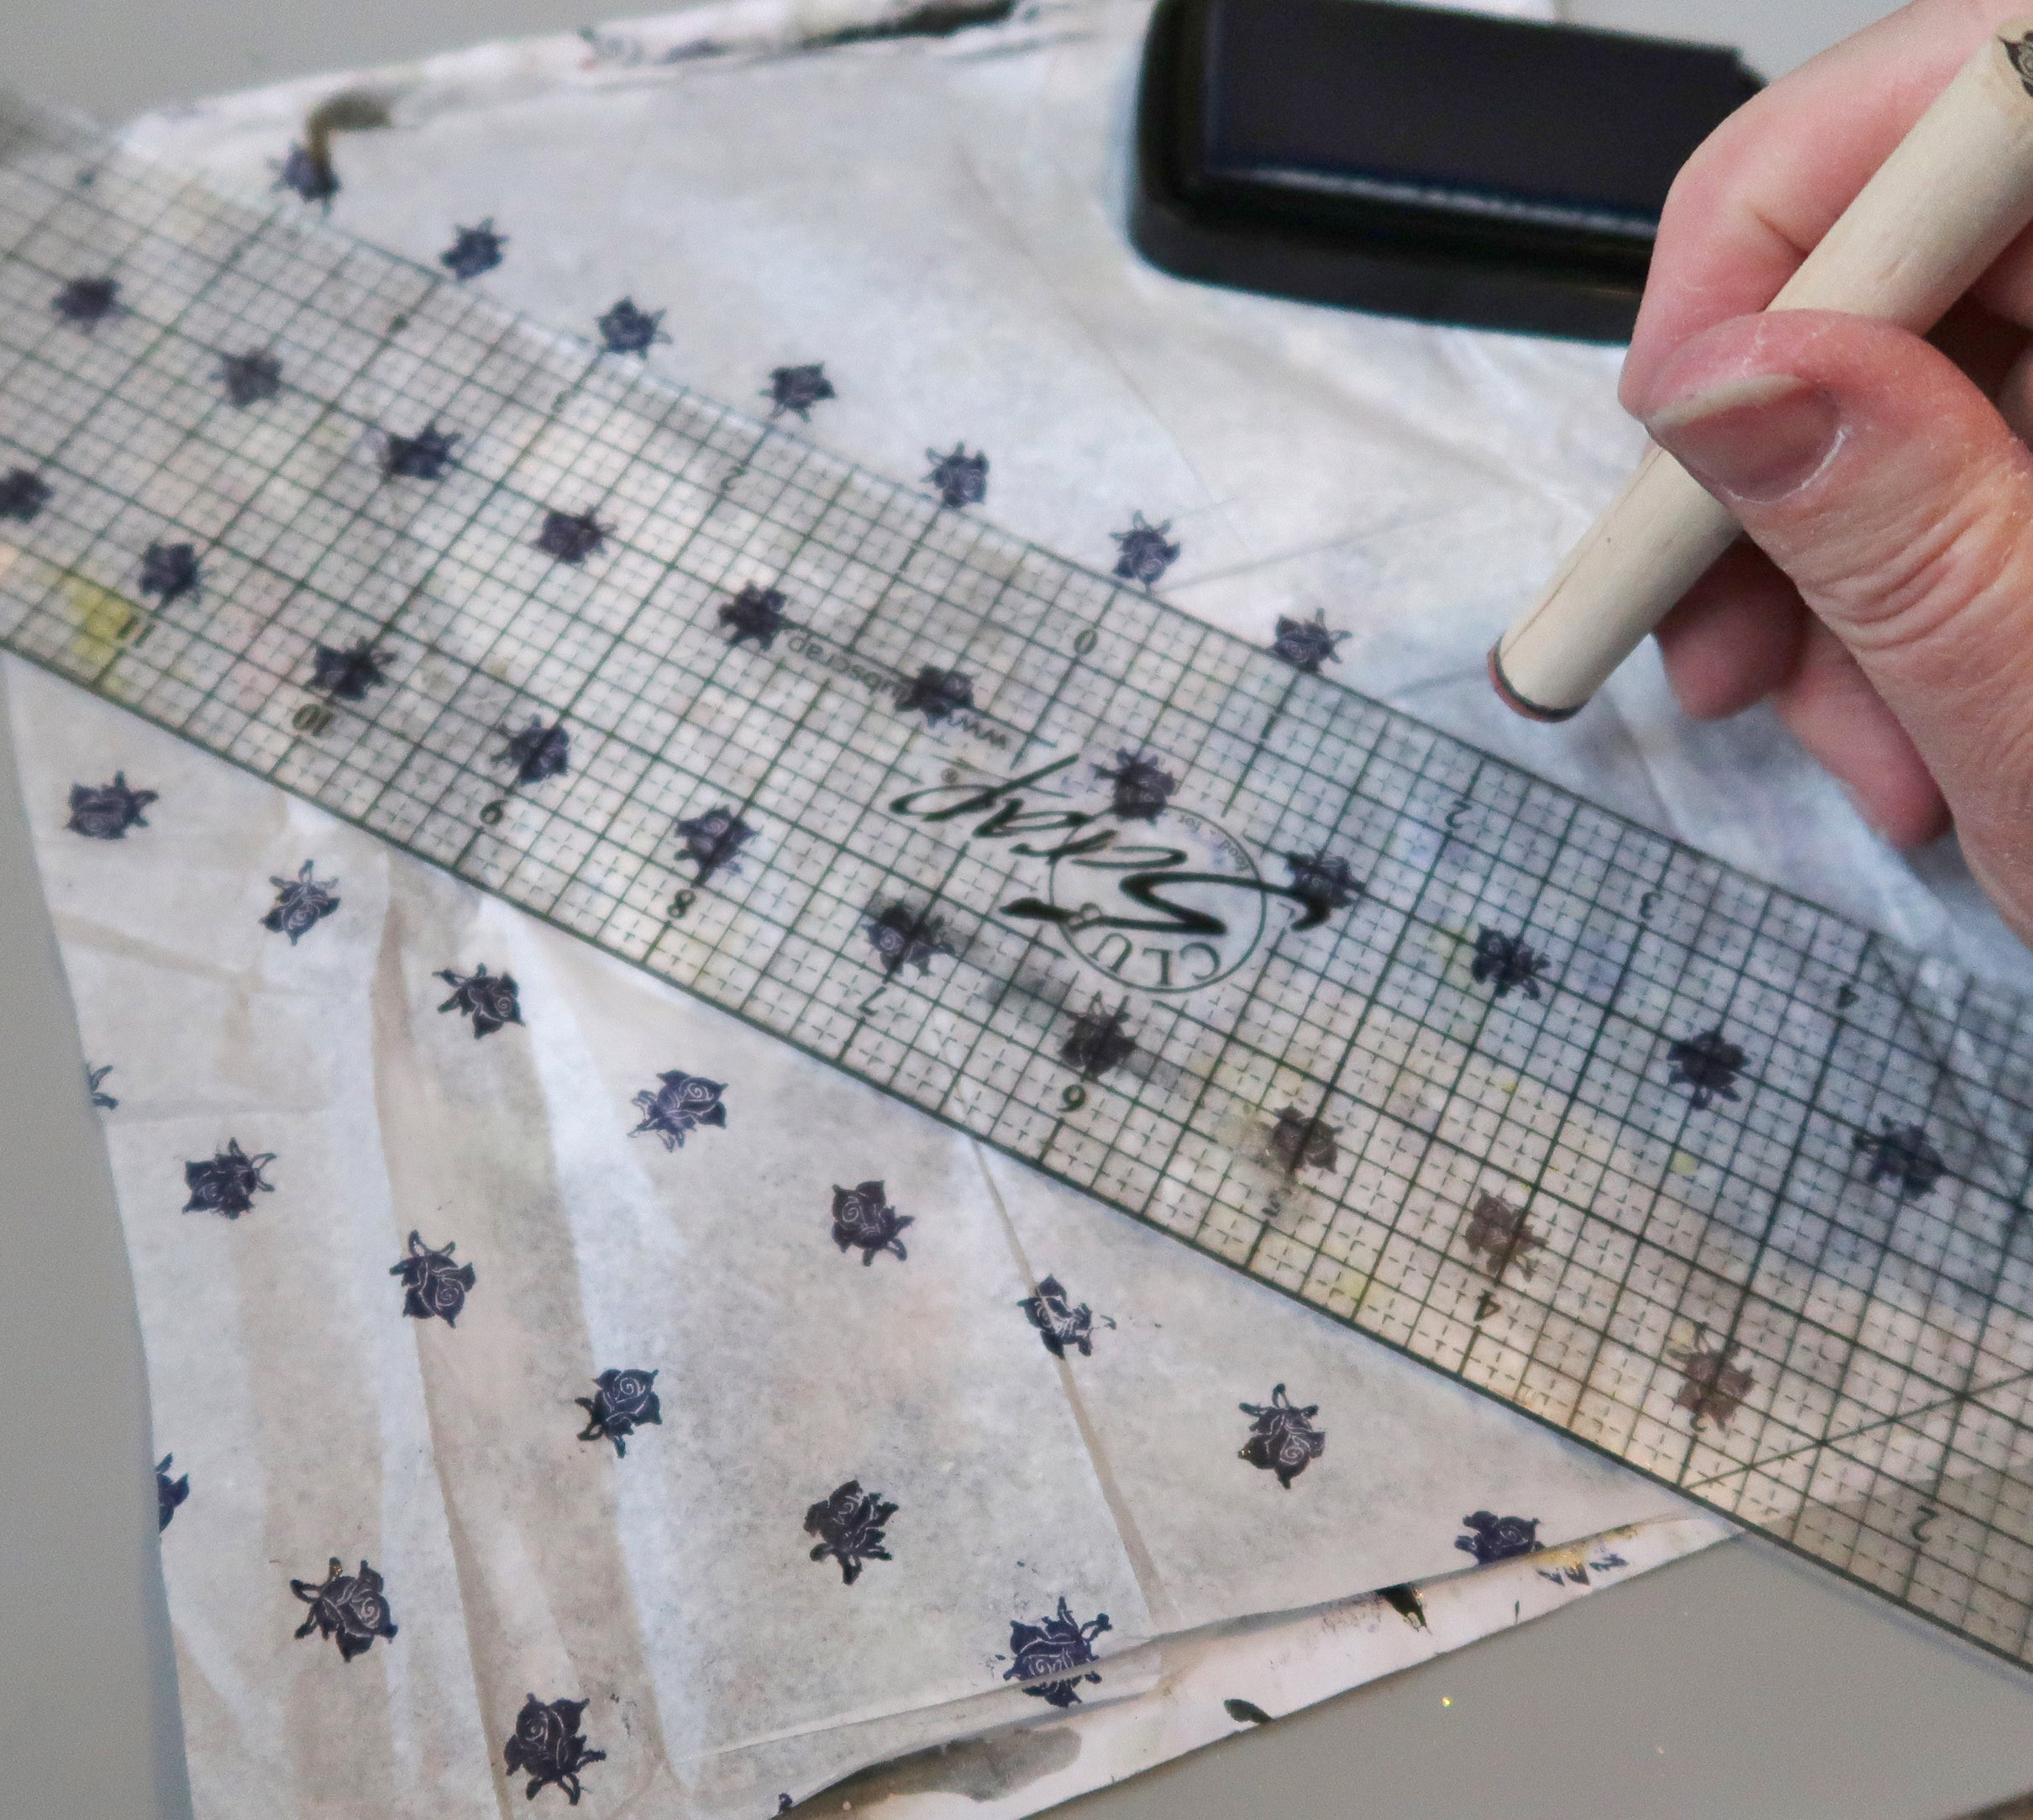
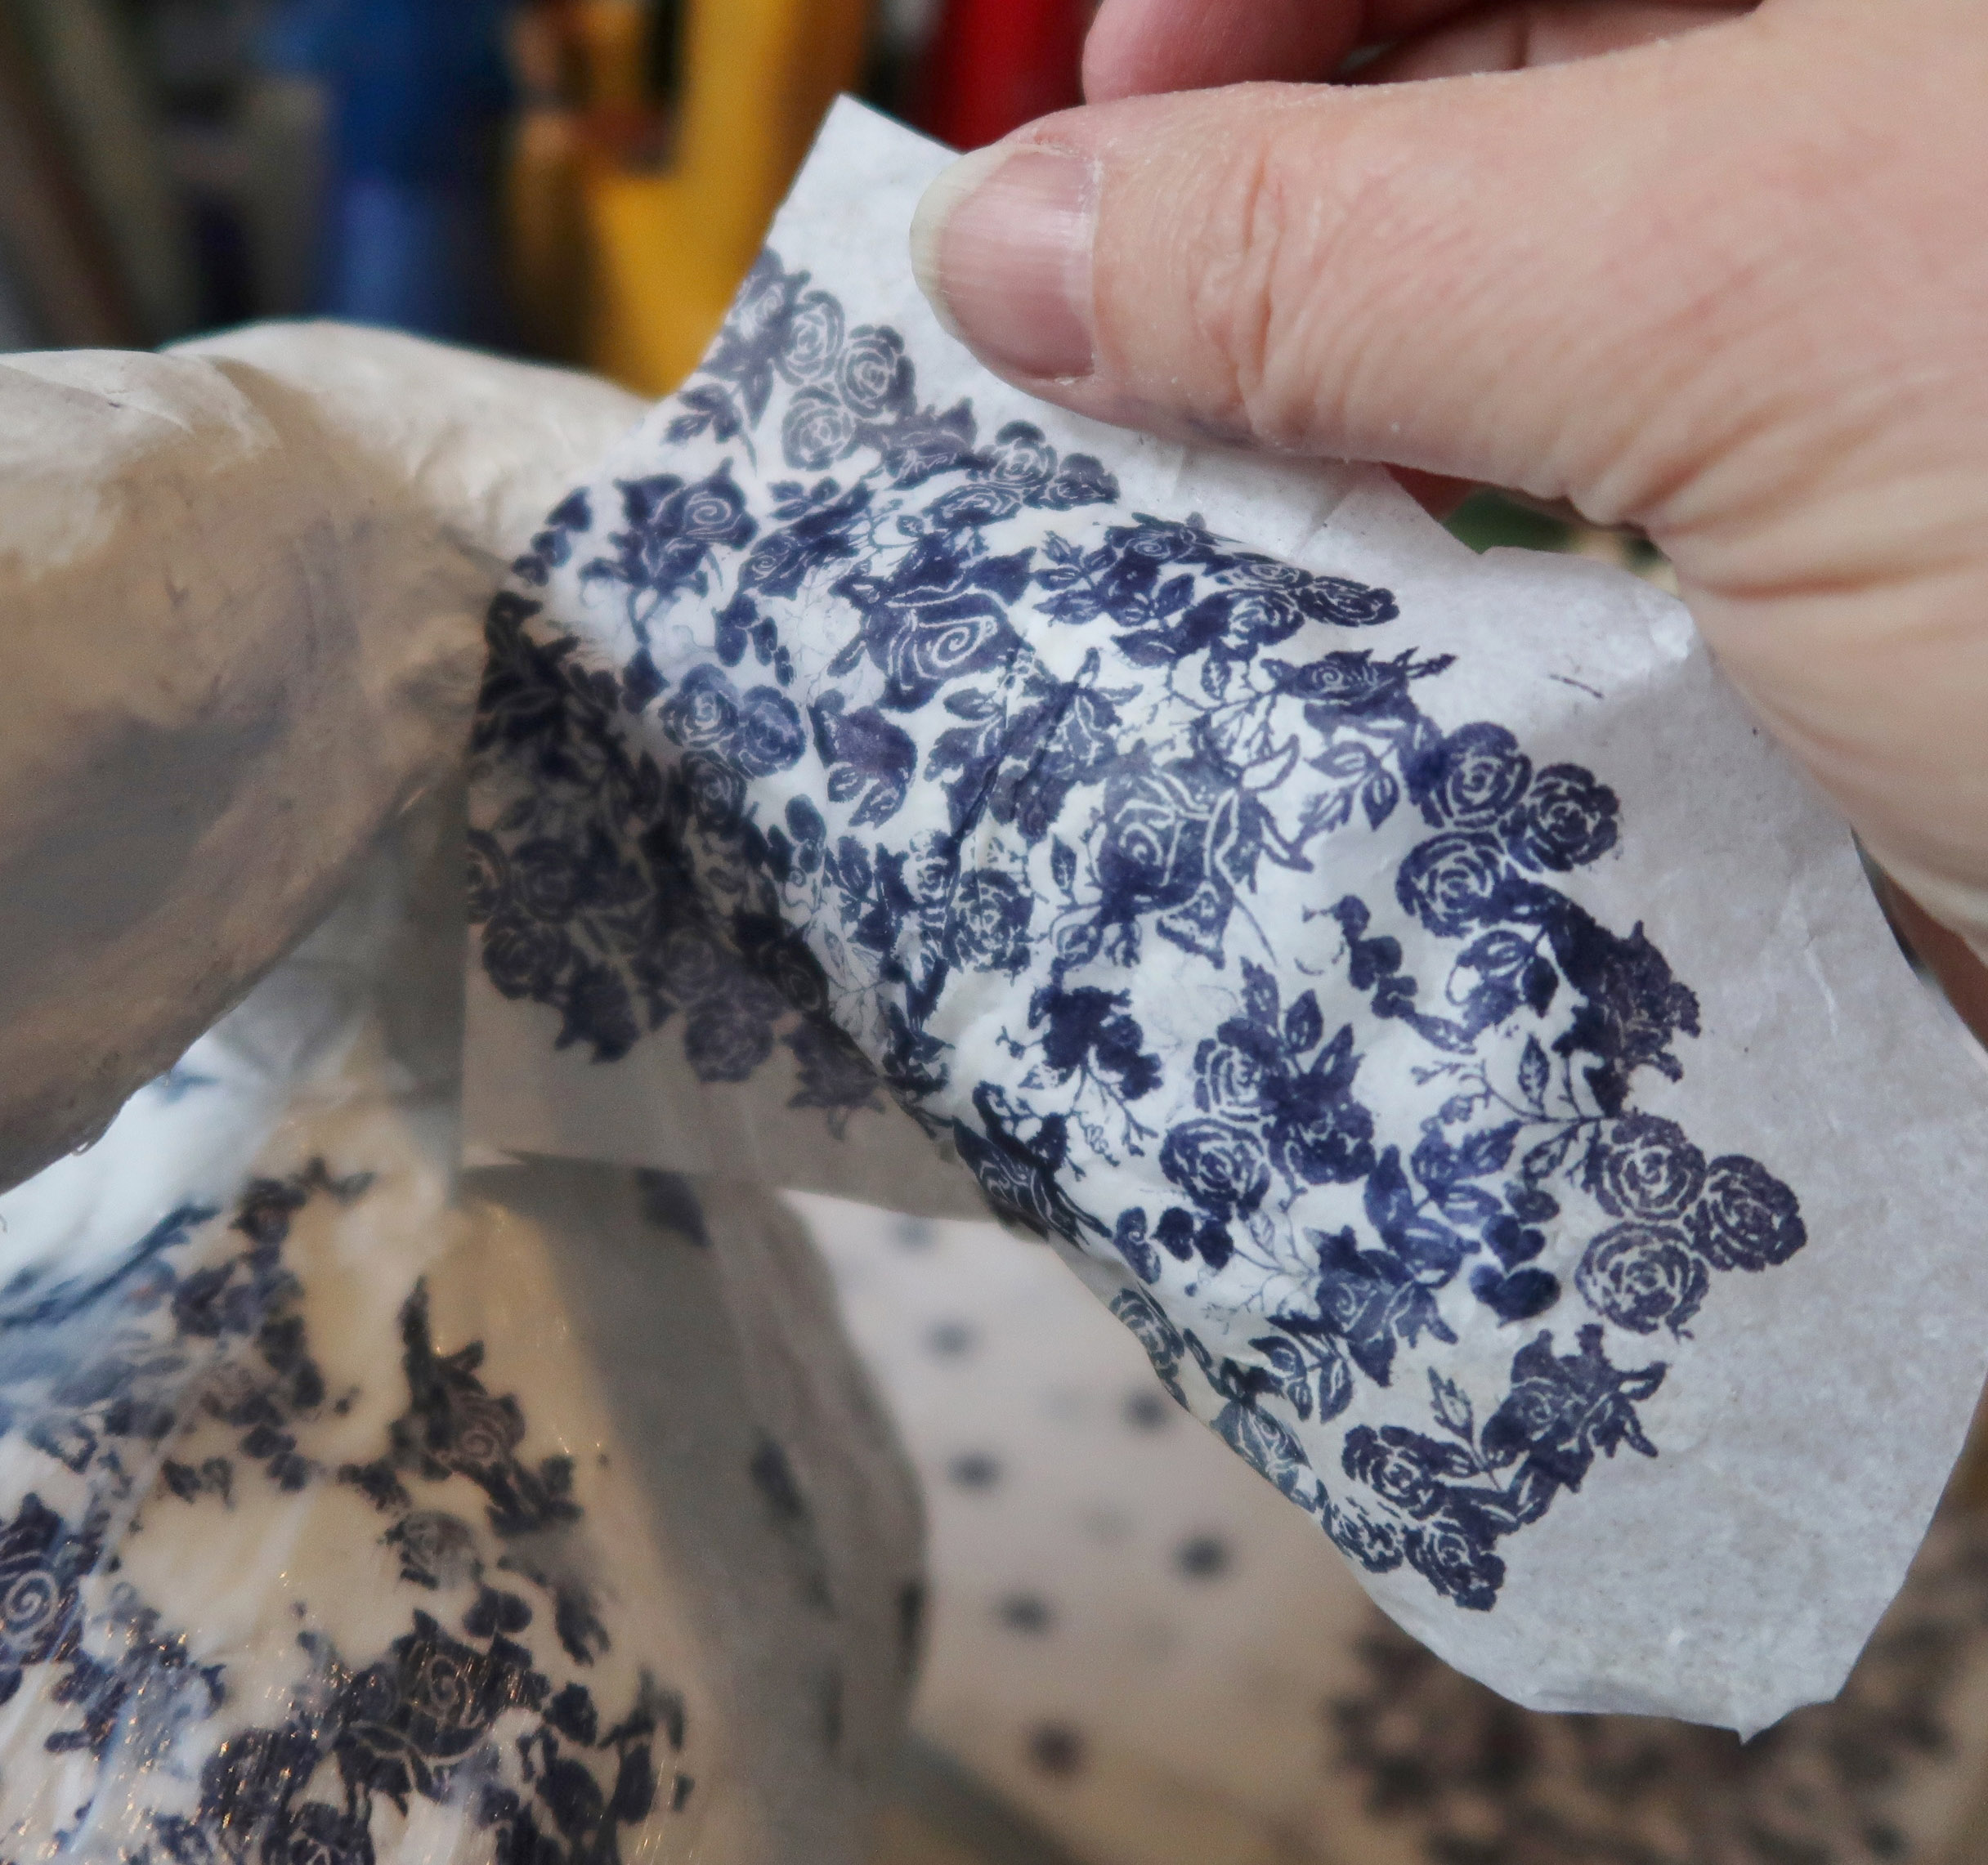
Step 8 – Use a ruler to stamp a small rose at 1” intervals in a diagonal line.


Step 9 – Continue stamping at 1” intervals until the entire piece of tissue paper has been covered.


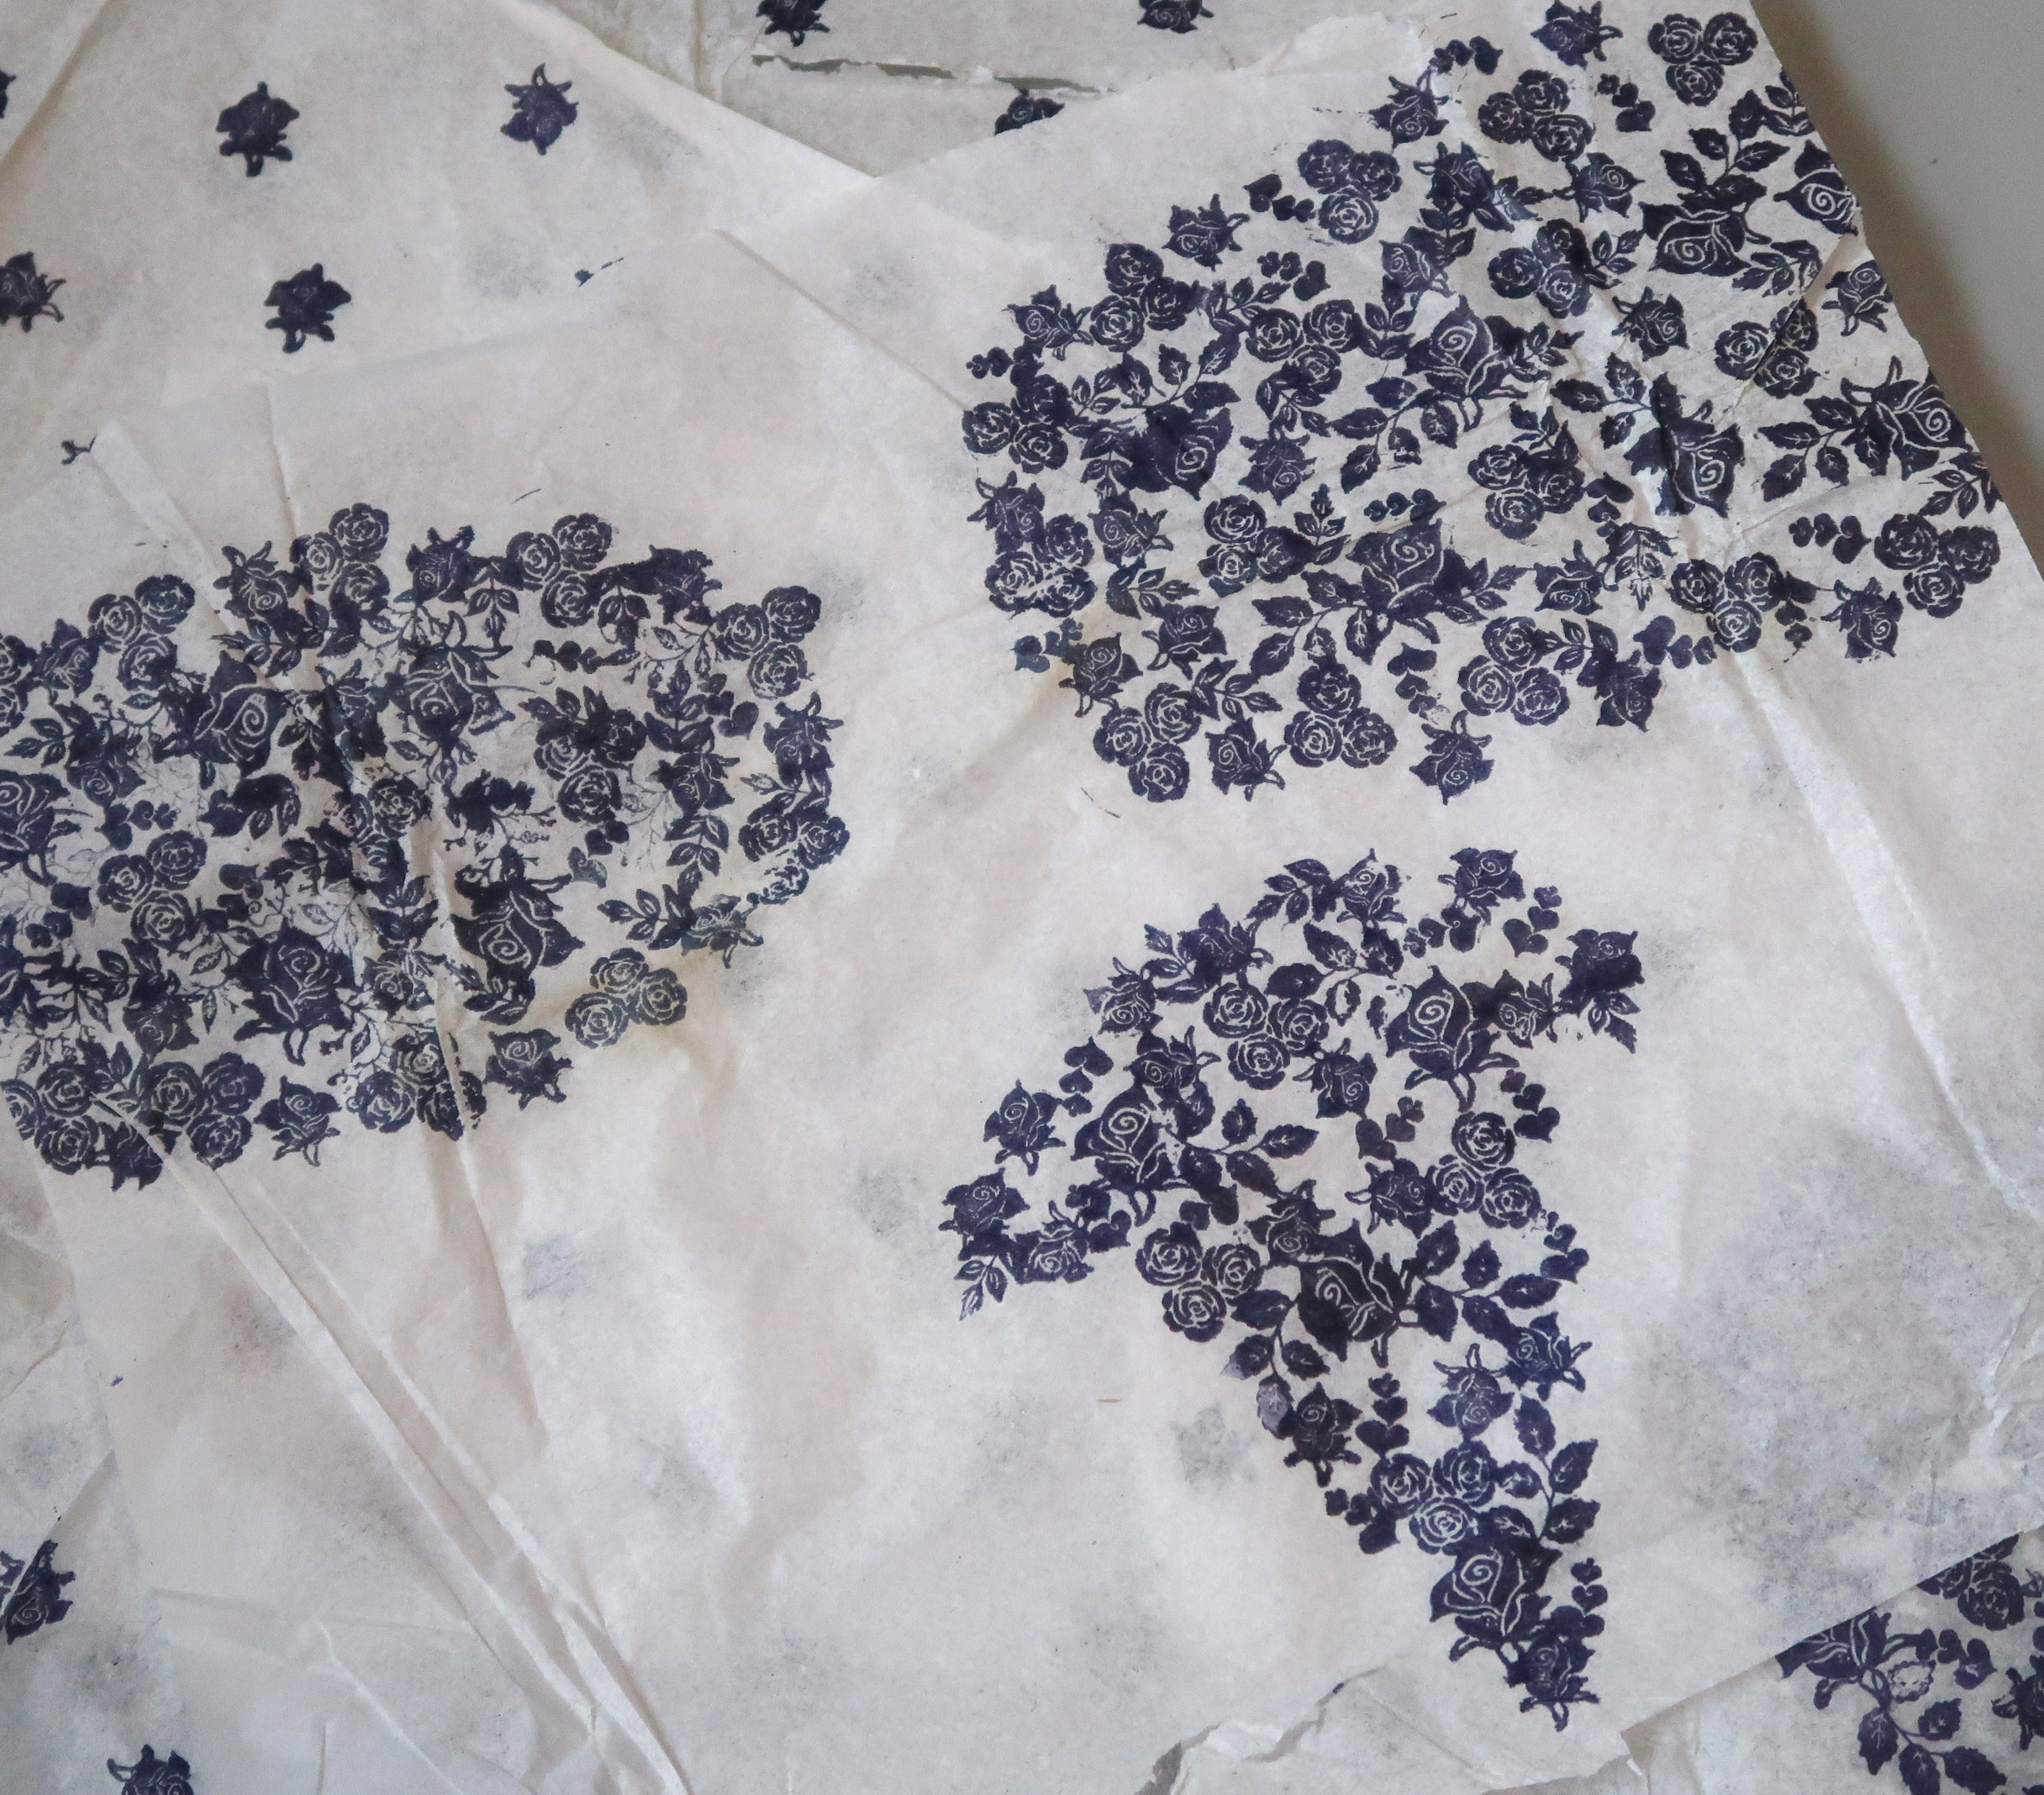
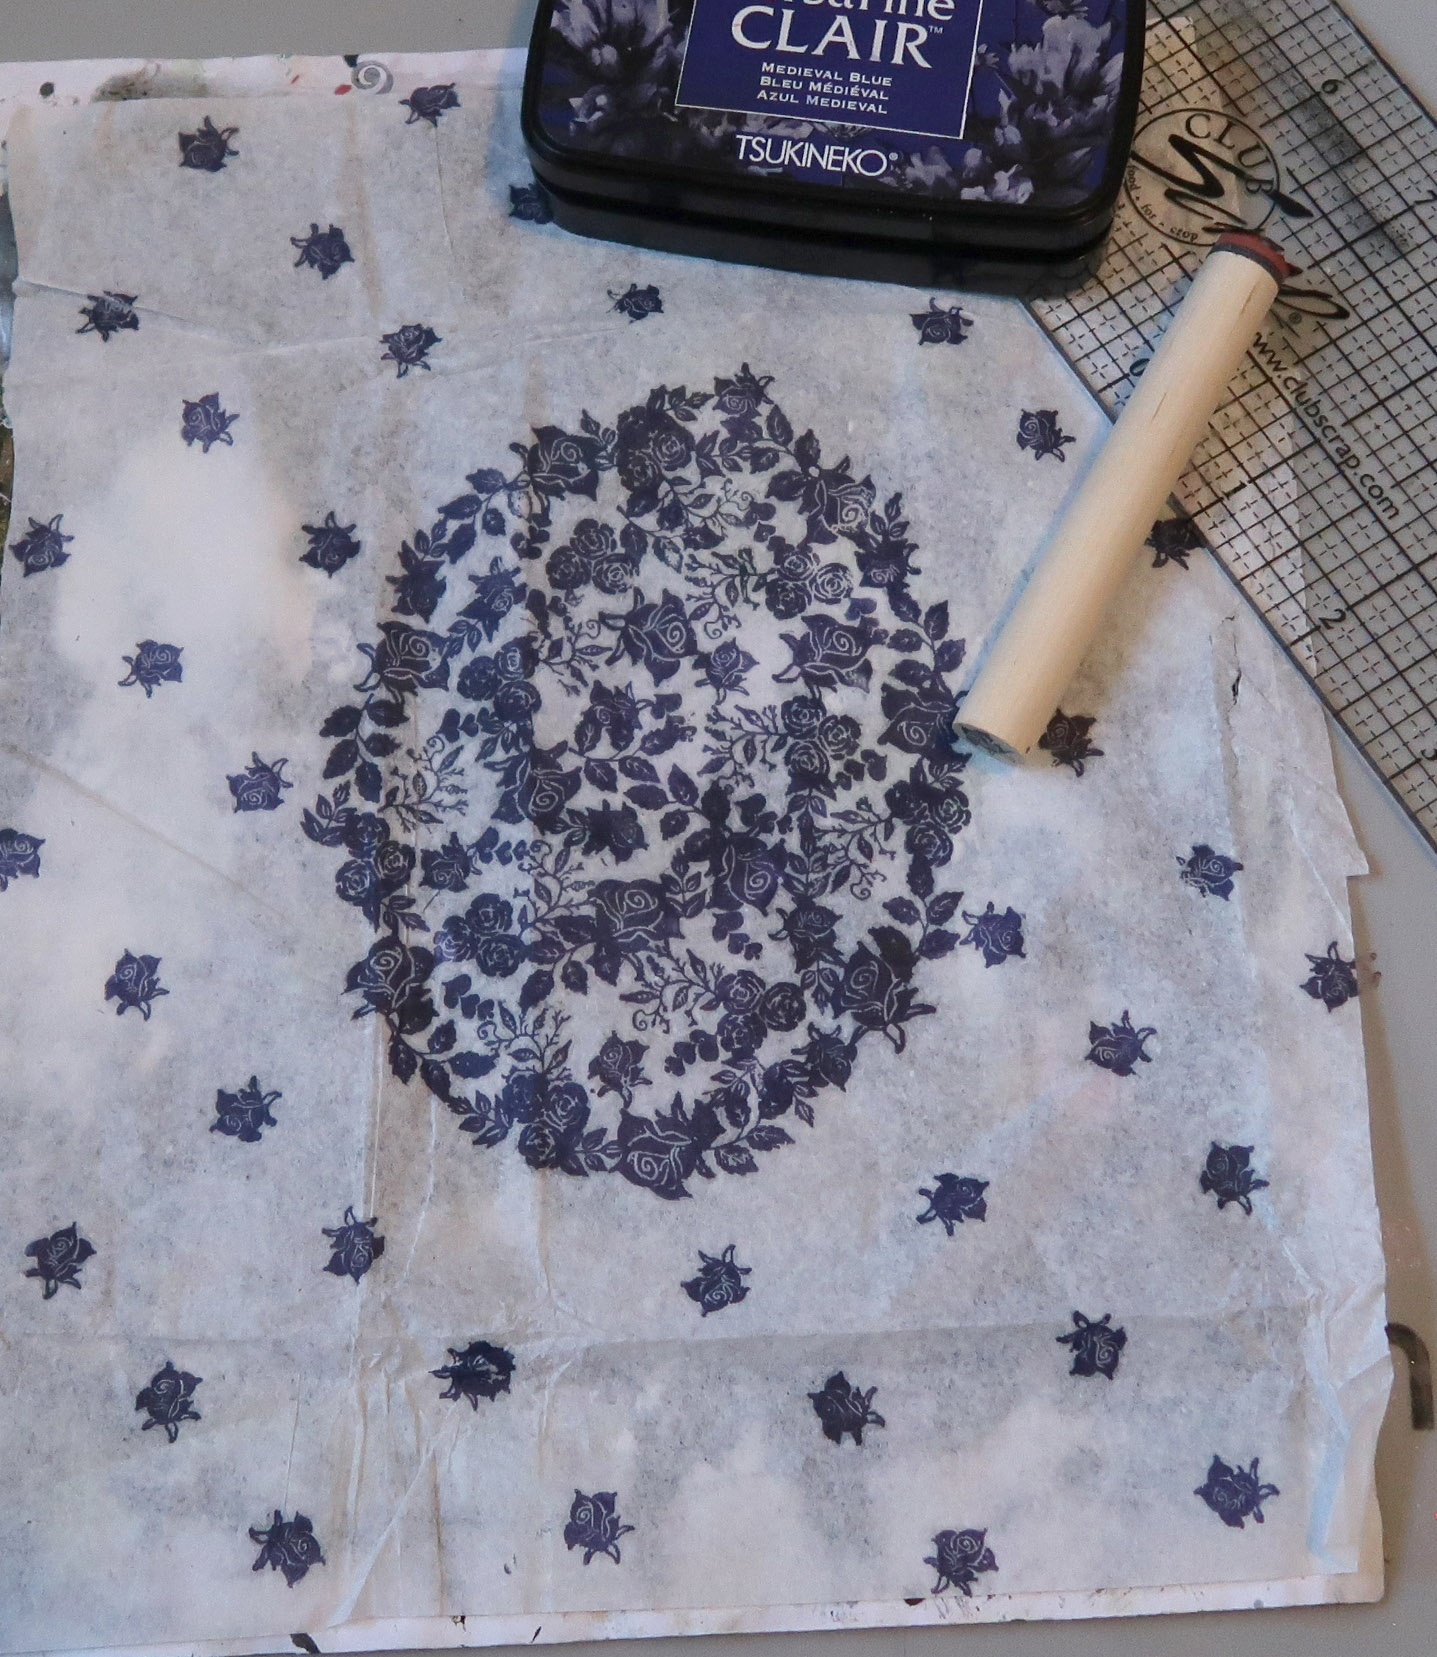
Step 10 – Repeat steps 4-9 for any additional areas you wish to cover with a concentrated stamping. For this example I made pieces for the back sides of the rabbit ears and one for the top of the nose and forehead.


Step 11 – Stamp extra pieces of tissue paper with the diagonal 1” pattern to cover any areas which are not going to be covered with the concentrated pieces.


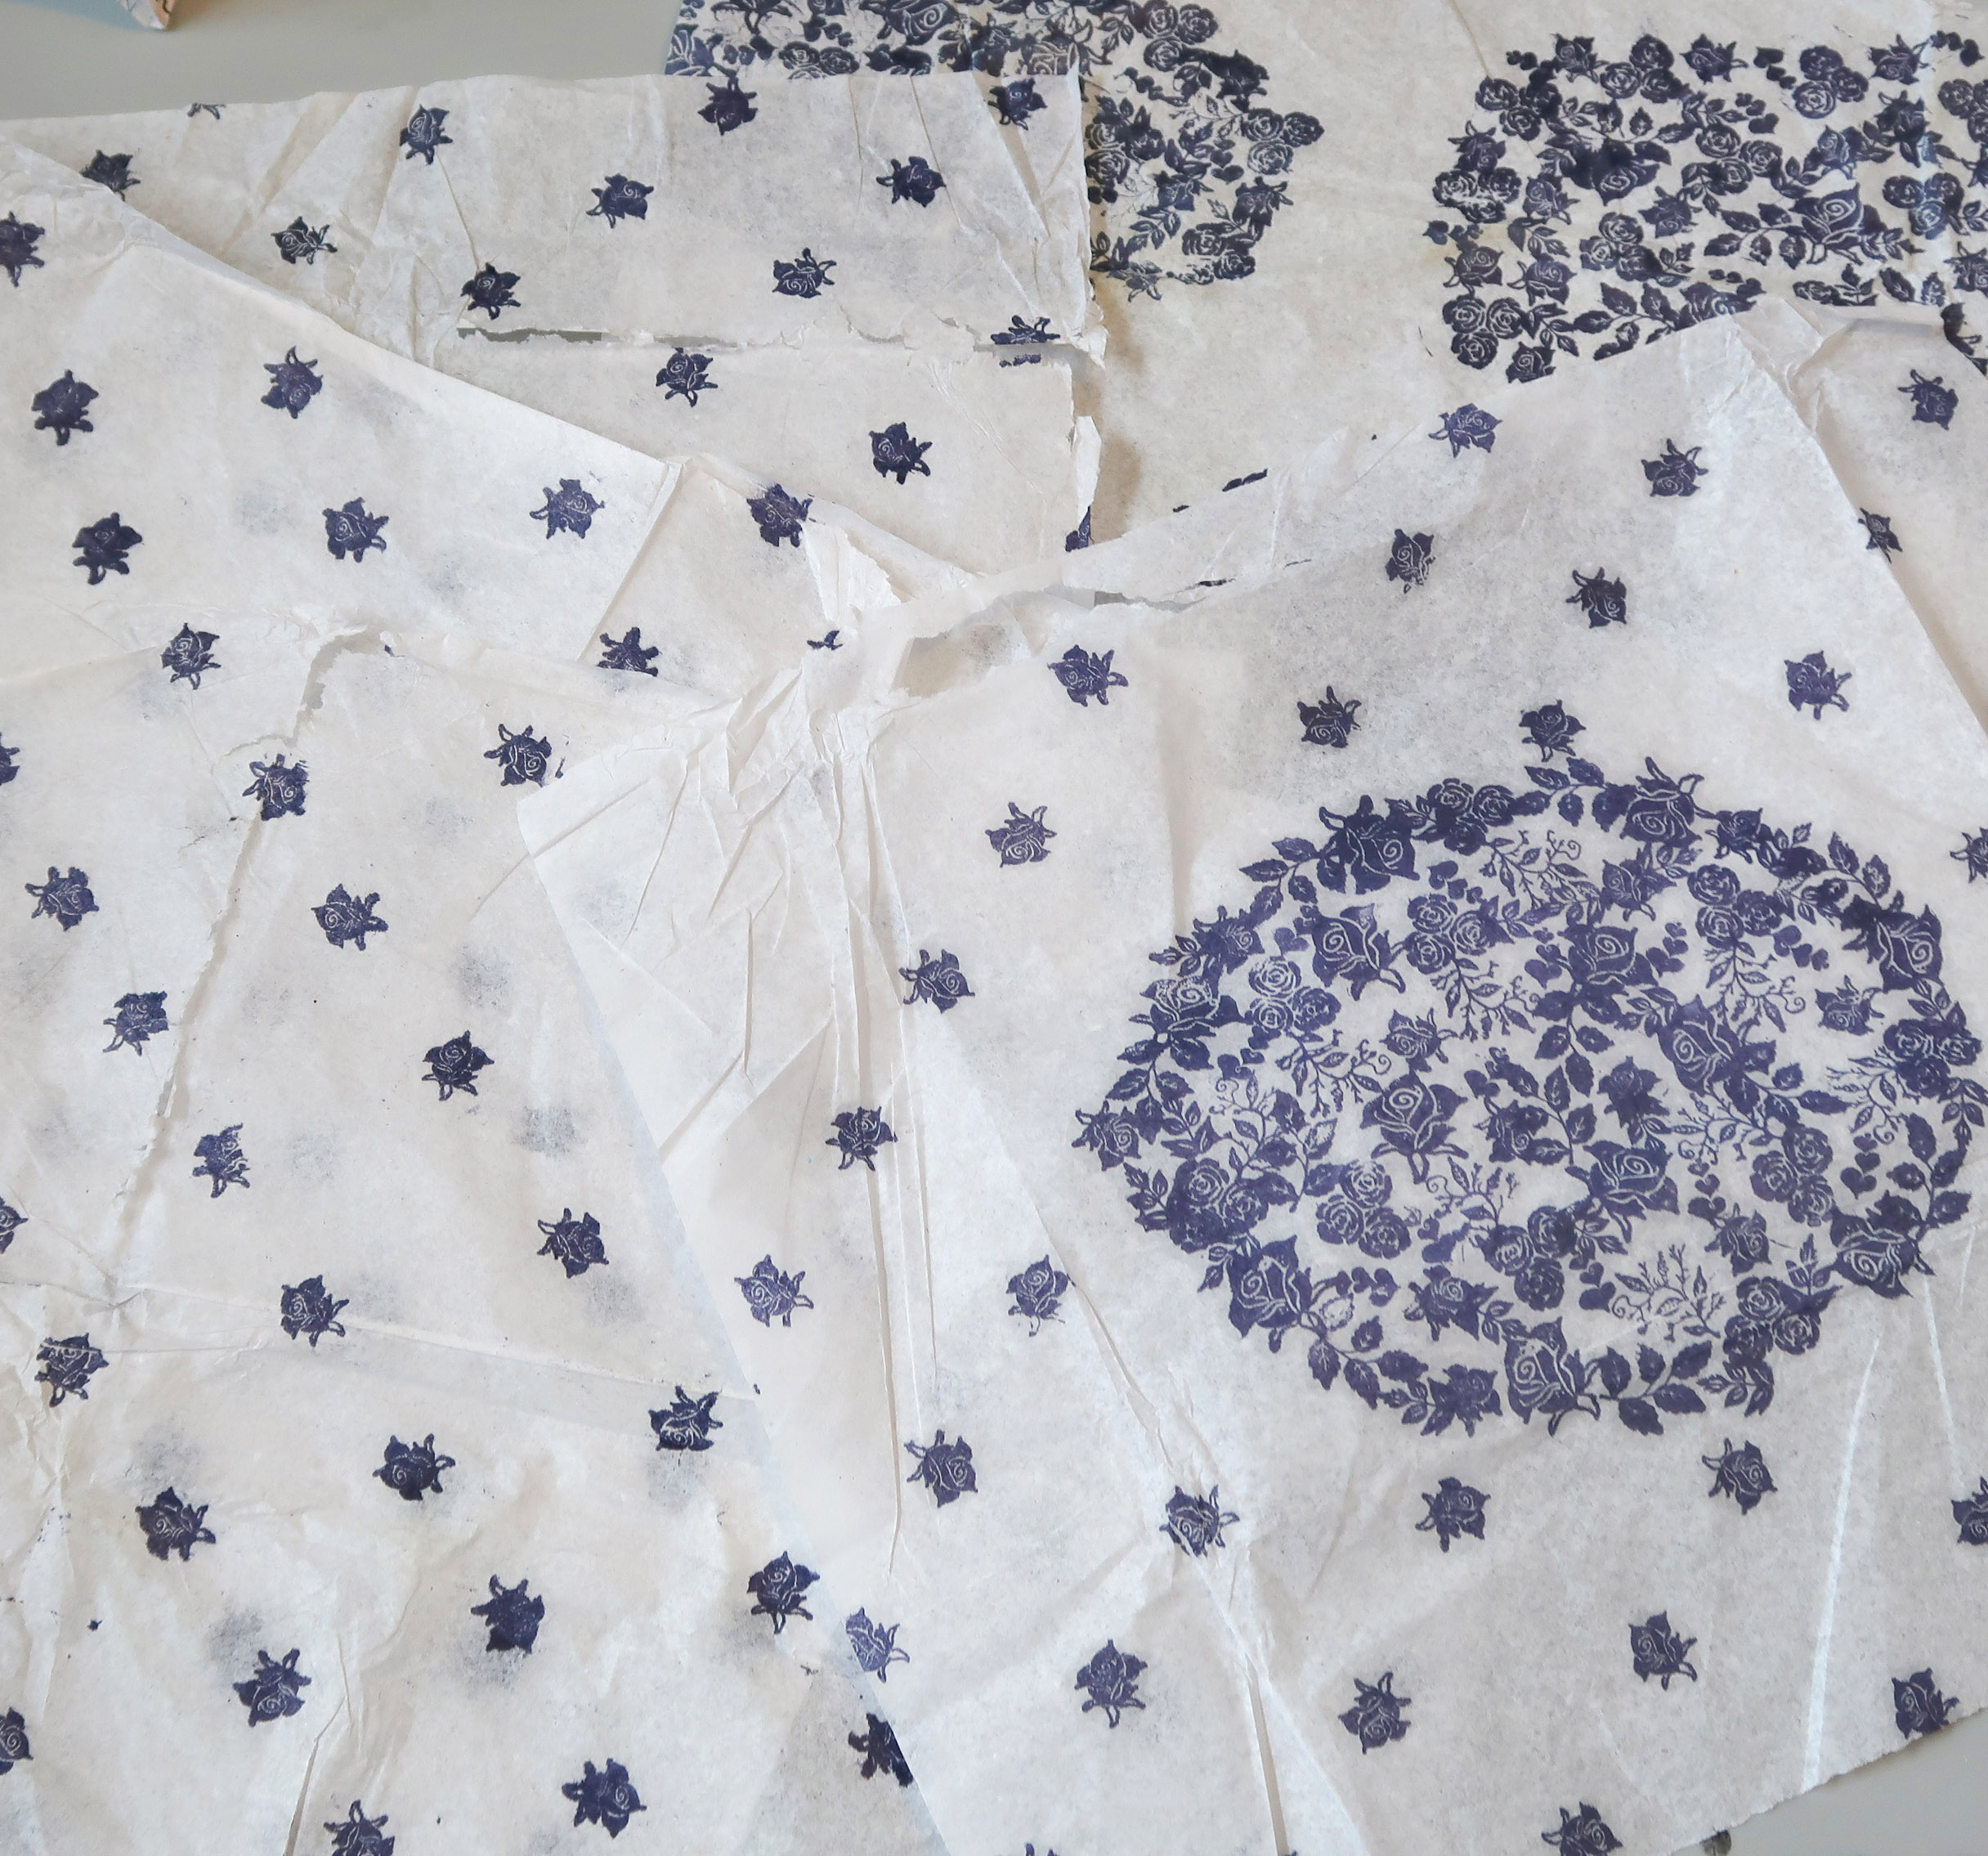
Step 12 – Stamp more tissue paper than you think you’ll need just in case. You don’t want to run out in the middle of covering the project and have to stop gluing to stamp more.


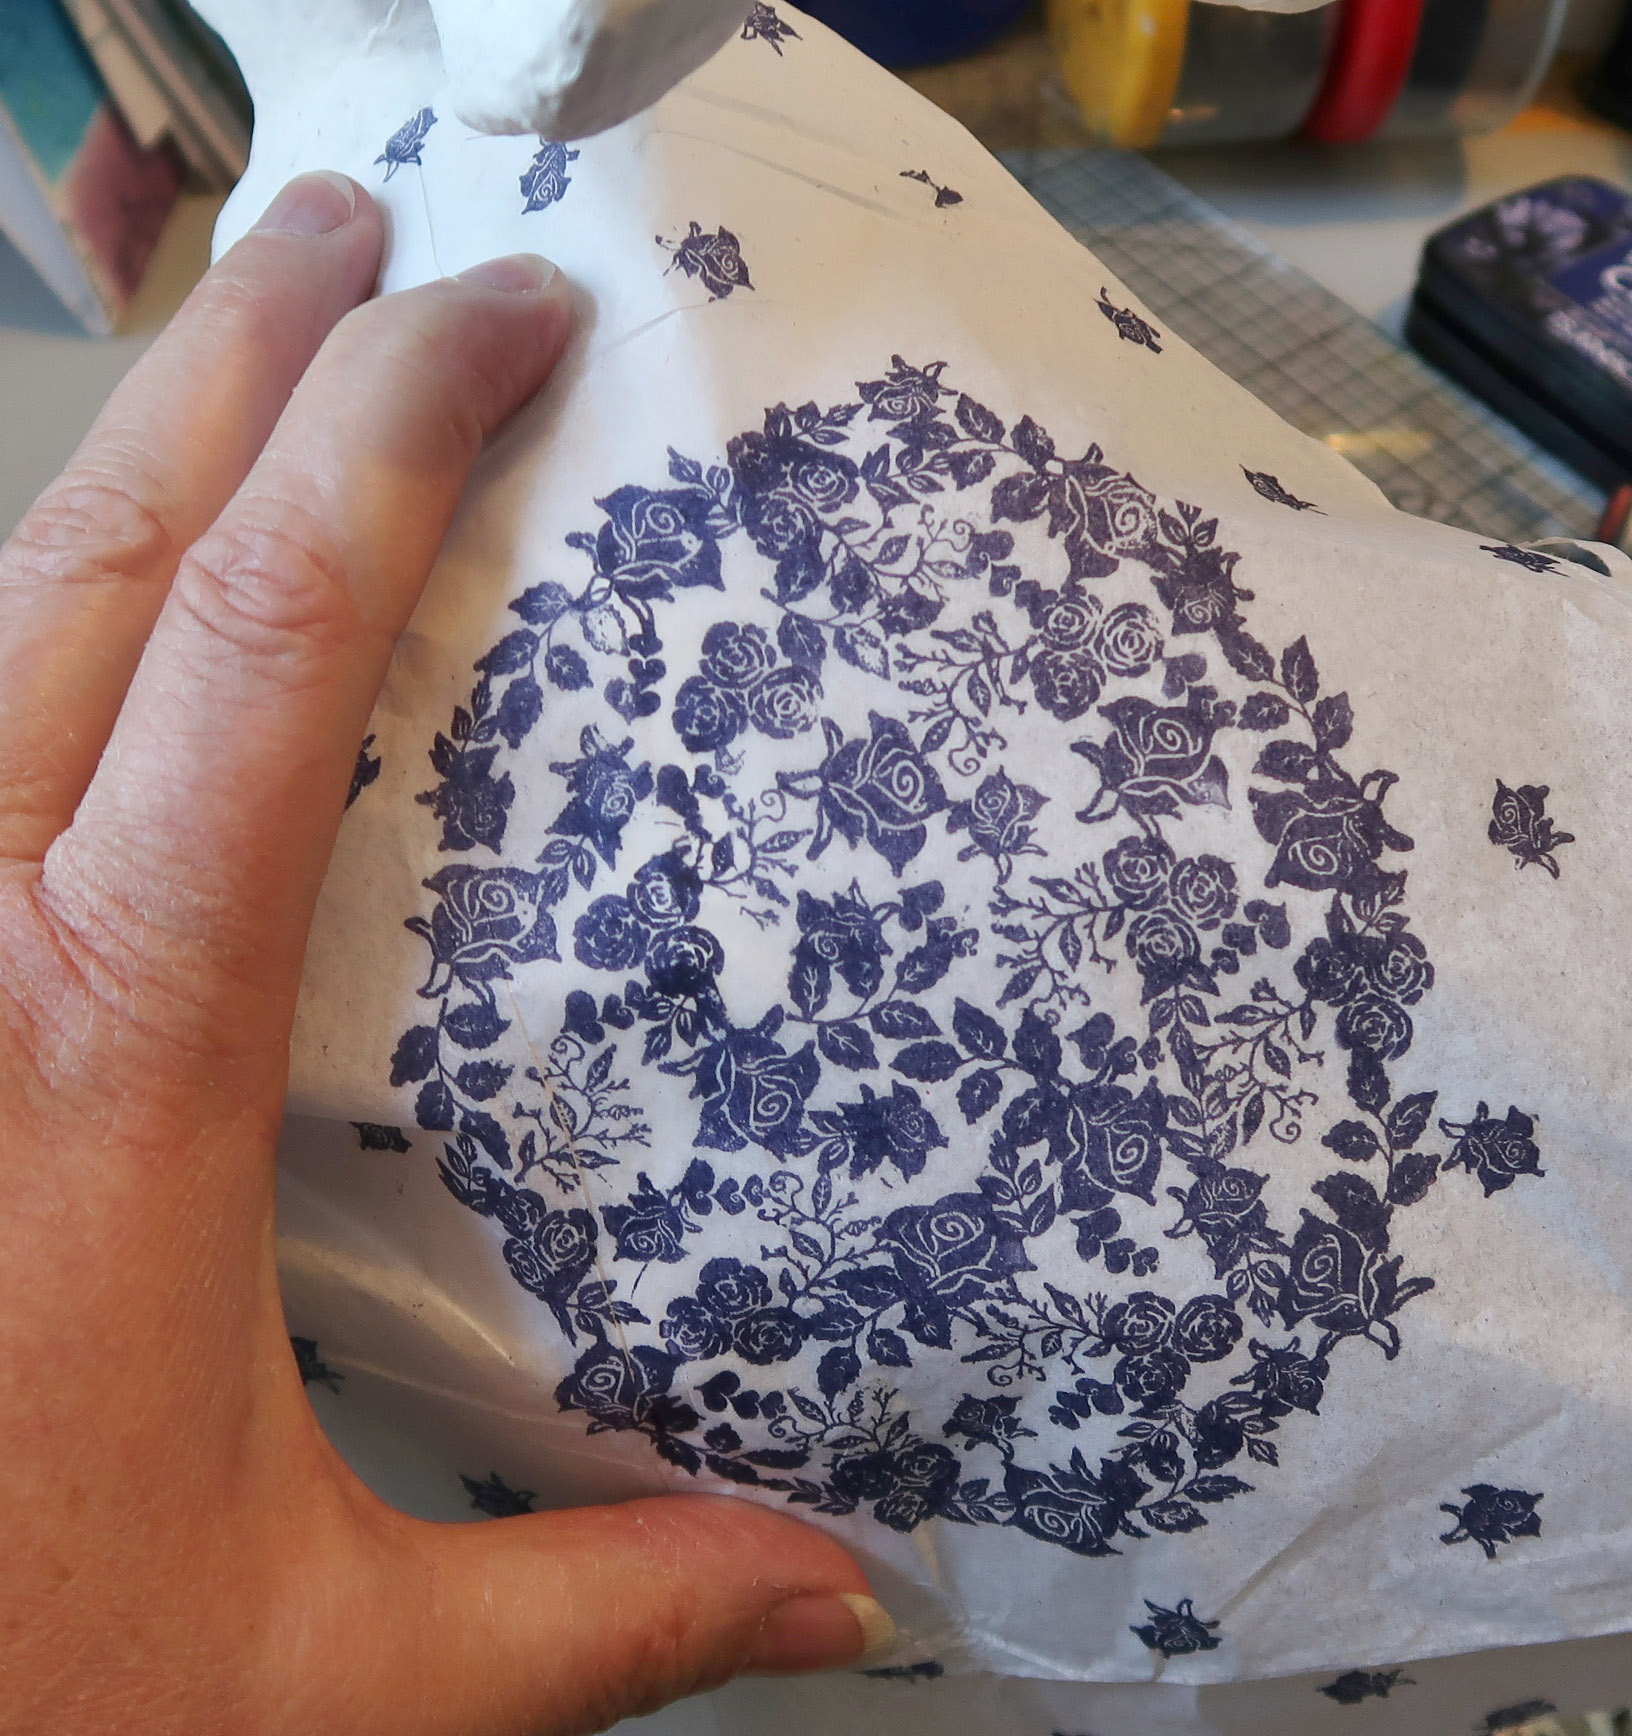
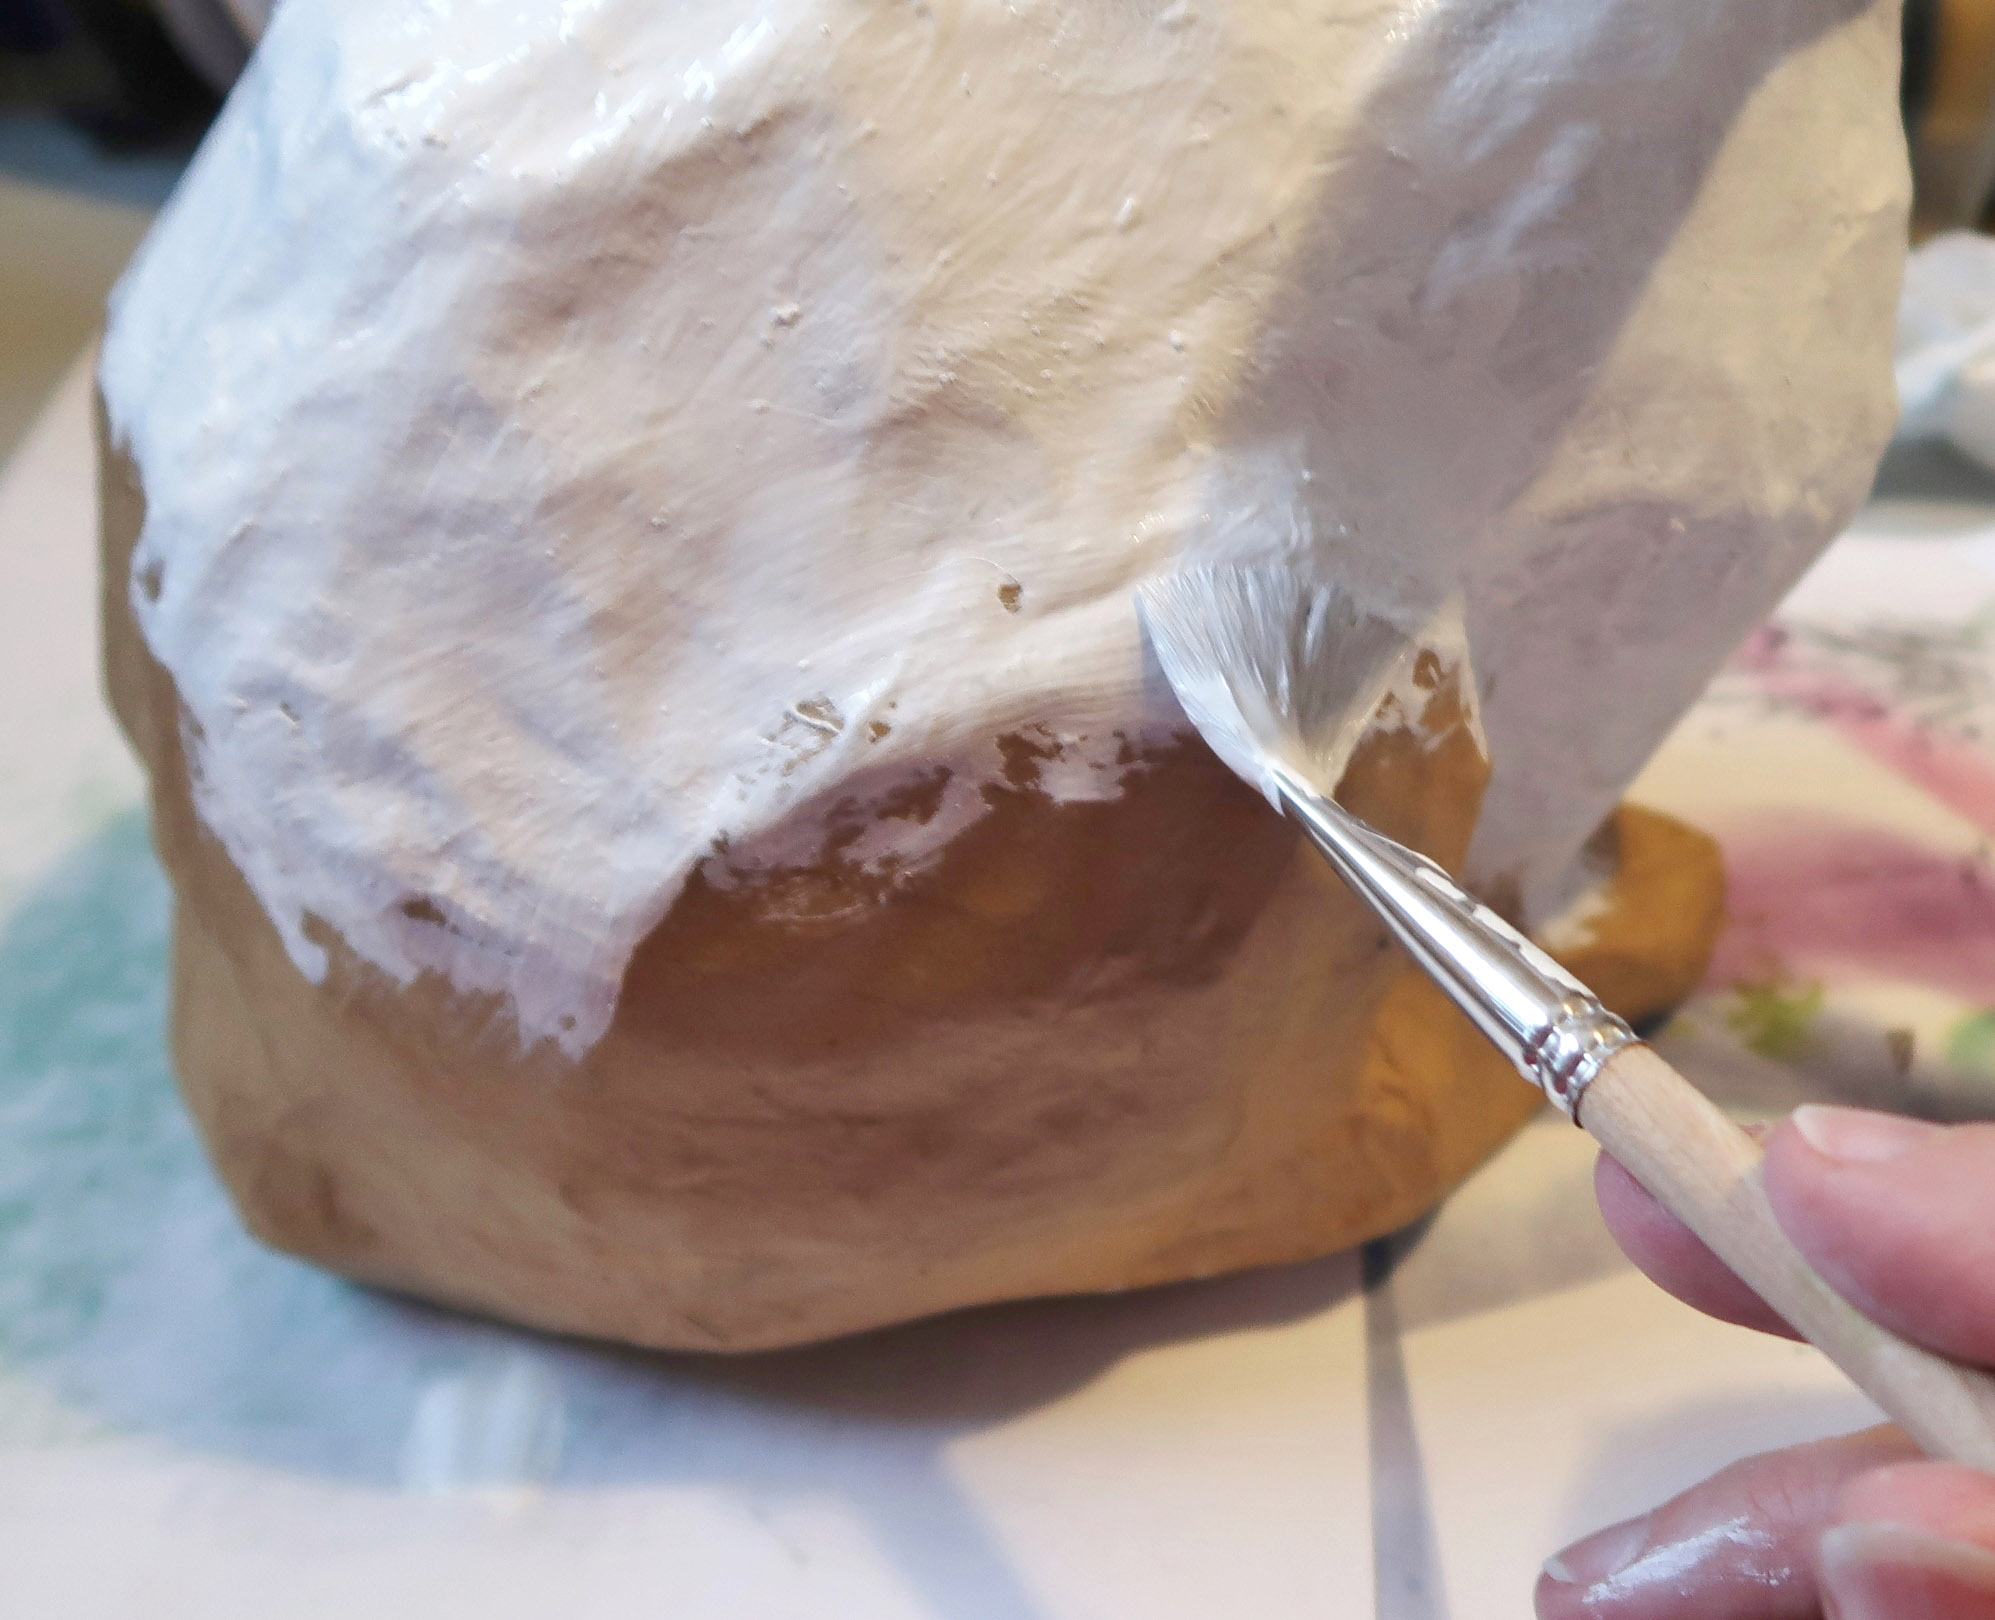
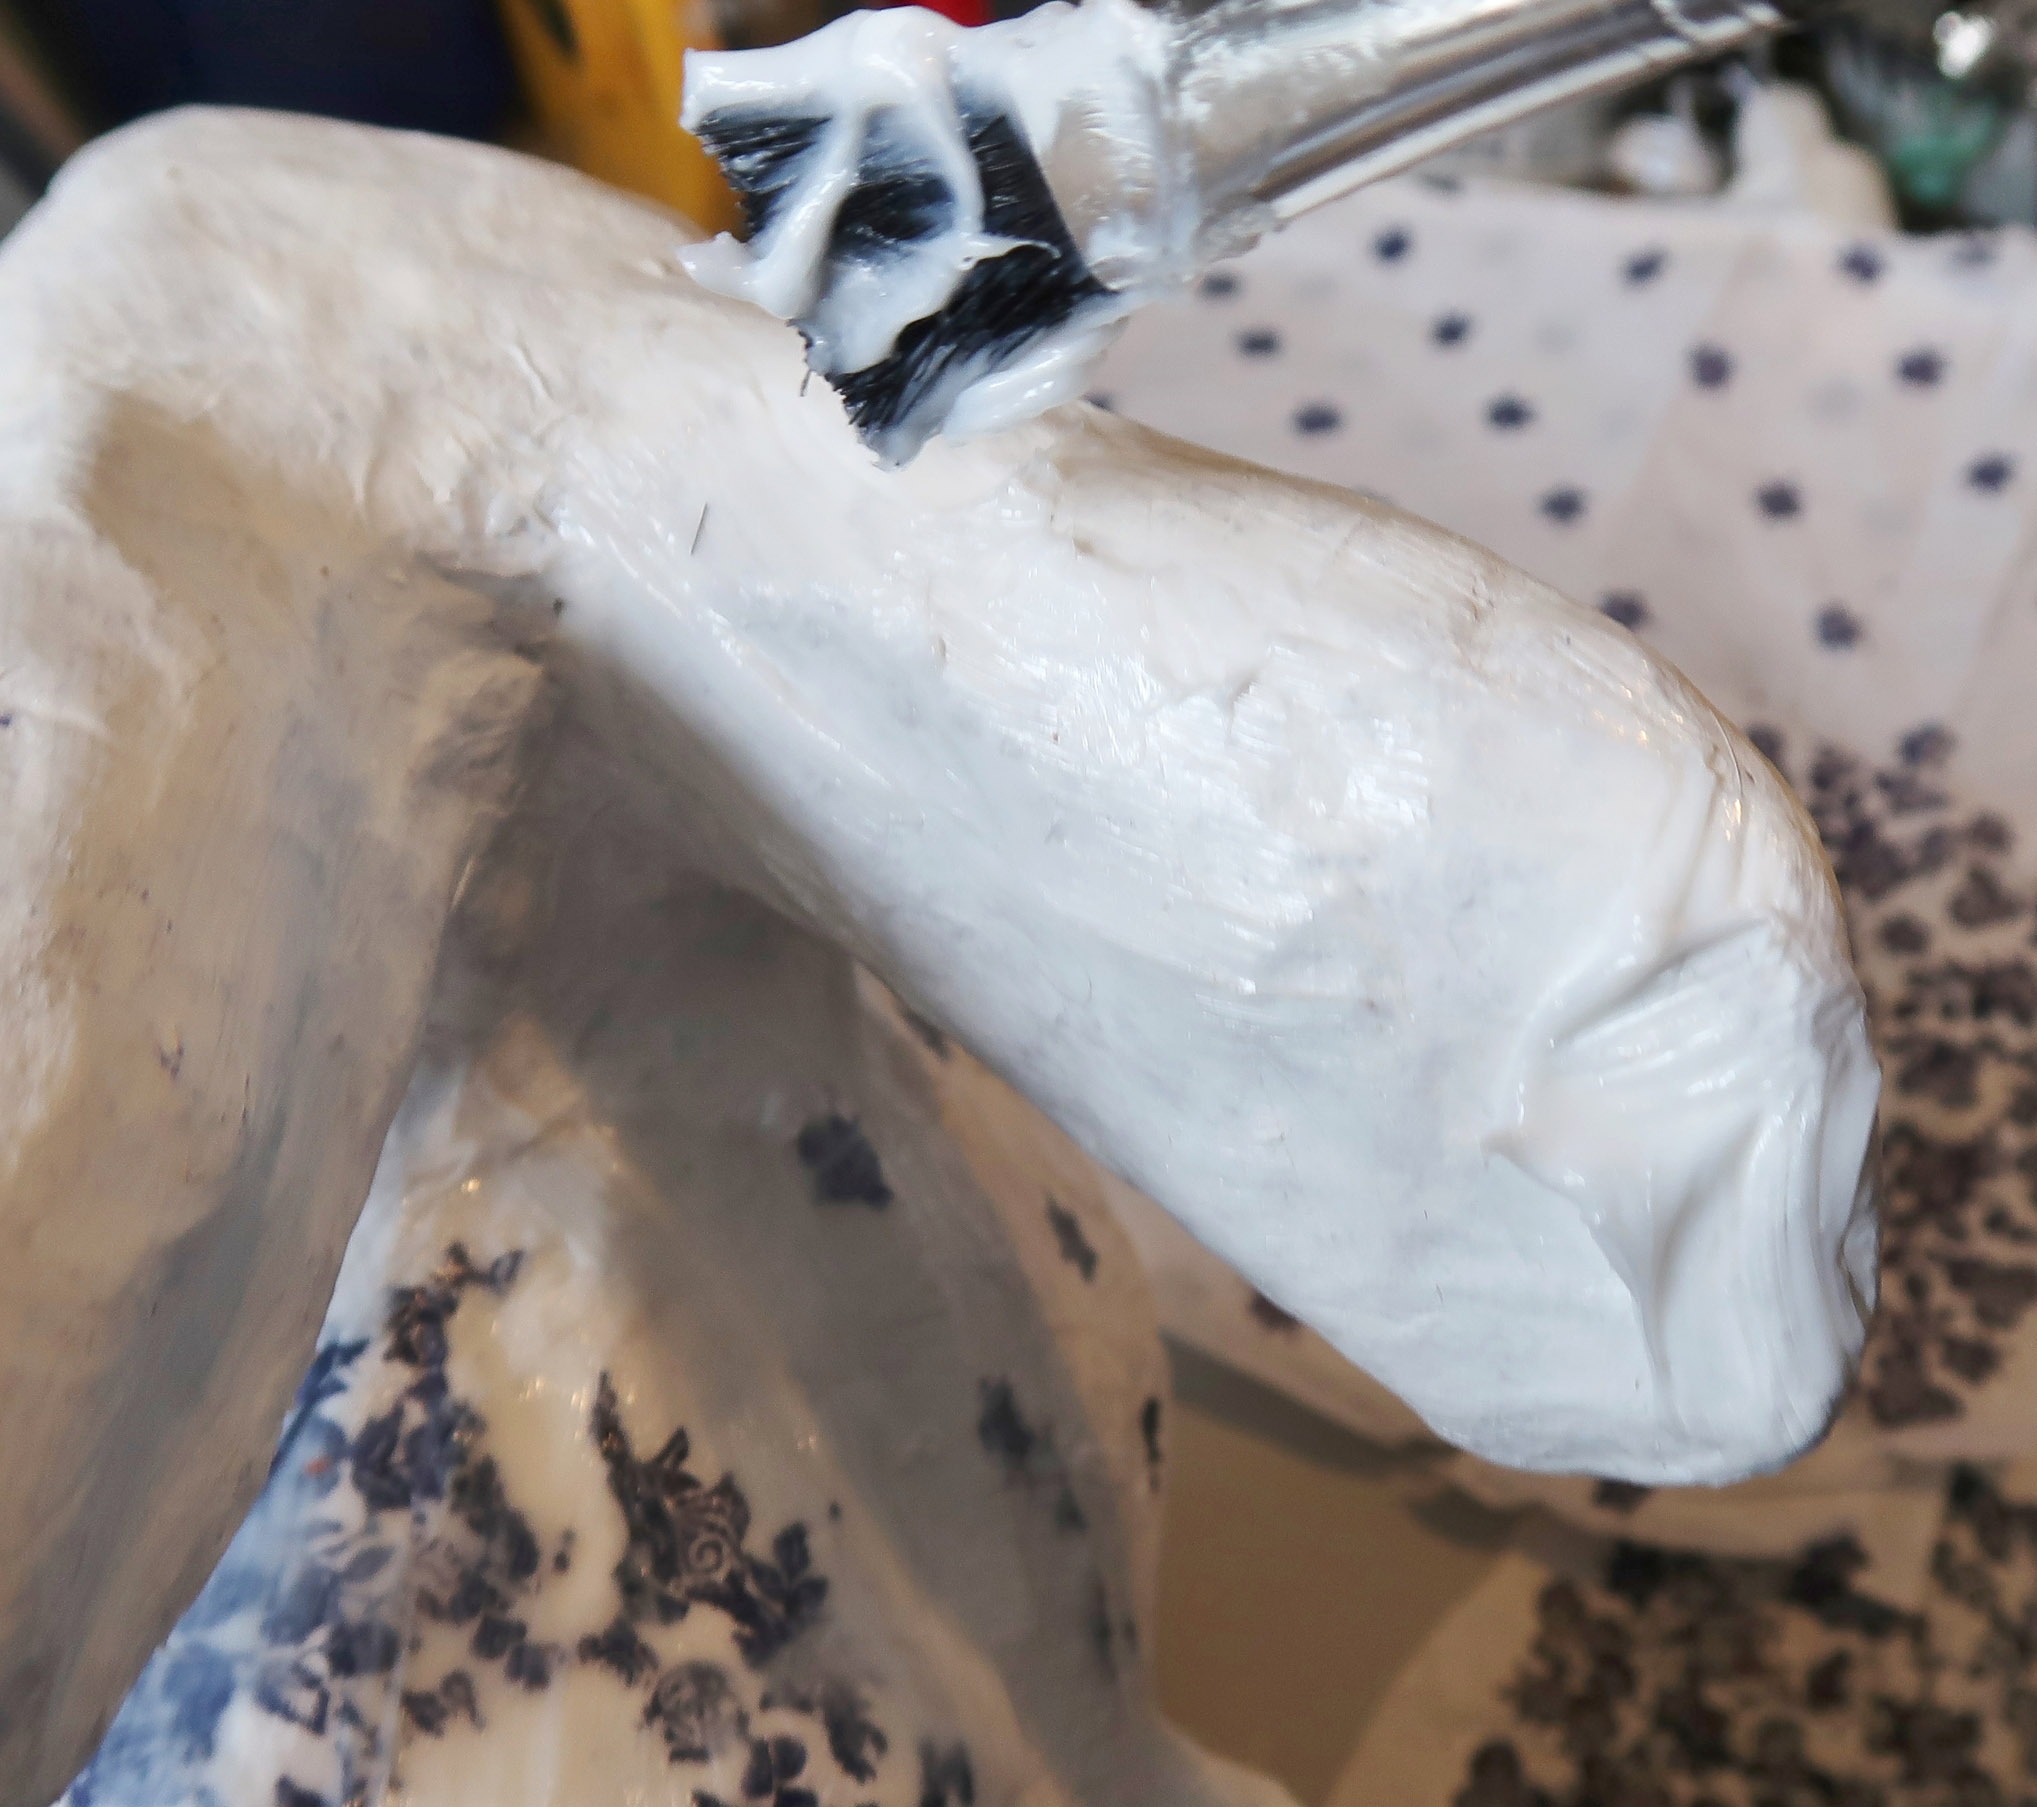
Step 13 – Apply a layer of Creative Medium over the section of the paper mache you want to begin with and carefully place the piece of tissue paper over the glue.


Step 14 – Pick up more Creative Medium on the paintbrush and gently dab the tissue paper and press it onto the paper mache form. Once in place cover the entire piece of tissue paper with a generous layer of Creative Medium.


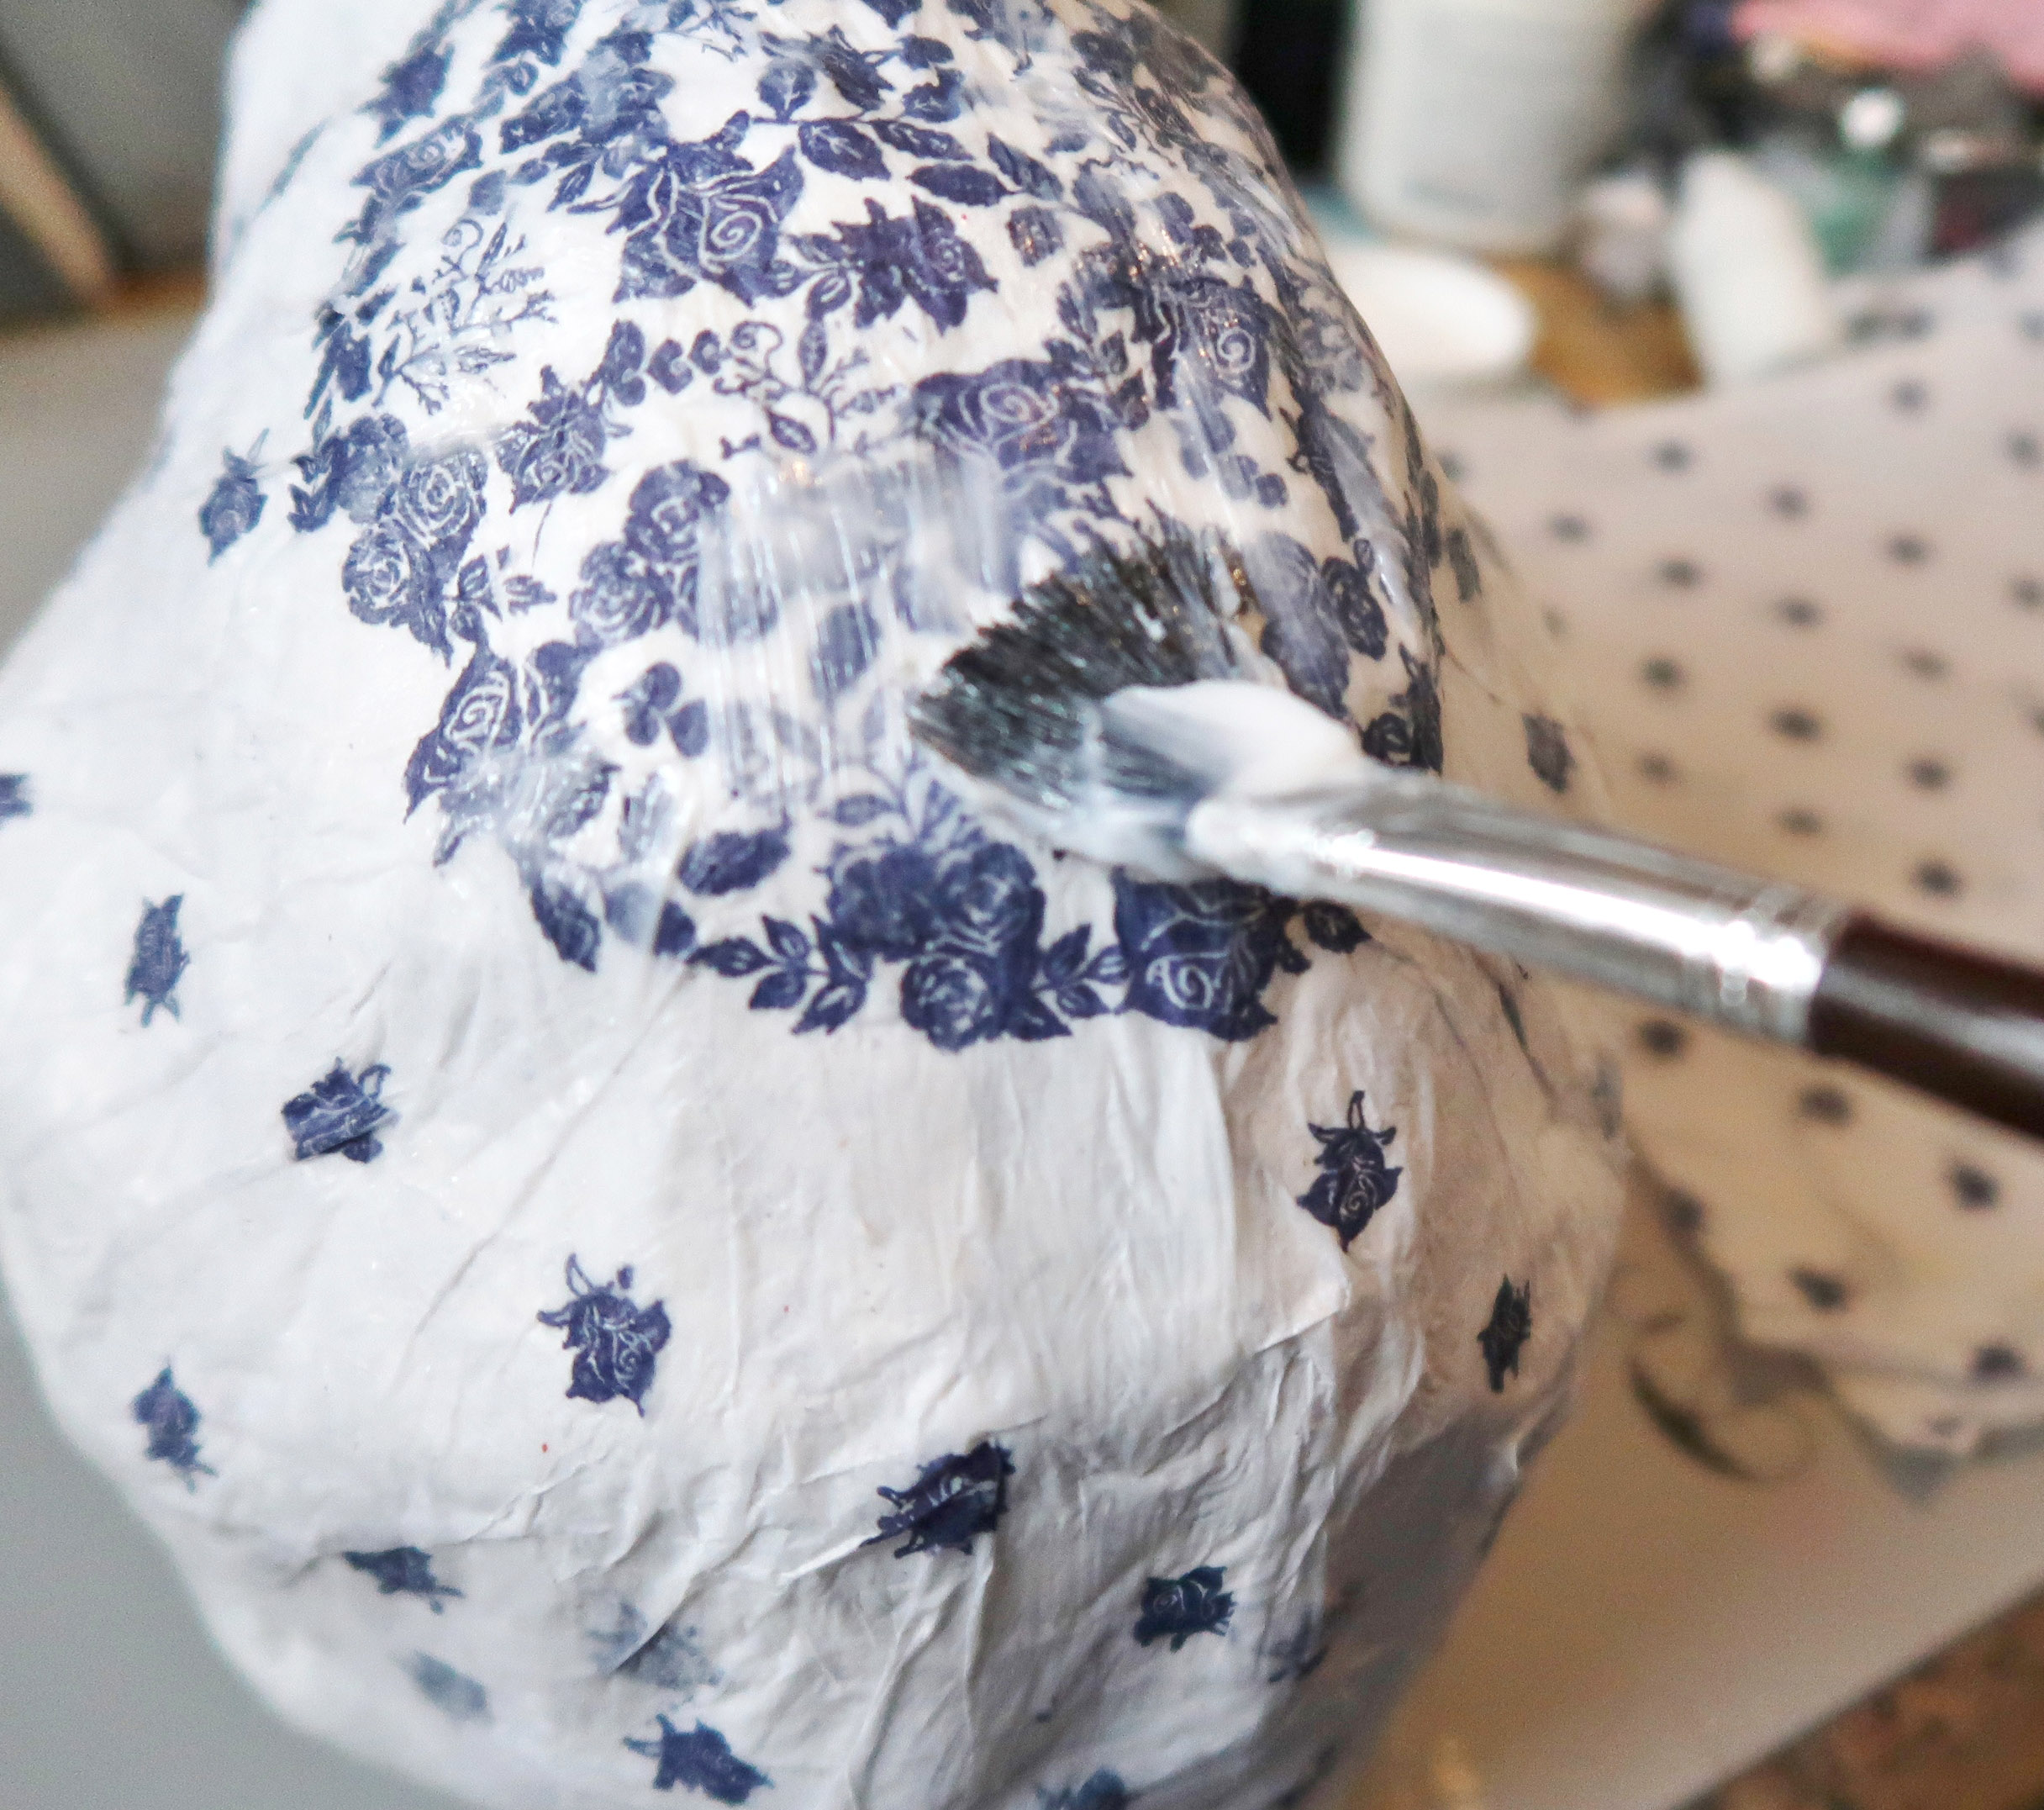
Step 15 – Continue covering the areas where you want the concentrated stamping, next the ears, one at a time.


Step 16 – Again gently layer the tissue paper over the Creative Medium base coat then cover with a top coat of Creative Medium. Gently pull away the excess tissue paper and smooth the edges with the paintbrush. Let these areas dry before continuing.


Step 17 – Once all of the concentrated areas have been applied (back medallion, ears, and forehead), use the diagonal stamped tissue paper to fill in any additional areas that need covering in the same fashion. Apply a foundation layer of Creative Medium; add the diagonal tissue paper and gently press into the glue then apply a top coat of Creative Medium.


Step 18 – Let the Creative Medium dry completely, I left this example dry overnight.


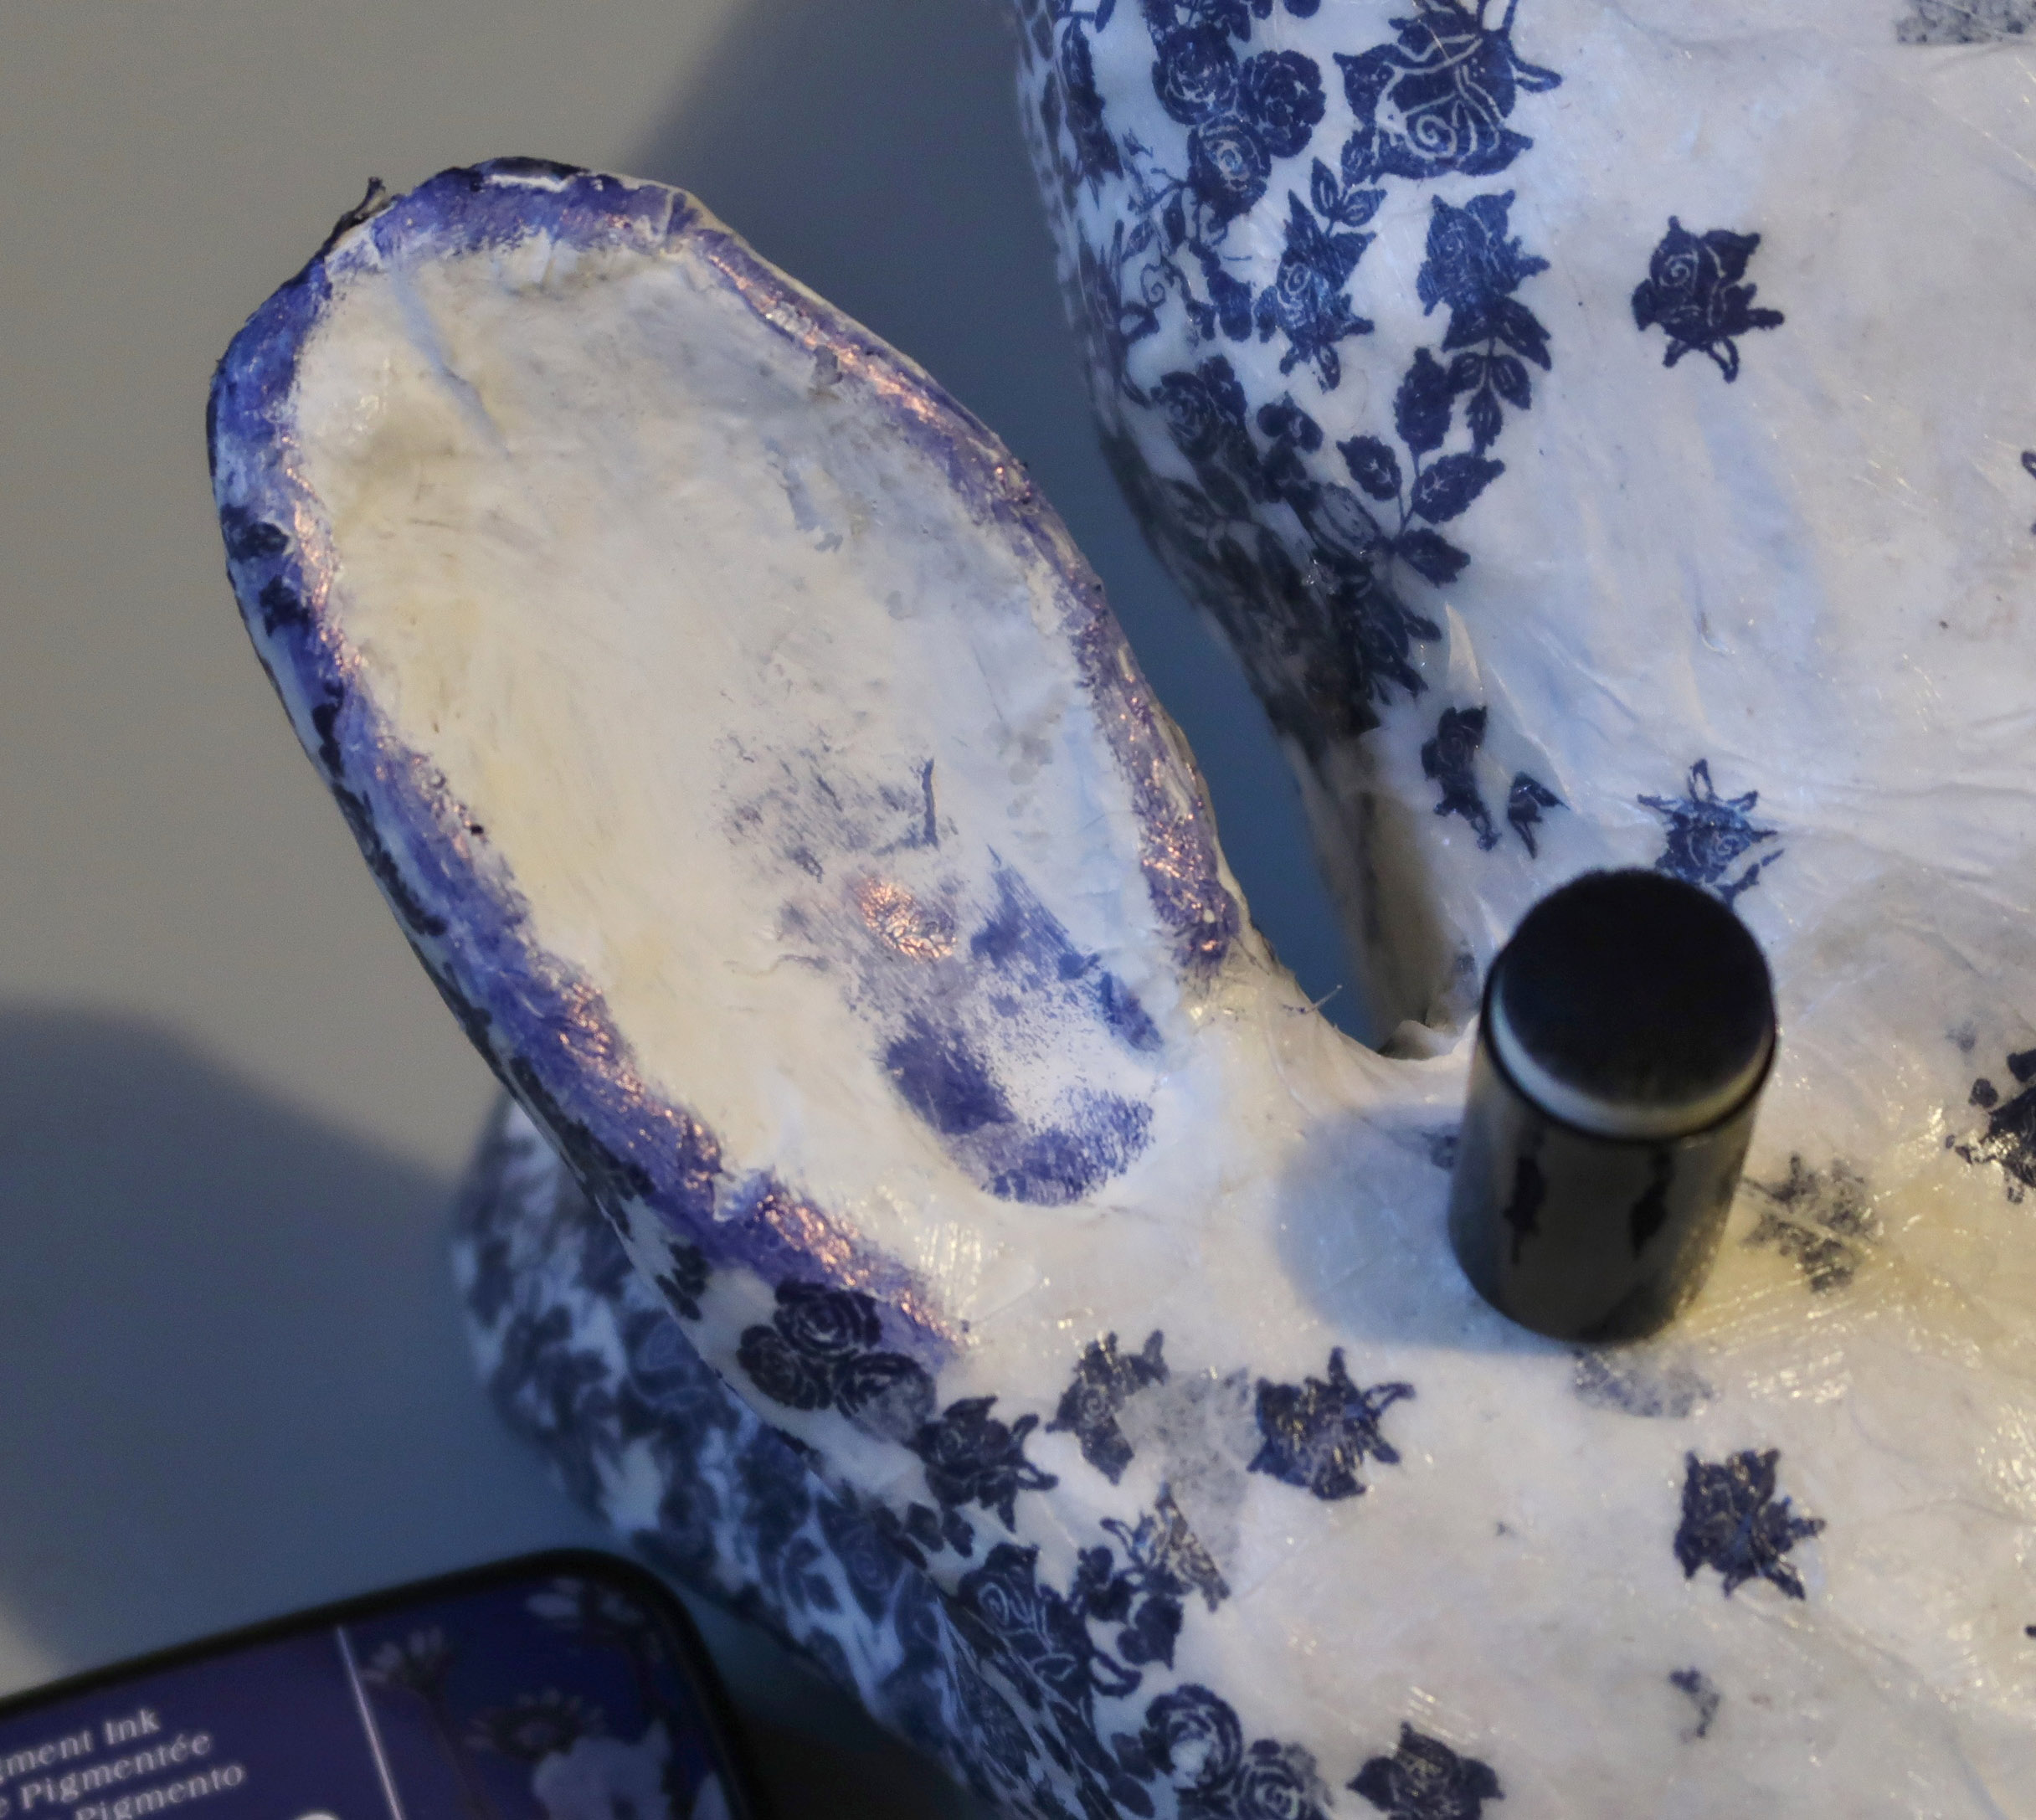
Step 19 – Use a sponge dauber to apply a bit of color around the edge and inside of the ear.


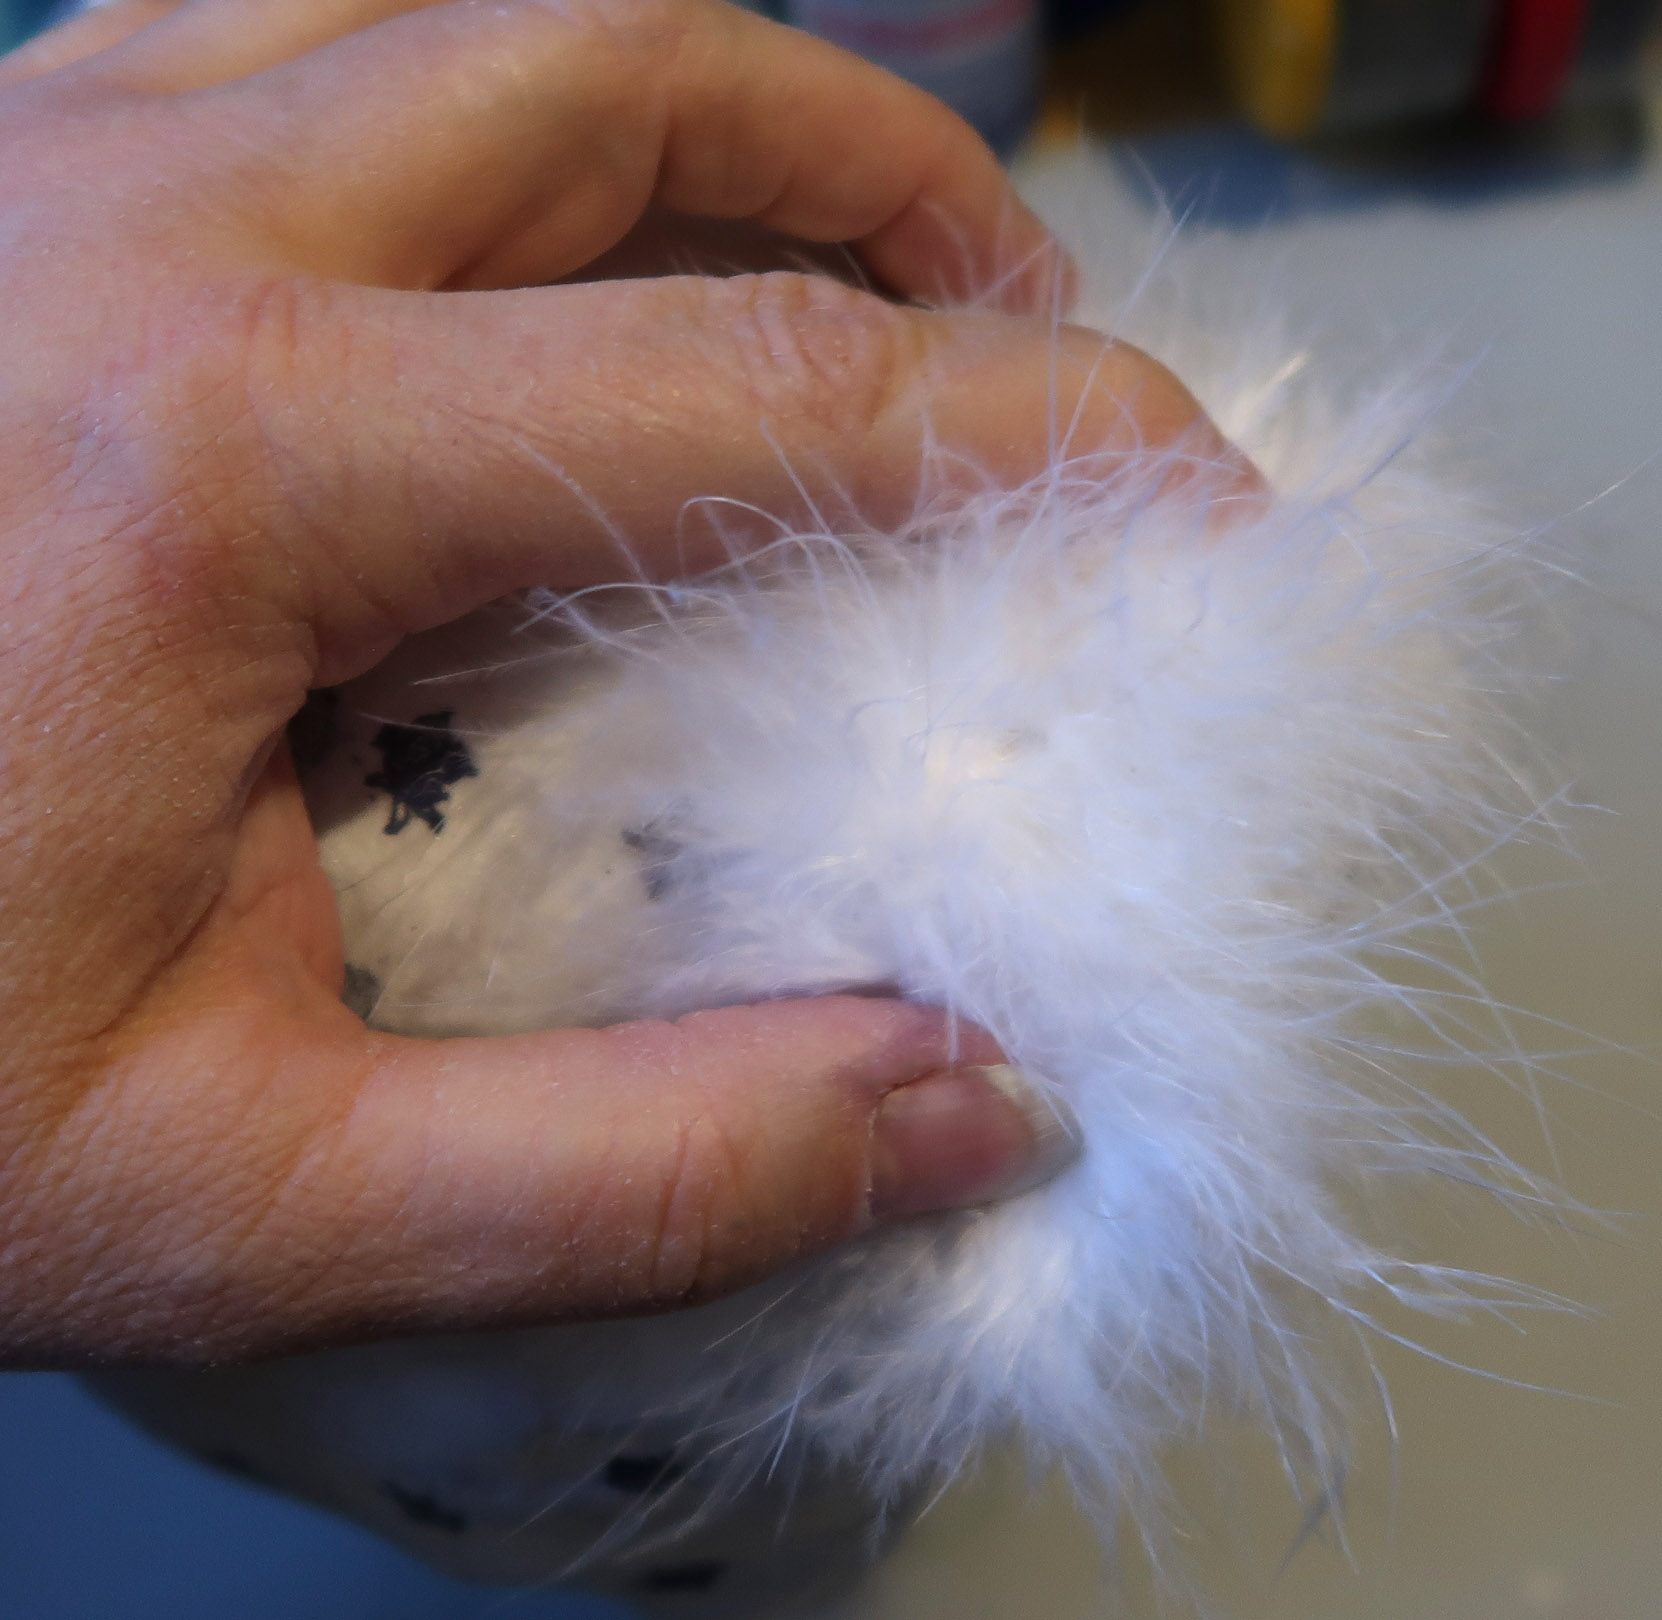
Step 20 – (Optional) – Glue a bit of marabou feather boa to the tail area.


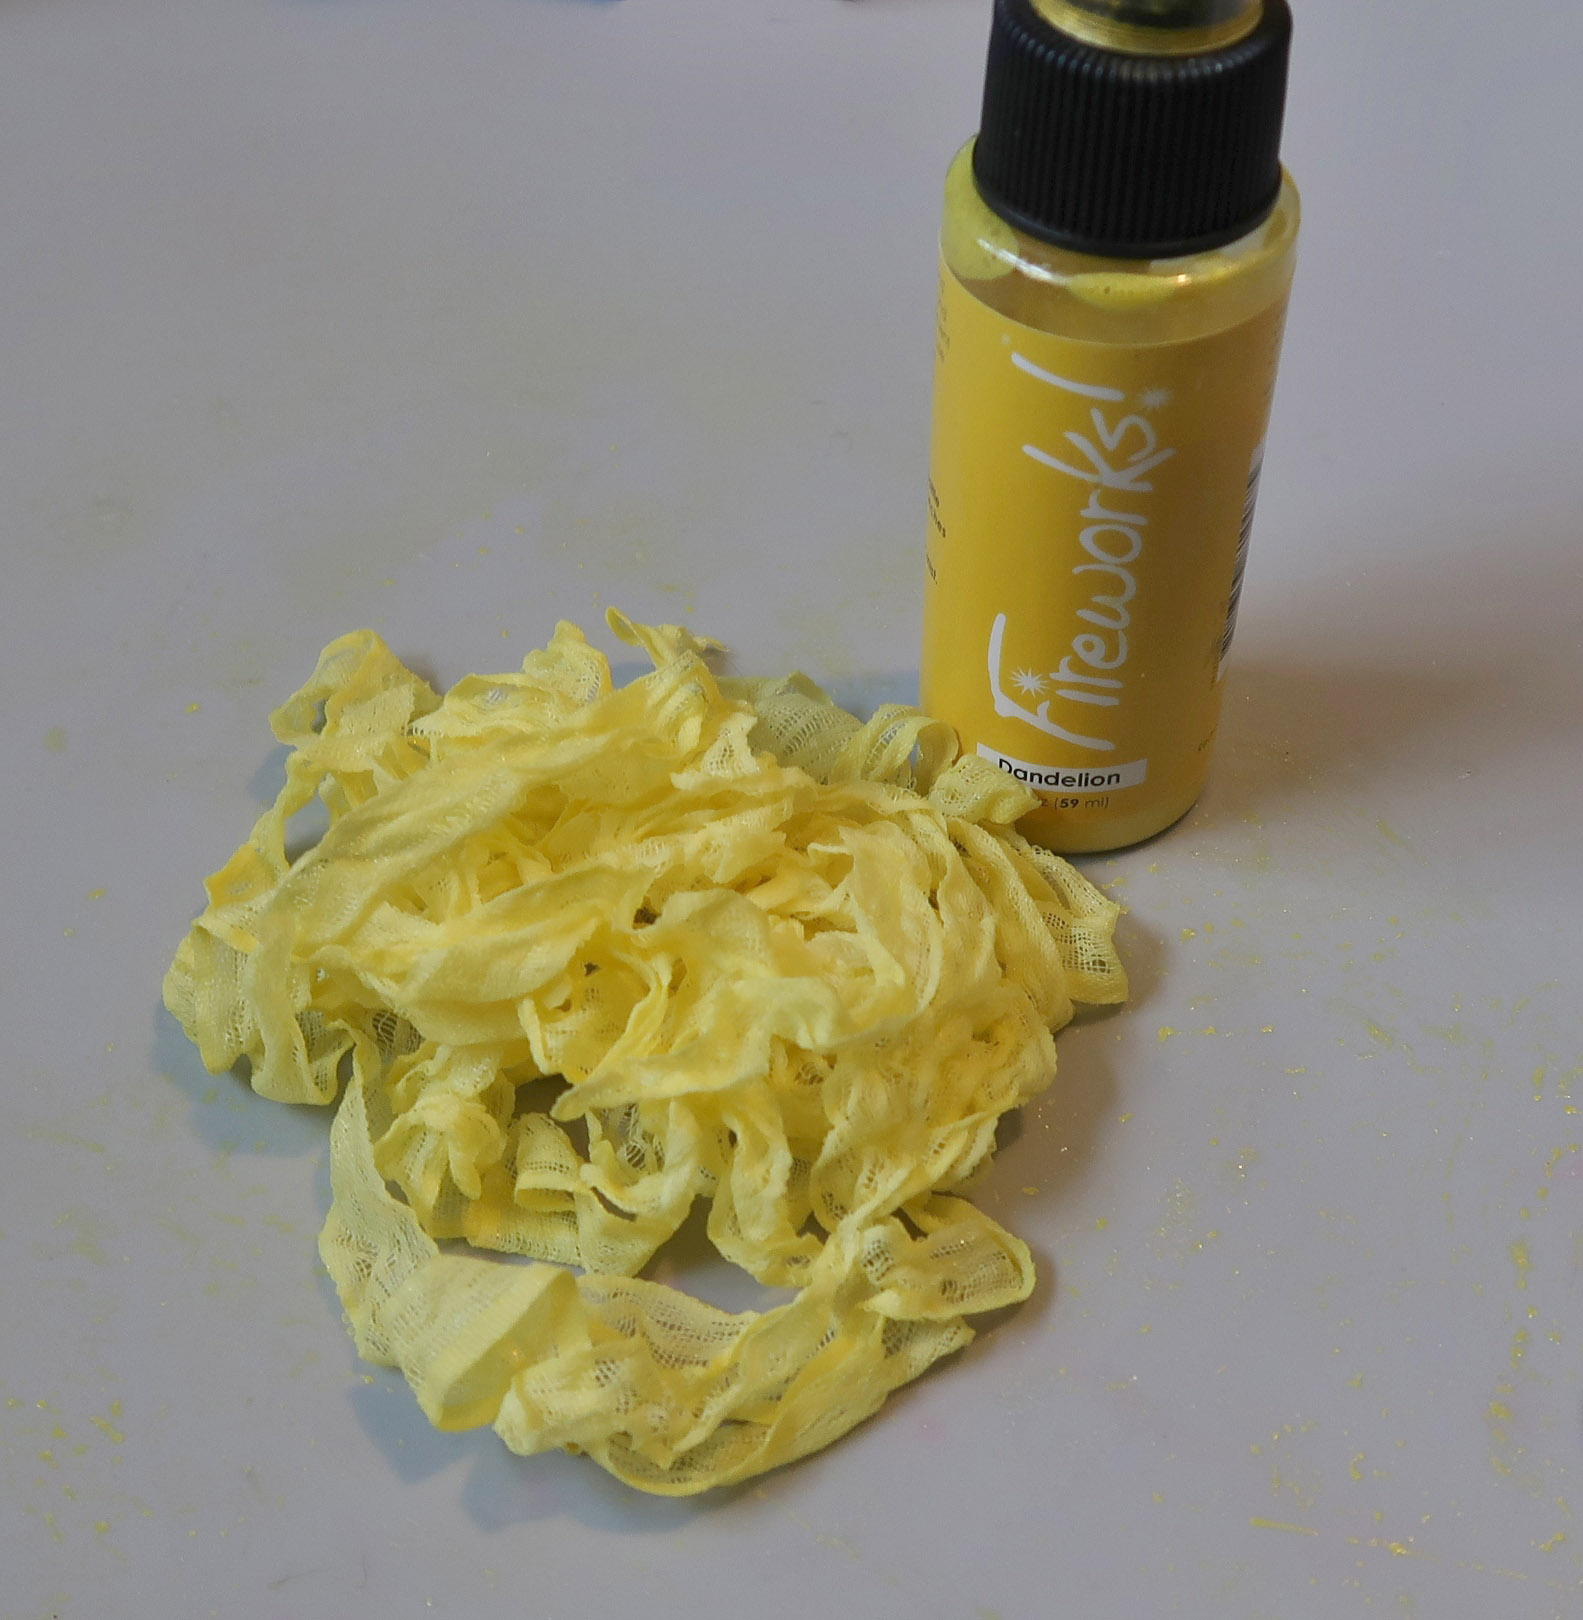
Step 21 – Dye rayon seam binding with Fireworks! Spray ink to create a bow around the bunny’s neck.


Art Supplies:

Imagine
Other
  • Paper Mache Rabbit
  • Tissue Paper
  • Rubber Stamp Tapestry – Roses, Leaves, Vine peg stamps
  • Ruler
  • Paint Brush
  • Rayon Seam Binding
  • DecoArt Americana Acrylic Paint – Titanium White
  • (optional) Marabou Feather Boa

Watercolor and Ink Blending Spring Cards with VersaMagic

By Jessica Lin

Hi everyone, it’s Jessica here and today I have two spring cards to share with you. They feature some cute critters watercolored by VersaMagic ink pads. Those ink pads are my favorite when it comes to creating pastel-themed cards. I hope you like these Easter projects!

Skill level: Medium


Art Supplies:

Imagine

• VersaFine Clair – Nocturne

• VersaMagic:

Squirrel: Sahara Sand, Jumbo Java, Thatched Straw, Ocean Depth, Pink Grapefruit, Tea Leaves

Rabbit: Sea Breeze, Ocean Depth, Wheat, Pumpkin Spice, Pink Grapefruit (Pixie Dust, Spring Pansy)

• VersaMark Dazzle – Champagne

• Mboss – Clear

• Brilliance Dew Drop Ink Pad – Galaxy Gold

• Tear-It Tape

• Craft Mat

Other

Stampin’ Up Fable Friends stamp set

Stamping tool (Stamparatus)

Ranger watercolor cardstock

Waterbrush

EK Success anti-static powder tool

Stampin’ Up A Wish for Everything bundle