Let’s Make Some Autumn Inspired Gift Card Tags

Kathy_October-Tutorial-last

By Kathy Pisupati –

Hi my crafty friends!  Today I have a new tutorial for you that may help you to use your fall dies in a new way.  I will be using the VersaColor Inks to make a mess, yes…a mess that turns out to be BEAUTIFUL!  We will be creating gift card tags for any occasion using fall leaf dies.

Skill Level: Intermediate
Time to Complete: 1 hour

Directions:

Kathy_October-Tutorial-01
Step 1:

Make a mess.  Yes, take a piece of 80lb card stock and swipe those VersaColor inks.  Smoosh ‘em, splatter ‘em, do whatever you want with them.  Use those reinkers that you have sitting on your shelf.


Kathy_October-Tutorial-04Kathy_October-Tutorial-02

Step 2:

Let these panels dry.  Because the VersaColor inks are a pigment ink they take a while to dry, let them dry!  Go have a cup of coffee and take a peek at more inspiration on the Imagine Blog.


Kathy_October-Tutorial-05
Step 3:

Use your leaf dies to cut several leaves from your messy panel. Trust me!  Are they pretty?


Kathy_October-Tutorial-06

Kathy_October-Tutorial-07
Step 4:

Use a gift card tag die to cut some tags. 
You should be able to get three holders from one sheet of 8.5” x 11”. 


Kathy_October-Tutorial-08

Kathy_October-Tutorial-09

Step 5:

Once cut, splatter some gold watercolor paint all over the panels.  


Kathy_October-Tutorial-10

Kathy_October-Tutorial-6b

Step 6:

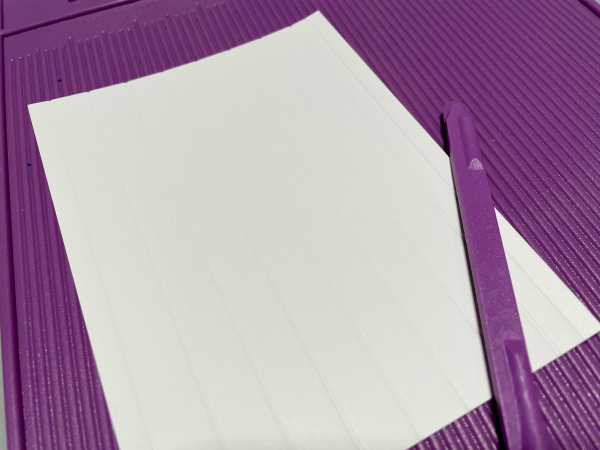
Fold and score your gift tags.  Use the Imagine Tear It! Tape to assemble.


Kathy_October-Tutorial-6c
Step 7:

Lay out your pretty leaves and glue them down with Imagine On Point Glue.  Trim off any excess.  


Kathy_October-Tutorial-14

Step 8

Stamp some sentiments, cut, and create a shadow strip from gold card stock.  Adhere with On Point Glue.  Put some foam tape on the back and adhere to your tags.  Add some bling with the On Point Glue.


Kathy_October-Tutorial-9
Step 9:

Loop some twine through the holes and the gift holders are done.  I hope this has helped you seen those fall products in a new light.  Thank you for stopping by the Imagine Blog!

Supplies Used:

Imagine Crafts

• VersaColor: Turquoise, Canary and Pink Shimmer

• Imagine Craft Mat

• Sponge Daubers

• On Point Glue

Tear-It! Tape

Other

• Brutus Monroe – Stand Alone Leaf Dies

• Gina K Designs Gift Card Tag

• Kat Scrappiness Simple Sentiments Stamp & Die Bundle

• Kat Scrappiness Gold Pearls

• Foam Tape

• Metallic Gold Card Stock

• Paper Trimmer

• Die-Cutting Machine

• Twine

Make a Beautiful Pumpkin Thank You Card

Thankful 12

By Alison Heikkila –

Greetings! Alison here and today my latest tutorial for Imagine is a textured, fall-themed thank you card. I can see making a bunch of these to put as place setting on your Thanksgiving table, as a thank you to your guests for celebrating the holidays with you. I used several simple techniques on this card that when combined, look really fancy and festive. 

Skill Level: Beginner to Intermediate
Time: 45 minutes- 1 Hour

Thankful 2

Directions:


Thankful 3
Step 1: 

Using a piece of metallic cardstock, run it through your die cutting machine with an embossing folder. 


Thankful 4
Step 2: 

Using a sanding block, a piece of sandpaper, or even a nail file, sand the raised areas of the embossed cardstock. This will give it an aged or distressed look. 

Step 3: 

Gently rub Spiced Chai StazOn ink across the surface to add more interest to the piece of cardstock. 

Thankful 5

Step 4: 

On a Gel Press Plate, gently tap the Cappuccino Delight Kaleidacolor Inks across the surface. You can use a brayer to blend the colors, as well as a few spritzes of water or Ink Potion No. 9. 

Thankful 6

Step 5: 

Lay white cardstock on to the Gel Press Plate and rub to get the ink to transfer. Pull the print and let it dry. I pulled a couple of prints and then chose my favorite to use for this card. 

Thankful 7

Step 6: 

Die cut a pumpkin out of the monoprint.

Thankful 8

Step 7: 

Die cut a bigger pumpkin out of brown cardstock and ink the edges with Golden Glitz Delicata Ink. 

Thankful 9

Step 8: 

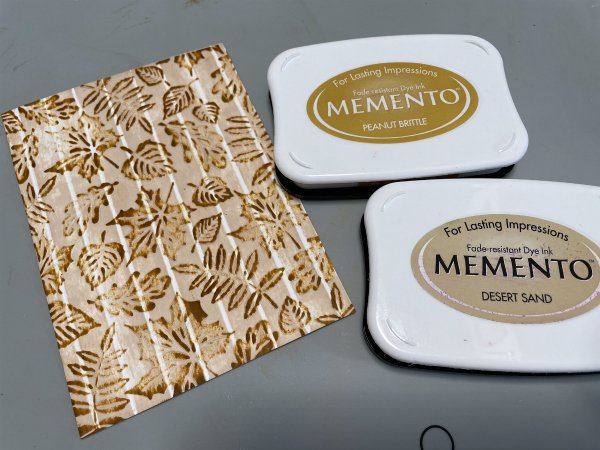
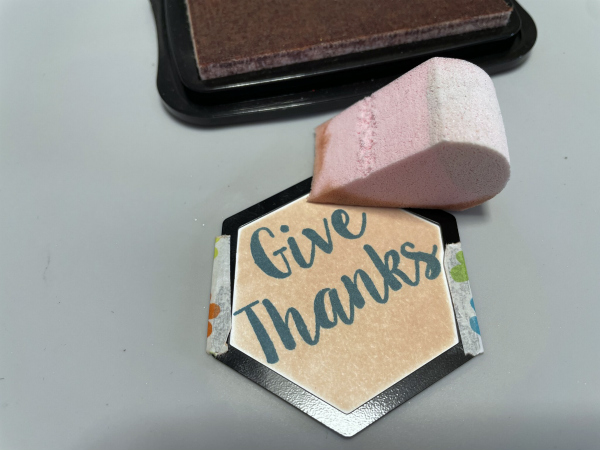
Die cut the sentiment out of cream colored cardstock and ink the edges with Desert Sand Memento Ink. 

Thankful 10

Step 9: 

Add Tear It Tape to the back of the embossed panel. I like to use this adhesive when I am working with a piece that has a lot of texture. It holds everything in place really well, and you don’t need to worry about liquid adhesive getting “stuck” in the wells. 

Step 10: 

Assemble the rest of the card. I used On Point Glue to attach the rhinestones. 

Thankful 11 600

Isn’t it pretty? 

 I love all of the shine from the embossed panel. I also really like seeing all the colors on the pumpkin through the die cut. I hope you’ll give some of these techniques a try!

Art Supplies:

Imagine:

• StazOn Ink: Spiced Chai 

• Delicata Ink: Golden Glitz

• Kaleidacolor Ink: Cappuccino Delight 

• Memento Ink: Desert Sand

• Tear It! Tape

• On Point Glue

Other:

• Darice: Embossing Folder

• Gel Press: 3×5 Plate

• Recollections: Pumpkin Die Cuts

• Simon Says Stamp: Thankful Die

• Doodles Paper Playground: Gold Starburst Rhinestones

• Brown, Cream, and White cardstock

A Few Ways to Get Creative with Memento Markers

Rose-1_800

By Alison Heikkila –

Greetings! My latest project for Imagine started off as a Halloween card, but truthfully, it became a card that I could mail out at any time of year, depending on the recipient. I’ll leave it up to you to decide if you think it’s just for Halloween or not. In this tutorial, I’m going to show you a few ways to use your Memento Markers, along with a couple of other great products from Imagine. My supplies are listed at the bottom of the post. 

 Skill Level: Beginner to Intermediate
Time to Complete: 1 Hour

Directions:


Rose 2
Step 1:

Stamp the skeleton hand on to Smooth Bristol Cardstock with VersaFine Clair Ink in Nocturne. 

Rose 3

Step 2: 

Color the image with London Fog, Rhubarb Stalk, Love Letter, Northern Pine, and Olive Grove. Be sure to leave some white space to mimic a shine. 

Step 3: 

Cut the image out. I used an X-Acto knife for the interior areas, and then my precision scissors for the rest. I left a thin border around the piece so that I didn’t have to be perfect. 

Rose 4

Step 4: 

Die cut the 4th largest Hexagon die in the Waffle Flower set out of white cardstock, and the 5th largest out of black. 

Step 5: 

Use the Rhubarb Stalk Memento Marker to color the outer edge of the white hexagon, so that it will perfectly match the rose. 

Rose 5

Step 6: 

Using Fireworks! Spray in Tuxedo Black, flick the ink on to your card base. 

Step 7: 

Scribble some Rhubarb Stalk Memento Marker on to an acrylic block. Add some water to a brush, and then flick the color off the side of the block to get splatter. 

Rose 6

Step 8: 

Glue the hexagons together and the skeleton hand on top using On Point Glue. I usually glue everything at the end, but i knew I would be moving this piece around a bit, so gluing it early is helpful.

Step 9: 

Die cut a bunch of foliage from black cardstock and arrange them around the edge of the card. Have them going off the edge and in different directions to keep things interesting. Adhere with On Point Glue. 

Rose 7

Step 10: 

After the foliage is glued, cut off the pieces that overhang. 

Step 11: 

On the black cardstock, stamp a sentiment with VersaMark Ink. If you have one, use an anti-static powder bag first. Then, sprinkle on white embossing powder, shake off the excess, and heat set it. 

Rose 8

Step 12: 

Run the Rhubarb Stalk Marker around the edge of the card base to create a thin border of color.

Step 13: 


Adhere the hexagons to the card base. 

Rose 11 600

Supplies Used

*Some affiliate links are used in this post. That means that if you shop through these links, I may receive a small compensation, at no cost to you. For more information, please see my Affiliates page.


Imagine:

• VersaFine Clair Ink: Nocturne 

• Memento Markers: London Fog, Rhubarb Stalk, Love Letter, Northern Pine, Olive Grove

• Fireworks! Spray: Tuxedo Black

• VersaMark Ink 

• White Embossing Powder

• Sponge Dauber

• Craft Mat

• On Point Glue

Other:

• Erin Lee Creative: Stay Weird Stamp Set

• Erin Lee Creative: Tropical Leaves Die Set

• Waffle Flower: Hexagon Dies

• Tim Holtz/Stampers Anonymous: Noteworthy Stamp Set

• Black and White Cardstock

• Acrylic Block

• Paintbrush


Make a FABULOOOS Halloween Card

2022---September---Martha-Lucia-Gomez---Halloween-Card-1_700x700

By Martha Lucia Gomez –

Hello there! Todays tutorial is a quick project that you can make using your Halloween stamps and the heat embossing techniques. On this, I am combined VersaFine Clair, VersaMark and Memento Inks with our traditional Embossing Powders.

Skill Level: Beginner
Time to Complete: 30  Minutes


Directions:

2022 - September - Martha Lucia Gomez - Halloween Card Step 1

 
Step 1

Stamp a Halloween background onto your colored card stock using VersaFine Clair Nocturne. 

2022 - September - Martha Lucia Gomez - Halloween Card Step 2
Step 2:

Cover the inked area with Embossing Powder and melt it with a heat tool. On this step, you can use clear embossing powder or black embossing powder.   

2022 - September - Martha Lucia Gomez - Halloween Card Step 3
Step 3:

With an Ink Blusher or sponge apply Memento Ink Grape Jelly around the stamped background.  

TIP: You can stamp your background onto white smooth cardstock and then ink all the area with your selection of Memento Ink. 

2022 - September - Martha Lucia Gomez - Halloween Card Step 4
Step 5:

With VersaMark Ink stamp the sentiment on the center of the card and covered it with White  Embossing Powder. Melt the powder with the heat tool.

2022 - September - Martha Lucia Gomez - Halloween Card Step 6
Step 6:

Ink the center or your card using Memento Tangelo Ink.

2022 - September - Martha Lucia Gomez - Halloween Card Step 7
Step 7:

According with the stamps and colors of card stock that you used you can enhance some details using additional colors of Memento Ink. In my sample, I used purple card stock and three different colors of Memento Ink: Grape Jelly around the card, Tangelo for the Center and Paris Dusk for the corners.

2022 - September - Martha Lucia Gomez - Halloween Card Step 8
Step 8:

To embellish the card, you can use a coordinated die cut. I am using a witch die that I cut onto Silver Metallic cardstock three times. I layered pasted all the die cut images with On Point Glue to add more dimension. And as final touch, I gave an additional color to the face on the pumpkin using Memento Dual Tip Markers.

2022 - September - Martha Lucia Gomez - Halloween Card_700x700
Step 9:

Assemble your card pasting all the layers with Tear It! Tape or Crafty Foam Tape.

Art Supplies:

Imagine:

• VersaFine Clair – Nocturne

• VersaMark – Clear

• Memento – Grape Jelly, Tangelo and Paris Dusk

• Memento Dual Tip Markers

• Ink Blushers

• Tear it! Tape

• Craft Mat

Other:

  Joy Clair Designs – Spiderweb Background Clear Stamp 

  Crackerbox Stamps – Faboolous Rubber Stamp

  Die Cut Machine

  Positional Stamp Tool.

  Scrapbook Adhesives Crafty Foam.

• Heat Tool

• Brayer

Fall Themed Note Cards Using First and Second Generation Stamping With Memento Inks  

Sept-2022_Katy-Ingram_Fall-Thanks_Group-IG-1

By Katy Ingram –

Hello Friends! Katy here and today I am creating some fall themed note cards with second generation stamping. This is a great way to get more from your inks and create a beautiful subtle look to your projects. 

In todays video tutorial you will see both first and second generations stamping with a variety of fall color Memento Inks and a quick way to add interest with a bit of twine. Video has all the details. Thanks for joining me today.

Skill: Intermediate
Time: 10 minutes

Sept-2022_Katy-Ingram_3-leaf-cards_4

Sept-2022_Katy-Ingram_4-leaf-cards_IG-2

Sept-2022_Katy-Ingram_5-Leaf-Cards_IG-3

Art Supplies:

Imagine:

• 5 Leaf Card 

– Memento Inks: Bamboo Leaves, Pistachio, Olive Grove, Northern Pine, Toffee Crunch

“Thanks” Sentiment: Memento Rich Cocoa

• 4 Leaf Card

– Memento Inks: Desert Sand, Peanut Brittle, Potters Clay, Morocco

“Thanks” Sentiment: Stamped with VersaFine Clair Pinecone and Memento EspressoTruffle

• 3  Leaf Card

Memento Inks: Rhubarb Stalk, Olive Grove, Toffee Crunch

“Thanks” Sentiment: VersaFine Clair Pinecone

– Tear It! Tape

Other Products Used:

• Gina K Designs Skeleton Leaves Stamp Set

• May Arts Jute Twine

• MISTI Stamping Tool

• Heavyweight White Cardstock panel 2 1/2 inches wide by 4 inches long

• Heavyweight White Cardstock Base 7 inches by 4 7/8 inches score at 3 1/2 inches on the 7 inch side.

Follow Katy Here:

Youtube: https://youtube.com/c/eastwickspaperandink 

facebook: fb.me/eastwickspaper 

Instagram: https://www.instagram.com/eastwickspaperandink/ 

Blog: https://www.eastwickspaperandink.com/

Learn How to Make a Vividly Fall Colored Thank You Card Using Kaleidacolor

2022_Sept_Neva_KaliedacolorLeavesThankYouBeauty_600

By Neva Cole –

There are many Kaleidacolor pads that are in the autumn themed pallet.  Even though this card is multi-layered it comes together in a short amount of time considering all of the inked embellishments!

Skill: Intermediate

Time: 2 Hours

Directions:

2022_Sept_Neva_KaliedacolorLeavesThankYouStep1
Step 1:

Trim cream cardstock to 5” x 5” and center the overlay and stamp on the center rotation point of the Turn About Stamp.  Place on stamp platform to pick up stamp, and remove overlay.

2022_Sept_Neva_KaliedacolorLeavesThankYouStep2
Step 2:

Ink up the stamp with Kaleidacolor in Autumn Leaves with the green end of the pad and stamp the image.  Rotate the paper 90 degree to the right.

2022_Sept_Neva_KaliedacolorLeavesThankYouStep3
Step 3:

Ink up the stamp with Kaleidacolor in Desert Heat with the orange end of the pad and stamp the image.  Rotate the paper 90 degree to the right.

2022_Sept_Neva_KaliedacolorLeavesThankYouStep4
Step 4:

Ink up the stamp with Kaleidacolor in Cappuccino Delight with the brown end of the pad and stamp the image.  Rotate the paper 90 degree to the right.

2022_Sept_Neva_KaliedacolorLeavesThankYouStep5
Step 5:

Ink up the stamp with Kaleidacolor in Desert Heat with the red end of the pad and stamp the image.  Rotate the paper 90 degree to the right.  After I started the card I realized it can also be completed with two complementary Kaleidacolor pads, just by using opposite ends to ink the image.  Die cut the completed wreath with a circle die cut.

2022_Sept_Neva_KaliedacolorLeavesThankYouStep6
Step 6:

Ink the sentiment from the red end of the Kaleidacolor Desert Heat pad and stamp.

2022_Sept_Neva_KaliedacolorLeavesThankYouStep7
Step 7:

Die cut the sentiment.  The edges are then blended in with an Ink Dauber and the yellow end of the Kaleidacolor Desert Heat pad.  

2022_Sept_Neva_KaliedacolorLeavesThankYouStep8
Step 8:

More embellishment is added with included stamps from the set from various sections of all three Kaleidacolor pads.

2022_Sept_Neva_KaliedacolorLeavesThankYouStep9
Step 9:

Spritz a section of cream cardstock with Ink Potion No. 9.  This will allow the ink to spread more uniformly on the cardstock.  Generally glossy cardstock works best, but the rest of the card was regular cream cardstock, this is a good work around.

2022_Sept_Neva_KaliedacolorLeavesThankYouStep10
Step 10:

Using a 2” rubber brayer add ink liberally to the white cardstock until fairly well blended.  All three Kaleidacolor ink pads are used on one piece of cardstock with the intention to have several colors to die cut the coordinating leave dies.

2022_Sept_Neva_KaliedacolorLeavesThankYouStep11
Step 11:

Decorate the front of the 5” x 7” card front in the same way the sentiment die is inked and stamped in Step 8. 

2022_Sept_Neva_KaliedacolorLeavesThankYouStep12
Step 12:

Arrange die cuts from the brayered section of cardstock on the card base.  Use repositionable adhesive to pick up the edges of the die cuts and flip over the entire front circle wreath.  Add dimensional foam adhesive to secure die cuts in place.  (You will notice that the reverse side was the first try, however it wasn’t the best, so it is simply flipped over and the other side was used.  You only see the mistake in the demonstration step!)

2022_Sept_Neva_KaliedacolorLeavesThankYouBeauty_13
Step 13:

Adhere stamped wreath to card front.  Adhere the sentiment to the center of the stamped wreath with dimensional foam adhesive.

Art Supplies

Imagine

• Kaleidacolor–Autumn Leaves, Desert Heat, Cappuccino Delight

• Ink Potion No. 9

• Ink Dauber

Other:

• Cream  Cardstock

• Concord & 9th–Harvest Wreath Turnabout Set and Dies

• Elizabeth Craft Designs–Stitched Circles

• 2” Rubber brayer

• Temporary repositionable adhesive

• Dimension Foam adhesive

• Die Cut machine

• Stamp Platform