Gold-Embossed Ombre Effect Congrats Card

By LVHandcrafted

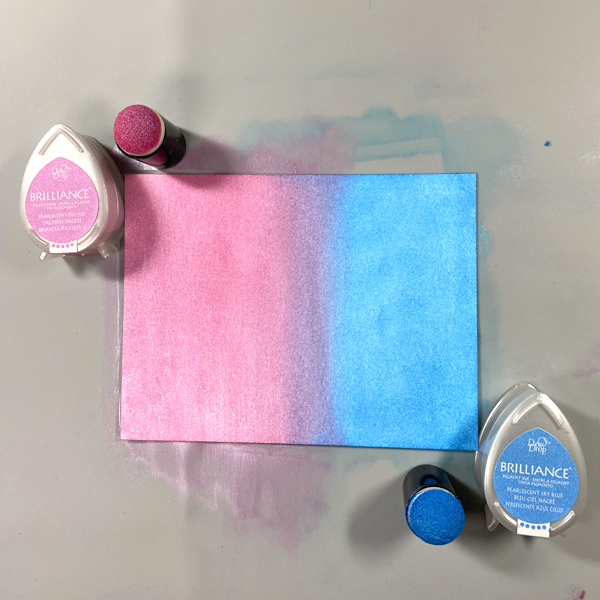
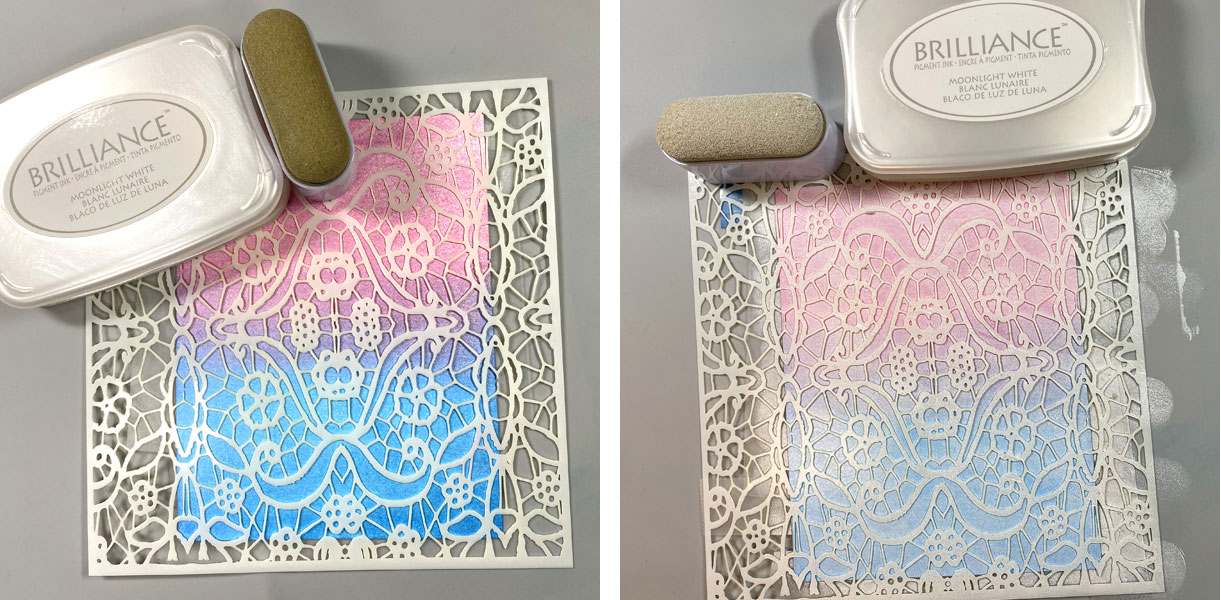
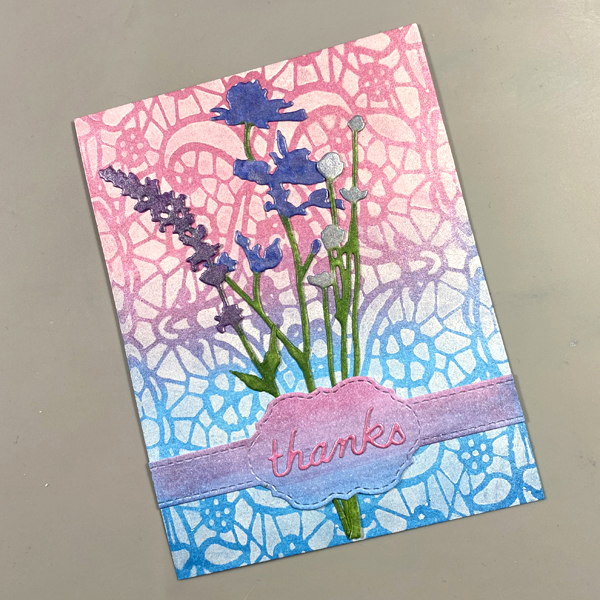
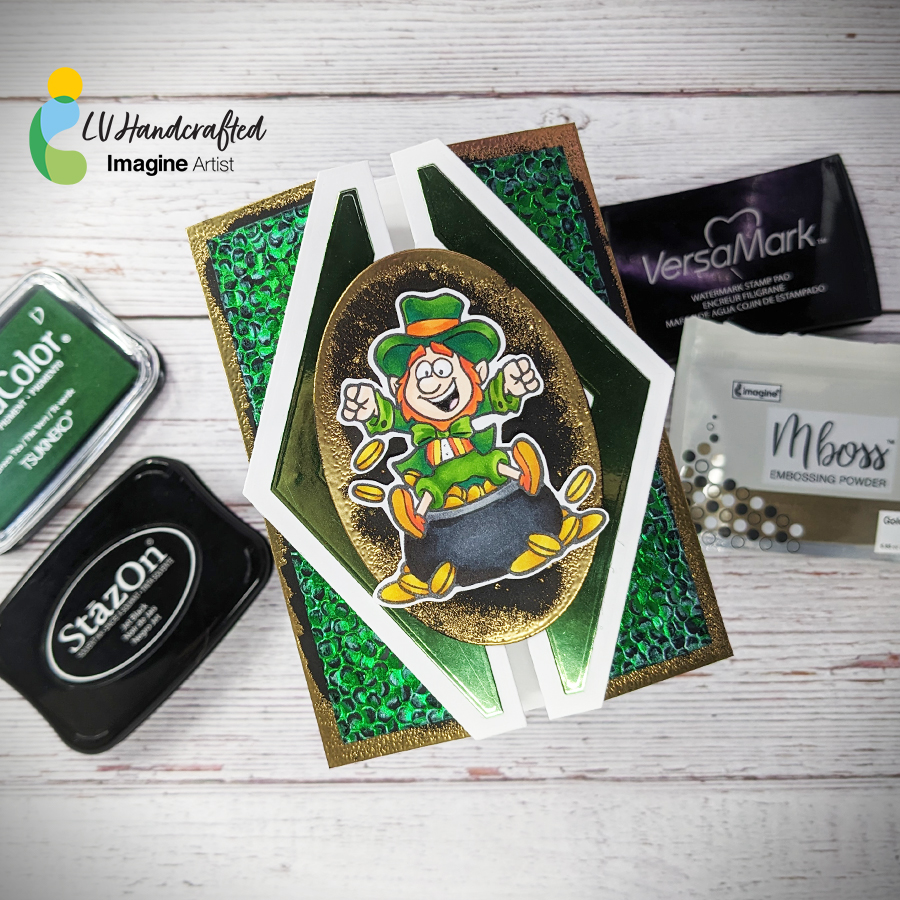
Hello friends! This is Linh (or LV Handcrafted on all the socials). This is a fun way to create your own heat embossed ombre effect. I used Delicata ink, which is a pigment ink and remains sticky for period of time to swipe across a white cardstock panel. I made a very solid swatch of ink. Before the ink dried, I covered one end (the bottom) with Mboss powder in gold. I aimed for about 25% of the way up with solid coverage. Then I tipped the panel so the letter “C” is at the bottom and the letter “S” is at the top. Then spooned more Mboss powder from one and and further tipped the panel so it runs down the panel to create that graduated, ombre effect. 

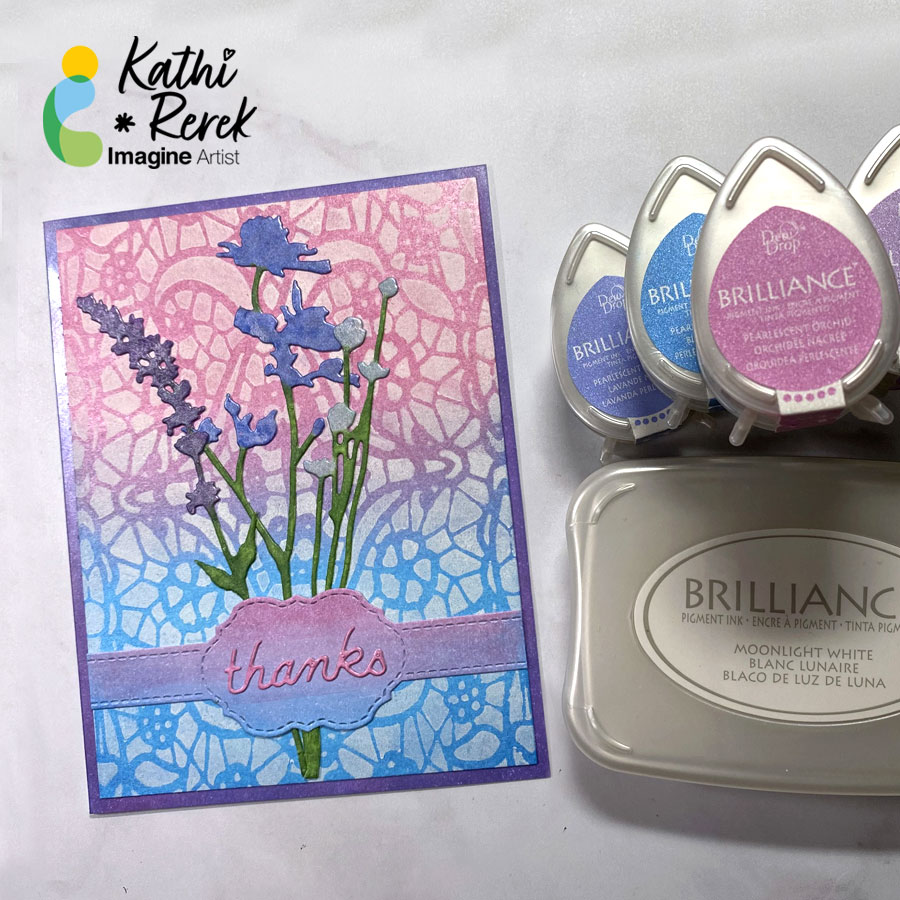
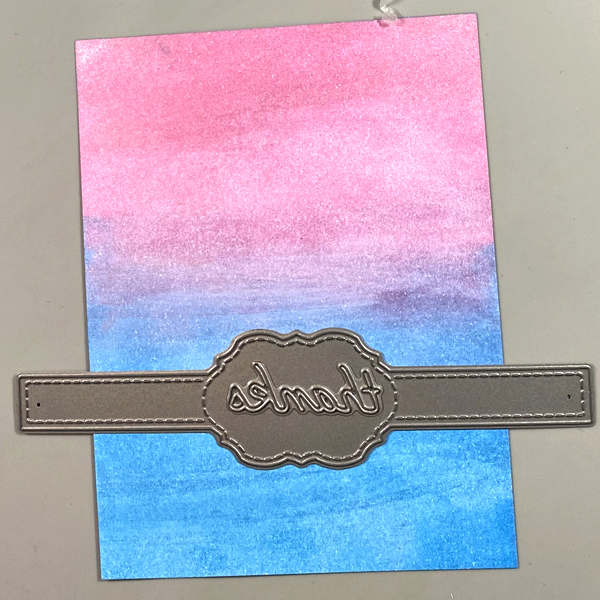
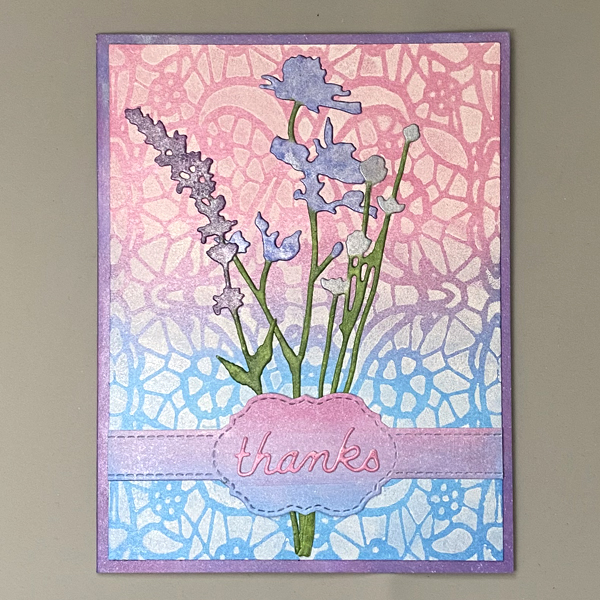
When I make panels like this, I really want the panel and the effect to shine, so I like to keep the rest of the card really simple. These word dies are wonderful because they are so big, they nearly take up the entire card. And with a panel this beautiful, I save everything and made a second card using the negative effect of the word die. 

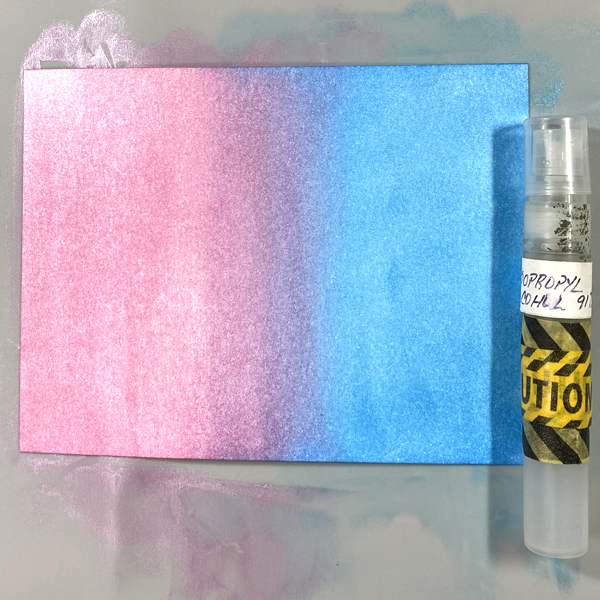
NOTE: In the video, you will actually see me create a smaller panel that I decided against using. I used a Sakura glue pen to draw a design over the Delicata-inked panel and then poured Mboss powder over it. The glue pen lets you draw or write anything you want and have that lovely embossed effect.

Skill: Intermediate

Time: 15 minutes

Supplies Used

Imagine:

• Mboss Powder in Gold

• Delicata Ink in Pink Shimmer

• On Point Glue

Other Products Used

• Spellbinders Congrats Die

• Hammermill 100lb white card stock (card base)

Easy Easter Egg Holders for Sweet Easter Displays

By Nancy May

Hey y’all.  I am going to share how you can create simple Easter egg holder rings that you can use to create an Easter display to match your style, your décor, etc. The sky is the limit! Let get to it!

~Nancy

==============

Skill: Beginner (but adaptable to more advanced learners)

Time: 30-ish minutes

Art Supplies

Imagine

• VersaFine Clair Ink Pad: Nocturn, Shady Lane, Verdant

• VersaColor Dew Drops: Magic Black, Tea Leaves

• Brilliance Dew Drop: Pearlescent Orchid

• On-Point Glue

Other

•  Simon Says Stamp – Clear Stamps – Tim Holtz/Stampers Anonymous Hipster Bunny 

• Whimsy Stamps – Dies – Grass and Cloud Edger Dies 

• Whimsy Stamps – Supplies – Large Blender Brush

• Lavinia Stamps – Stencils – White Orbs

• Scrapbook.com – Supplies – Reverse Tweezers

Let’s Make a Thank You Card

By

By Kathi Rerek

– Greetings! It’s Kathi here. In today’s tutorial, I am going to show you how to create a shimmery Thank You card using multiple Brilliance Ink colors.

Skill: Beginner to Intermediate

Time: 1.5 hours

Directions:

Step 1: 

Cut a piece of Mixed Media paper to 4” x 5.25”. Using a Sponge Dauber, apply Sky Blue Pearlescent Brilliance Ink to half of the panel. Use another Sponge Dauber to apply Orchid Pearlescent Brilliance ink to the other side. Blend the two colors of ink in the center. 

Repeat this step with a second piece of paper. Set this piece aside to be used later.

Step 2:

Spray Isopropyl Alcohol onto ink blended paper panel and let sit for a minute. The alcohol will lighten, blend, and add white speckles to the paper. Heat set.

Step 3:

Use Removable Scotch Tape to tape the background panel to the back of the Mosaic Stencil, then use an Ink Sweeper to apply Moonlight White Brilliance ink over the stencil onto panel.

Step 4:

Remove the tape and the stencil. Heat set.

Step 5: 

Use three flower dies from the Wildflowers 1 Thinlits Die Set to cut Mixed Media Paper.

Step 6: 

Use Sponge Daubers to apply Pearlescent Purple, Pearlescent Ice Blue, and Pearlescent Lavender to the flowers. Use Fantastix Brush applicators to detail the flowers with Mediterranean Blue Brilliance, Pearlescent Sky Blue Brilliance, Grape Jelly Memento inks. Color the flower stems and leaves with Pearlescent Thyme Brilliance and Cottage Ivy Memento inks.

Step 7:

Use the Belly Band and “thanks” dies to cut the extra panel of paper created in Step 1.

Step 8:

Adhere the flower die-cuts to the stenciled panel. Adhere the Belly Band die-cut over the flower stems. Adhere the “thanks” die-cut to the center ornament of the Belly Band.

Step 9:

Cut a piece of white cardstock in half. Score and fold to form an A2 card. Put a piece of scrap paper inside the card, then use a Sponge Dauber to apply Purple Brilliance ink around the edges of the front of the card. Heat set.

Step 10:
Use Tear It! Tape to adhere the image panel to the card.

Art Supplies:

Imagine:

• Brilliance:

– Pearlescent Sky Blue

– Pearlescent Orchid

– Moonlight White

– Pearlescent Purple

– Pearlescent Ice Blue

– Pearlescent Thyme

• Fantastix Brush Tip

• Memento Ink

– Grape Jelly

– Cottage Ivy

• Sponge Dauber

• Ink Sweeper

• Tear It! Tape

Other:

• Mixed Media Paper by Strathmore

• Solar White Classic Crest Cardstock by Neenah

• Mosaic #54 Stencil by AALL and Create

• Wildflowers 1 Thinlits Flower Dies by Tim Holtz for Sizzix

• Belly Band Die by Frantic Stamper

• “Thanks” die: Source Unknown

• Removable Scotch Tape by 3M

• 91% Isopropyl Alchohol

• Heat Tool

• Big Shot by Sizzix

Let’s Make Two Fun Plaid Backgrounds for Spring Cards

By Nancy May

Hey y’all. We are going to make two very different fun, bright Spring plaid backgrounds. One is very controlled, precise, and clean, stamped in VersaFine Clair inks with a fun color gradient; the other is much looser and more organic, hand painted with VersaColor inks for a more painterly look.

~Nancy

Skill: Beginner, Intermediate

Time: 30 -60 minutes

Art Supplies:

Imagine 

• VersaFine Clair Ink Pad: Charming Pink, Cheerful, Summertime and Verdant

• VersaColor Dew Drop: Mango Madness, Pink Grapefruit, Red Magic and Tea Leaves

• Memento Ink Pad – Tuxedo Black

• Tear It! Tape

• Craft Mat

• On-Point Glue

Other 

• Simon Says Stamp – clear Stamps – Spring Gnomes

• PinkFresh Studio – Cling Stamp – Diamond Plaid

• Creek Bank Creations – Dies – Stitched Rectangle

• Creek Bank Creations – Dies – Stitched Hearts

Floral Birthday Card Using Fireworks!

By LV Handcrafted

Hello friends! This is Linh (or LV Handcrafted on all the socials). Today I’m playing with Fireworks! I start off by using what would normally be used to create a shaped 3D flower and I cut it out of a scrap piece of cardstock to use as a stencil.  I lined that over black cardstock and sprayed the Grape Jelly Fireworks! Then I rotated the flower stencil to offset the petals. I sprayed the Lulu Lavendar Fireworks! And without shifting the stencil, I sprayed a bit of the Lilac Posies.  What’s fabulous about these Fireworks! sprays is they are opaque and as you can see are gorgeous even on black cardstock. They have a beautiful shimmer and shine!

Skill: Intermediate

Time: 25 minutes

Supplies Used

Imagine:

• Fireworks! Juicy Purples

• On Point Glue

Other Products Used:

• Spellbinders Glimmer Sentiment

• Spellbinders Gerber Daisy Die

• Nuvo Drops – Silver

• Astrobright 80lb Black Cardstock

• Hammermill 100lb white card stock (card base)

Get Messy With Embossing – St. Patty’s Day Card

By LV Handcrafted –

Hello friends! This is Linh (or LV Handcrafted on all the socials). I’ve made this St. Patrick’s Day card featuring some messy embossing techniques. Embossing powders aren’t just for stamped images. They are fun for creating a distressed, mixed media effect as well! 

Here I’ve swiped clear VersaMark ink on the border of black cardstock and embossed with gold. In my video, you’ll also see me use gum arabic and water to create a splatter effect and emboss with gold as well. (There’s some beautiful gold splatter beneath the leprechaun).

Skill: Advance

Time: 45 minutes

Supplies Used:

Imagine:

• VersaColor Green Tea

• VersaMark

• StazOn

• Mboss Gold Powder

Other Products Used

• Creative Crafts Double Gatefold Die Set

• Creative Crafts Nested Oval Dies

• Tonic Studios Handmade Cotton Paper

• Astrobright 80lb Black Cardstock

• Artful Angel Leaping Leprechaun Stamp Set

• Hammermill 100lb white card stock (card base)

• Ohuhu Alcohol Markers