By Kathy Pisupati –
creating art for Imagine Crafts! Today I have a new tutorial for you. This is an OLD technique it is still fun, but messy! What do you need? A fabulous VersaColor Ink and some painter’s tape or any masking tape!
Skill Level: Intermediate
Time to complete: 1 hour
Step 1
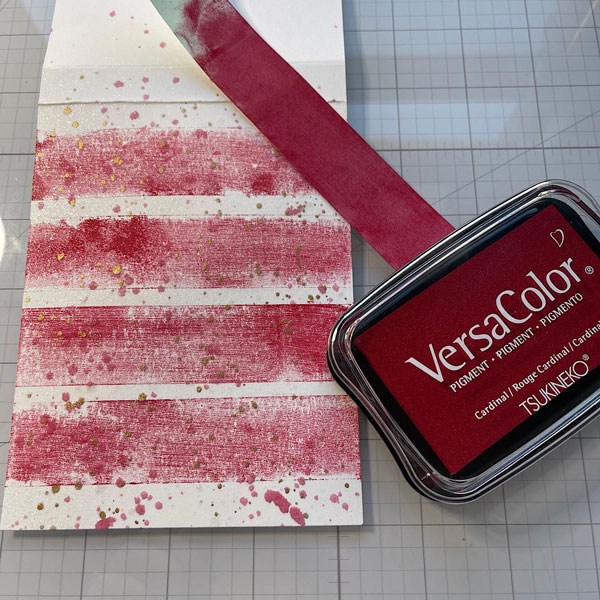
You will need a top-folding card base measuring 4 1/4 x 5 1/2“. You will also need another white panel measuring 3.75” x 5”. Grab your masking tape and a VersaColor ink. I used Cardinal. At this point you can put on some gloves if you want but I didn’t. I swiped the ink across a 5”piece of tap. I then laid the tape across the white card stock panel, put a piece of copy paper over it and pressed. I repeated this stripe 4 times. I like the texture of the stripe.
Step 2
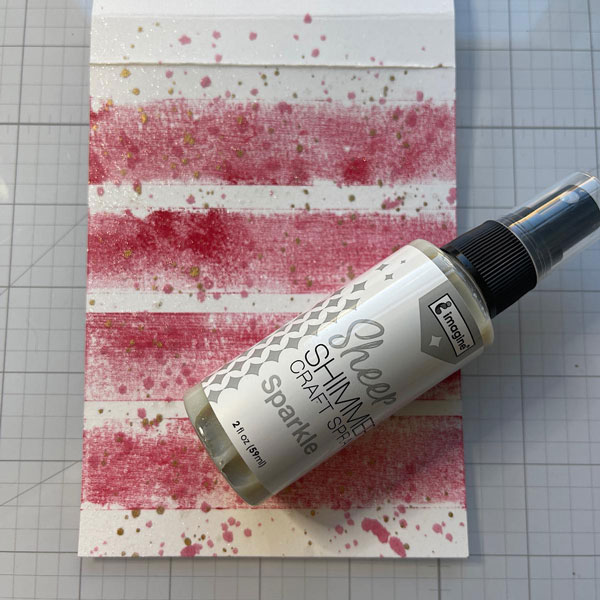
Next I smushed some of the Cardinal ink on my glass mat, added water and with a paint brush I splattered the panel. I did the same with some gold water color paint. Finally, I spritzed the Sheer Shimmer Craft Spray in Sparkle all over the panel. Can you see the shimmer? It is pretty!
Step 3
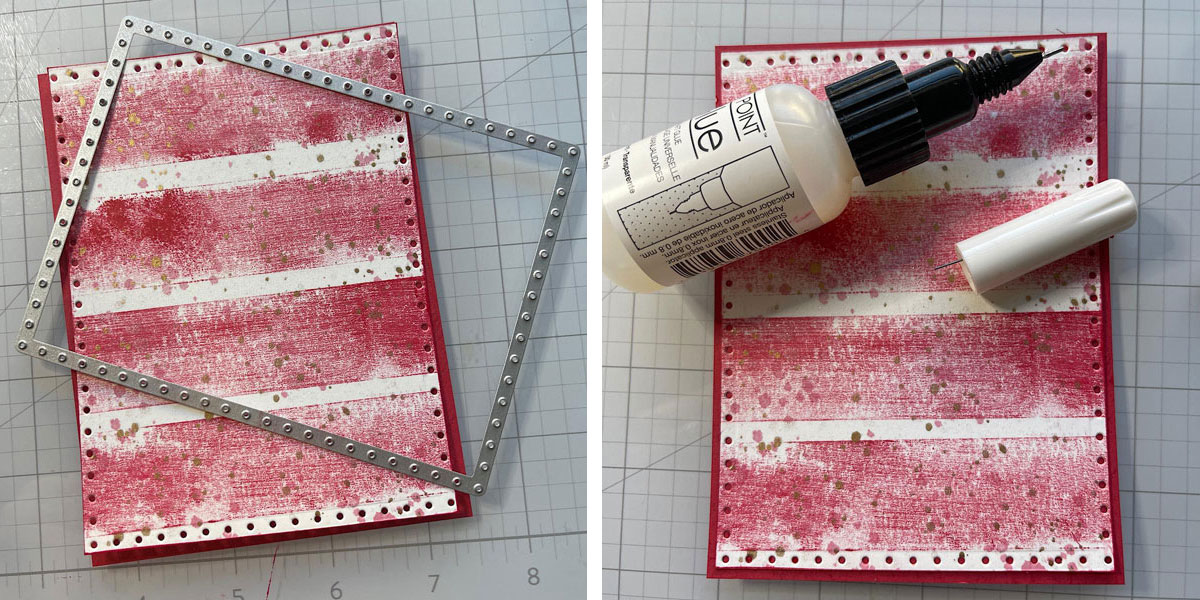
Next, I cut the panel with a die and added a piece of red stock to the back. The red card stock is 1/4’’ larger than the striped panel. Adhere with some On Point liquid glue.
Step 4
Now cut a hole from the panel and the red card stock you used for the frame.
Step 5
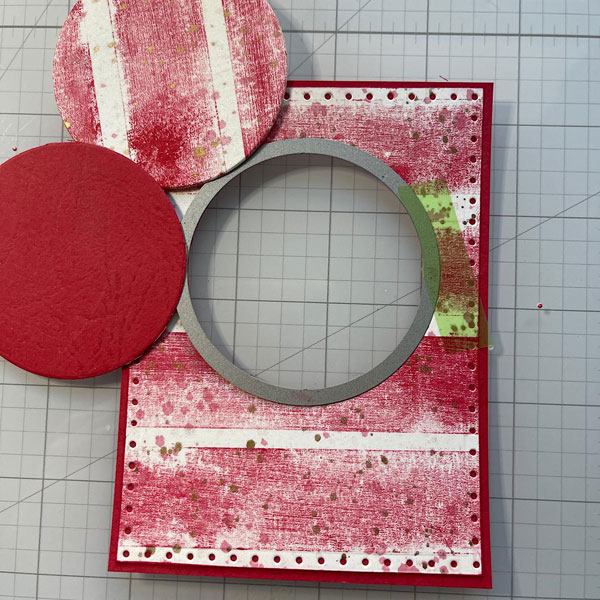
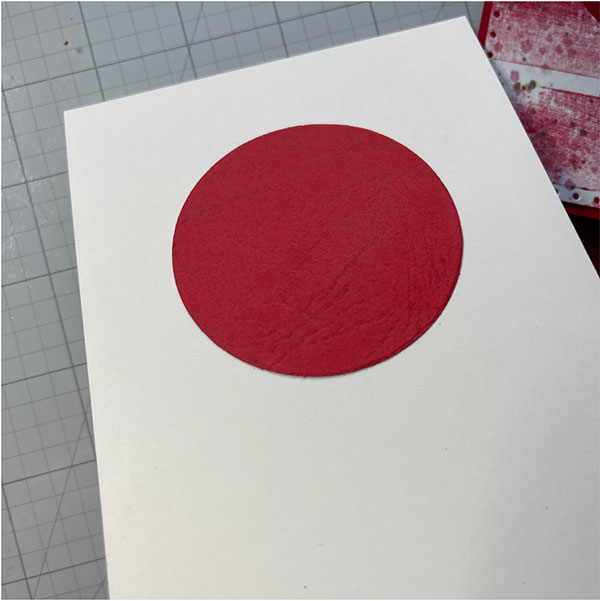
Cut a panel of white card stock slightly smaller than your main panel. Add liquid glue to the back of the red circle. Use your main panel as a guide, place over the white panel and press your circle into place.
Step 6
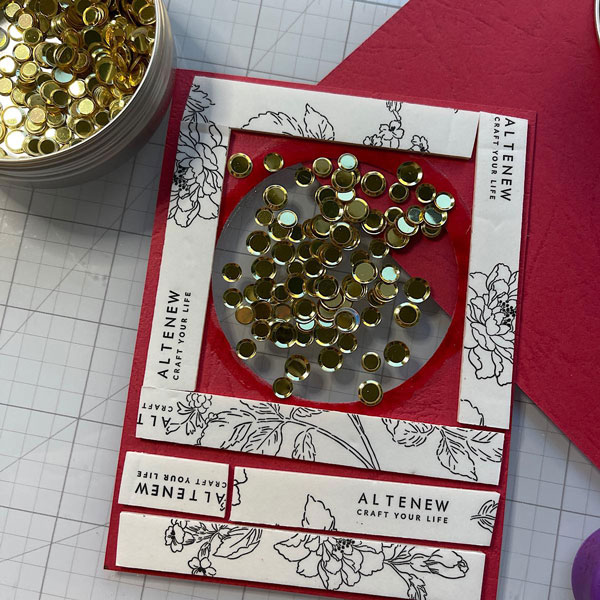
Cut a slightly larger circle from acetate or old packing and glue to the back of the main panel. Add foam tape all around and add flat embellishments to the center. I used gold confetti from Kat Scrappiness.
Step 7
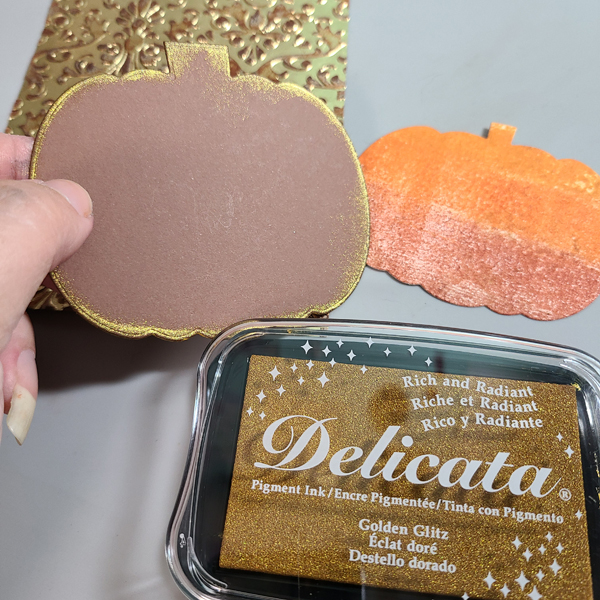
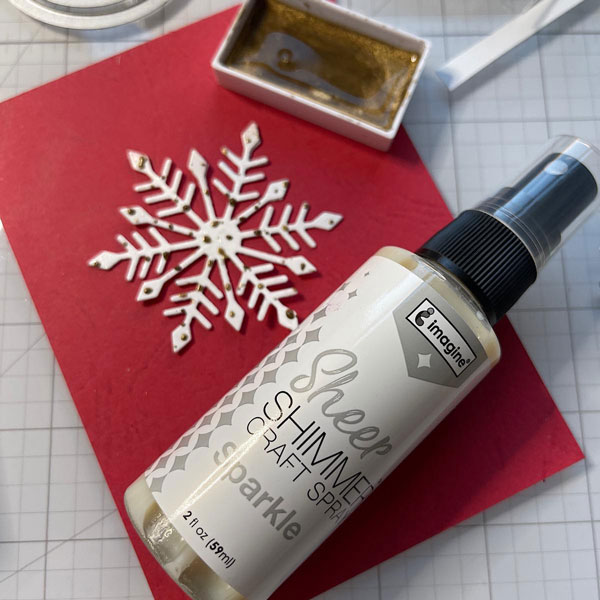
Die-cut a few of the medium sized snowflakes from the Kat Scrappiness Snowflake Trio and glue together. Then I used the Sheer Shimmer Craft Spray and spritzed the snowflake. I also splattered it with gold water color paint. It was still a bit too white so I pressed the snowflake into my Delicata Golden Glitz ink pad.
Step 8
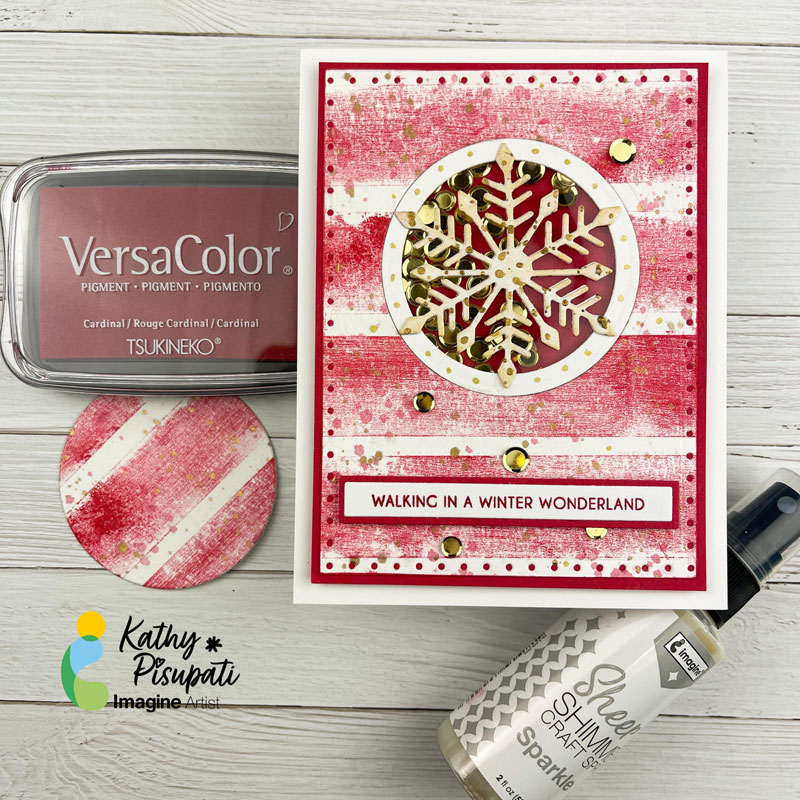
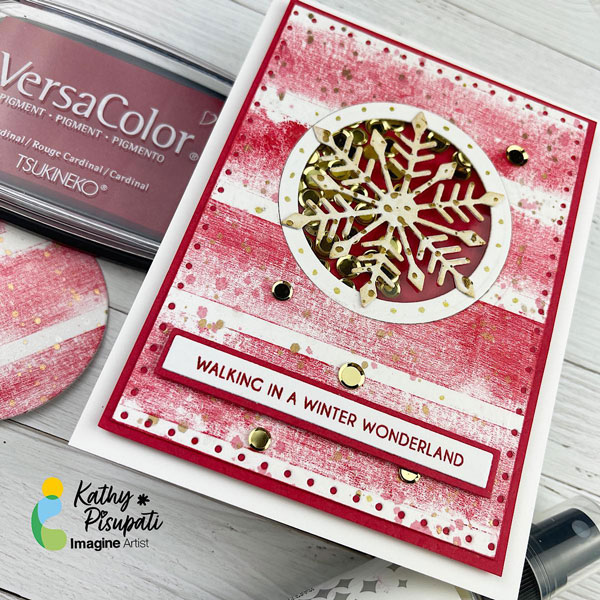
Cut a circle frame using the die you used for the front panel and a slightly smaller one. Glue this inside the cut out on top of the acetate. Adhere the snowflake on top of the acetate and allow to dry. Add a sentiment, I used the Christmas Stack Sentiment from LDRS Creative with the Sentiment Stack Shadow. I glued these together and then popped it up with foam tape. I also added a few of the gold confetti around the outside of the card and some dots to the frame with a gold gel pen. I added foam tape to the back of the panel and adhered to an A2 top-folding, white card base.
I hope you enjoy this card and the tutorial. Thanks for stopping by.
SUPPLIES
Imagine Crafts
• Sheer Shimmer Craft Spray SPARKLE
Other
• Kat Scrappiness Snowflake Trio
• Circle Dies
• LDRS Creative Christmas Sentiment Stack Stamp
• LDRS Creative Sentiment Stack Die
• LDRS Creative Shadow Stack and Die
• Essentials Rectangles for Stitching by Ellen Hutson
• Kat Scrappiness Round Gold Confetti
• Gold Gel Pen
• Gold Watercolor Paint
• Paint brush
• Spellbinders Platinum 6 Die-Cutting machine
• Colored card stock
• Neenah Classic Crest Solar White 110lb
• Paper Trimmer
• Teflon bone folder
• Foam Tape