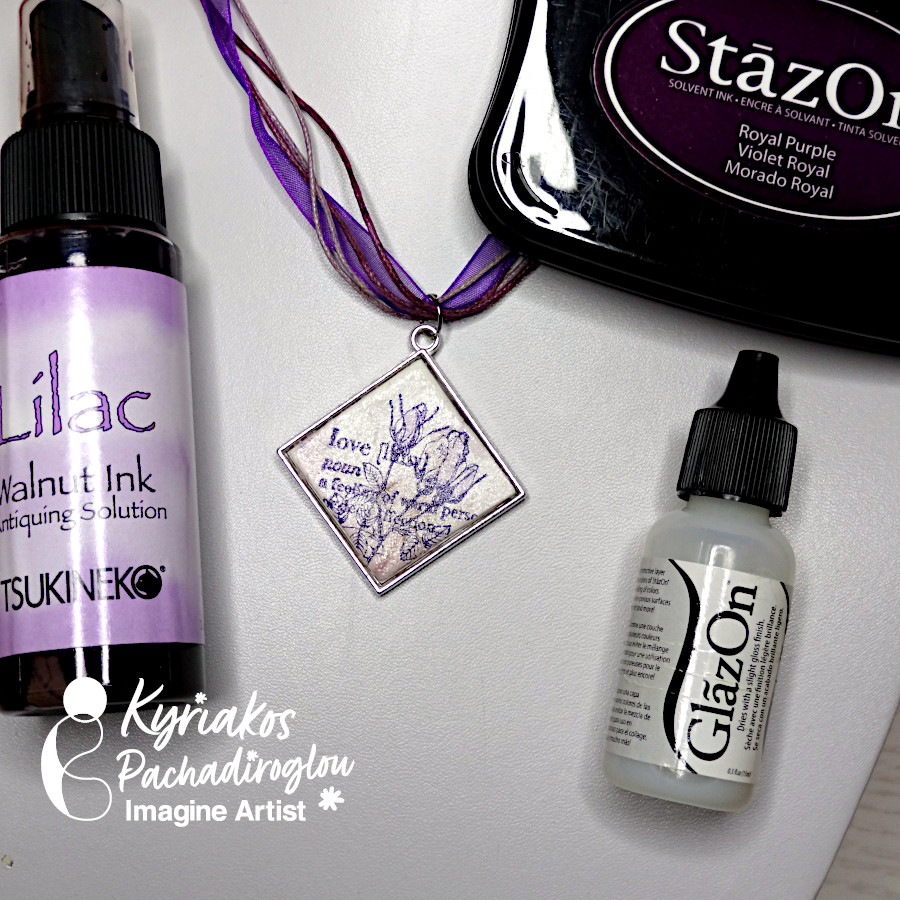
By Kyriakos Pachadiroglou
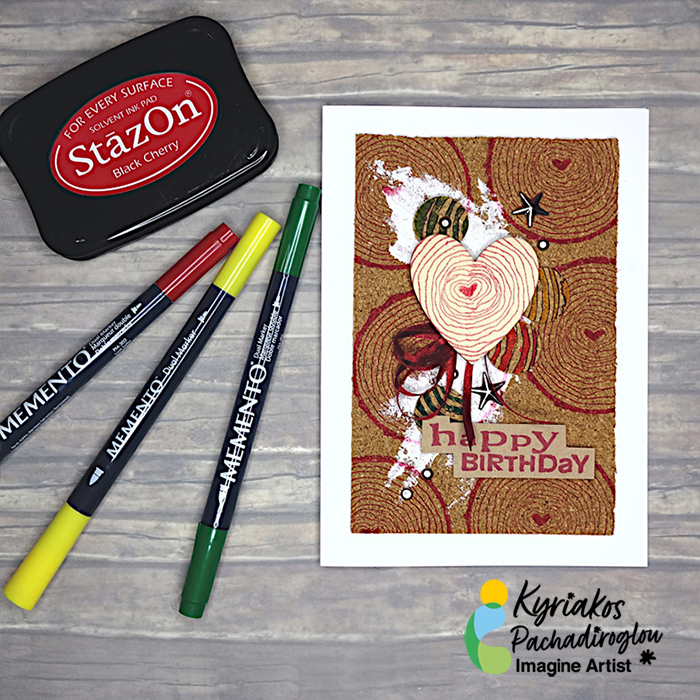
– Use a piece of cork sheet as a base to stamp with StazOn inks and color with MEMENTO markers to create a Birthday greeting card. Add cork round shapes and a wooden heart to embellish the card.
Skill: Beginner
Time: 30 Minutes
Directions:
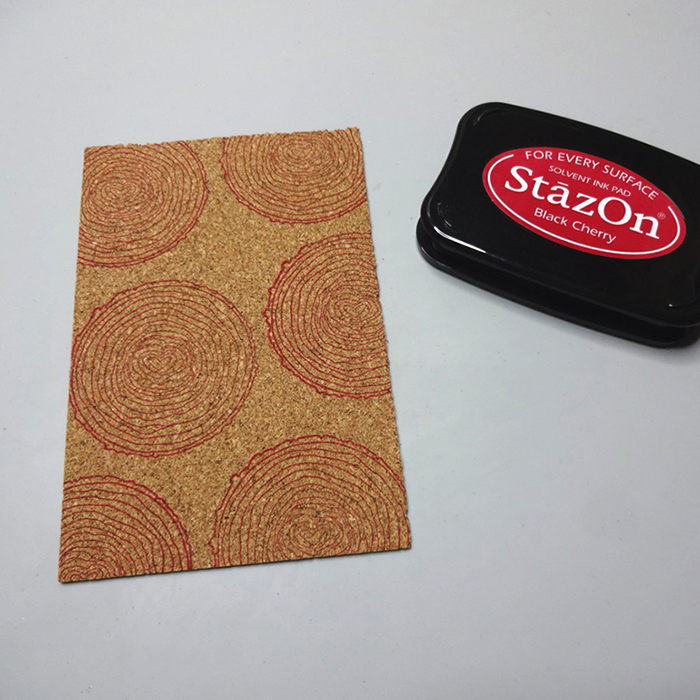
Step 1
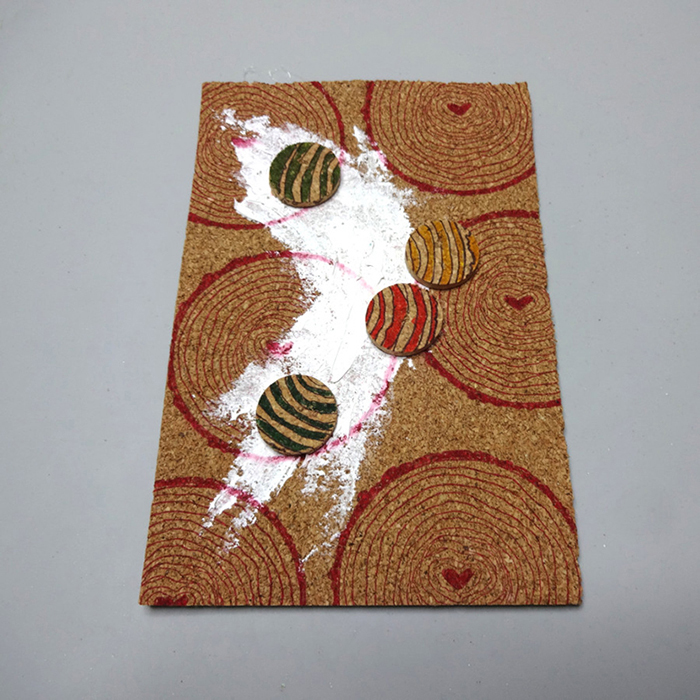
Cut a 4x5in piece of the cork sheet. Stamp with the wood slice stamp and the StazOn Black Cherry to cover the surface.
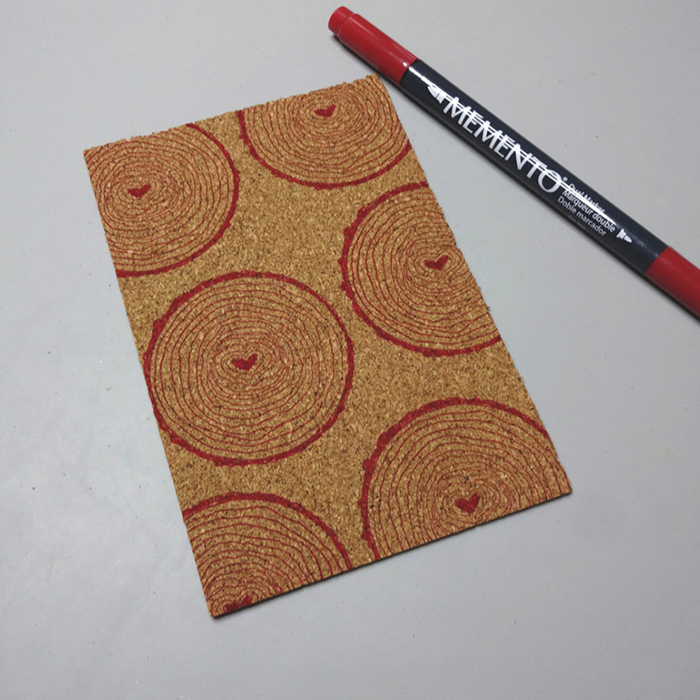
Step 2
Color the heart in the center of the stamp design with the MEMENTO Love Letter marker.
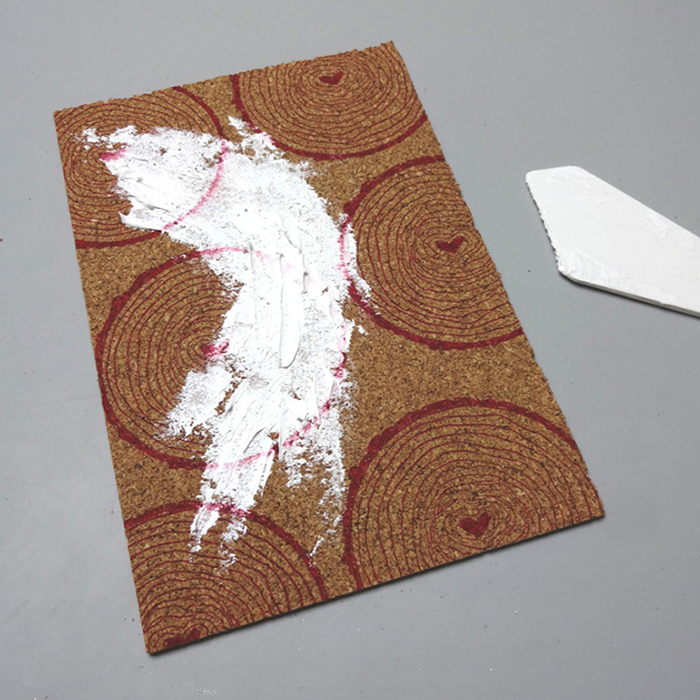
Step 3
Use a palette knife to spread some structure paste and let it set.
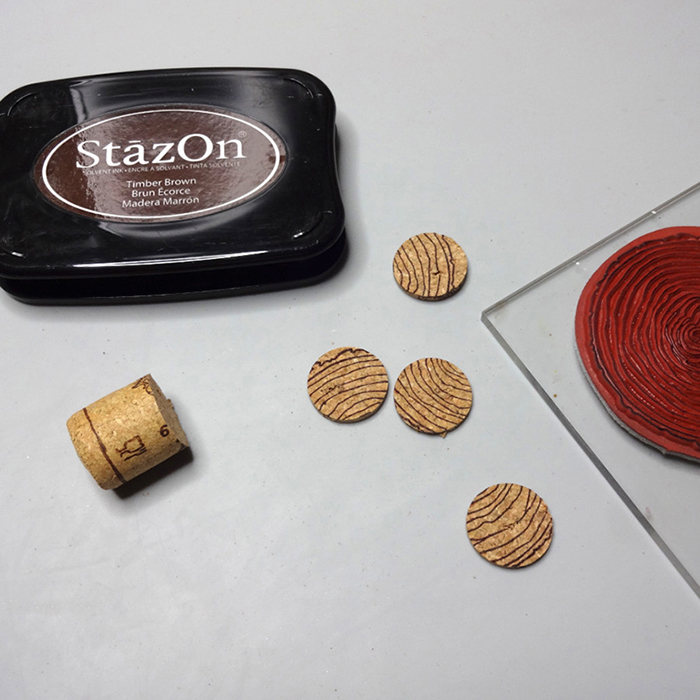
Step 4
Cut thin slices of the wine cork and stamp them with the wood slice stamp and the StazOn Timber Brown ink pad.
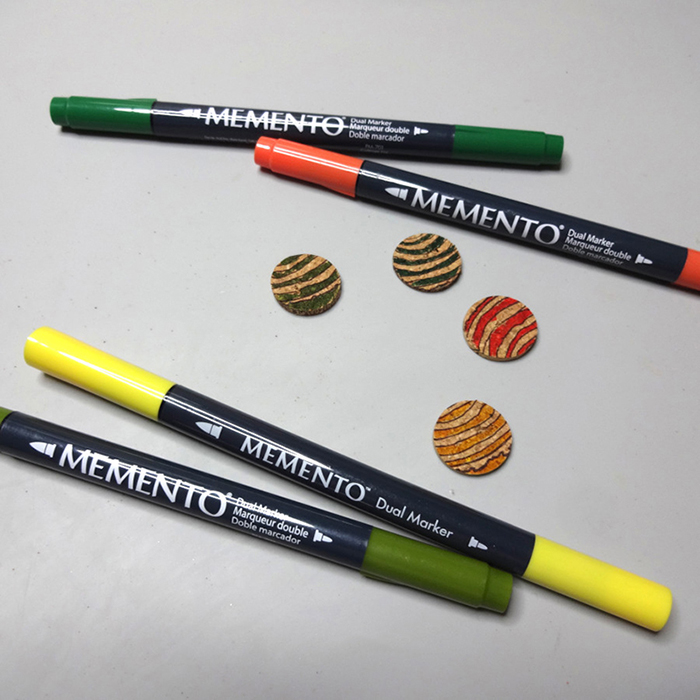
Step 5
Color the lines of the stamped cork slices with the MEMENTO markers
Step 6
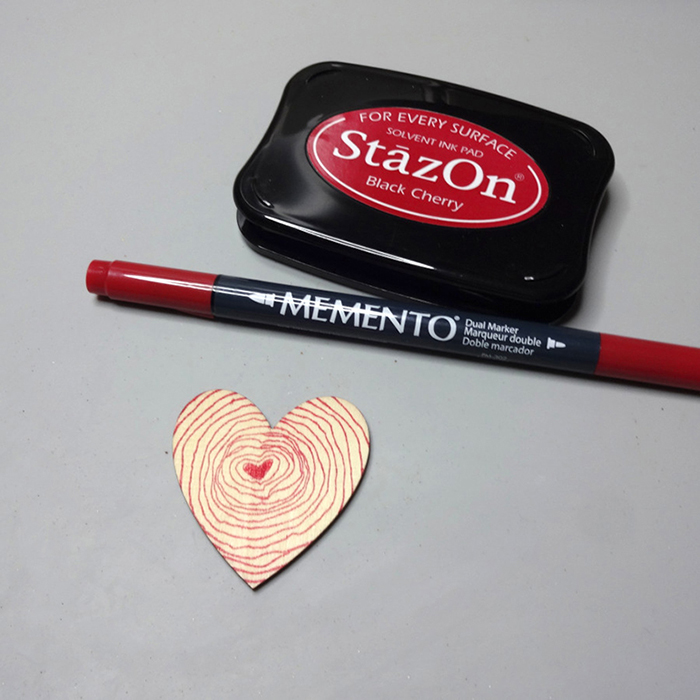
Stamp and color the wooden heart with the StazOn Black Cherry ink pad and the MEMENTO Love Letter marker.
Step 7
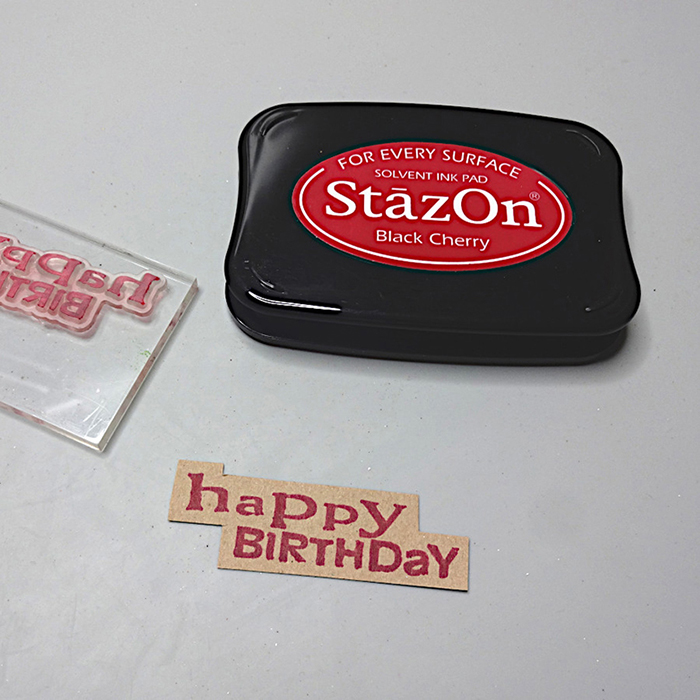
Stamp with the StazOn BlackCherry ink pad the happy birthday stamp and cut around.
Step 8
Glue the colored cork slices on the card first to work as a base for the wooden heart.
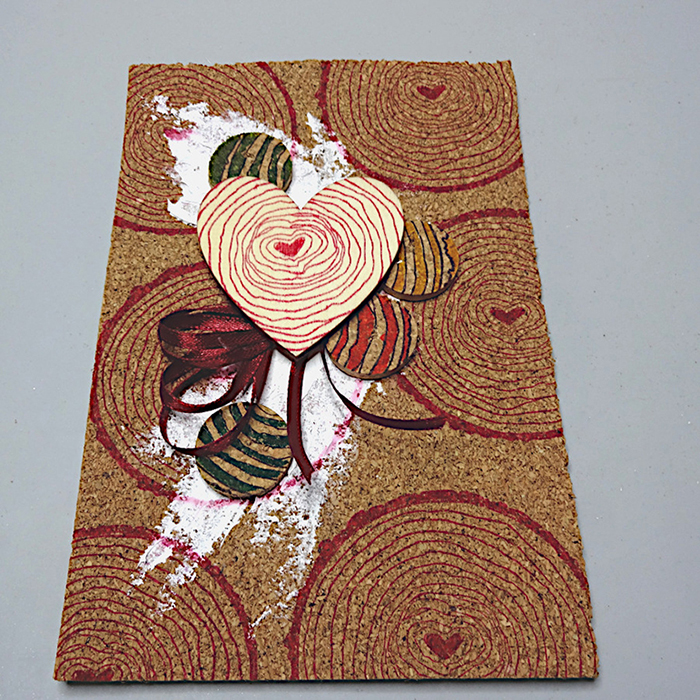
Step 9
Continue by adding the rest of the embellishments.
Art Supplies:
Imagine
StazOn – Timber Brown, Black Cherry
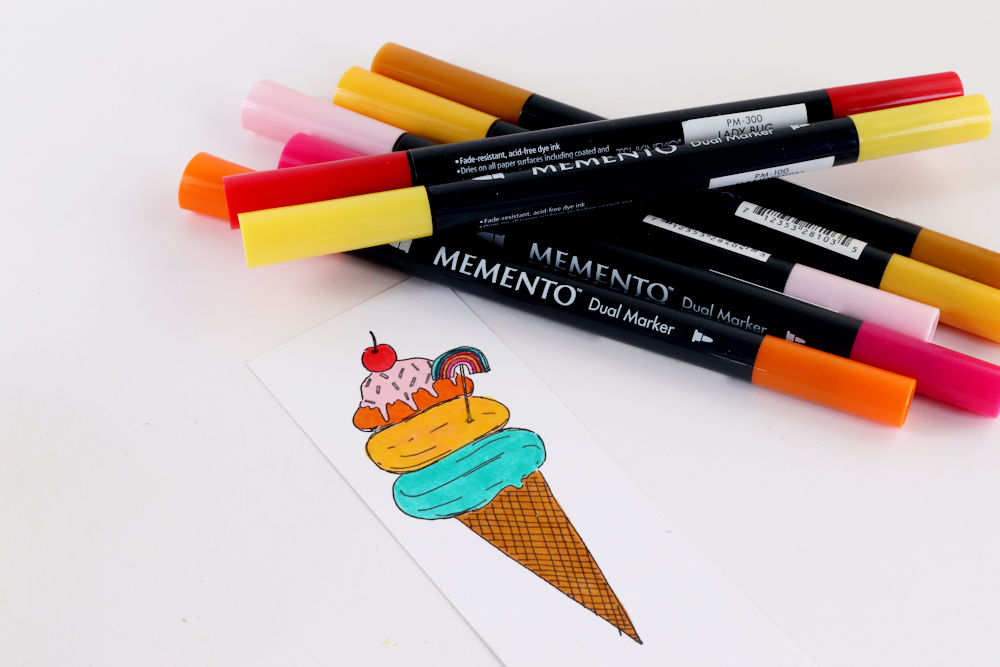
MEMENTO Markers – Love letter, Dandelion, Cottage Ivy, Pine
Other
Card base
Cork sheet
Wine cork
Wooden heart shape
Structure paste
Crackerbox and Suzy stamps – wood slice
Happy birthday stamp