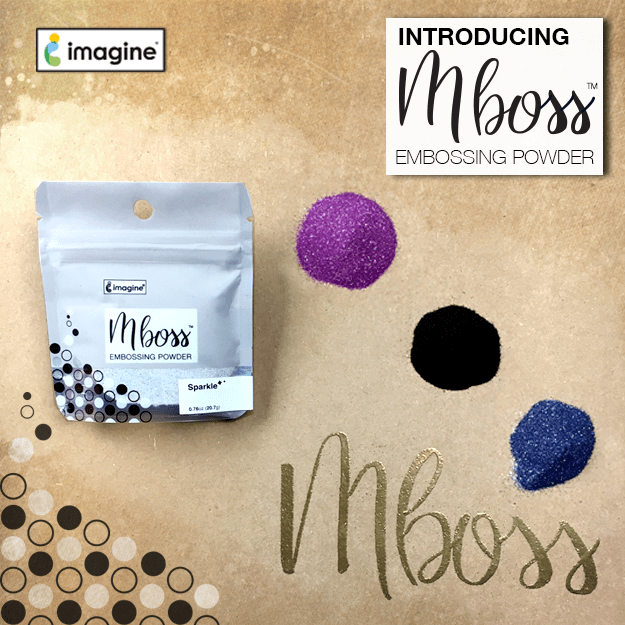
Introducing Mboss Embossing Powder
Mboss is high-quality embossing powder available in new and revolutionary packaging that will make using it a breeze. Mboss embossing powder is great for sentiments and large area coverage. The large color range includes classic primary, metallic, pearlescent, and super fun glittery combinations. We had the crafter in mind with a unique selection of holiday and seasonally focused colors. The new packaging is very functional with a wide mouth for easy powder return.

Clear 013, Clear Matte 014, White 015, Black 016, Gold 017, Copper 018, Silver 019, Champagne 020, Red 021, Orange 022, Yellow 023, Green 024, Blue 025, Violet 026, Rose Gold 027, Metallic Berry 028, Metallic Orchid 029, Emerald 030, Icy Blue 031, Sapphire 032, Amethyst 033, Jade Pearl 034, Amber Pearl 035, Indigo Pearl 036, Gold Glitter 037, New Years Eve 038, Sparkling Champagne 040, Valentine 041, Lucky Stars 042, Sparkle 043, Black Hologram 044, Hologram 045, Birthday Party 046, Princess Party 050, Blue Icicle 047, Iridescent 048, Iridescent Opaque 049, Shimmering Night Sky 051
High quality all-purpose embossing powder
• Available in a wide range of colors with a holiday & seasonal focus for card makers
• Wide-mouthed resealable bag makes it easy to use and store at home
• Large color range includes classic primary, metallic, pearlescent, and glittery combinations


Check out our website to buy or learn more about Mboss.