The sparkle of the Delicata ink on the patterned paper background helps to make the Rinea foiled paper die-cut pieces really pop off the card! See how I make this purple elephant themed card.
Create a beautiful dimensional Moon and Stars home decor element using resin embellishments and Fireworks Shimmery Craft Spray. Combine warm rich colors to compliment your yellow and the end result is simply stunning. A quick and easy project with lots of colors showcasing the amazing shimmer and shine by using Fireworks.
Add stenciling to a piece of wood using texture paste and leave to dry. Adhere resin elements to the block over the stenciling and leave to dry.
Step 2
Paint the entire block with the dimensional elements on using black gesso. Make sure you cover all the pieces and the sides too. Leave to dry.
Step 3
Use 3 to 4 colors of Fireworks Shimmery Craft Spray and mist over the entire design. Layer the colors over each other. Use a heat gun to dry layers in between and then add more color until you are happy with the look.
Step 4
Once the colored layers are dry, give it one last misting of Sheer Shimmer Spray in Sparkle for extra shine. I also added some Delicata Gold inker and rubbed it over the resin elements with a sponge to highlight the details and dimension.
Create a wonderful mixed media “Best Wishes” card that is full of texture, layers, and dimension. Start with a stenciled layer using Creative Medium, add a lace focal point and finish it up with a saying strip mounted with dimensional tape.
Skill: Advanced Time: 1 hour
Directions
Step 1
Apply VersaMagic inks to the Craft Mat, spray with water, and lay cardstock into the wet ink. Trim to size.
Step 2
Mix White Neon Amplify with Iridescent Creative Medium and apply over the stencil using a palette knife. Allow to fully dry.
Step 3
Cut out a rose from a panel of lace and then apply various VersaMagic ink colors to the rose with a Brushstix.
Step 4
Spray lace rose with Shimmer Sheer Craft Spray and allow to dry.
Step 5
Once dry, apply VersaMagic ink in Cloud White to lace rose with Brushstix if you want to soften any of the tones.
Step 6
On a scrap strip of paper trimmed from panel in Step 1, stamp with a script stamp.
Step 7
On the same strip of paper, stamp flower image. Here I used VersaMagic in Mango Madness.
Step 8
Add ink splatters from VersaMagic Ink in Pink Grapefruit by rubbing ink directly to the craft mat and spraying with water. Pick up with a brush and flick onto the card.
Step 9
Edge all elements with VersaMagic in Pink Grapefruit.
Step 10
Stamp script pattern randomly onto the panel.
Step 11
Adhere lace rose to stenciled panel with On Point Glue.
Step 12
Adhere paper strip saying onto the card panel and then highlight rose with irRESISTible Pico Embellisher.
See how I use a simple masking technique and water coloring to create a cute and simple woodland creatures card. This stamping and coloring tutorial is a perfect activity for a Sunday afternoon of paper crafting and art-making. Enjoy!
“In geometry, a cube is a three-dimensional solid object”, according to Wikipedia, and that’s exactly what I was aiming for in creating a unique jewelry piece. The perfectly flat and square Sheet metal pieces were the best option to build a cube that would make a modern, out of the ordinary, piece of jewelry. The shiny surface of the Sheet metal was slightly moderated by pressing the metal pieces on the StazOn Pigment ink pad surface that gave a patterned result. Adding stamped designs using VersaMark and black Mboss embossing powder to the sides of the cube created a lovely contrast between the silver, white and black colors in the piece.
Skill: Intermediate Time: 1.5 hours
Directions
Step 1
Press the Sheet Metal shapes on the StazOn Pigment Inkpad in Snowflake and remove carefully to avoid sliding on the surface. Let them dry (it really doesn’t take long).
Step 2
Align the Sheet Metal shapes on a stamping platform with the butterfly stamp. Make sure the corners with holes meet. Cover with the VersaMark Watermark inkpad and press.
Step 3
Cover with the Mboss Embossing Powder in Black and heat set. Let cool before touching.
Step 4
Align the metal pieces with the stamped side downwards and apply hot glue on the joint edges. Quickly fold to create an L shape.
Step 5
Continue adding metal pieces by gluing on the un-decorated side of them. There should be corners with 3 holes lined up together on opposing corners of the cube.
Step 6
Cut 16 inches long pieces of the cord and pass them through the holes.
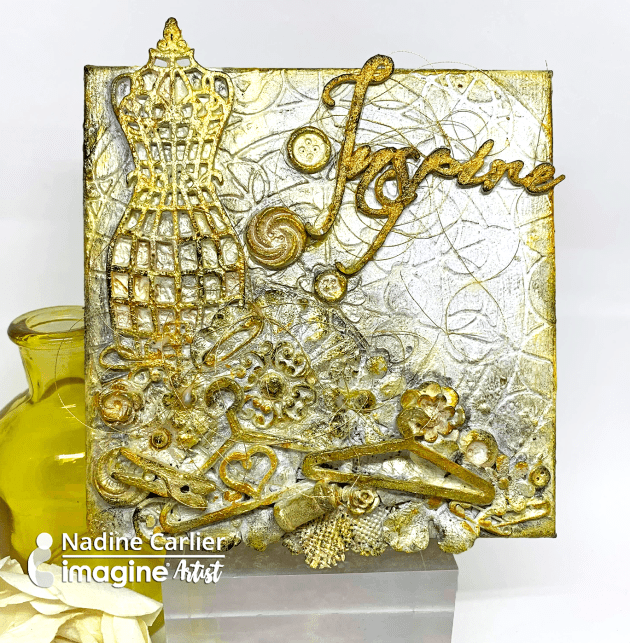
Imagine has so much more than just inks! They have lots of mixed media products too. I used several of them to create my mixed media canvas.
Watch my video below to see how I did it. Enjoy!