Let’s Make an Autumn Card 

Annie_Collins_Autumn_600x600

By Annie Collins

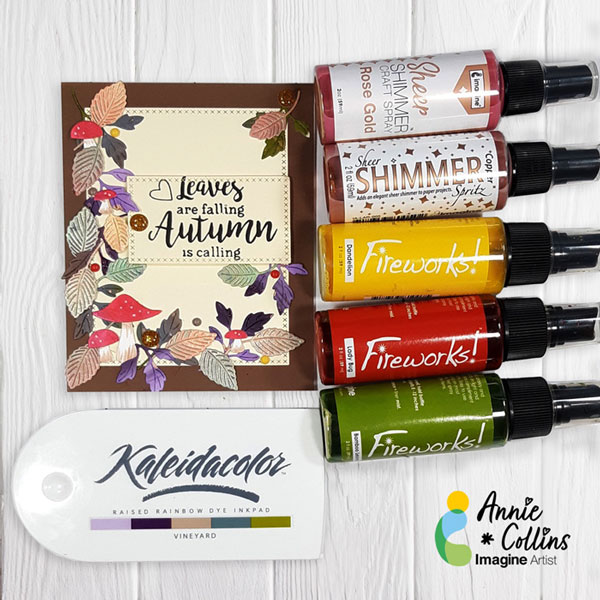
Hello Crafty Friends – Annie here with a fall card featuring a variety of Imagine Crafts products.

Skill Level: Beginner to Intermediate

Time to Complete: 30-40 Minutes depending on dry time

Art Supplies:

Imagine:

• Sheer Shimmer Craft Spray: Copper & Rose Gold

• Fireworks! Shimmer Craft Spray: Cottage Ivy, Dandelion, Ladybug, Paris Dust, & Rose Bud

• KaleidaColor Ink: Vineyard

• Memento Markers: Desert Sand

• VersaFine Ink: Onyx Black

• Tear It! Tape

• On Point Glue

• Imagine Craft Mat

Other products:

• PoppyStamps: Orchard Leaves Dies

• PoppyStamps: Mushroom & Toadstools Dies

• Lawn Fawn Cross-Stitch Rectangle Dies

• Sakura Gelly Roll Pen: White # 10

• Recollection Brand 110# Cardstock: White & Brown

• Recollections Brand 65# Cardstock: Cream

• Echo Park Enamel Dots

Create a Watercolor Sunflower Card using Stencils and Fireworks! Shimmery Craft Spray

2022-Aug-WatercolorFireworksSunflowers-600

By Neva Cole 

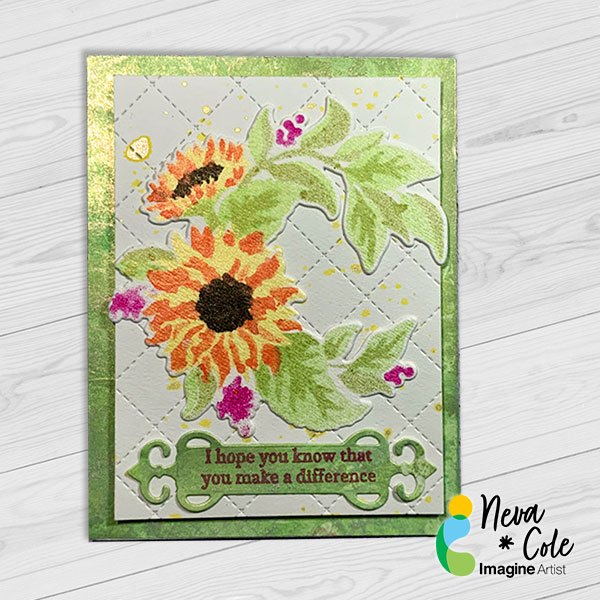
In today’s tutorial, I will share how I used layering sunflower stencils to create a water color look to my image.  Notice there is no stamp outline, that helps achieve a more organic look to the project.  I learned a few things along the way, and almost want to include a few blooper photos!  Instead I share the way that will give you the cleanest look avoiding the pit falls!

Skill: Beginner

Time: 2 Hours

Directions:

2022-Aug-WatercolorFireworksSunflowers-Step1

Step 1:

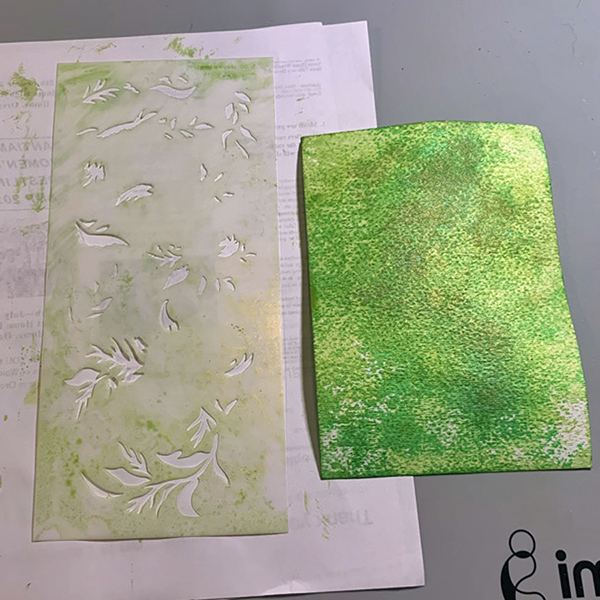
Trim white watercolor cardstock to 4 1/4” x 9 1/4”,  or about 1/4” on each side larger than your stencil.  this will allow you to handle your project more cleanly.  Use reposition able painters tape or washi tape to secure stencil along left side with edges matching along the upper and left hand side.  Spritz with Fireworks! in New Sprout until color depth desired is achieved.  In this close up photo freezer paper is used underneath the stencil and paper with the plasticized side up.  This allows collection of the over spray for background papers.  Carefully lift stencil to keep excess Fireworks from leaking under the stencil and adding unwanted color.

2022-Aug-WatercolorFireworksSunflowers-Step2
Step 2:

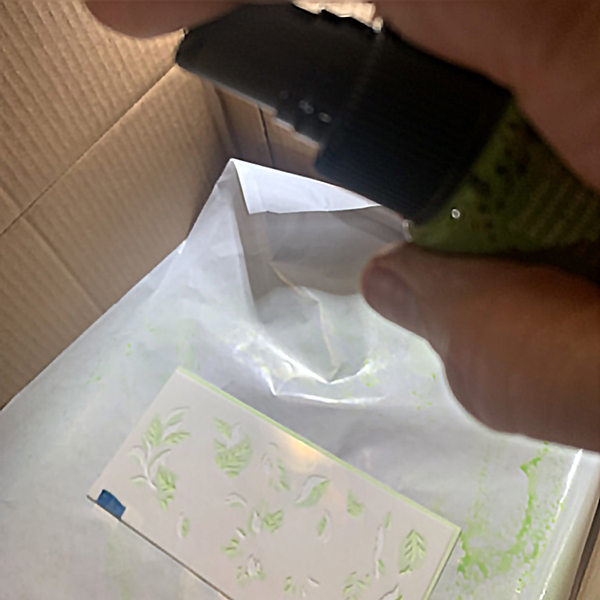
Secure next layer of layering stencil in place and spritz with Fireworks! Shimmery Craft Spray in Bamboo Leaves.  This photo shows a spray box that protects your work area from over spray.  It also shows the best distance of 12” to 18” to spray the stencil to avoid large droplets of Fireworks!. 

2022-Aug-WatercolorFireworksSunflowers-Step3

Step 3:

Clean stencils with sections of watercolor paper after each layer.  Move the watercolor paper around on the freezer wrap to pick up excess spray.  Keep color families together, as both colors of green are used on this background paper.  Clean up excess with paper towels or baby wipes. 

2022-Aug-WatercolorFireworksSunflowers-Step4
Step 4:

Continue with additional layering stencils.
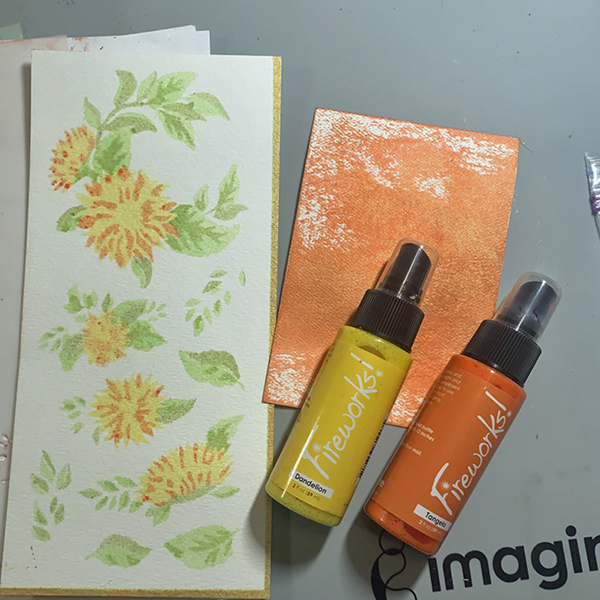
Here Dandelion is used for Stencil 3, and Tangelo for Stencil 4. 

2022-Aug-WatercolorFireworksSunflowers-Step5
Step 5:

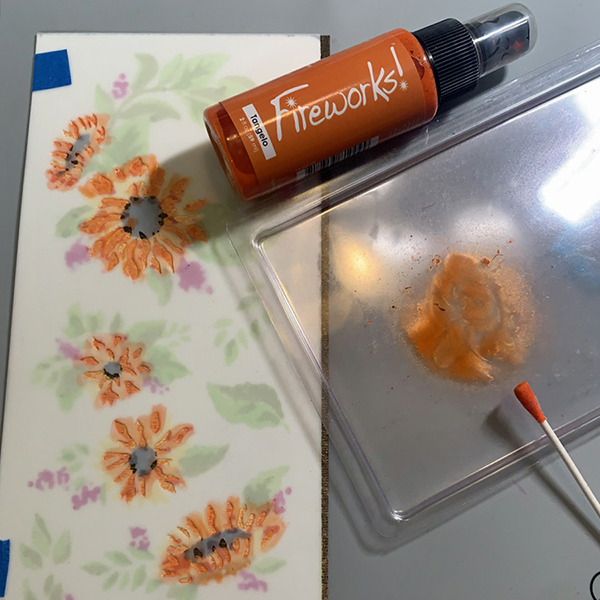
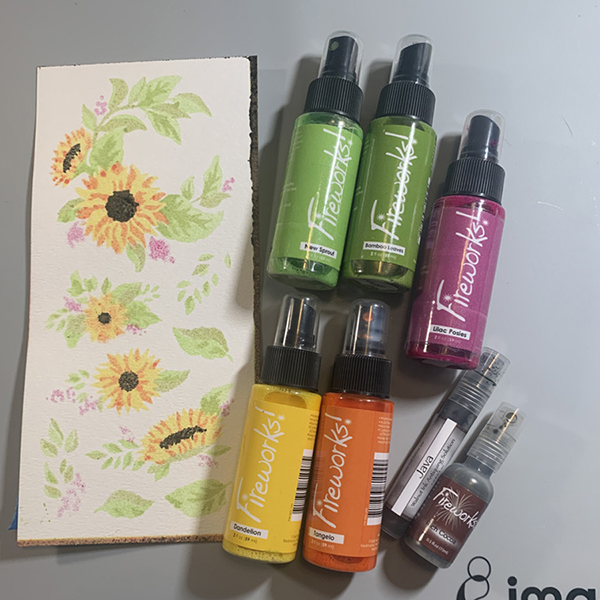
Sometimes as a designer you discover easier methods in the process of designing a project.  I was not satisfied with the color through the stencil by just spraying with the stencils that were smaller openings.  It is recommended to use this method for the rest of the layers.  Fireworks! in Tangelo is shown here sprayed on a plastic sheet.  Using a cotton swab the color is carefully dabbed through the stencil to give better color depth.  A cotton swab also prevents leakage underneath the stencil of excess color.  A lot less of the spray was used with this method!  Stencils 5 and 6 used this method to complete the look.  Stencil 5 used Fireworks! in Lilac Posies, and Stencil 6 a mixture of Fireworks! Rich Cocoa (for shimmer) and Walnut Ink in Java for a darker color. 

2022-Aug-WatercolorFireworksSunflowers-Step6
Step 6:

Here are the images from the entire stencil set.

2022-Aug-WatercolorFireworksSunflowers-Step7
Step 7:

One “blooper” photo, all the backgrounds made with the over spray and Fireworks! left on the stencils.  To be used in future projects?  The green sheet is trimmed to 4 1/4? to 5 1/2” to cover the front of the card.

2022-Aug-WatercolorFireworksSunflowers-Step8
Step 8:

Tap drop of Fireworks! in Dandelion on white watercolor paper trimmed to 3 3/4” x 5”.
Use quilted card front die to add texture to front panel.

2022-Aug-WatercolorFireworksSunflowers-Step9
Step 9:

Part of the remaining background section is stamped with Memento Luxe in Lilac Posies using a sentiment from the Sunflowers stamp set.  It is die cut with a Spellbinder die.

Step 10:

The Sunflower is die cut with the coordinating die.  The layers are adhered together with Tear It! Tape with dimension foam tape behind the card front.  

Art Supplies

 Imagine
Other:
  • White Watercolor Cardstock
  • Pink Fresh Studio Sunflowers Stencils, Coordinating Die, and Clear Stamp
  • Concord & 9th Quilted Card Front Die
  • Spellbinders Fancy Tabs
  • Dimension Foam adhesive
  • Cotton swabs
  • Die Cut machine
  • Stamp Platform

Learn to Make a Rose Themed Congratulations Card 

2022-Annie-Aug-700x700

By Annie Collins

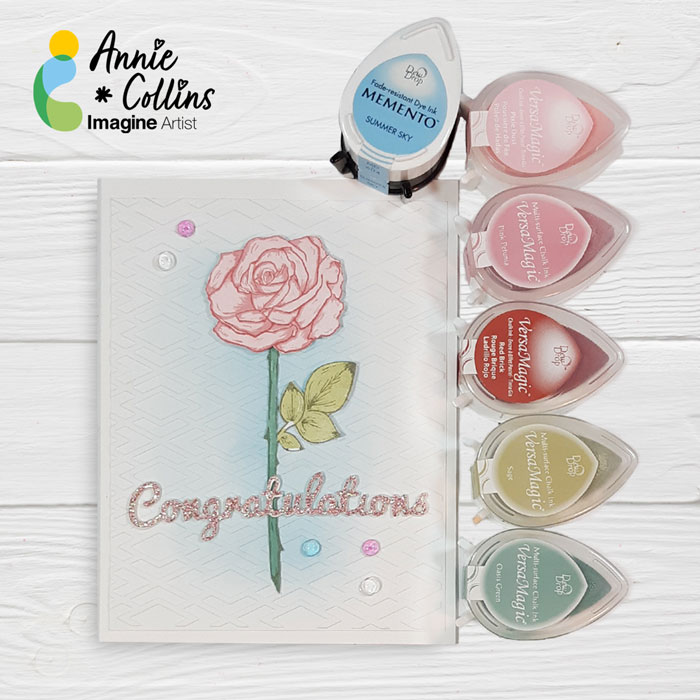
– Hello Crafty Friends – Annie here with a fun summer themed card featuring a variety of Imagine Crafts products.

Skill Level: Beginner

Time to Complete: 30 Minutes

Art Supplies:

Imagine:

VersaMagic Inks: Pixie Dust, Pink Petunia, Red Brick, Sage, Oasis Green, & Hint of Pesto

• Memento Ink: Summer Sky

• magine Crafts: Tear It! Tape

• Imagine Crafts: On Point Glue

• Imagine Crafts: Craft Mat

Other products

• Hero Arts Stamps: Color Layering Set: Layering Rose CM243

• Recollections Brand 110# Cardstock: White

• Accent Ultra Smooth 80# Cardstock: Opaque White

• Lifestyle Crafts Embossing Folder: Lattice

• Blending Brush

• Tiny Acrylic Bubbles: Clear, Pink and Light Blue

Learn to Make a Back to School Card

2022_Aug_Martha-Lucia-Gomez_600x600

By Martha Lucia Gomez –

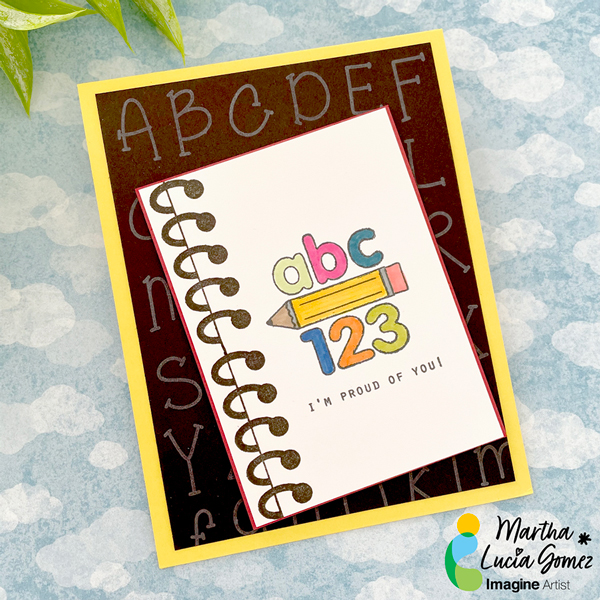
Hello there! During summer our time es limited and today I have an easy and fun Back To School Card featuring several of Imagine products, like VersaColor, Memento Ink and Markers and VersaFine. During the process you will see how all the different inks looks according to the project.

Skill Level: Beginner
Time to Complete: 30 Minutes

Directions

2022 - August - Martha Lucia Gomez - Step 1a

Step 1:

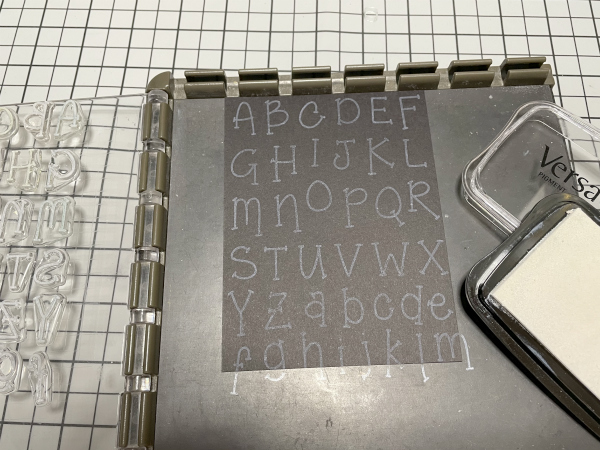
Take a piece of a dark color cardstock to create the background. On my sample, I am using dark grey, but this type of stamping looks great in additional colors like red, blue or black. Select the stamp set that you prefer to create the background.

 I selected an alphabet set of stamps but I stamped the entire sheet at once. To make it, just secure the entire sheet over the stamping tool. To create the soft look, I used VersaColor  White. It is a soft ink ideal to emboss or create shadows.  

If you are not heat embossing it, let the piece a side for a while to ink dry naturally or use a heat tool to speed the process.

2022 - August - Martha Lucia Gomez - Step 2

Step 2:

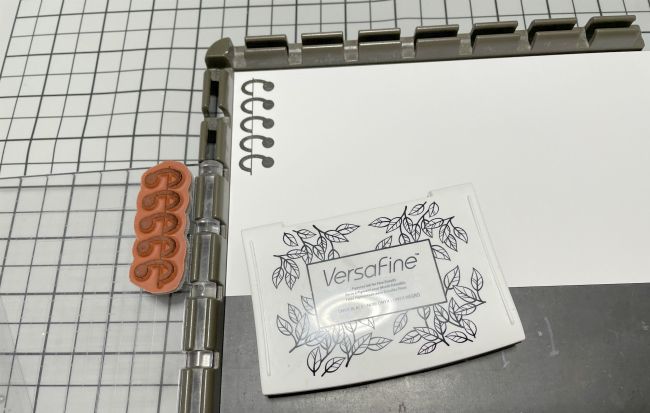
In a separate piece of white smooth cardstock, stamp the spiral image using VersaFine Onix. Let the ink dry naturally and you will obtain a crisply image. Or if you prefer, you can heat emboss the stamped image to add a shiny look. 


2022 - August - Martha Lucia Gomez - Back to School - Step 3

Step 3:

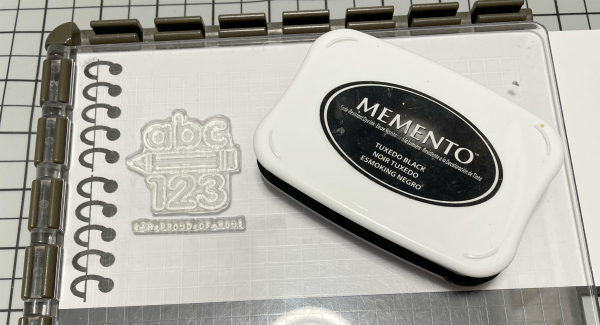
Stamp the focus image with Memento Tuxedo Black Ink.

2022 - August - Martha Lucia Gomez - Back to School - Step 4

Step 4:

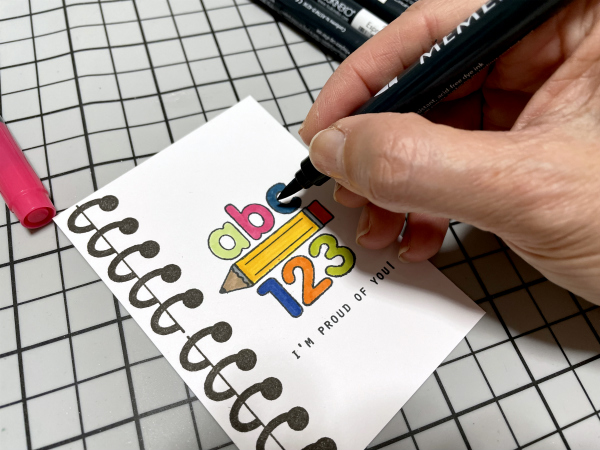
Color all the details with Memento Dual Tip Markers.  

TIP: Keep in mind that you can use your Memento Dual Tip Markers with both inks, VersaFine and Memento without any coloring problem. 

2022---August---Martha-Lucia-Gomez---Step-5

Step 5:

Create the card base and resize all the layers of your card. You can paste them with Tear It! Tape or use crafty foam tape to add more dimension and interest to your card.

Art Supplies:

Imagine:

• VersaColor – White 

• Memento – Tuxedo Black 

• Memento Dual Tip Markers 

• VersaFine – Onix Black

• Tear it! Tape 

• Craft Mat 

Other:

• Joy Clair Designs – Friendly Alpha Clear Stamp Set, White Smooth Cardstock 

• Crackerbox Stamps – Spiral Side Rubber Stamp

• Precious Remembrance Shop – School Days Stamp Set

• Positional Stamp Tool.

• Scrapbook Adhesives Crafty Foam.

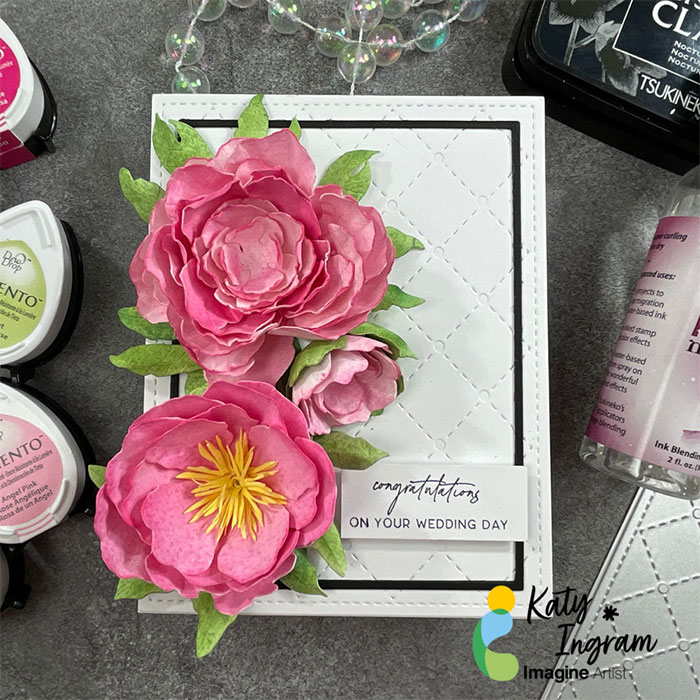
Gorgeous Wedding Card with Memento and Ink Potion No. 9 


By Katy Ingram –

Hello Friends! Katy here and today I am sharing an easier way to color your own cardstock using Memento Inks andInk  Potion No. 9 blending solution. 

In todays video tutorial I use our newly colored cardstock to create some 3D flowers for a beautiful summer wedding card. Thanks for joining me today. I hope you enjoy.

Skill: Beginner, Intermediate, Advanced
Time: 30 minutes

Art Supplies:

Imagine:

Memento Inks – 

Angel Pink, Rose Bud, New Sprout, Cottage Ivy, Northern Pine, Bamboo Leaves and Dandelion

Ink Potion No. 9

1/4 inch Tear-It! Tape 

Other Products Used:

Spellbinders Double and Single Peonies Die 

Susan’s Garden Tool Kit

Watercolor Paper

PVA Glue or Hot Glue

Heavyweight White Cardstock

Kat Scrappiness Quilted Background Die

Essentials By Ellen Hutson Rectangle Dies

The Greetery Sentiments Suite Love Stamp Set

The Greetery Pretty Postmarks

Clear Box A2 Size  4 1/2 inches x 1 inch x 5 7/8 inches

Follow Katy Here:

Youtube: https://youtube.com/c/eastwickspaperandink 

facebook: fb.me/eastwickspaper 

Instagram: https://www.instagram.com/eastwickspaperandink/ 

Blog: https://www.eastwickspaperandink.com/

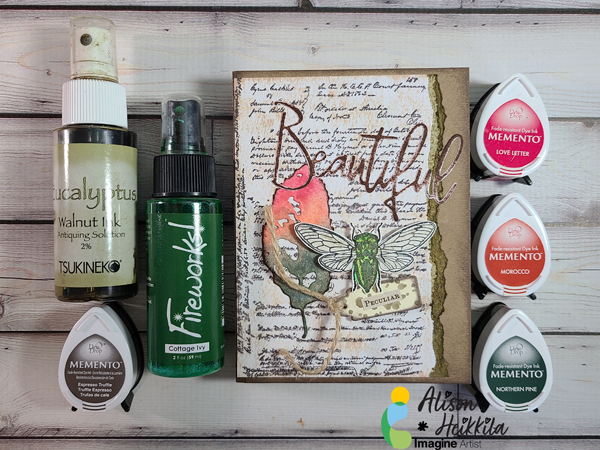
Simply Beautiful Collage-Style Card

Peculiar 1 600

By Alison Heikkila –

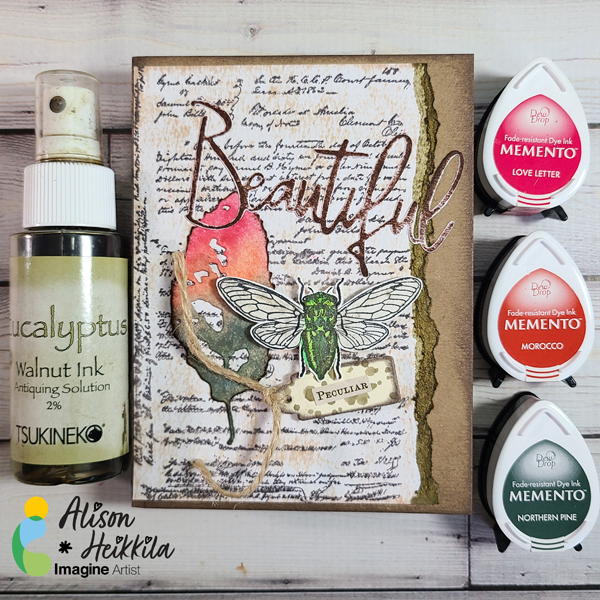
Hello! Many crafters love the look of collage-style cards, but they may be intimidated to try making them. If you throw away the idea of perfection and just enjoy the process, you can achieve this look without too much trouble. Be sure to have some text stamps on hand, as they really help achieve this look. 

Skill Level: Beginner to Intermediate
Time to Complete: 45 minutes- 1 Hour
Peculiar 2

Directions

Peculiar 3
Step 1:

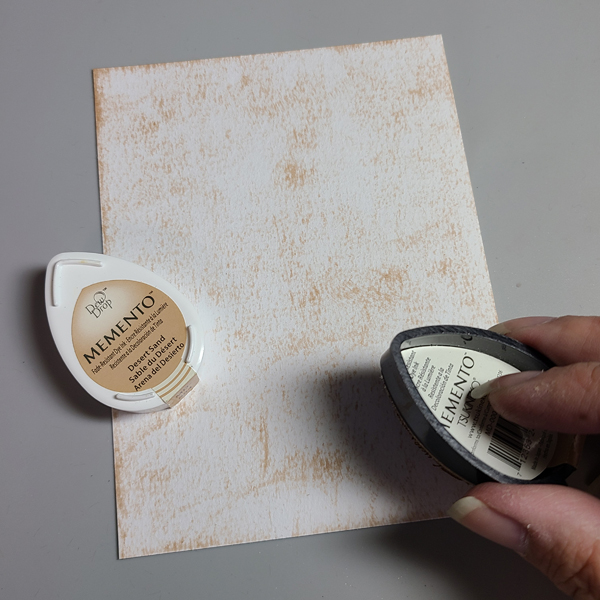
On a textured cardstock, gently ink the rough surface with Desert Sand Memento Ink. Don’t push too hard…we only want to enhance the texture. 
Peculiar 4

Step 2:

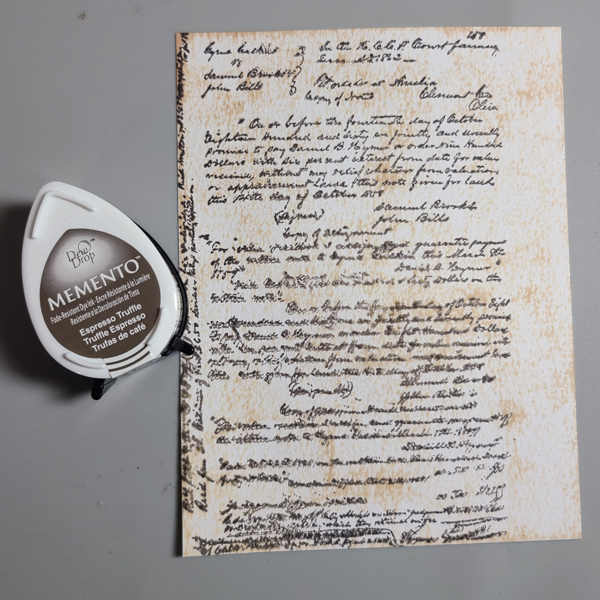
With Espresso Truffle Memento Ink, apply a text background stamp to the cardstock. I didn’t use a block or stamping tool to apply this, because I wanted imperfections and blurring. 
Peculiar 5

Step 3:

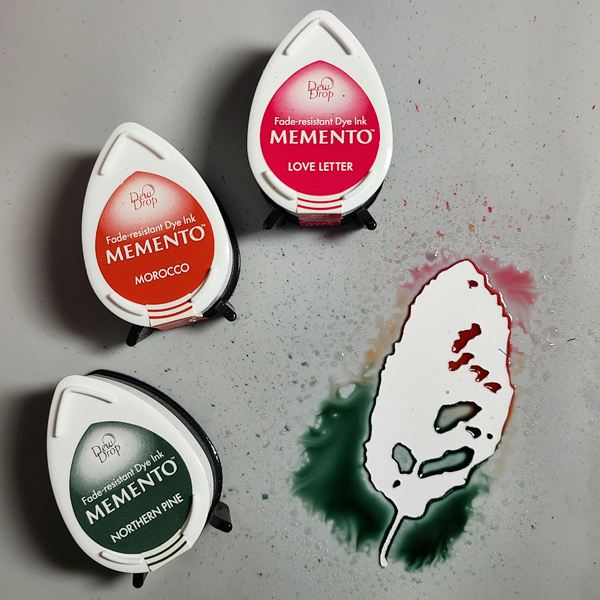
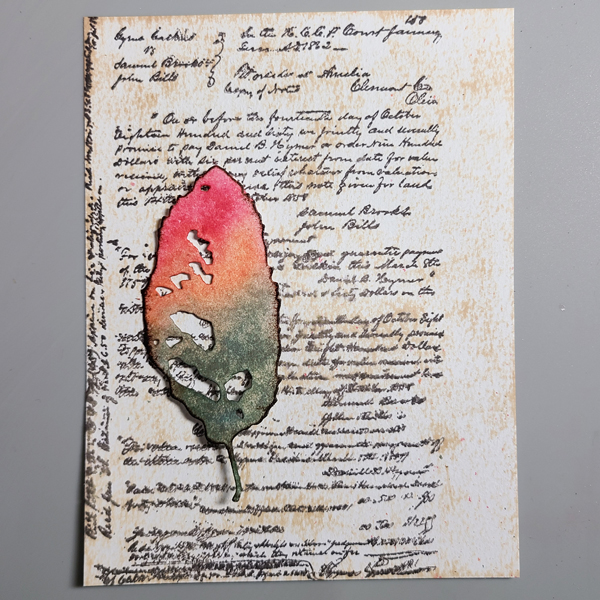
Die cut a leaf out of white cardstock. Apply Northern Pine, Morocco, and Love Letter Memento Ink right next to each other on your craft mat and spritz the colors with water. Lay the leaf into the ink and let it sit for a bit to soak up the color. Lift the leaf out, and let it dry. Then, ink the edges with Warm Cocoa Memento Ink. 
Peculiar 6

Step 4:

Begin trying to decide where your pieces will go. I liked the placement of the leaf here. Now I need to choose the rest of my elements. 
Peculiar 7

Step 5:

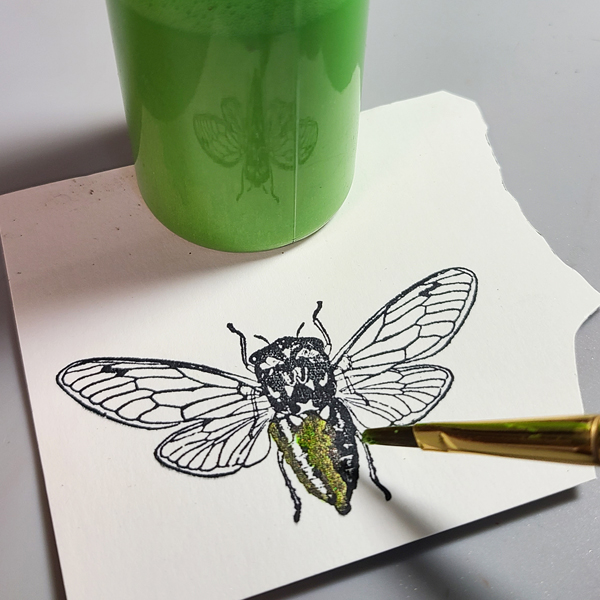
Ink up an insect you like…I went with a cicada and used Nocturne VersaFine Clair Ink. To give the bug metallic shine, I applied New Sprout and Cottage Ivy Fireworks! Spray to the body and Sheer Shimmer Spritz in Sparkle to the wings with a brush. Let dry, then cut out. 
Peculiar 8

Step 6:

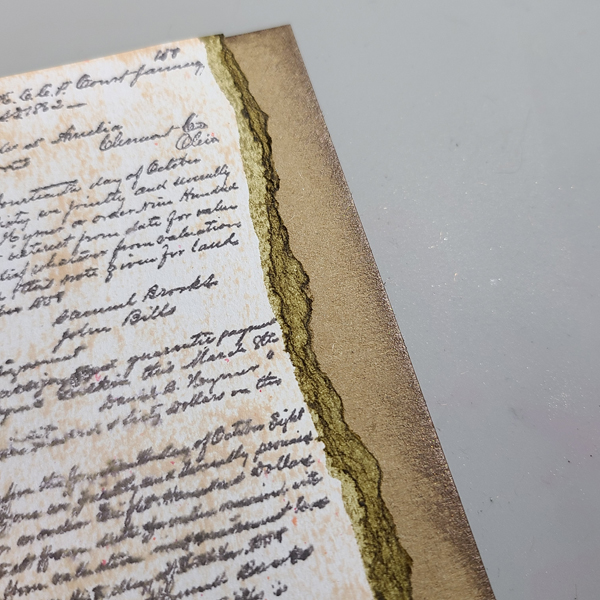
Collages always look better with imperfections, texture, and aging. To achieve all of that on this card, I first tore the right side off of my text panel. Then, I applied Eucalyptus Walnut Ink with a brush on the tear. On my Kraft colored card base, I inked the edges with Dark Brown Shimmer Delicata Ink, directly from the pad. 
Peculiar 9

Step 7:

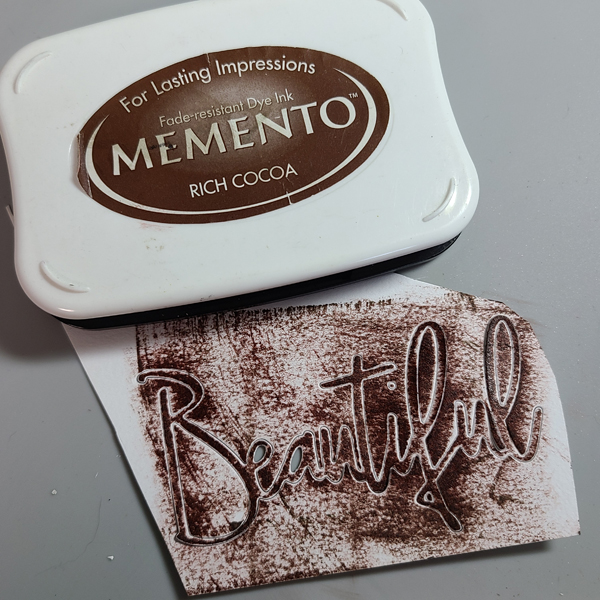
Using the same rough cardstock I used for the focal panel, I die cut the word “beautiful.” Then I rubbed Rich Cocoa Memento Ink across in, allowing some of he white to still show through. 
Peculiar 10

Step 8:

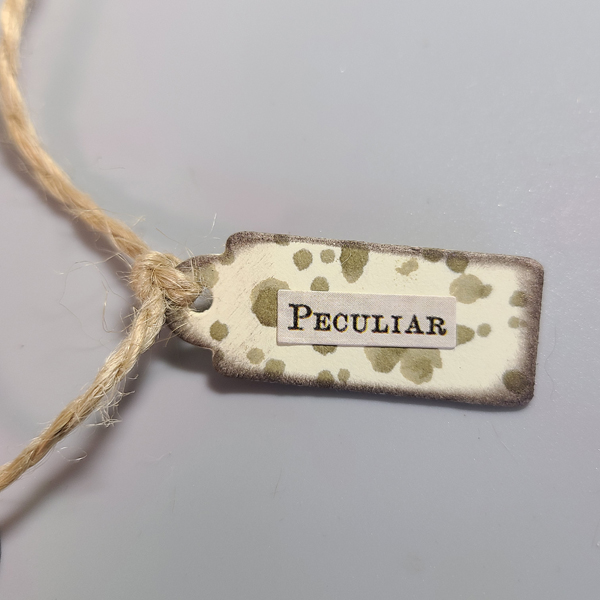
I die cut a little tag out of cream colored cardstock, and flicked on more of the Eucalyptus Walnut Ink. Then I aged the tag with Dark Brown Shimmer Delicata Ink and added a sticker. I finished the tag off with twine. Adding many elements, especially those with texture, really add to the collage style vibe. 
Peculiar 11 600

Step 9:

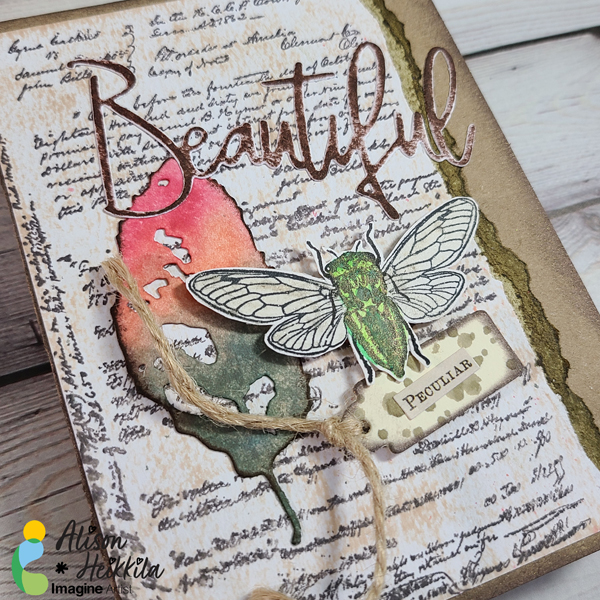
Attach all of your elements. Use flat glue as well as dimensional adhesives, like foam squares to add more interest to the card. My cicada and tag are both popped up for dimension. The twine was left long and can move freely. 
Peculiar 12


Art Supplies:

Imagine:

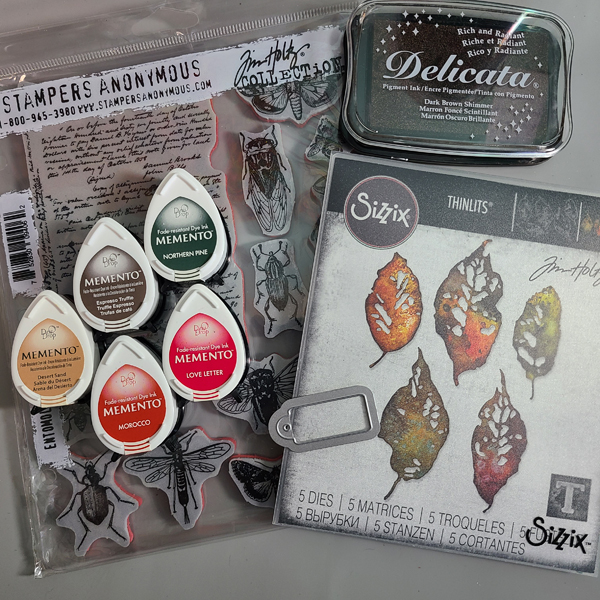
Memento Ink: Desert Sand, Espresso Truffle, Rich Cocoa, Love Letter, Morocco, Northern Pine

Fireworks! Shimmery Craft Spray: New Sprout, Cottage Ivy

Sheer Shimmer Spritz: Sparkle

Delicata Ink: Dark Brown Shimmer

VersaFine Clair: Nocturne

Walnut Ink: Eucalyptus

Craft Mat


Other:

Sizzix & Tim Holtz: Leaf Fragments, Tag Collection

Stampers Anonymous & Tim Holtz: Entomology

Pinkfresh Studio: Classic Word Dies

Canson: Mixed Media Paper XL

Brushes

Kraft & Cream Colored Cardstock

Adhesive (flat and dimensional)