Create a Beautiful Rainbow Ink Blended Card

By Jessica Lin

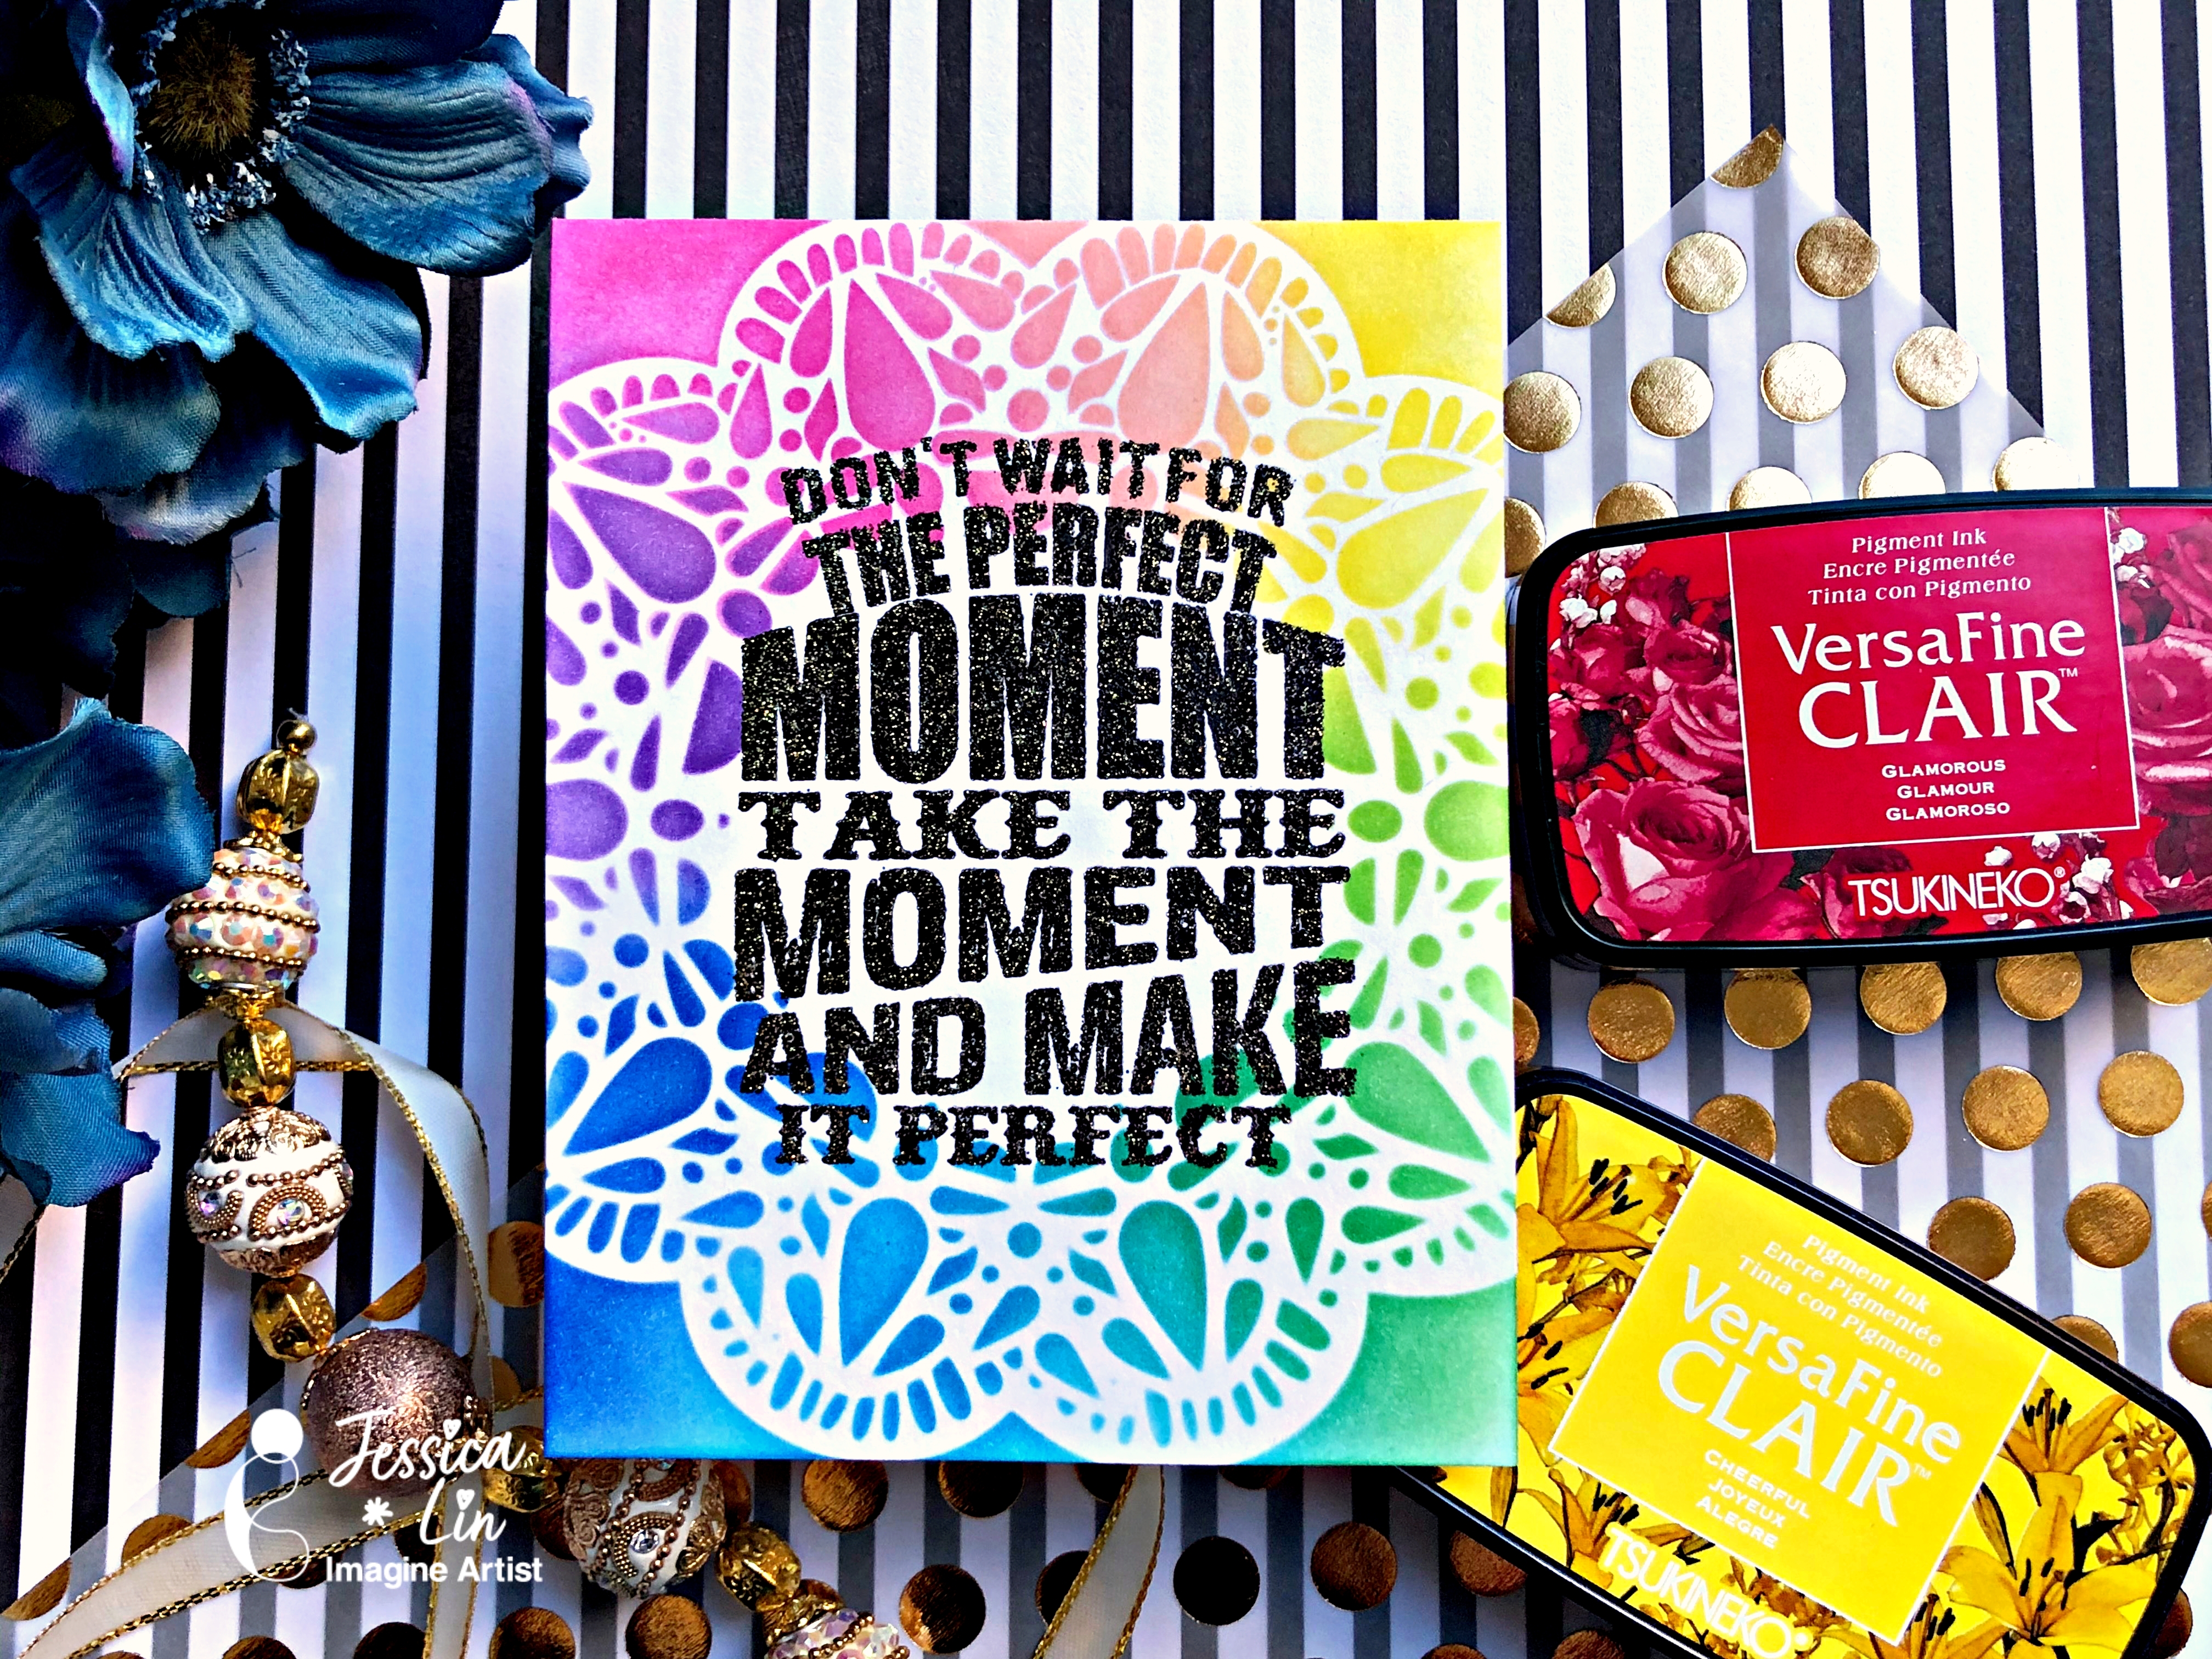
– Hi everyone! It’s Jessica. I have a simple rainbow ink blending card to share with you today. I used some of the brighter colors from the VersaFine Clair line, but you could try out different colors and different ink pads for a similar look. I also love the positive and motivational sentiment, which I’ve embossed with New Year’s Eve Mboss powder.

Skill Level: Beginner

Time: 15 minutes

Supplies:

Imagine

• VersaFine Clair: Glamorous, Summertime, Cheerful, Verdant, Green Oasis, Warm Breeze, Paradise, Blue Belle, Monarch – 

• Jumbo Dauber – 

• VersaMark Dazzle – 

• Mboss – New Year’s Eve – 

• StazOn All-Purpose Cleaner – 


Other:

• Crafter’s Workshop stencil – Deco Doily

• STAMPlorations Typografia Motivate: Perfect Moment stamp

• Heat gun

• Neenah Solar White 80lb cardstock

How to Create a Simple Ink Blended Masculine Valentine Card

by Katy Ingram

In today’s crafting tutorial, I show you how to make a simple ink blended masculine card using some Memento, Versafine Clair and Delicata inks.  This is a great project for that special someone in your life for Valentine’s Day. 

Skill: Advanced

Time: 25 minutes

Directions

Art Supplies:

Imagine

• Memento Ink Pad – Teal Zeal, Nautical Blue, Paris Dusk

• VersaFine Clair Ink Pad – Twilight

• Delicata Ink Pad  – Silvery Shimmer and Golden Glitz

• Imagine Craft Mat


Other

Simon Says Stamp – Background Stamp – You Are

Simon Says Stamp – Die – Deco Heart

Gina K Designs – Cardstock – White Layering

Neenah – Cardstock – 110 lb classic crest solar white

Mixed Media Fall Leaf Tag Décor ft. VersaFine Clair and All Purpose Ink

by Nicole Watt 

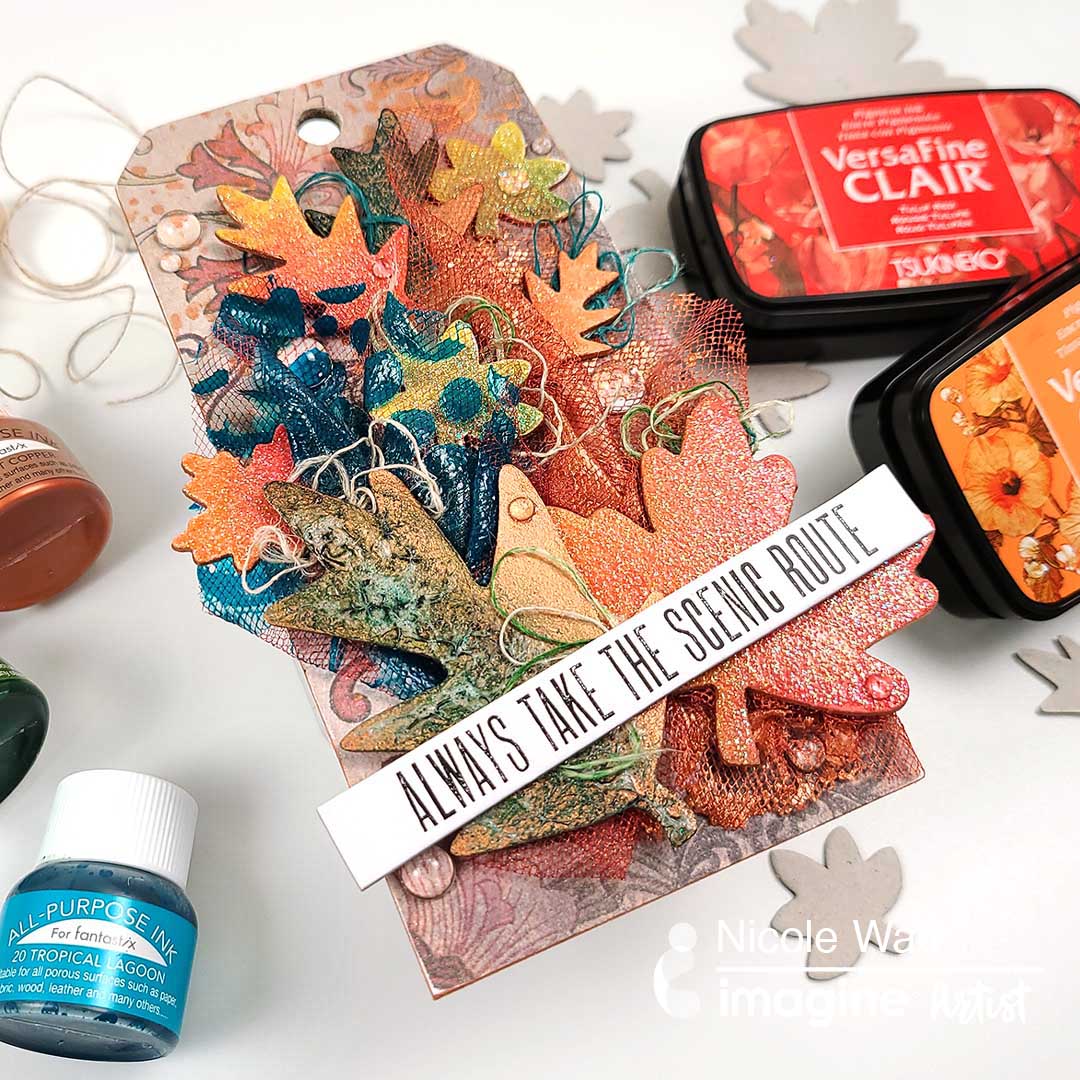
“Always take the scenic route,” perhaps a drive through all the fall leaves will brighten your day and provide some much needed crafting inspiration! In this crafting tutorial, Nicole creates gorgeous color and texture to celebrate Fall in a home décor thick-board tag. Use VersaFine Clair, All-Purpose ink, and Creative Medium for stenciling, and embossing to make a rich look and feel! Nicole breaks down every step so you can recreate the techniques yourself!

Skill: Advanced
Time: 1 hour

Directions

Art Supplies

Other Supplies

Quick and Easy Projects: Create a Marble Effect on Paper

by LeeAnn McKinney

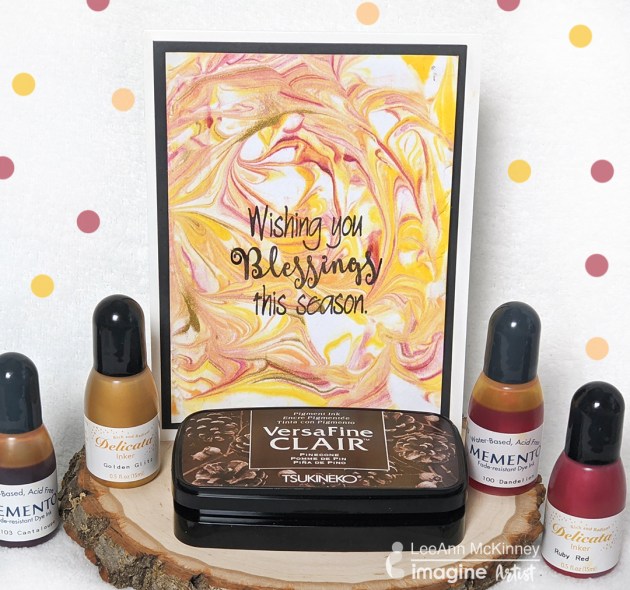
Greetings crafty friends! I was watching YouTube and came across this shaving cream ink marbling technique from GinaK and just had to try it. This is a quick, fun card style to make, you can use any re-inkers you have in your stash and mix/match with plain colors and beautiful metallic tones as I did here. As I say in the video, the Golden Glitz really makes this card for me. This technique can also be used on all sorts of paper crafting projects.

Since it is the fall season, I focus on a warm color palette for an Autumn leaves look and stamped the sentiment with a rich brown to compliment the yellow, orange, and gold colors. This card design is a perfect way to spend an afternoon crafting and coming up with multiple card designs with a marble look. The shaving cream can be used to make several card panels until you run out of the medium.

Skill: Beginner
Time: 30 minutes

Directions

Imagine

use memento inkers to create marble paper

Other Art Supplies
  • Bamboo Skewer
  • Joy Clair Fall Leaves Stamp Set
  • Paper Plate
  • Card Base
  • Brown Cardstock
  • Shaving Cream (Foam type)


Quick and Easy Projects: Stamp and Color Rainbows, Pineapples and Donuts on a School Folder


by Annie Collins

Hello Friends! In this video, I teach you how to create a fun custom school folder that you and your kids can make together.

Skill: Beginner
Time: 20 minutes

Directions

Other
  • File Folder
  • Various Stamps

Guest Artist: Helen Gullett with Color Blending

We did a Call for Art for Color Blending. And we got a great submission by Helen Gullett! We love this card design!

Helen writes:

I had fun creating the background using VersaFine Clair ink pads: Blue Belle, Purple Delight, Tulip Red, Summertime, Green Oasis, and Nocturne (Black). I picked the ink up with a makeup sponge and started sponging it on white cardstock. I stamped the lighthouse image from the Light House Stamp Set with VersaFine Clair Nocturne Ink Pad, and then I heat set the ink with craft heater. I colored the image with ShinHan Twin Touch Markers and Colorless Blender Marker. After that, I fussy cut the image, and I added it on the card with 3D foam tape.

I stamped the sentiment with VersaFine Clair Blue Belle and trimmed it.

Helen’s Instagram is @helengdesigns

Stay tuned for more opportunities to be a guest artist!