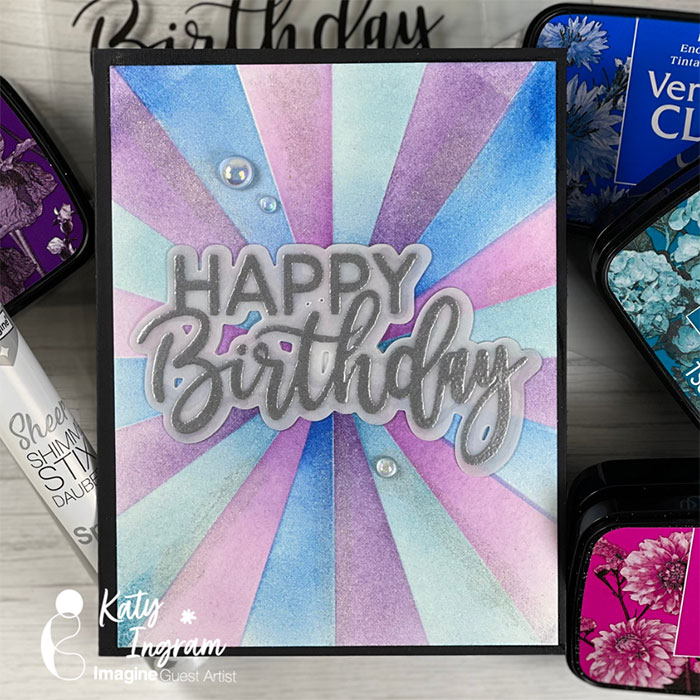
How to Make a Pastel Birthday Card Using VersaMagic Ink Pads

2021_July_JL_Pastel-Birthday

By Jessica Lin

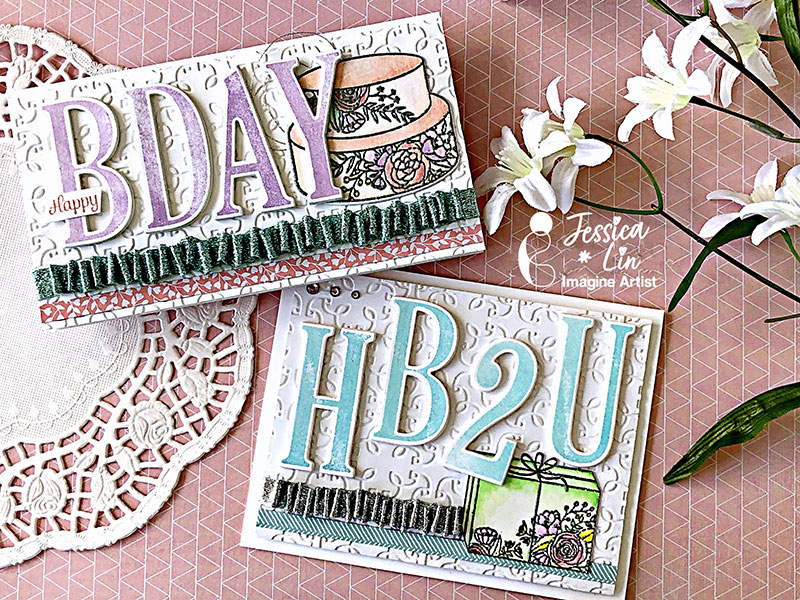
Hi everyone, it’s Jessica here and welcome back to another card tutorial. Today’s card is the kind that I create the most: birthday cards! I chose a soft color palette for this set of cards, and the VersaMagic inks are perfect for the pastel colors. I also watercolored with my ZIG Clean Color Real Brush pens and shared a technique about using ribbons to embellish your projects. I hope you’ll enjoy today’s tutorial! 

Skill: Intermediate

Directions:

Supplies Used

Imagine:
Other products:

• Stampin’ Up – Letters for You, Number of Years, Cake Soiree, Garden Trellis
• Embossing Folder, Ribbon, Designer Series Paper
• Kuretake ZIG Clean Color Real Brush Pens – No. 028, No. 220, No. 230, No. 071, No. 803, No. 083, No. 049, No. 042, No. 051, No. 041, No. 045
• Heat Tool
• Foam Sheet
• Cardstock – Neenah Solar White


How to Make Stunning Bookmarks Using Ancient Dynasty Coins

2021-jul-kyriakos-oriental-bookmarks-horizontal-main-wm

By Kyriakos Pachadiroglou

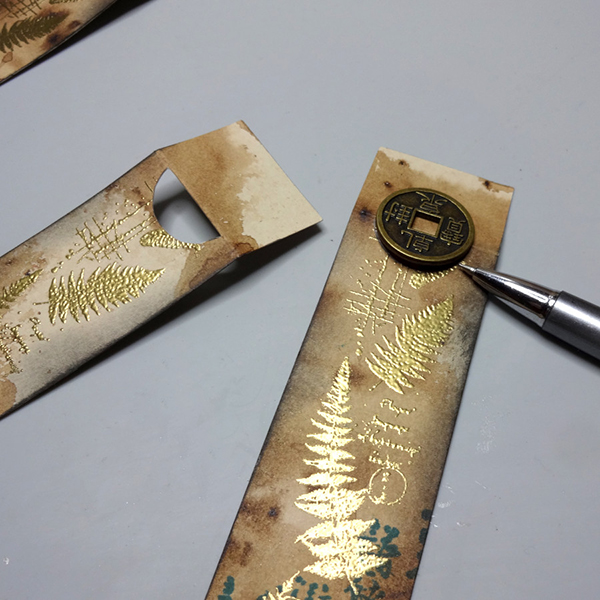
Make oriental theme bookmarks by distressing paper with Walnut Inks, stamping and embossing with Gold Mboss Embossing Powder and adding a Ancient Dynasty Coins that holds a tassel.

Skill: Intermediate

Time: 1 Hour

Directions:

2021-jul-kyriakos-oriental-bookmarks-step1

Step 1

Place a few Walnut Ink Crystals on a piece of natural color card stock and spray with some water. Dilute the crystals and dry well.


2021-jul-kyriakos-oriental-bookmarks-step2
Step 2

Cut 8×1.5″ pieces of the card stock.


2021-jul-kyriakos-oriental-bookmarks-step3

Step 3

Score 1″ from the top.


2021-jul-kyriakos-oriental-bookmarks-step4

Step 4

Stamp with the leaves stamp and the VersaMark ink pad, cover with Mboss Gold Embossing Powder and heat set.


2021-jul-kyriakos-oriental-bookmarks-step5

Step 5

Stamp with letters stamp and the VersaFine CLAIR ink pads.


2021-jul-kyriakos-oriental-bookmarks-step6

Step 6

Distress the edges of the paper with VersaColor Black ink.


2021-jul-kyriakos-oriental-bookmarks-step7

Step 7

Place an Ancient Dynasty Coin to the score, leaving the hole of the coin above it, and mark around the coin to the long side. Cut around the marked half circle and the scoring line (only to the part of the long side of the bookmark).


2021-jul-kyriakos-oriental-bookmarks-step8

Step 8

Cover with Creative MEDIUM clear to protect the paper.


2021-jul-kyriakos-oriental-bookmarks-step9

Step 9

Turn the bookmark backside and add Tear It! Tape on the short only part of it and glue on the long one.


2021-jul-kyriakos-oriental-bookmarks-step10

Step 10

Add the Ancient Dynasty Coin on the gap and tie a tassel.


Art Supplies

Imagine

• Ancient Dynasty Coins – Prosperity

• VersaFine CLAIR – Glamorous, Warm Breeze, Tulip Red

• VersaMark Ink Pad

• VersaColor Black

• Mboss – Gold

• Creative MEDIUM – Clear

• Walnut Ink Crystals

• Tear It! Tape

• Sponge Dauber

• Palette Knife

 
Other materials

Card stock natural

Moking travel stamp – Forest Whispers

Kaisercraft stamp set – Lush

Tassels

Water sprayer

Heat tool


Learn How to Make a Textured Metallic Wedding Card

2021-Jun-Neva-Metallic-Wedding-Card_blog

By Neva Cole 

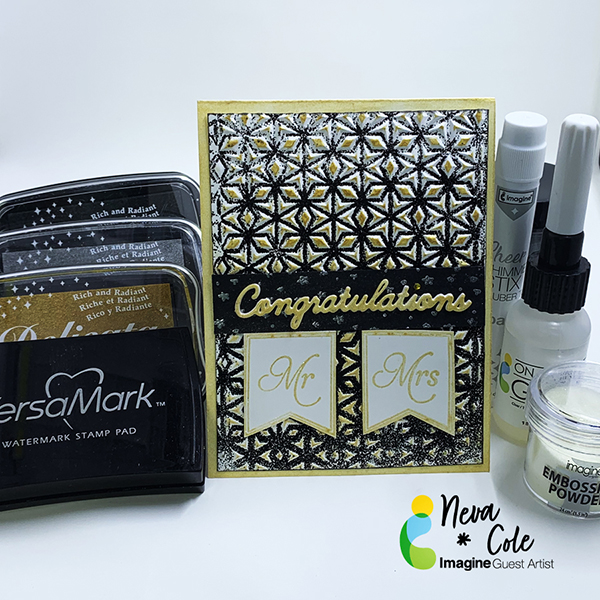
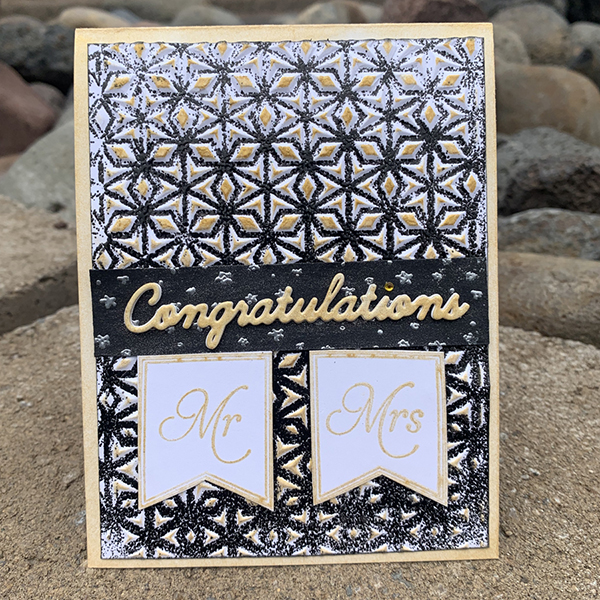
In today’s card making tutorial, I will show you how to make a Textured Metallic Wedding Card using VersaMark, Delicata, and Embossing Powder.  This is a stunning card to make for a bride and groom as they celebrate their wedding day.

Skill:  Intermediate

Time:  2 hours

Directions:
2021-Jun-Neva-Metallic-Wedding-Card-Step1

Step 1

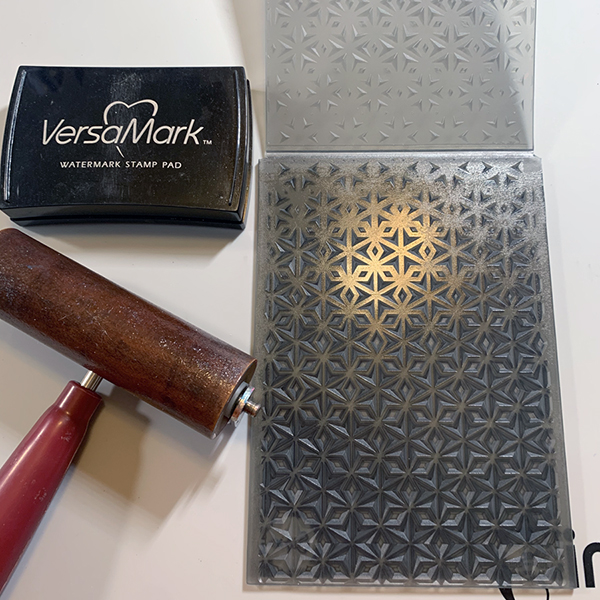
This technique involves inking the FLAT side of an embossing folder for either 2-D or 3-D folder.  This folder is 3-D with both indentations and slight protrusions.  Ink the folder well using a brayer and VersaMark ink.  Place white cardstock in folder and pressure emboss.
2021-Jun-Neva-Metallic-Wedding-Card-Step2
Step 2

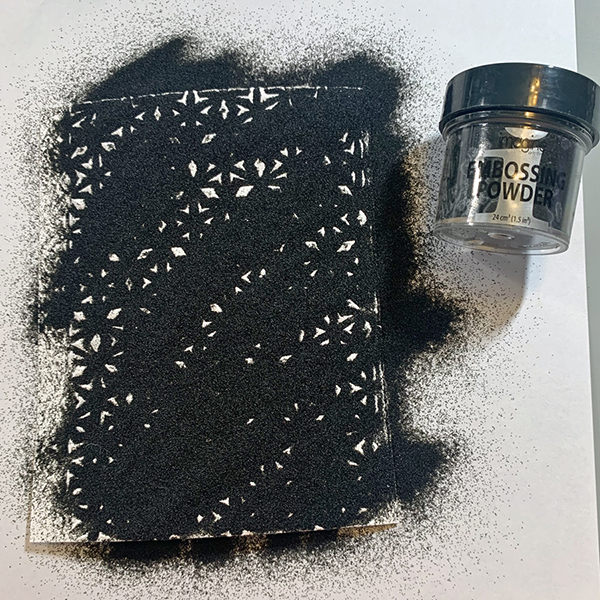
Sprinkle liberally with Black Embossing Powder and heat the card from below with a heat embossing gun.  Allow cardstock to cool.
2021-Jun-Neva-Metallic-Wedding-Card-Step3

Step 3

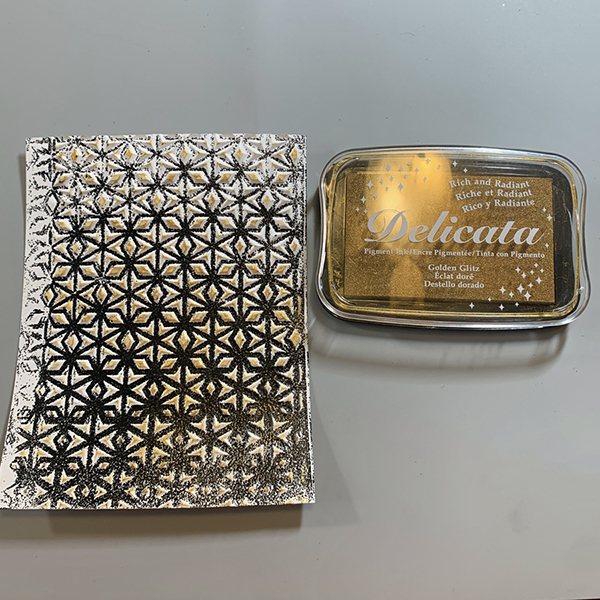
Lightly rub Delicata Golden Glitz over the surface of the cardstock.  The high areas will pick up the ink.  This creates a great three dimension look of black, white, and gold.  Trim the finished panel to 4” x 5 ½”.
2021-Jun-Neva-Metallic-Wedding-Card-Step4

Step 4

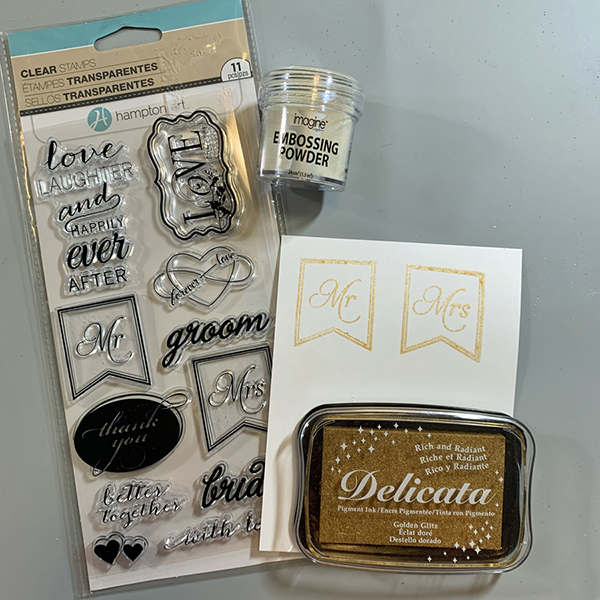
Stamp “Mr.” & “Mrs.” in Delicata Golden Glitz and heat emboss with Iridescent Embossing Powder.  Fussy cut the banners with scissors
2021-Jun-Neva-Metallic-Wedding-Card-Step5

Step 5

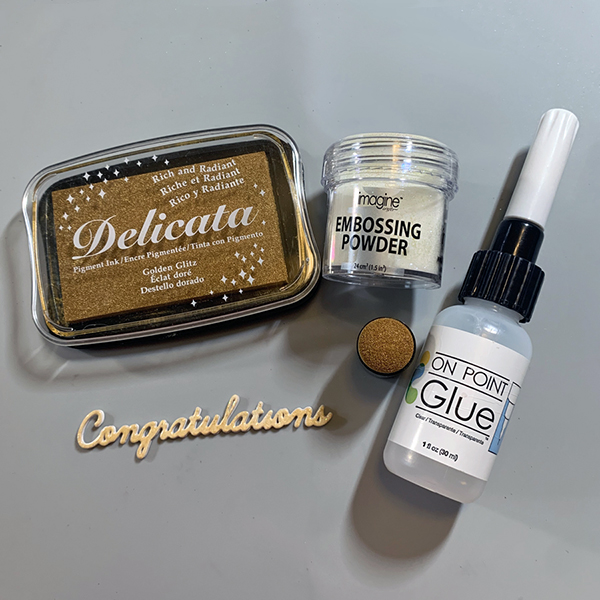
Die cut four “Congratulations” die cuts from white cardstock with Spellbinders Phrase Set One.  Use an ink dauber to color the top die cut then heat emboss with Iridescent Embossing Powder.  Use very small dots of On Point glue around the letters of the die cut to glue the layers together.
2021-Jun-Neva-Metallic-Wedding-Card-Step6

Step 6

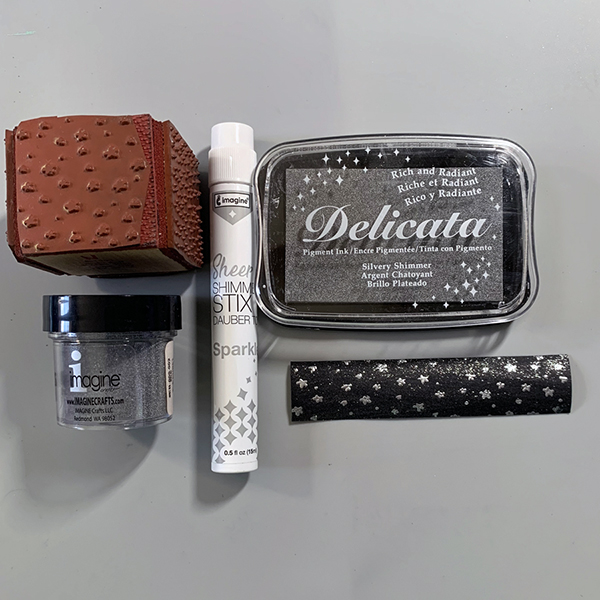
Trim a strip of black cardstock to 7/8″ x 4″.  Stamp with a background stars stamp in Delicata Silvery Shimmer and heat emboss with Silver Embossing Powder.  Once cool add shine with Sheer Shimmer Stix in Sparkle.
2021-Jun-Neva-Metallic-Wedding-Card-Step7

Step 7

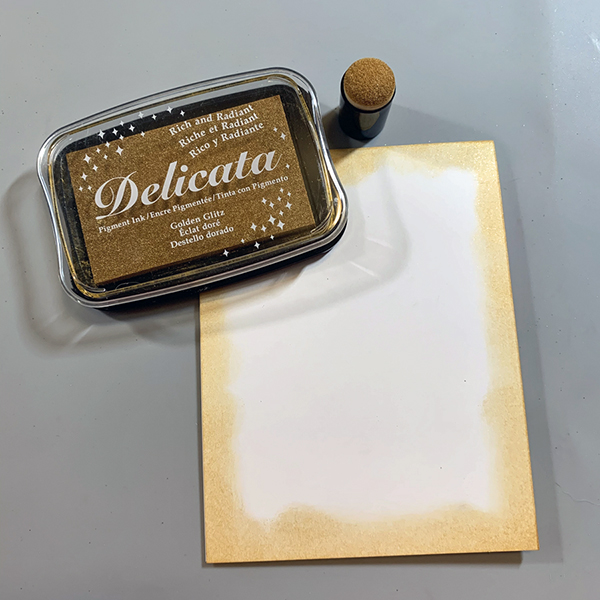
Trim cardstock to 4 1/2″ x 11″ and fold in half for a top fold card.  Using and ink dauber add Delicata Golden Glitz ink around the outer 1/4″ of the card base.
2021-Jun-Neva-Metallic-Wedding-Card-Step8

Step 8

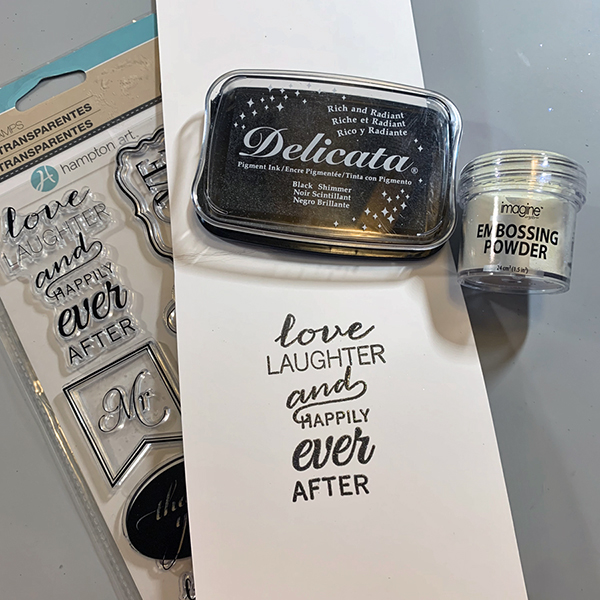
Stamp the sentiment inside the card with Delicata Black Shimmer and heat emboss with Iridescent Embossing Powder.
2021-Jun-Neva-Metallic-Wedding-Card-Step9

Step 9

Adhere card layers together with TearIt Tape, and adhere die cut with On Point Glue.  The small little dot (tittle) of the letter “i” is replaced with a small gold adhesive rhinestone.  The original tittle was too small to layer together.

Art Supplies

Imagine

• VersaMark

• Embossing Powder – Black, Iridescent, Silver

• Delicata – Golden Glitz, Silvery Shimmer, Black Shimmer

• Sheer Shimmer Stix -Sparkle

• On Point Glue

• Sponge Daubers

• Tear-It! Tape

Other

• Sizzix- 3-D Textured Impressions by Georgia Evans Star Fall

• Hampton Art-Bride and Groom Stamp Set

• Spellbinders-Phrase Set One-Congratulations

• Neato Stuff-Background cube stamp stars

• Brayer

• Scissors

• Gold adhesive rhinestone

Make a Thank You Card for Medical Workers with Heat Embossed Ombre Effect

2021_June_JL_Ombre-Mboss-

By Jessica Lin

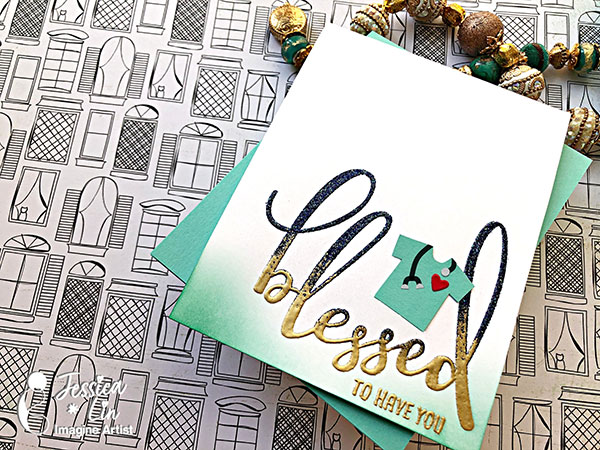
Hi everyone, it’s Jessica here. Have you gotten your vaccine yet? I recently got my second dose to become fully vaccinated and I made a thank you card to go with it. I love heat embossing because it’s so quick and simple, but always provides such a big wow factor. And I added a twist this time by creating the ombre effect! Let me know if you have ever tried heat embossing with different colors.

Skill: Beginner

Directions:

Art Supplies

Imagine:
Other products:
  • Honey Bee Stamps Bless Your Heart  
  • Heat Gun
  • Neenah Solar White cardstock 
  • Stamparatus 
  • Antistatic powder tool 


Learn How to Make a Mini Slimline Happy July 4th Card

Happy-July-4th-card-Blog-2

By Annie Collins

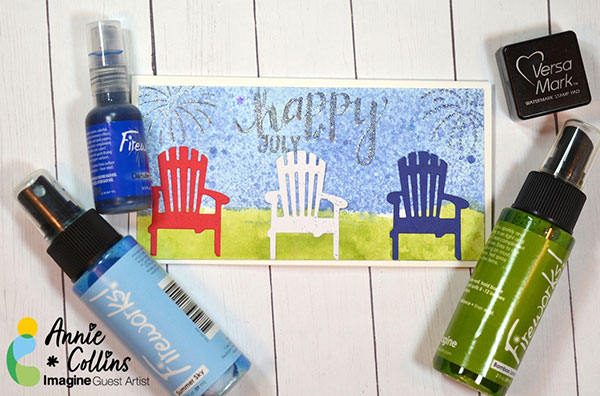
Hello Crafty Friends – Annie here with a fun July 4th mini slimline card, featuring Fireworks! Shimmery Sprays.

Directions:

Art Supplies:

Imagine

• Fireworks! Shimmering Spray: Bamboo Leaves, Summer Sky and Danube Blue

• Mboss Embossing Powder: Shimmering Night Sky, Silver and Irridescent

• Memento Marker: Tuxedo Black

• VersaMark Watermark Ink

• On Point Glue

• Tear It! Tape

Other:

• Hero Arts Stamp & Die Set: DC150 Happy
https://heroarts.com/

• Maker’s Movement Stamp: Sarcastic New Year
https://themakersmovement.com/MOS231-Sarcastic-New-Year-Stamp-Set/

• Gina Marie Designs: Adirondack Beach Chair
Adirondack Beach Chair – Gina Marie Designs

• Recollections Planner Die: Months

• Recollections Brand 110# Cardstock: White

• Recollections Brand 65# cardstock: Red, White & Blue

Learn How to Make a Quick Father’s Day Card


By Neva Cole 

Today I will be demonstrating how to make a quick multi-layered card using three stamps and VersaColor and StazOn inks.  This tone on tone card is a simple way to create a wonderful card for the Father in you life.


Skill: Beginner

Time: 30 Minutes


2021-May-Neva-FathersDay-Card


Directions:


2021-May-Neva-FathersDay-Card-1

Step 1

Stamp the sentiment in VersaMark Mountain Lake and heat emboss with Sparkle Embossing Powder.  Then die cut the sentiment with Lawn Fawn Everyday Sentiment Banners.


2021-May-Neva-FathersDay-Card-2
Step 2

Use VersaColor Mountain Lake and stamp the “Tape Measure” and the “Love Beyond Measure” around the perimeter of an A-2 card base.  Ink the edges of a 3 1/2″ x 4 5/8″.  Stamp the Tape Measure in StazOn Ink in in Jet Black, die cut with matching die.


2021-May-Neva-FathersDay-Card-3

Step 3

Pressure emboss the 3 1/2″ x 4 5/8″ with Spellbinders Maze Embossing Folder.  Lightly ink with Seafoam.  Stamp the the Love Beyond Measure on card front.


2021-May-Neva-FathersDay-Card-4

Step 4

Assemble the card with dimensional foam adhesive and enjoy!


Art Supplies

Imagine

VersaMark: Mountain Lake, Seafoam

StazOn-Jet Black

Embossing Powder-Sparkle


Other

Hero Arts CL1498 Holiday Sentiments

Technique Tuesday What a Guy Stamp and Die

Lawn Fawn Everyday Sentient Banner

Spellbinders Maze Embossing Folder