Let’s Make a Dazzling Friendship Card

Kathy_Aug_Main-600

By Kathy Pisupati –

Good morning!  Kathy here, creating art for Imagine Crafts!  Today I have a new tutorial for you.   I must admit I am in LOVE with the Delicata Golden Glitz pigment ink. There are several reasons:

• The color is AMAZING!

• When I don’t feel like using gold embossing powder this works fabulous (and is less messy!).

• It works fabulous with sentiments.

• It is easy to clean up.

So today I have a project for you that uses the Delicata Golden Glitz and some beautiful Tsukineko Brilliance Dew Drops. The card didn’t start out as I planned but I am happy with the finished result. Please let me know what you think in the comments! Let’s make a card. 

Skill Level: Intermediate
Time to Complete: Two hours

Directions:

image_Step1
Step 1:

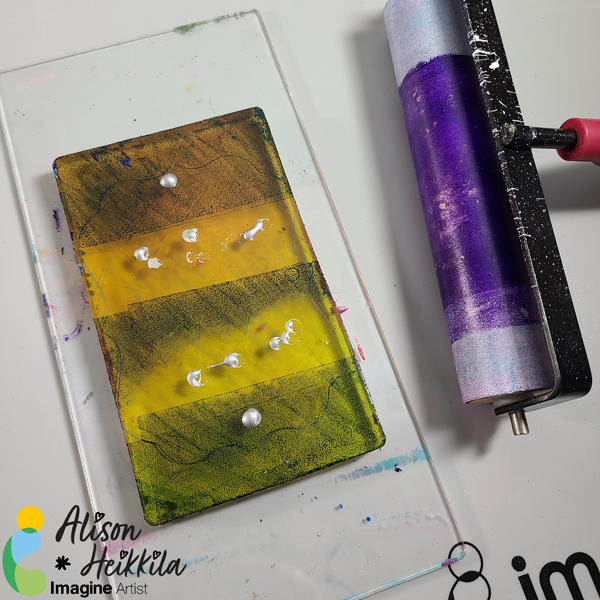
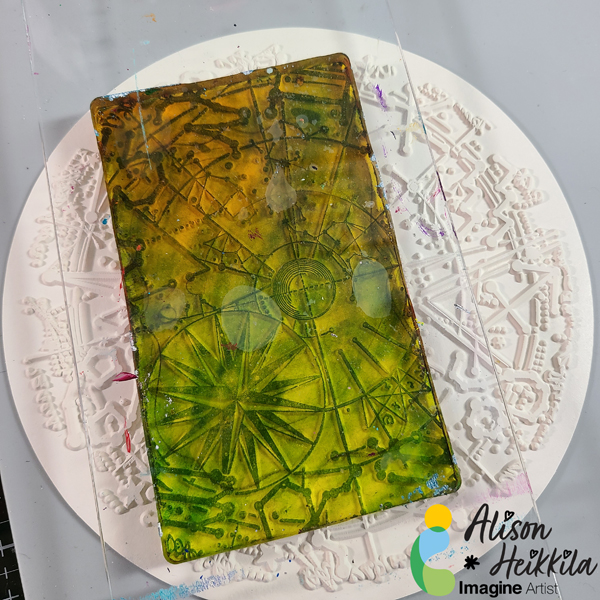
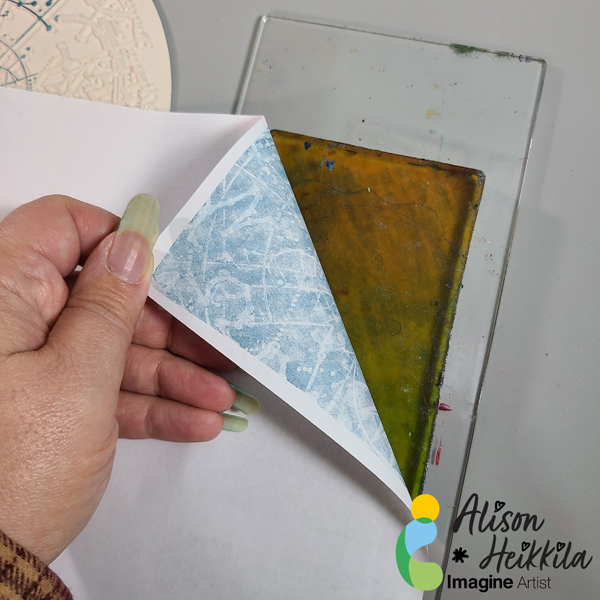
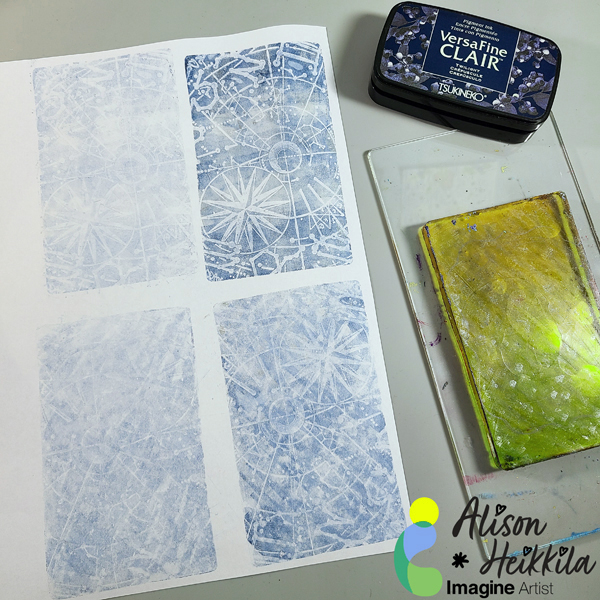
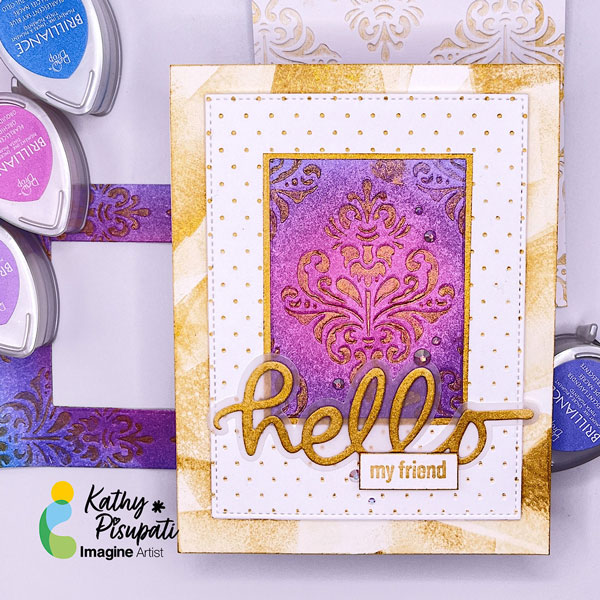
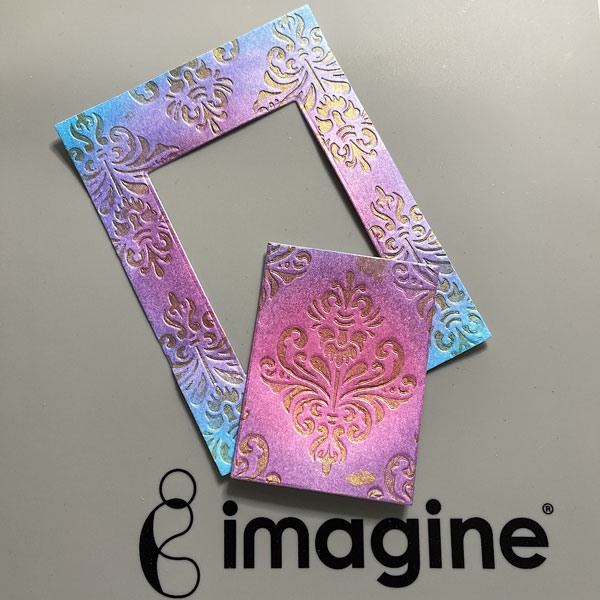
You will need a top-folding card base measuring 4 1/4 x 5 1/2“. The rest of the panels we will create as we go. So, the first thing I wanted to play with was the Brilliance Dew Drops. I ink blended them all over a piece of Neenah Classic Crest Solar White 110lb card stock. I then found an embossing folder. I chose an older folder from Spellbinders. I am not sure if it is still available, but it was called the Large Medallion. I dug out my brayer, inked it up with some Delicata Golden Glitz, and rolled it over the RAISED area of the embossing folder. I put in my ink blended panel and ran it through my die-cutting machine. Here is where the plan changed. I pulled out my Gina K Designs Master Layout 2 to get the “perfect” rectangle. I taped the die to the panel. Now here is a tip when you have a panel that is loaded up with ink like mine, BEFORE you pull off the tape, heat it with your heat tool on LOW. Yeah….I didn’t do that and ripped a chunk out of the frame I was going to use. Oh well, moving right along……I used a rectangle die from GKD Master Layout 7 to cut the middle out. I WILL save this card! 


image_Step2

Step 2:

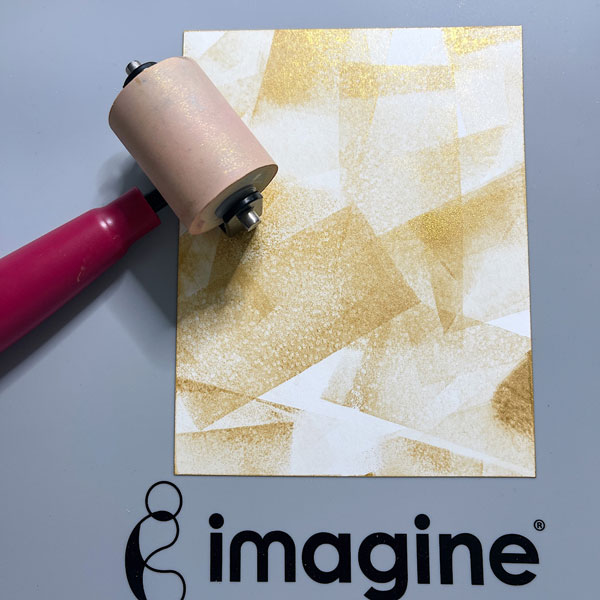
I had a lot of gold ink on my brayer, so I inked up a Swiss Dot embossing folder and ran another piece of white card stock through my machine.


image_Step_3

Step 3:

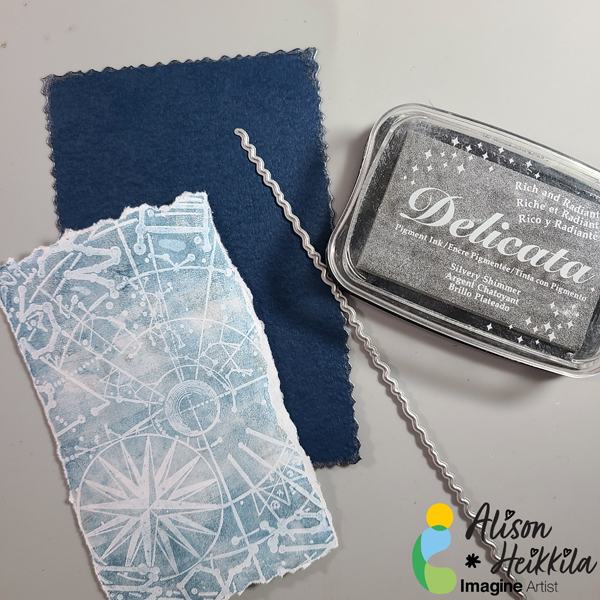
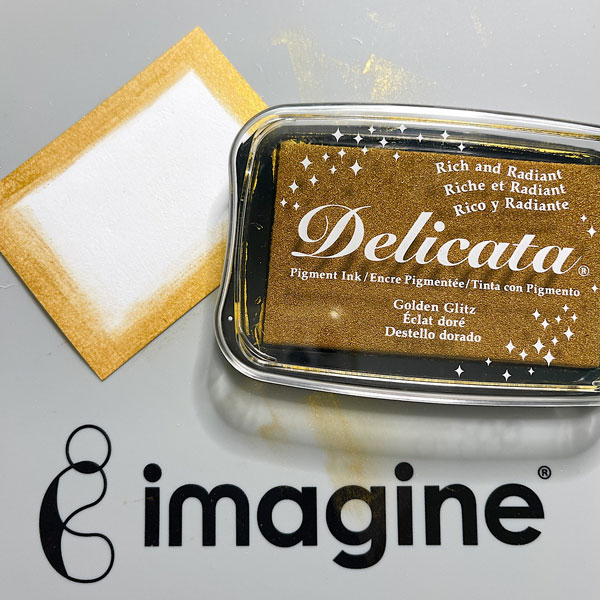
I then rolled the excess ink on a piece of white card stock measuring 4.25” x 5.5”. Isn’t it pretty? I HAD to incorporate it!


image_Step-4

Step 4:

Cut a piece of white card stock an 1/8” larger than the focal point and with your Sponge Dauber, ink the edges of the rectangle with the Golden Glitz.


Image_Step-5

Step 5:

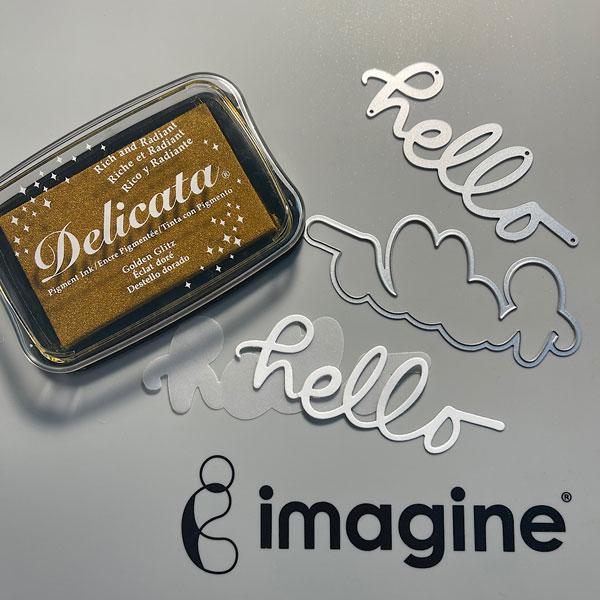
Die-cut your sentiment and using the Golden Glitz ink, use Imagine Crafts sponge daubers to apply your ink to the sentiment. Cut a shadow from the vellum. Glue these together.  Using the Delicata Golden Glitz stamp the smaller, MY FRIEND, sentiment. Cut this sentiment to size. I also inked the edges of this sentiment.
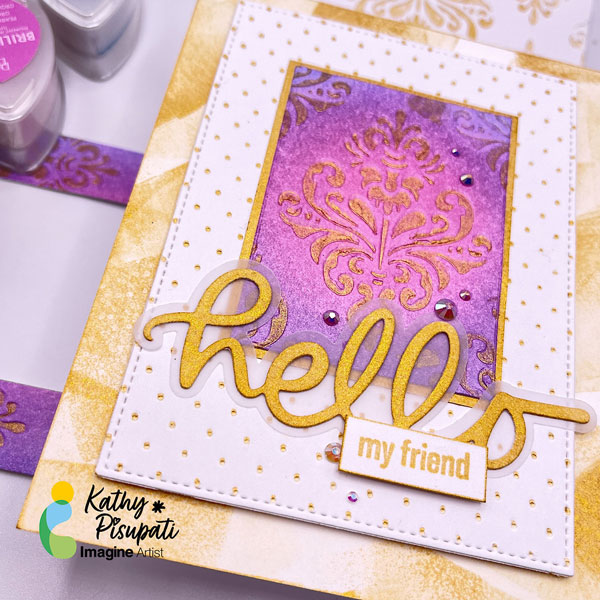


Image_Step-6

Step 6:

Now we can assemble the card. The focal point is glued to the gold border and then adhered to the Swiss dot panel with Imagine On Point Glue. The sentiment is also adhered to the panel with glue. The MY FRIEND strip sentiment was popped up with foam tape. Then I added foam tape to the Swiss dot panel and attached it to the background panel.

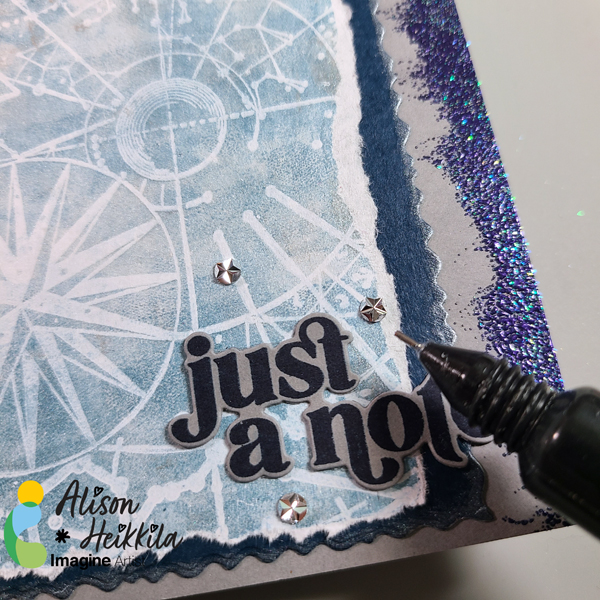
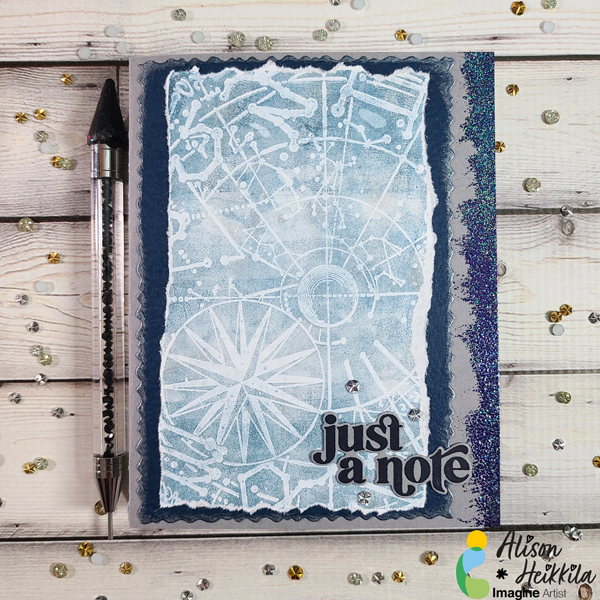
Finally, I used Imagine Tear It! Tape and attached it to the card base. I added a few gems, and the card is done!


Supplies Used:

Imagine Crafts

Delicata Golden Glitz

Brilliance Dew Drops: Pearlescent Lavender, Pearlescent Sky Blue, Orchid and Pearlescent Purple

Imagine Craft Mat

Sponge Daubers

On Point Glue

Tear-It! Tape


Other

Gina K Designs Master Layout 2

Gina K Designs Master Layout 7

SCT Let’s Stamp Together Kit July 2022-Sentiment

Cuttlebug Swiss Dot Embossing Folder

Crafty Meraki Gems

Brayer

Neenah Classic Crest Solar White 110lb

Paper Trimmer

Die-Cutting Machine

Foam Tape

How to Make a Fun Rainbow Card with VersaColor

Kathy_July_2022_Step_1-600

By Kathy Pisupati –

Hi there, Kathy here with Imagine Crafts with a new tutorial.  My space is limited so by using VersaColor pigment inks, I can reduce the amount of colored card stock I need on hand.

VersaColor pigment inks are bright and bold and coupled with the Delicata Golden Glitz it’s a winning combination.

Skill Level: Intermediate
Time to Complete: 1 hour with drying time

Directions:

Kathy_July_22_Step-1
Step 1:

You will need a card base measuring 4 1/4 x 5 1/2“. You will also need a panel that measures 4“ x 3 1/2“. I have also used the Rainbow Builder and Rainbow Accent dies from Honey Bee Stamps. You will die-cut  the rainbow card and the rainbow stripes from the accent set. 

Kathy_July_22_Step-2
Step 2

Using VersaColor & Delicata pigment inks, use Imagine Crafts sponge daubers to apply your ink to the rainbow stripes. I used the Delicata Golden Glitz for the smallest stripes. Allow these pieces to dry. 

Kathy_July_22_Step-3
Step 3

On the smaller card panel I used a stencil from Simon Says Stamp called Interlocking Circles Good Luck Charm. It is a Layered Stencil but I only used two of the layers. I used a heavy amount of Delicata Golden Glitz on the squares and a light amount on the diamonds. I also used the Daubers to ink around the edges of this panel.  On the front of the card panel, I splattered some gold watercolor paint.  I stamped a sentiment from Pink & Main, Spring Sentiments Stamp Set onto white card stock using the Delicata Golden Glitz Ink. I used my paper trimmer to cut the sentiment to size.

Kathy_July_22_Step-4
Step 4

Next use Imagine Craft On Point glue to adhere your stripes to the rainbow card die-cut.  I used Imagine Crafts Tear-It tape to adhere the rainbow card to the stencil panel. I also used Imagine Crafts On Point glue to adhere the sentiment to the front of the rainbow. Foam tape was used on the back of the stencil panel to adhere it to the card base.

Kathy_July_2022_IG_600

Supplies Used:

Imagine Crafts

Delicata Golden Glitz

VersaColor: Pink, Turquoise and Canary

Sponge Daubers

On Point Glue

Tear-It! Tape


Other

Honey Bee Rainbow Builder

Honey Bee Rainbow Accents

Pink & Main Spring Sentiment Stamps

Neenah Classic Crest Solar White 110lb

Paper Trimmer

Die-Cutting Machine

Foam Tape

Gold Watercolor paint

Paint brush

Colorful Peonies Created with Ink and Stencils Birthday Card

2022-April-Neva-PeonyBirthday_Beauty_Step12_700

By Neva Cole 

See how to use a variety of inks to create a stunning card using layering stencils and Fireworks! as an embellishment.  Layering stamps have been around for a few years, but recently a few companies have come out with layering stencils that match stamp sets.  It takes a bit more time, but the results are phenomenal and I find that the placement is just a tiny bit easier.  For a finishing touch, The Essential Glue Pad produces the look of foil without the need for heated plates or a laminating machine, a win in my book! 

Skill: Intermediate

Time: 1 Hour

Directions:

2022-April-Neva-PeonyBirthday_Step1
Step 1

Stamp Pink Fresh Painted Peony Mix in Delicata Golden Glitz and heat emboss with Iridescent Embossing Powder.  I placed the stamp at a 45 degree angle on my stamp platform, as the stamped image is longer than most platforms.  This technique creates enough images for at least three cards!

2022-April-Neva-PeonyBirthday_Step2
Step 2:

Most Peonies are white or light pink.  I choose Memento Angel Pink and used a heavy hand with the ink dauber to ink the first stencil.  Using an ink dauber allows for a bit of shading in the process as well.  Each stencil has registration marks to allow precise placement.  

2022-April-Neva-PeonyBirthday_Step3
Step 3:

The next stencil in the series colors the complementary flowers in the design.  Memento Dandelion Yellow is inked with an ink dauber, again with a heavy hand.  

2022-April-Neva-PeonyBirthday_Step4
Step 4:

The next layer creates the leafy background.  It is inked with Memento New Sprout.  

2022-April-Neva-PeonyBirthday_Step5
Step 5:

To shade in the fourth layer of color I used VersaColor Orchid.  As you can see the images are coming together.

2022-April-Neva-PeonyBirthday_Step6
Step 6:

Each successive layer adds more dimension, so pretty!  Memento Rose Bud is added in this layer.

2022-April-Neva-PeonyBirthday_Step7
Step 7:

Small pieces of removable tape are placed on the flowers that I preferred to accent with something other than the Memento Cottage Ivy used on the leaves.

2022-April-Neva-PeonyBirthday_Step8
Step 8

To finish the flowers, Memento Sweet Plum was inked through the previously covered sections of the stencil.

2022-April-Neva-PeonyBirthday_Step9
Step 9

Die cut with the matching die.  All nine pieces cut at the same time!

2022-April-Neva-PeonyBirthday_Step10Step 10

Trim a section of white linen textured cardstock to 4” x 5.25”.  Shake each Fireworks! and Shimmer spray until the fine shimmer particles are dispersed in the bottle.  Remove sprayer nozzle and tap gently to add color sprays around the white cardstock.  This method produces larger droplets that are not as closely placed together as compared to using the direct spray technique.  

2022-April-Neva-PeonyBirthday_Step11
Step 11

Stamp the sentiment on a piece of black cardstock with The Essential Glue Pad and gently place Metallic Flakes over the glue.  Use a brush to remove larger pieces of Metallic Flakes and return to the jar.  A paper towel will clean up the rest of the image.  Trim to desired shape, in this case a fishtail banner.  

2022-April-Neva-PeonyBirthday_Beauty_Step12_700
Step 12

Trim black cardstock to 5 3/8” x 4 1/8”.  Adhere layers together on a A-2 size card base with Tear It! tape.  The flower bouquet is adhere with dimensional foam adhesive. 


Art Supplies

 Imagine

• Delicate Golden Glitz

• Iridescent Embossing Powder

• Memento–Angel Pink, Dandelion, New Sprout, Rose Bud, Cottage Ivy 

• VersaColor:  Orchid 

• Fireworks!–Rose Bud, New Sprout

• Sheer Shimmer Spray Gold

• Tear It! Tape 

• Sponge Daubers 

Other

• Pink Fresh–Painted Peony Mix Stamp, Stencil Set, Die

• Black and white cardstock

• Stamp Platform

• Heat Embossing Gun 

• Paper Studio Fish Tail punch

• Painter’s tape

• Prima Art Ingredients Metallic Flakes Vintage

• Small paint brush

• Dimensional Foam Adhesive

• The Essential Glue Pad

Create a Dramatic Anniversary Card with Multi Layers of Metallic Shimmer

2022-Jan-Neva-Anniversary_blog

By Neva Cole –

Today’s tutorial will demonstrate how to create multi layers of texture for a dramatic Anniversary Card.  StazOn, Delicata, and Mboss will add amazing levels of metallic shimmer.

Skill:  Beginner

Time:  1 Hour

Directions:

Step 1
Trim white piece of sturdy cardstock to 4 1/8” x 5 3/8”.  I used the backing of a paper pack, that had one shiny white side.  First, I pressure embossed with Sizzix 3-D Textured Impressions Doodle Triangles.  A makeup sponge was used to spread StazOn Metallic inks from re-inkers in Platinum, Silver and Gold randomly around the surface of the card front.  StazOn dries on the sponge and makes it a one-time use tool. StazOn Jet Black ink is gently tapped over the raised portions of the card panel.  Set aside to dry or heat with a heat gun.
Step 2
Using a stamp from my stash (manufacturer unknown) small hearts were stamped randomly in VersaMark ink and heat embossed in Mboss in Valentine.
Step 3
Memento Luxe in Tuxedo Black is used to stamp Taylored Expressions Simple Strips Background sentiments followed by heat embossing with black embossing powder.  The matching die is used to die cut the entire set and five sentiments are selected for the front of the card.
Step 4
Each sentiment strip is inked with Delicata in Silvery Shimmer, Golden Glitz or Ruby Red with an Ink Dauber.  Since the sentiment is embossed, the ink will not change the color.
Step 5
The sentiment strips are backed with white cardstock with the matching backer die.  The edges are inked with Memento Tuxedo Black and an ink blusher to add definition.
Step 6
A Scribble Heart die by Impression Obsession is die cut from white cardstock.  The die is then inked with Versa Mark ink and heat embossed with Mboss in Valentine.
Step 7
A white card base is trimmed to 5 ½” x 8 ½”.  The edges are inked with Memento Tuxedo Black and an ink blusher.
Step 8
The card base is adhered to textured front with TearIt! Tape.  The Heart is adhered with On Point Glue.  The sentiment strips are adhered with dimension foam tape.  A striking masculine anniversary card goal achieved!

Art Supplies

Imagine
Other
  • Sizzix 3-D Textured Impressions Doodle Triangles
  • Make up sponge
  • Background heart stamp (manufacturer unknown)
  • Taylored Expressions Simple Strips Background Sentiments, Die, and Backer Die
  • Impression Obsession Scribble Heart die
  • Dimensional foam adhesive
  • Black and White cardstock
Neva Cole http://snippetscrafter.blogspot.com/ n.cole@windward-performance.com

New Ink Blending Technique Using Eyeshadow Brushes With Memento and Delicata Inks


2022-jan-katy-new-year-new-beginnings-Blog

2022-jan-katy-new-year-new-beginnings-inside-Blog-2

By Katy Ingram –

Hello Friends! I am so excited to be back with you for another year of card making and crafting here at Imagine Crafts. I know for many, Valentine’s Day cards are in full swing, but I thought it would be fun to start the year off with something a bit different. However; this card can also be turned into a Valentine or a Mother’s Day card which gives you some versatility. In todays video I show you how to use eyeshadow brushes to color your images using Memento and Delicata Inks. I hope you enjoy the video. Thanks so much for watching.

Skill: Beginner, Intermediate, Advanced
Time: 25 minutes


Art Supplies:

Imagine

• Memento Ink Pad – Angel Pink 

• Memento Ink Pad – Rose Bud

• Memento Ink Pad – Gray Flannel 

• Memento Ink Pad – Bamboo Leaves 

• Memento Ink Pad – Espresso Truffle 

• Memento Ink Pad – Rich Cocoa 

• Delicata Ink Pad  – Pink Shimmer 

• VersaMark Ink Pad 

• Mboss Embossing Powder – White 

• On Point Glue 

• Brushstix Chisel Tip 

Other Products Used:

• Ellen Hutson – Mondo Sakura Stamp Set

• Waffle Flower – New Beginnings Stamp Set

• Ellen Hutson – Essentials Rectangles Die Set

• Waffle Flower – A2 Layering Rectangle Die Set

• Stathmore 500 Series – Hot Pressed Watercolor Paper

• Stardream Metallic Silver

• Accent Opaque 110 lb Card Stock

• Misti Stamping Tool

• Couture Creations Precision Stamp Press

• Kaolin Clay Powder Tool


Learn How to Make an Astrological Card

Astrological-Chart-Card-1200

By Alison Heikkila –

Hello! It’s time for my newest post for Imagine, as an official part of the 2022 Design Team. After the hustle and bustle of the holidays, many of us are wiped out, or even burnt out from making cards and gifts all season. Because of that, I decided to come up with a fast card that doesn’t take a ton of effort, but looks like it did because of the layering.

Skill Level: Beginner
Time: 15 to 20 Minutes

Directions:

Astrological Chart Card 2

Step 1:

Adhere your 3″ x 5″ Gel Press to an acrylic block. While you can adhere it to your work surface, but if it’s attached to a block, you can control where it goes on your printing plate.


Astrological Chart Card 3

Step 2:

Apply Versa Fine Clair Ink in Twilight to the Gel Press Plate. I applied it in rows, but you can do it however you like.

Step 3:

Squeeze on a bit of Silvery Shimmer Delicata reinker. You don’t need too much.


Astrological Chart Card 4

Step 4:

Using a brayer, roll the colors together. Try not to overmix them.


Astrological Chart Card 5

Step 5:

While the inks are still wet, flip the Gel Press Plate on to the printing plate. Since it’s on an acrylic block, you can place the Gel Plate wherever you want easily. Press the Gel Press into the printing plate firmly.

Step 6:

Flip the Gel Press back over, and lay a piece of copy paper on top. This will create your print. Press the paper firmly and evenly all over the plate to get a good transfer.


Astrological Chart Card 6

Step 7:

Carefully peel back the paper to reveal your print. You can place the paper back down before you peel up the entire thing if you feel that you need to transfer the ink more.


Astrological Chart Card 7

Step 8:

After I made 3 more prints, I chose the one I wanted to use on my card. I went with my first print, which is the upper right. I tore the edges around the print instead of trimming it smoothly.


Astrological Chart Card 8

Step 9:

Using an edger die, trim a piece of navy colored cardstock to create a mat around your print.

Step 10:

Using Silvery Shimmer Delicata Ink, ink up the edges of the die cut mat.


Astrological Chart Card 9

Step 11:

On a gray card base, ink the right side with VersaMark ink. Try to not make it even, so that it has a more organic feel.

Step 12:

Sprinkle Mboss in Shimmering Night Sky on to the wet ink. Shake off excess, and heat set with a heat tool.


Astrological Chart Card 10

Step 13:

Adhere your layers. I added a stamped and die cut sentiment, as well as some jewels. For the jewels, I used On Point Glue.


Astrological Chart Card 11 600

The finished card has lots of shine and cool texture. Using your inks and reinkers on a Gel Press Plate gives you the ability to mix colors from different lines and get beautiful, soft effects.


Astrological Chart Card 13 600

Again, using all of these layers may make it seem that this card took a lot of time, but it really didn’t because making the print is such a fast process. And you can choose to use a larger Gel Press Plate to cut down on some of the layers.


Art Supplies:

Imagine:

• VersaFine Clair Ink in Twilight
• Delicata Ink Pad & Reinker in Silvery Shimmer
• VersaMark Ink Pad
• MBoss in Shimmering Night Sky
• On Point Glue
• Craft Mat

Other:

• Gel Press: 3″ x 5″ Plate
• Carabelle Studio: Zodiac Printing Plate
• Speedball: Brayer
• Stampendous: Deckle Die Set, Slim Acrylic Handle
• Pinkfresh Studios: Perfect Sentiments stamp & die set
• Doodles Paper Playground: Silver Starburst Rhinestones
• Gray card base, white copy paper, navy cardstock
• Heat Tool