The sparkle of the Delicata ink on the patterned paper background helps to make the Rinea foiled paper die-cut pieces really pop off the card! See how I make this purple elephant themed card.
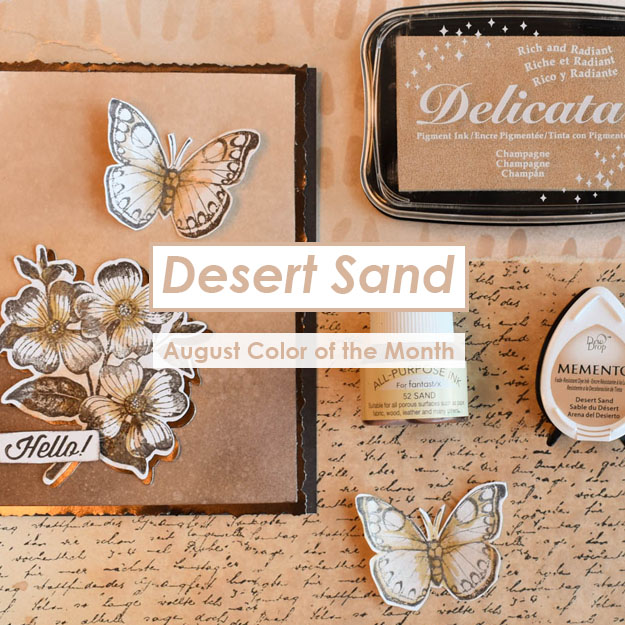
Color of the Month for August is Desert Sand. This light cream color is a beautiful way to express warm soft earthy tones. Not only is it a great compliment to chocolate browns but it looks great with a shimmery element. If you are looking for a soft shimmery gold that is not bright yellow then we highly recommend inks such as Delicata Champagne or Fireworks Shimmery Craft Spray in Desert Sand. If you are looking for a dye ink to blend with brown colors then Memento Desert Sand is also a great choice.
August also brings a collaboration with Rinea Foil Paper. Look out for how unique and versatile these foil papers are in paper crafting and jewelry making projects.
Create a beautiful dimensional Moon and Stars home decor element using resin embellishments and Fireworks Shimmery Craft Spray. Combine warm rich colors to compliment your yellow and the end result is simply stunning. A quick and easy project with lots of colors showcasing the amazing shimmer and shine by using Fireworks.
Add stenciling to a piece of wood using texture paste and leave to dry. Adhere resin elements to the block over the stenciling and leave to dry.
Step 2
Paint the entire block with the dimensional elements on using black gesso. Make sure you cover all the pieces and the sides too. Leave to dry.
Step 3
Use 3 to 4 colors of Fireworks Shimmery Craft Spray and mist over the entire design. Layer the colors over each other. Use a heat gun to dry layers in between and then add more color until you are happy with the look.
Step 4
Once the colored layers are dry, give it one last misting of Sheer Shimmer Spray in Sparkle for extra shine. I also added some Delicata Gold inker and rubbed it over the resin elements with a sponge to highlight the details and dimension.
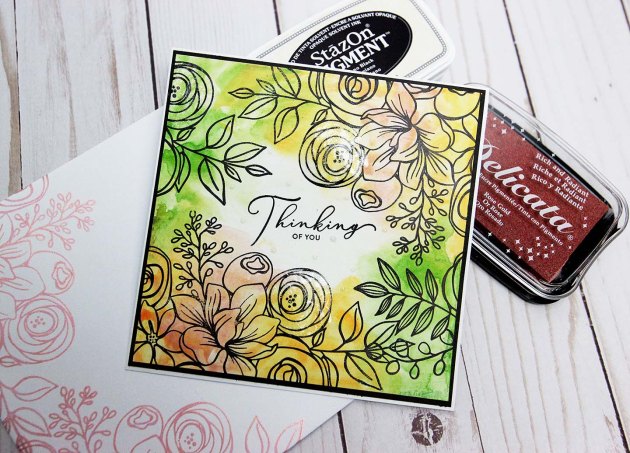
When creative inspiration hits me, I am usually creating layers of mixed media designs on frames or cards. But today, I decided to go a different route. Here is my attempt at a clean and simple Thinking of You card. I love using a mix of Tsukineko inks to create a watercolor effect. They are pigment-rich and blend like a dream. See how I made this card!
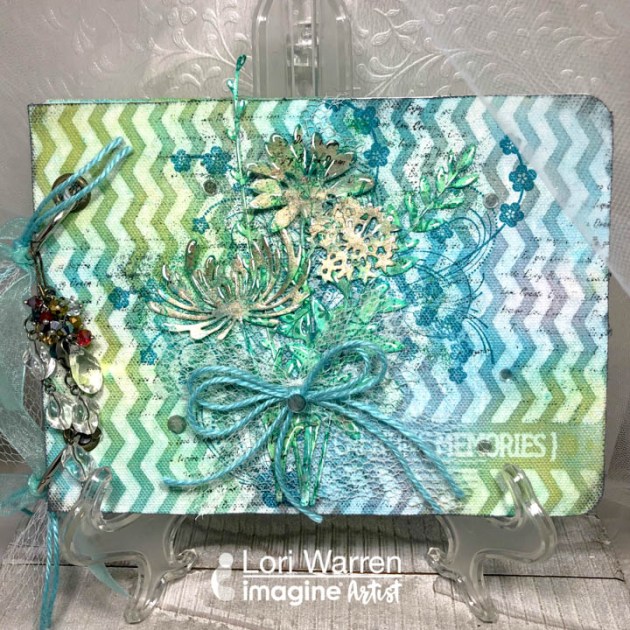
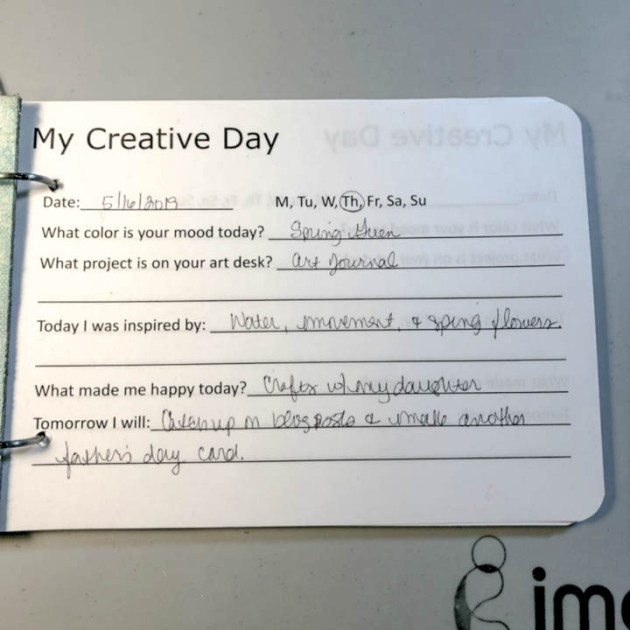
Interested is slowing down and being more mindful? A Daily Journal to document artsy ideas and creative thoughts might be just what is needed. This journal includes “My Creative Day” journal templates (with prompts for daily journaling), blank art pages (for art journaling, sketching and jotting down ideas) and a special hand decorated cover to house it all.
Skill: Advanced Time: 1 hour
Directions
Step 1
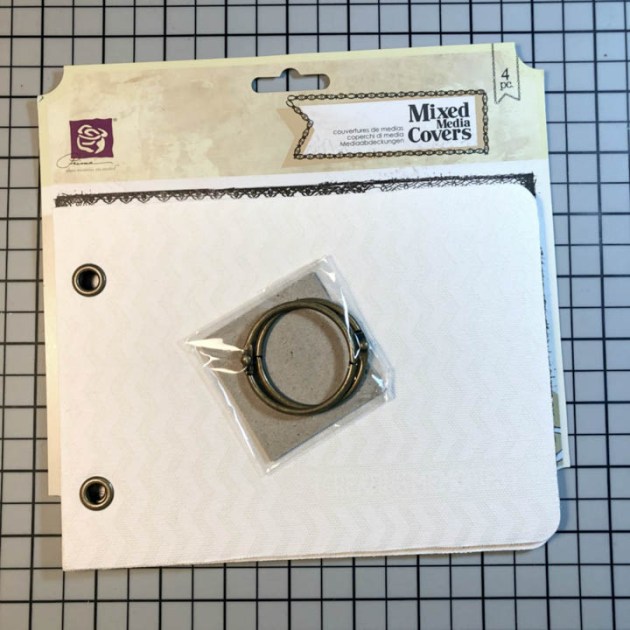
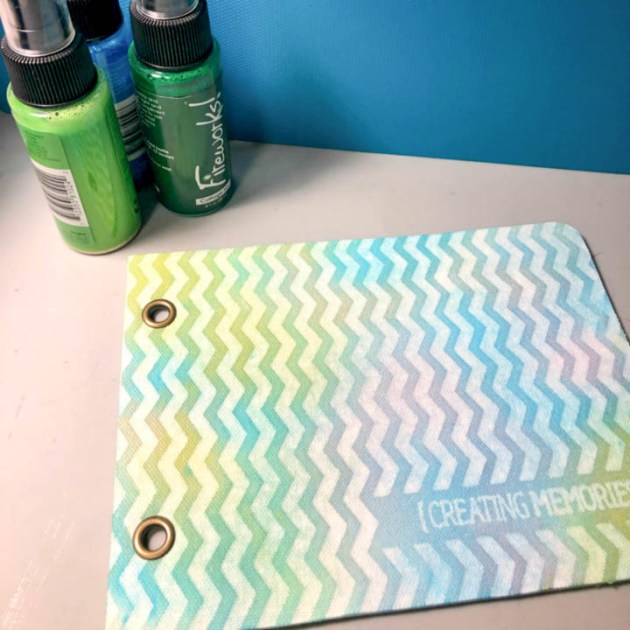
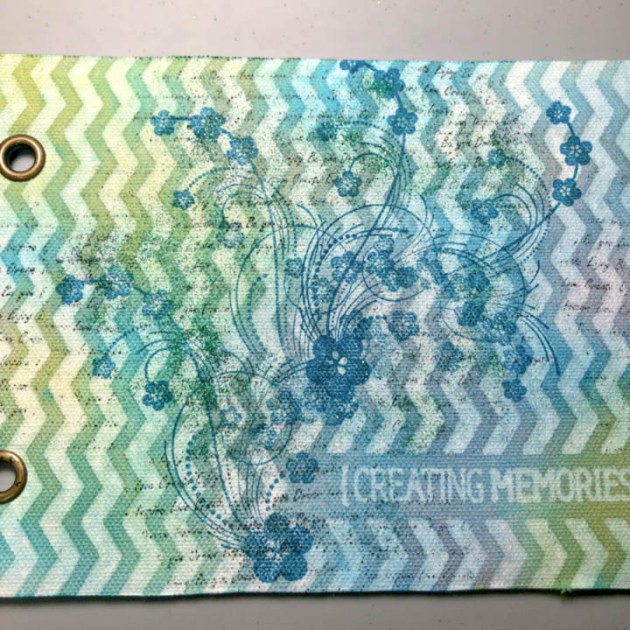
Select ready to make a cover or create a cover of your own (size 5 ½” x 7 ½”)
Step 2
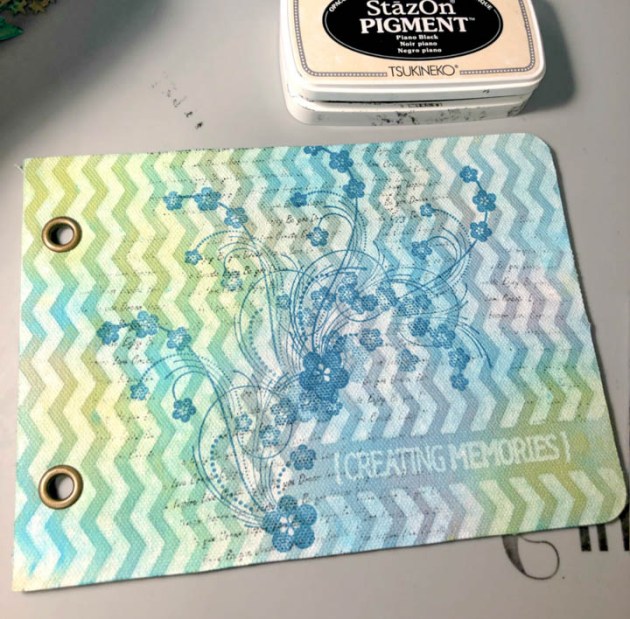
Apply a trio of Fireworks! Sprays to add color, allow to dry. As you can see the color of the waterbased inks brings out the chevron design that was preprinted.
Step 3
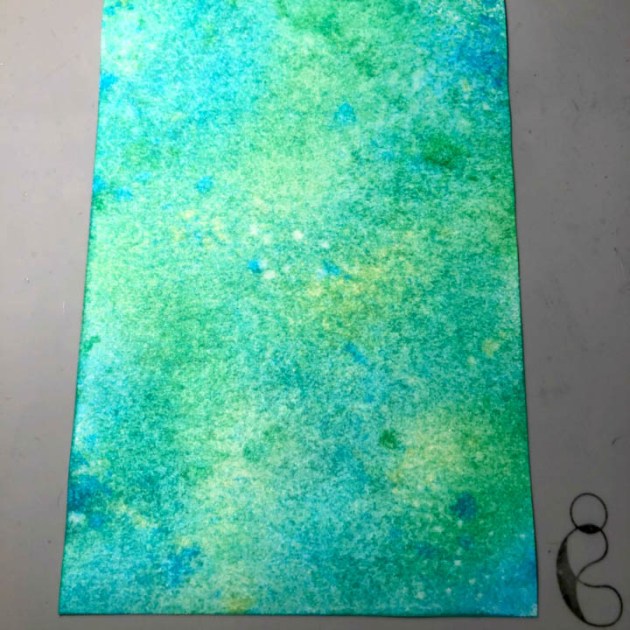
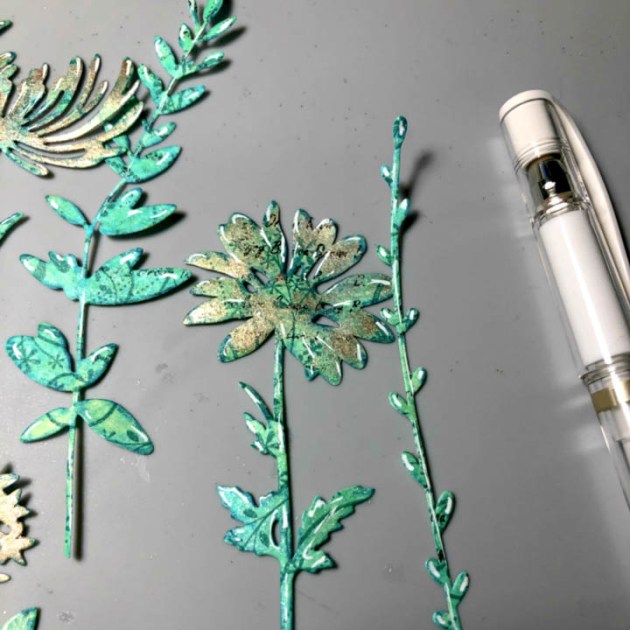
Use the same Fireworks! colors on a ½” sheet of white card stock, allow drying.
Step 4
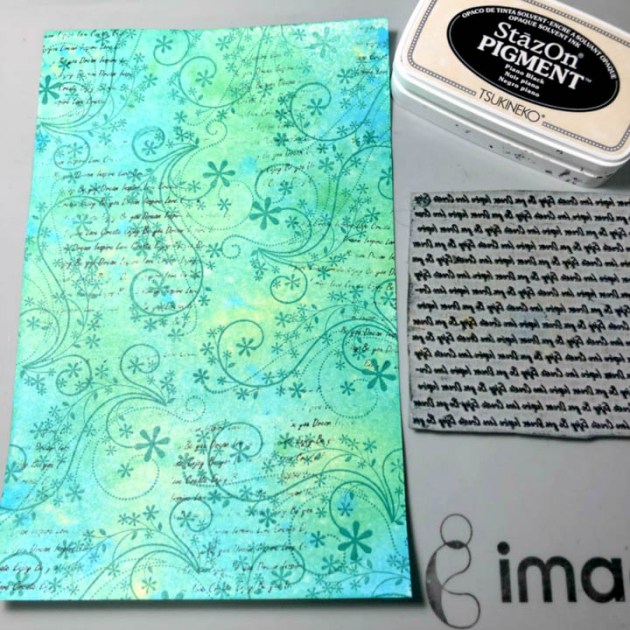
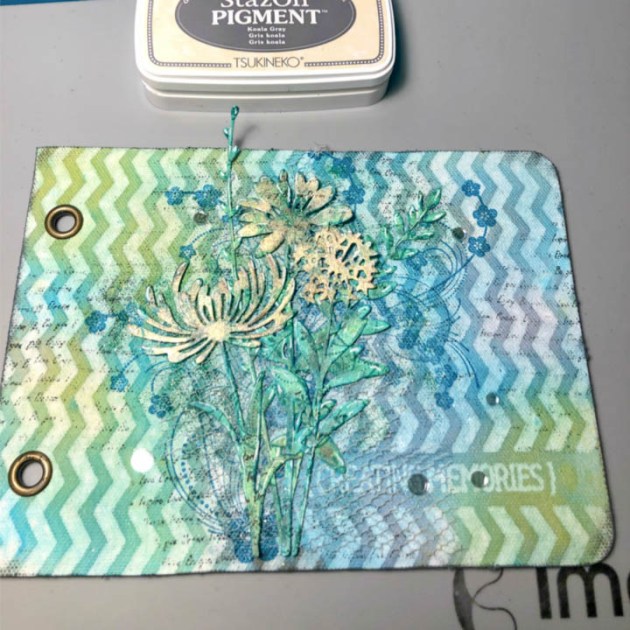
Stamp swirls and script randomly onto the card stock panel with StazOn Pigment ink.
Step 5
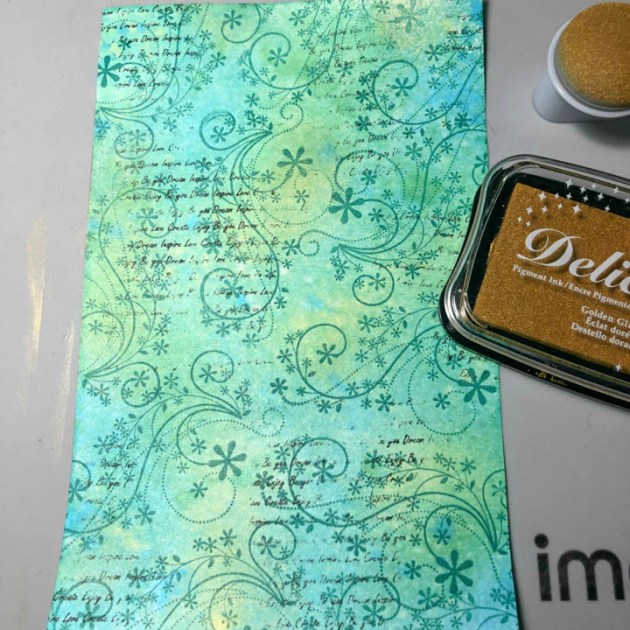
Add some shine to sections of the card stock panel with Delicata ink and a large Sponge Dauber.
Step 6
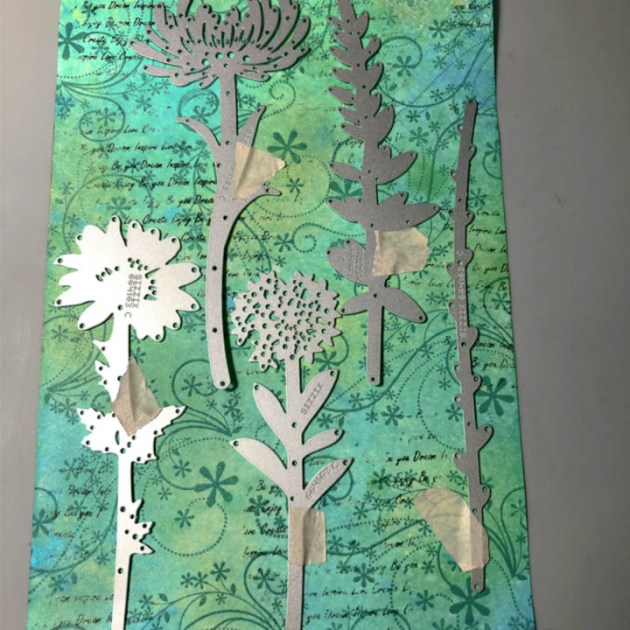
Use diecuts to cut out floral images from the card stock panel.
Step 7
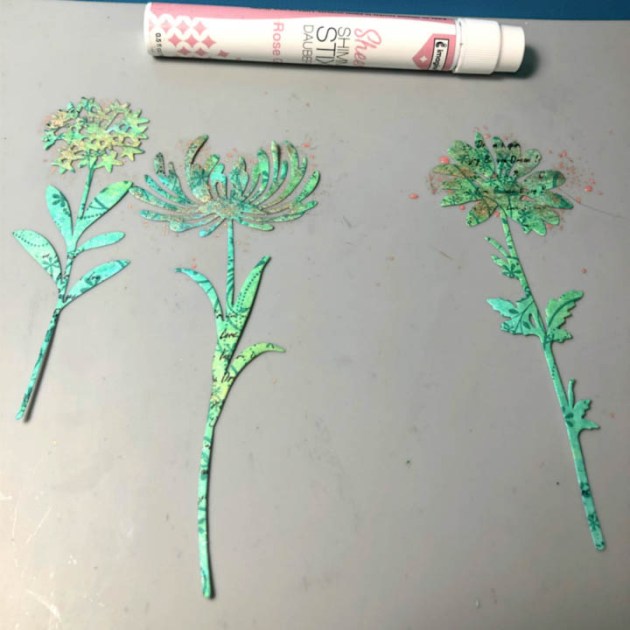
Add additional color to the flower heads with Shimmer Stix in Rose Gold.
Step 8
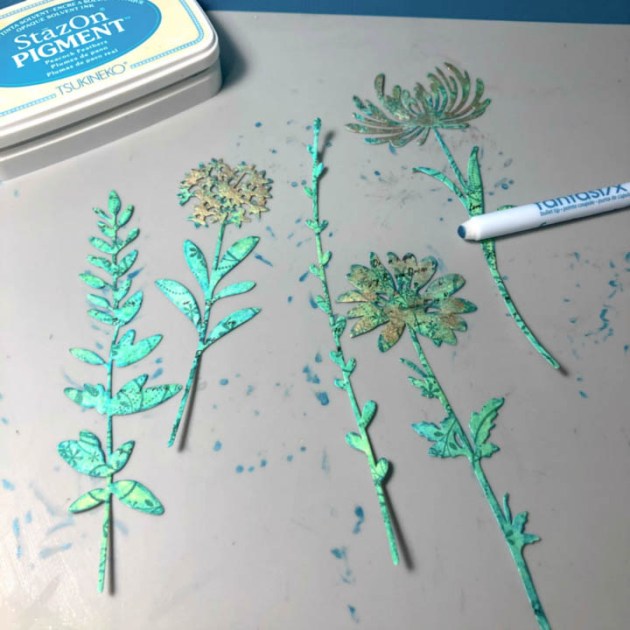
Apply shading to the flower by using a Fantastix tool with StazOn Pigment ink.
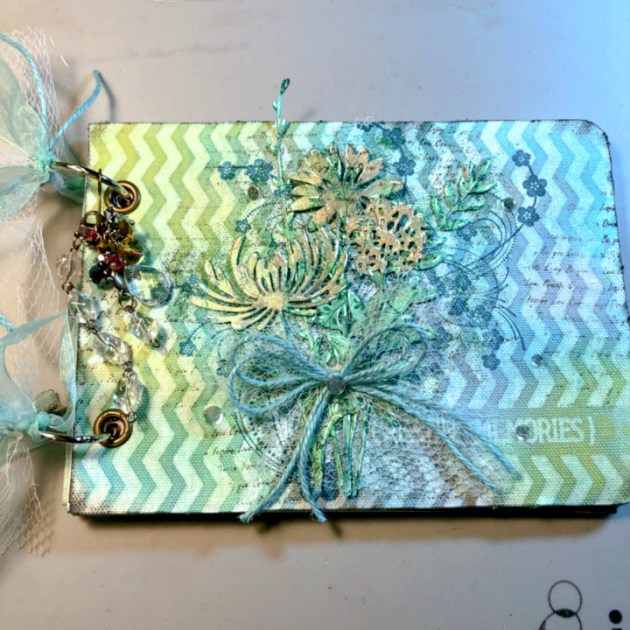
Step 9
Stamp a floral pattern and script onto journal cover with StazOn Pigment ink.
Step 10
Directly apply VersaMark ink to cover, sprinkle with MBoss powder(s) and heat set for added texture.
Step 11
Adhere to a layer of tulle.
Step 12
Highlight floral cutouts with white ink.
Step 13
Assemble floral die cuts, adhere sequence, and apply StazOn ink directly to edges of cover for shading.
I made a travel theme card with a porthole using the Vertigo film. This is a plastics film containing a 3D, hologram-like imprint. The porthole window view has a fantasy feel. It’s like looking into the abyss as you go onto your great adventure. Vertigo can be tinted with Imagine’s inks and cut with scissors or other cutting tools. Check out how this grungy, travel-themed card is made.
Skill: Beginner Time: 1 hour
Directions
Step 1
Cut out or use a die cut tool to cut a circle containing an open center from the chipboard.
Step 2
Cut out four or more different size pieces of chipboard. This will be the steampunk looking wall. Rip the edges with your hands for added grungy-ness.
Step 3
Add a few Walnut Crystals to water and mix. Paint the chipboard with a brush. Dry the paper.
Step 4
Smoosh the Golden Glitz Delicata ink onto the craft mat. Spray with water and mix.
Step 5
Smoosh the card pieces onto the watered ink. Dry the paper. Ink the edges with VersaFine Vintage Sepia ink. Ink the porthole with Delicata Celestial Copper ink.
Step 6
Now we will create the porthole. It’s made using the Breeze Vertigo. This is a firm plastic film that has a cool effect imprint. Looks like a hologram.
Step 7
Tint the Vertigo with Cottage Ivy and Pear Tart Memento inks.
Step 8
Add tiny drops of the On Point Glue to the Vertigo circle and adhere the chipboard circle.
Step 9
Add tiny drops of the On Point Glue to the chipboard circle and adhere the metal studs.
Step 10
Ink an area onto one of the chipboard pieces with the White Shimmery Delicata ink and stamp the sentiment over it with the Piano Black StazOn Pigment ink. I did this so one can better see the sentiment. You may choose to stamp the sentiment over the chipboard piece as is.
Step 11
Adhere the map paper onto the card base first, then adhere the chipboard pieces. Next, adhere the porthole and finally add the rest of the studs onto the chipboard pieces.