THANKS, You Mean So Much To Me with Imagine Crafts

2021_LeeAnn_Nov_IG

By LeeAnn McKinney –

Hi there friends and fellow crafters, LeeAnn here with a fun Thanks card, using products you might not think about when not using them in the means intended.

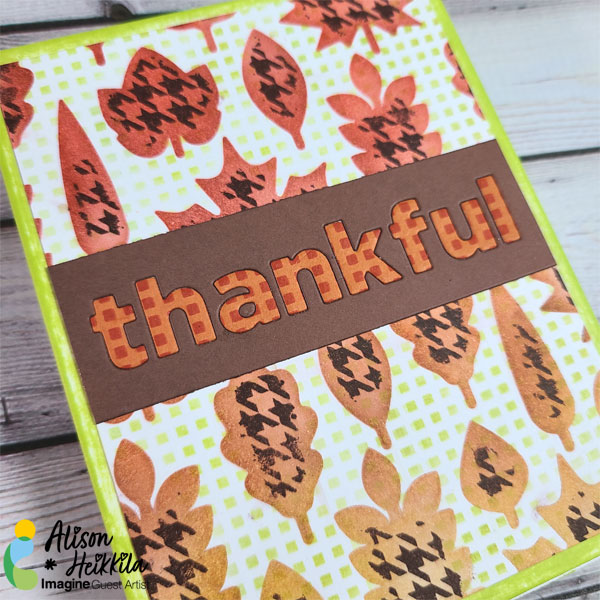
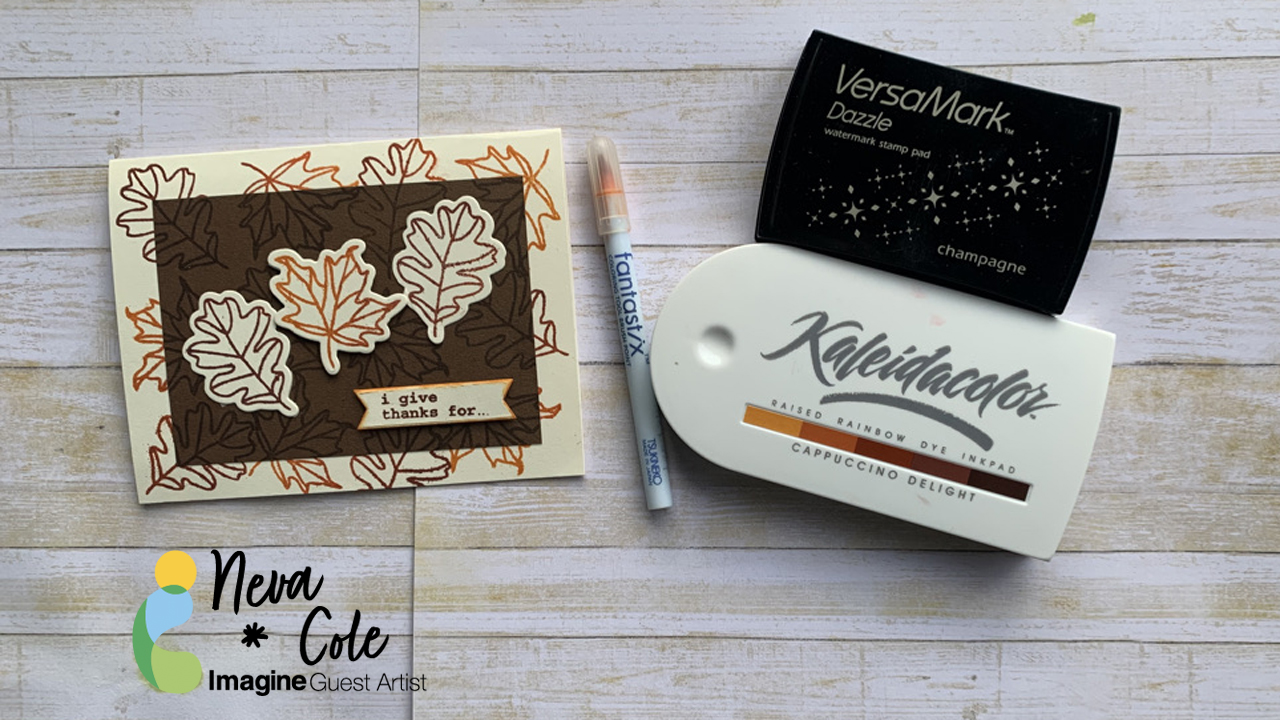
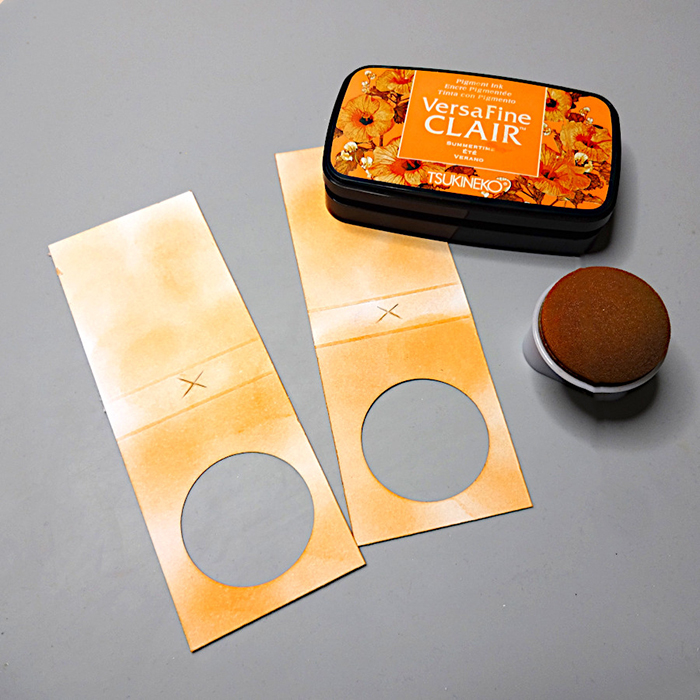
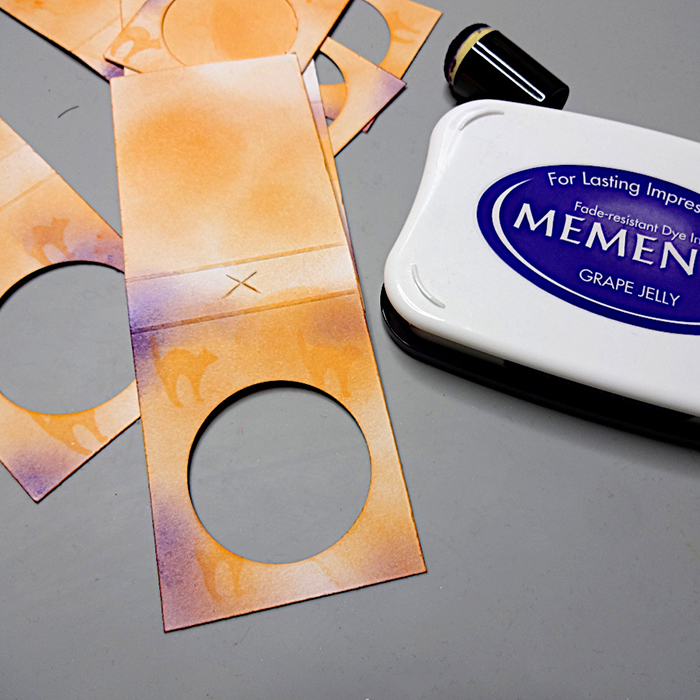
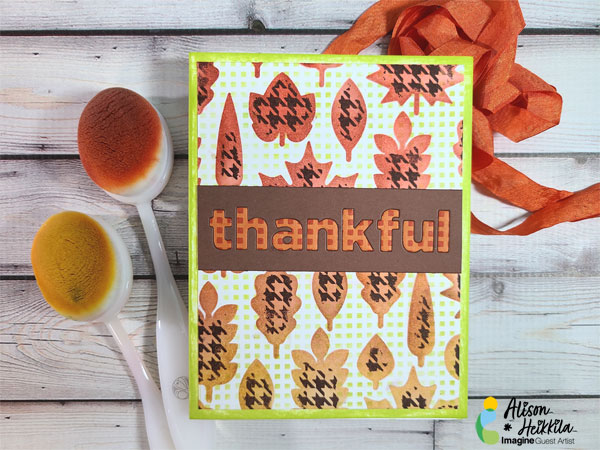
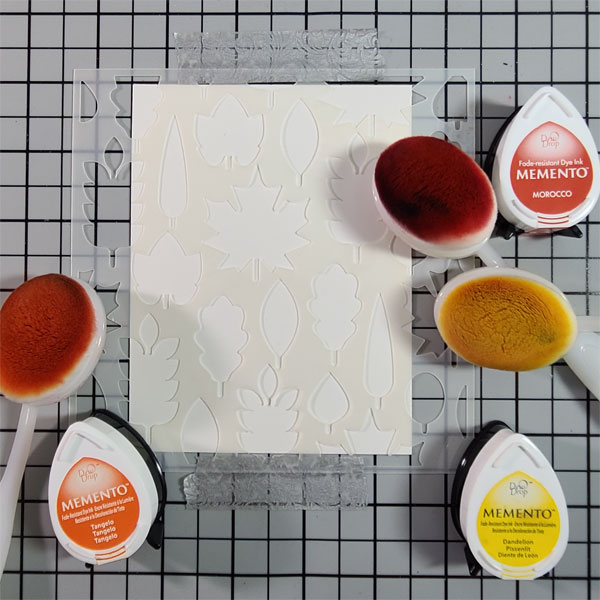
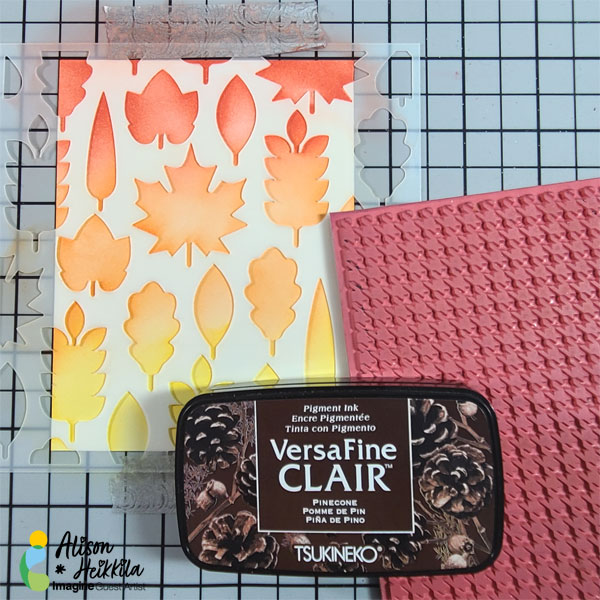
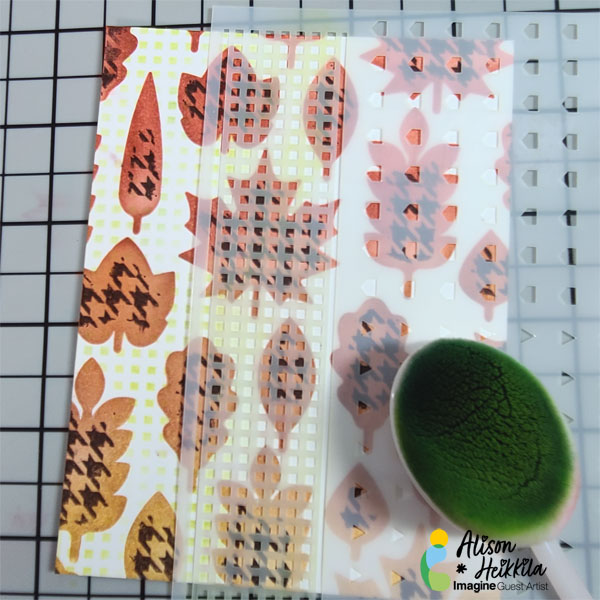
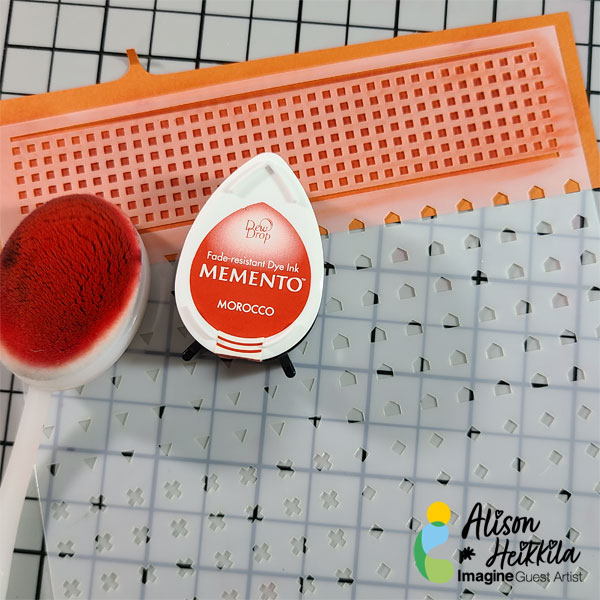
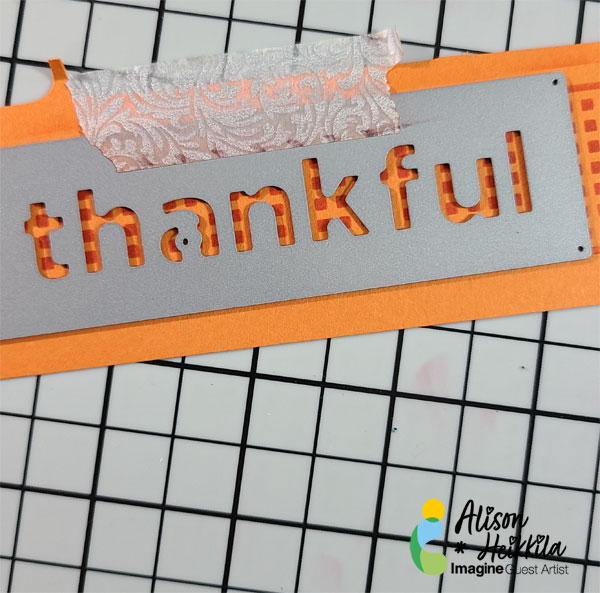
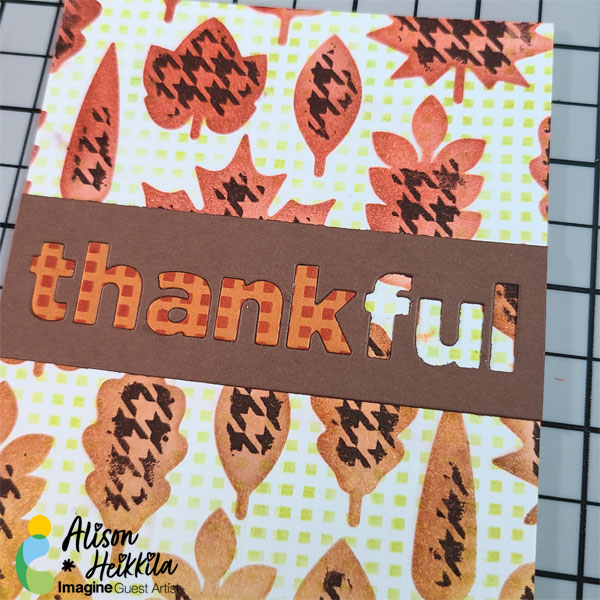
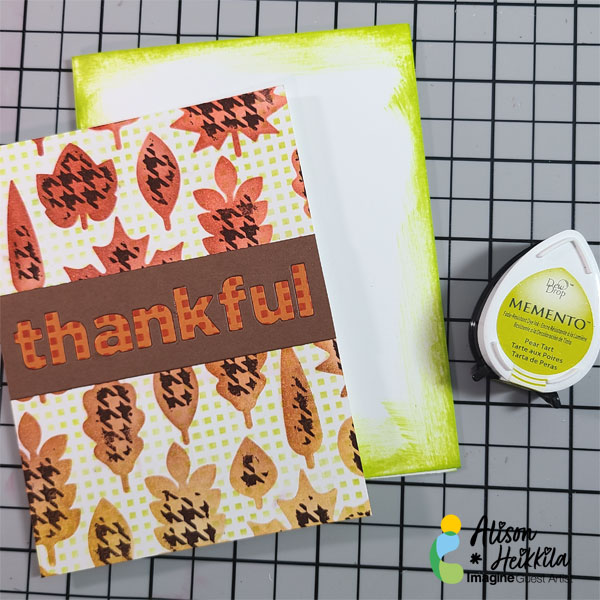
I purchased a few (4) Hot Foil Dies a couple months ago, and didn’t have the machine needed to play with them. So I’ve been thinking, and decided to use them like a letter press. I inked up the Fall Leaves with VersaFine Clair Pigment Ink in Tulip Red, Summertime Cheerful, Verdant and Pinecone, taped it to a panel of Mixed Media Cardstock and then did the same with the word “Thanks”, using Delicata Golden Glitz. I used a piece of heavyweight cardstock and rubber embossing pad, on my big shot platform, then added my panel with the foil plates adhered to it and then the regular top plate, ran it through my big shot twice (forward then back) and wow, other than a little over-inking where I tried to cover up with some sequins they turned out amazing. I used On Point Glue to adhere the sequins and Tear It! Tape to adhere the panel to my cardbase. I also heat embossed the secondary part of the sentiment using Mboss Gold Embossing Powder.

Hope you enjoy. Watch until the end and let me know which card you prefer, the card on the left without the sequins or the card on the right with the sequins. Oh, forgot that I used Gold Sheer Shimmer Spritz on my panel as well.

Thanks for watching, have a great day.


Art Supplies

Imagine:


• VersaFine Clair

• VersaMark Watermark Ink

• Paper Delicata

• Mboss

• Craft Mat

• On Point Glue

• Tear It! Tape

• Gold Sheer Shimmer Spritz


Other Products:

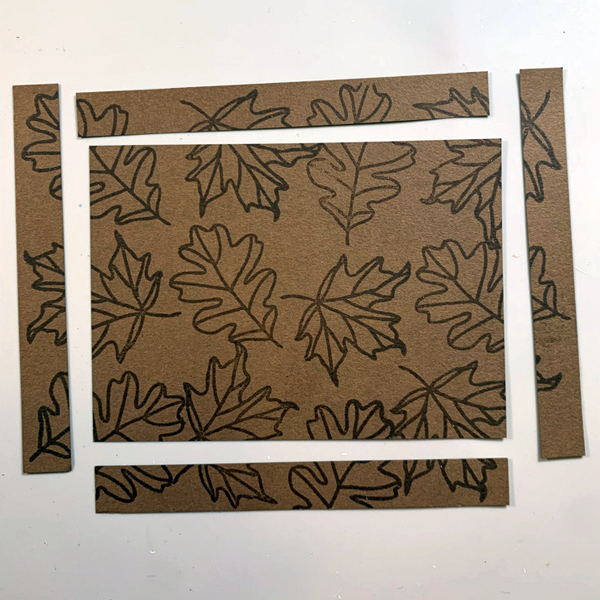
• Kraft Cardstock (heat embossed strip)
• Heavyweight Letter Press Cardstock
• Aww-Tumn Embellishment Sequin Mix


Make a Thankful Card Using Multiple Stencils

Thankful-13-600

By Alison Heikkila –

I love to use stencils. They’re an inexpensive and simple tool that has a ton of options. For this Thankful card, I used stencils in a few different ways, along with a fun background stamp. You do not need to have the exact items I used to get this effect, so check through your stash to see what you have to recreate this look. Combining these tools along with some of your favorite inks from Imagine, will give you a visually interesting and unique card.

Skill Level: Intermediate
Time: 30-45 Minutes

Directions:

Thankful-1

Step 1:

Tape your background panel of Smooth Bristol Cardstock (4″ x 5 1/4″) to your craft mat. Adhere your stencil on top with washi tape.

Step 2:

Using a Blending Brush, apply Morocco, Tangelo, and Dandelion Memento Inks on to the panel, being sure to blend the colors where they meet.

Thankful-3

Step 3:

After checking the panel to make sure the stenciling is complete, transfer the panel and the stencil to a stamping platform. Adhere the 2 pieces in the middle of the platform temporarily.

Step 4:

Attach your stamp to the platform. We’ll be using this houndstooth background stamp with VersaFine Clair in Pinecone.

Step 5:

After inking up the stamp, press the stamp very firmly. You need to try to get the inked image past the stencil, which has some dimension. Depending on your stencil and the stamp, you may or may not get a complete image. This is fine, either way. It just depends on the look you’re going for. You can see on my example below, that the houndstooth pattern didn’t go from edge to edge on all the leaves, but I like this look.

Thankful-5

Step 6:

Using another stencil with a small design, apply Pear Tart around the foliage. We’re only inking the white spaces with this design. I chose a grid pattern that is easy to line up as I work my way across the card.

Thankful-6

Step 7:

Using the same grid pattern, I inked it up on to a deep pumpkin colored cardstock with Memento ink in Morocco.

Thankful-7

Step 8:

Arrange the sentiment die on top of the stenciled cardstock and die cut.

Step 9:

Repeat the process with brown cardstock

Thankful-9

Step 10:

Adhere the brown outer portion of the die cut to the card panel.

Step 11:

Adhere the stenciled letters into the negative spaces. Don’t forget to add the center of the “a” in brown!

Thankful-10e.

Step 12:

On an A2 sized card base, ink the edges with Pear Tart Memento ink.

Step 13:

Adhere your card panel to the card base.

Thankful-14

Art Supplies:

Imagine:

• Memento Ink in Morocco
• Memento Ink in Tangelo
• Memento Ink in Dandelion
• Memento Ink in Pear Tart
• VersaFine Clair Ink in Pinecone

Other:

• Brutus Monroe: Fall Foliage Stencil
• Simon Says Stamp: Game Day Patterns
• Simon Says Stamp: Bold Thankful Die
• Erin Lee Creative: Houndstooth 6×6 Stamp
• Strathmore Smooth Bristol Cardstock
• Brown and Pumpkin Colored Cardstock
• White A2 Sized Card Base
• Blending Brushes
• Adhesive

Create a Clean and Simple Fall Layered Card

2021-Nov-Neva-FallCard

By Neva Cole –

In today’s tutorial, I will demonstrate how to use both VersaMark and Kaleidacolor ink to create a layered background for a clean and simple design fall card. VersaMark is a beautiful watermark ink especially on dark cardstock.

Skill:  Beginner

Time:  30 Minutes

Directions:

2021-Nov-Neva-FallCard-step1

Step 1

Trim a cream cardstock base to 8.5” x 5.5”, score and fold in half.  Trim a dark brown cardstock to 4.25” x 5.5”.

2021-Nov-Neva-FallCard-step2
Step 2

Use a stamp platform and stamp the leaf images in VersaMark Dazzle Champagneon the dark brown cardstock.  Any VersaMark ink will work, but there is a bit of Champagne shimmer with the Dazzle ink.  With the stamps in the same position on the stamp platform, stamp in Kaleidacolor Cappuccino Delight.  The Oak leaf is stamped on the darker brown end and the maple leaf is stamped on the lighter orange end of the Kaleidacolor Cappuccino Delight pad.

2021-Nov-Neva-FallCard-step3

Step 3

Continue stamping the base cardstock and dark brown cardstock.  Clean stamps between the Kaleidacolor ink and VersaMark ink.  It is not necessary to clean after the VersaMark ink as it will not affect the color of the Kaleidacolor ink.

2021-Nov-Neva-FallCard-step4

Step 4

Trim 0.5” from each edge of the brown cardstock.

2021-Nov-Neva-FallCard-step5

Step 5

Stamp the leaves in Kaleidacolor Cappuccino Delight.  The sentiment is stamped in the darkest color of the ink pad.  (I choose and another sentiment for the finished card.)  Die cut the leaves and the sentiment.  Edge the banner sentiment with a Brush Tip Fanstix using the orange from the Kaleidacolor Cappuccino Delight.

2021-Nov-Neva-FallCard-step6

Step 6

Line up the dark brown cardstock with the base layer.  Adhere with Tear It! Tape.  Adhere the oak leaves with Tear It! Tape and the maple leaf and sentiment with dimensional foam adhesive.

Art Supplies

Imagine
Other
  • Technique Tuesday I Give Thanks Stamp and Die
  • Lawn Cuts Everyday Sentiments Banners

How to Make a Lunar Cat Greeting Card

2021-oct-kyriakos-moon-cat-card-700-wm

By Kyriakos Pachadiroglou –

Create a dark sky background by blending MEMENTO inks on white card stock and adding details with sprinkles of All-Purpose ink White and Wisteria colors. Use the On Point glue to set little rhinestones and the Tear It! Tape to attach the background to a card base.

Skill: Beginner

Time: 1 Hour

Directions:

2021-oct-kyriakos-moon-cat-card-step1

Step 1

Cut a 4x6in piece of heavy card stock and using a jumbo Sponge Dauber heavily distress it with the MEMENTO Paris Dusk ink pad.

2021-oct-kyriakos-moon-cat-card-step2

Step 2

Repeat with the MEMENTO Grape Jelly ink pad.

2021-oct-kyriakos-moon-cat-card-step3

Step 3

Use a small Sponge Dauber to add more detail with VersaColor Indigo ink pad.

2021-oct-kyriakos-moon-cat-card-step4

Step 4

Sprinkle All-Purpose White and Wisteria inks on the card piece and let it dry.

2021-oct-kyriakos-moon-cat-card-step5
Step 5

Cut a 3 /14″ circle and color with VersaFine CLAIR Golden Meadow, while pressing the Sponge Dauber a bit on some place creating spots imitating the moon surface.

2021-oct-kyriakos-moon-cat-card-step6
Step 6

Stamp the face of the cat with the VersaFine CLAIR Nocturne.

2021-oct-kyriakos-moon-cat-card-step7

Step 7

Glue the moon on the background card using the On Point Glue and add small dots of it to set the rhinestones around.

2021-oct-kyriakos-moon-cat-card-step8

Step 8

Add some ribbon and the quote chip.

Art Supplies:

Imagine

• VersaColor – Indigo

• VersaFine CLAIR – Golden Meadow, Nocturne

• MEMENTO – Grape Jelly, Paris Dusk

• All-Purpose Ink – White, Wisteria

• Tear It! Tape

• Sponge Daubers

• On Point Glue

Other

• White Card Stock

• Cat Themed Stamps

• Orange Color Mesh Ribbon

• Orange Color Rhinestones

• Tim Holtz Ideology Quote Chips

• Hot Glue

How to Make Purr-fectly Fun Cat Fairy Lights

2021-oct-kyriakos-cat-fairy-lights_wm_700

By Kyriakos Pachadiroglou

-Decorate your home with a cat themed fairy light string with stamped designs on tracing paper using StazOn inks and creating paper lamp shades. Attach the paper lamp shades on a battery powered led string and place them in any corner for the house.

Skill: Beginner

Time: 1 Hour

Directions:

2021-oct-kyriakos-cat-fairy-lights-step1

Step 1

Cut 2×5 ½ ” pieces of cad stock. Score on 2 ½ ” from each edge to the short side.

2021-oct-kyriakos-cat-fairy-lights-step2

Step 2

Make an X cutting to the center of the card stock cuttings (this will be the opening that will the lights)

2021-oct-kyriakos-cat-fairy-lights-step3

Step 3

Use the circle punch to create openings to one side of the card stock cuttings.

2021-oct-kyriakos-cat-fairy-lights-step4

Step 4

Color with the VersaFine CLAIR Summertime ink pad and a Sponge Dauber.

2021-oct-kyriakos-cat-fairy-lights-step5
Step 5

Distress with the MEMENTO Grape Jelly ink pad.

2021-oct-kyriakos-cat-fairy-lights-step6
Step 6

Stamp the cat design on the tracing paper using StazOn Jet black.

2021-oct-kyriakos-cat-fairy-lights-step7

Step 7

Cut along the designs, (about 2″ squares), turn to the back the tracing paper and color with StazOn Iris ink pad.

2021-oct-kyriakos-cat-fairy-lights-step8

Step 8

Place Tear It! Tape in the blank side (inner side to be) of the card stock cuttings, above and below the circular opening.

2021-oct-kyriakos-cat-fairy-lights-step9

Step 9

Set the tracing paper cuttings, stamped with the cat designs, to cover the circular opening and fold to attach the short edges.

2021-oct-kyriakos-cat-fairy-lights-step10

Step 10

Place led lights on the X opening made earlier.

2021-oct-kyriakos-cat-fairy-lights-step10

Art Supplies:

Imagine

• StazOn – Jet Black, Iris

• VersaFine CLAIR – Summertime

• MEMENTO – Grape Jelly

• Tear It! Tape

• Sponge Daubers

Other

• White Card Stock

• Tracing Paper

• Cat Themed Stamps

• 1.5in Circle Punch

• Battery Operated Lights String

• Kraft Knife

How to Make a Spooky Card

Crow-10-600

By Alison Heikkila –

Halloween is a great time to experiment with deeper shades, interesting textures, and unique combinations. Things don’t need to be pretty or perfect…in fact, the weirder and more off-kilter they are, the better! Let’s use a variety of Imagine products to make a spooky card for Halloween.

Skill Level: Beginner to Intermediate
Time: 30 Minutes, including drying time

Directions:

Crow-1

Step 1:

Apply Silvery Shimmer Delicata Ink Refill to a 6×6 gel printing plate and roll out with a brayer.

Crow-2

Step 2:

Lay your stencil on to the gel plate. Using a piece of scrap paper, rub the negative space areas to pick up the ink. Pull the print. You won’t be using this print for this project, but you can save it for another time.

Step 3:

Lift the stencil off of the plate.

Step 4:

Lay a piece of 4″ x 5 1/4″ black cardstock on top of the plate, where the stenciled image is. rub the paper on to the plate firmly, making sure to rub all areas to ensure a clean pull.


Crow-3

Step 5:

Pull the print.

Crow-5

Step 6:

Splatter irRESISTibles Spray in Love Letter on to the gel print. I open the bottle and tap the straw to get nice, big splatters. Let dry.

Crow-4

Step 7:

On a piece of gray cardstock, stamp a solid or silhouette image with VersaMark ink. I used a crow.


Step 8:

Sprinkle Shimmering Night Sky Mboss powder on to the inked image, tap off the excess, and heat set. Then, you can fussy cut the image out.

Crow-6

Step 9:

Die cut your sentiment out of a deep orange cardstock.

Step 10:

Using Tuxedo Black Memento Ink, press the front side of the letters into the pad gently. Memento ink pads have a wonderful texture, which will work perfectly with our creepy card.

Step 11:

On a black A2-sized card base, ink the edges with Black Shimmer Delicata Ink.


Step 12:

Adhere all of your elements on to the card base.


Crow-7

Art Supplies:

Imagine:

• Delicata Ink in Black Shimmer
• Delicata Reinker in Silvery Shimmer
• irRESISTible Spray in Love Letter
• VersaMark Ink
• Mboss in Shimmering Night Sky
• Memento Ink in Tuxedo Black

Other:

Black, Orange and Gray cardstock
Tim Holtz: Crossbones Stencil, Crow Stamp
6×6 Gel Printing Plate
Alphabet Dies