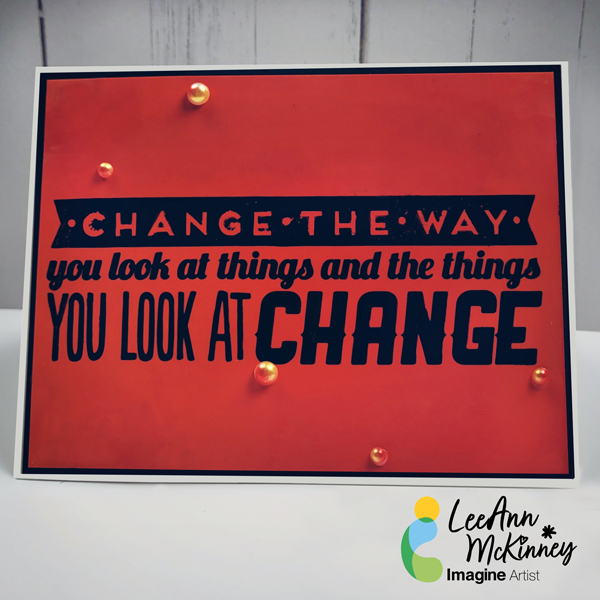
Hey there friends and fellow crafters, LeeAnn here with a fun Inspirational Card I made using my absolute favorite technique, and those of you that have been here for a while know I love Kaleidacolors.
Welcome to our blog! Imagine Crafts is pleased to be a super sponsor for the Coffee Lover’s Blog Hop for the Spring/Summer of 2022.Our design team members all joined in to show you some of the fun and coffee themed cards they made using some of the Imagine Inks and readily available stamps/dies that are coffee themed.
We are also having a giveaway!Since Imagine Crafts is a super sponsor, we will be giving away a $25.00 gift card to the store. Please comment below for your chance to win.
Some of our design team members have created extra projects in order to participate in the Coffee Lovers Blog Hop and we will now share their photos of their projects and links to the Imagine items used. That way, you can go visit the item and see if it is for you.
– Hi there Coffee Lovers, for my project today I used The Perfect Blend Stamp Set from Gina K Designs. Using Memento Espresso Truffle I stamped the background and since Memento is a dye based ink it dried quickly.
I cut a panel of vellum to cover most of my background panel, and then grabbed a circle tag out of my stash. I stamped the coffee cups on the tag with the Memento Espresso Truffle and then used Memento Markers to add a pop of color. For The cup part I used Bamboo Leaves and Pistachio, while for the rings I used Rich Cocoa and Desert Sand.
The final stamping was the sentiment in which I used VersaFine Clair in Pinecone. I used Tear It! Tape and On Point glue to adhere my panels together and with that my project is complete.
Happy Hopping in the Coffee Lover’s Blog Hop Spring/Summer 2022!!!
– I went with a simply designed card that is perfect for any coffee lover. I ink blended two VersaFine Clair Inks with my coffee bean stencil. My sentiment was die cut and I used the die itself as a mask to softly ink around the sentiment. Sparkle Blends were adhered with On Point Glue for some shine.
– Hi there friends and fellow crafters, Today I am here making 2 Impactful but clean and simple cards using Tear It! Tape, On Point Glue, VersaFine CLAIR in Nocturne, MBoss in Clear and Memento Luxe in Wedding Dress.
The first thing I had done to prepare for my video was to create 2 A2 panels 4.25” x 5.5”. I then used my Mini Misti stamped 1 panel with the sentiment from the Gina K Designs Delightful Daisies stamp set using VersaFine CLAIR in Nocturne. This is a Vegetable Oil based ink and takes a little time to dry so put it aside and move to my second panel.
The second panel, I put in the Altenew Daisy Bed 3D embossing folder and ran it though my Vagabond 2 machine with only 1 cutting plate and the platform, this worked perfectly and gave a great embossing effect.
I then went back to the first panel and ran it through the embossing folder as well, following that I poured a bit of clear MBoss on the sentiment and heat set it. This gave a seal and a shiny effect to the sentiment and allowed me to move on to the next step, which was using the Memento Luxe Mixed Media Pad in Wedding Dress to add a bit of shine and White color to the Raised edges of the panel. I added this purple panel to the card base, a few Jewels and this card was complete, Moving back to the Mint card, I used On Point glue to adhere the Happy Anniversary Sentiment and Shadow to the front panel, the Cantaloupe Memento Marker to the center of the Daisies and a Jewel for the tittle in the sentiment. Added this to the card base using Tear It Tape and this card was also complete.
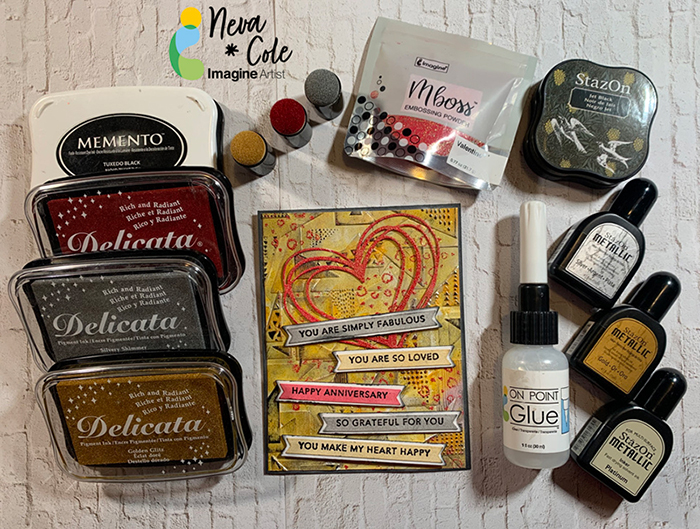
Today’s tutorial will demonstrate how to create multi layers of texture for a dramatic Anniversary Card. StazOn, Delicata, and Mboss will add amazing levels of metallic shimmer.
Skill:Beginner
Time:1 Hour
Directions:
Step 1
Trim white piece of sturdy cardstock to 4 1/8” x 5 3/8”. I used the backing of a paper pack, that had one shiny white side. First, I pressure embossed with Sizzix 3-D Textured Impressions Doodle Triangles. A makeup sponge was used to spread StazOn Metallic inks from re-inkers in Platinum, Silver and Gold randomly around the surface of the card front. StazOn dries on the sponge and makes it a one-time use tool. StazOn Jet Black ink is gently tapped over the raised portions of the card panel. Set aside to dry or heat with a heat gun.
Step 2
Using a stamp from my stash (manufacturer unknown) small hearts were stamped randomly in VersaMark ink and heat embossed in Mboss in Valentine.
Step 3
Memento Luxe in Tuxedo Black is used to stamp Taylored Expressions Simple Strips Background sentiments followed by heat embossing with black embossing powder. The matching die is used to die cut the entire set and five sentiments are selected for the front of the card.
Step 4
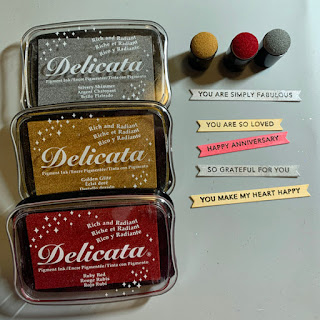
Each sentiment strip is inked with Delicata in Silvery Shimmer, Golden Glitz or Ruby Red with an Ink Dauber. Since the sentiment is embossed, the ink will not change the color.
Step 5
The sentiment strips are backed with white cardstock with the matching backer die. The edges are inked with Memento Tuxedo Black and an ink blusher to add definition.
Step 6
A Scribble Heart die by Impression Obsession is die cut from white cardstock. The die is then inked with Versa Mark ink and heat embossed with Mboss in Valentine.
Step 7
A white card base is trimmed to 5 ½” x 8 ½”. The edges are inked with Memento Tuxedo Black and an ink blusher.
Step 8
The card base is adhered to textured front with TearIt! Tape. The Heart is adhered with On Point Glue. The sentiment strips are adhered with dimension foam tape. A striking masculine anniversary card goal achieved!
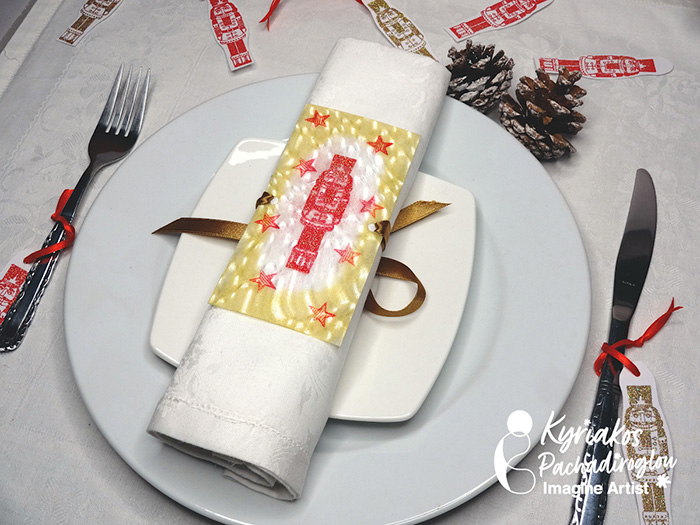
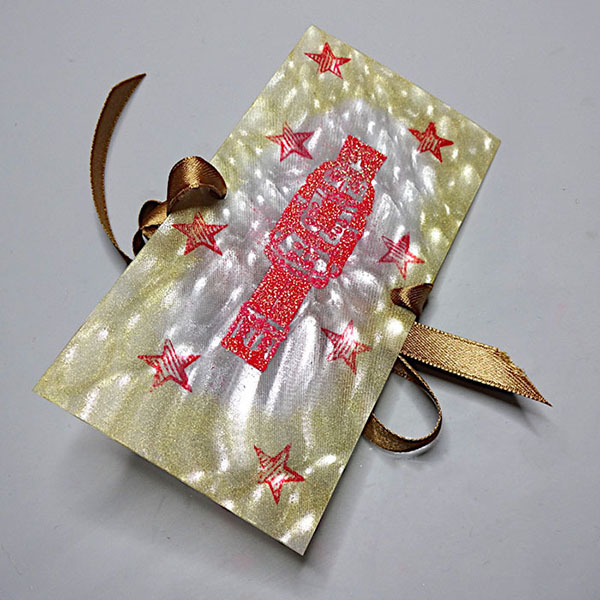
Stamp on Vertigo sheets to make sparkling napkin rings using Mboss Valentine embossing powder. Repeat stamping on white card stock to make little tags to decorate your festive table.
Skill: Beginner
Time: 1 Hour
Directions:
Step 1
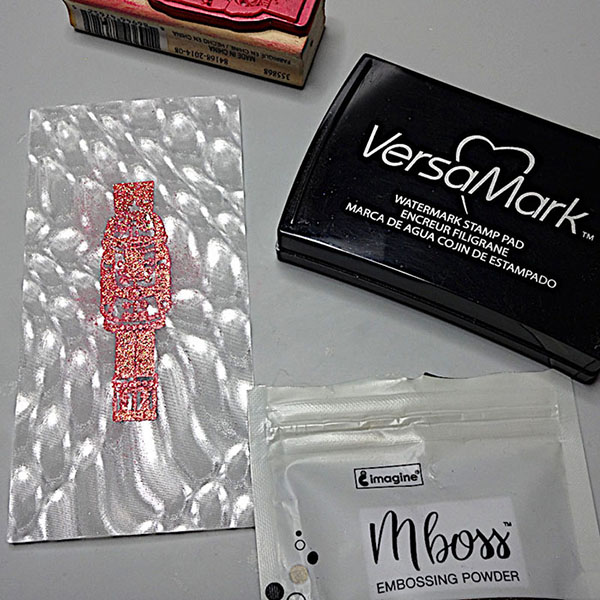
Cut 2 ½ x 5 in pieces of the Vertigo sheets and stamp with VersaMark watermark ink.
Cover with Mboss Valentine embossing powder and heat set.
Step 2
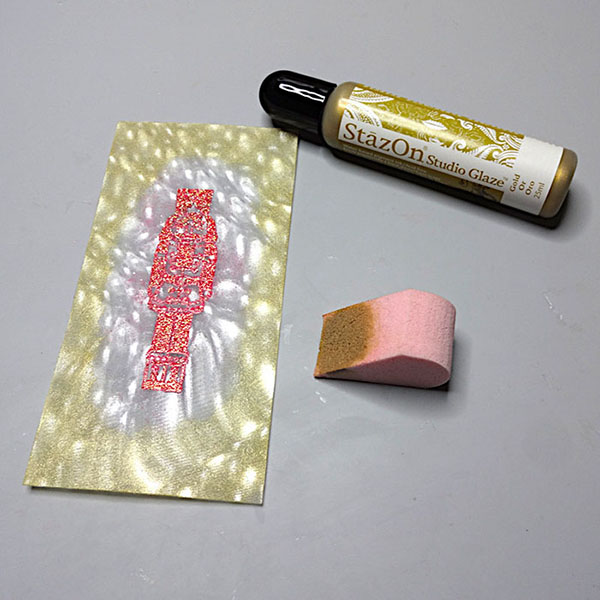
Use an ink blusher to color around the stamped image with the StazOn Studio Glaze gold.
Step 3
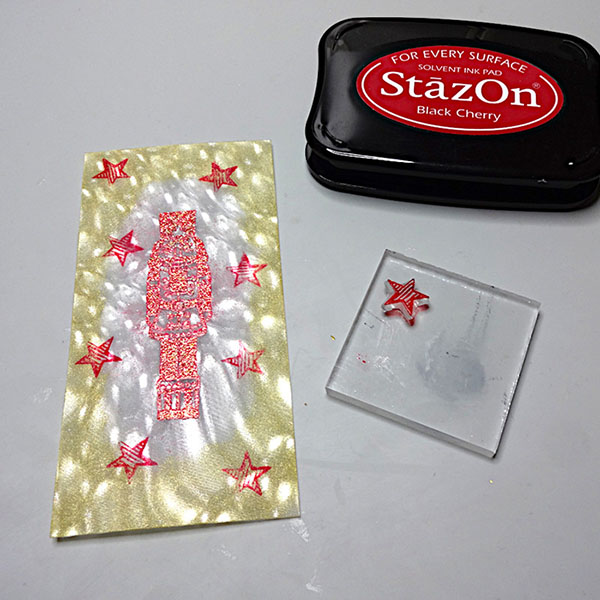
Stamp stars with the StazOn Black Cherry ink pad.
Step 4
Punch one hold at the middle left and right long side edges and place satin ribbon.
Step 5
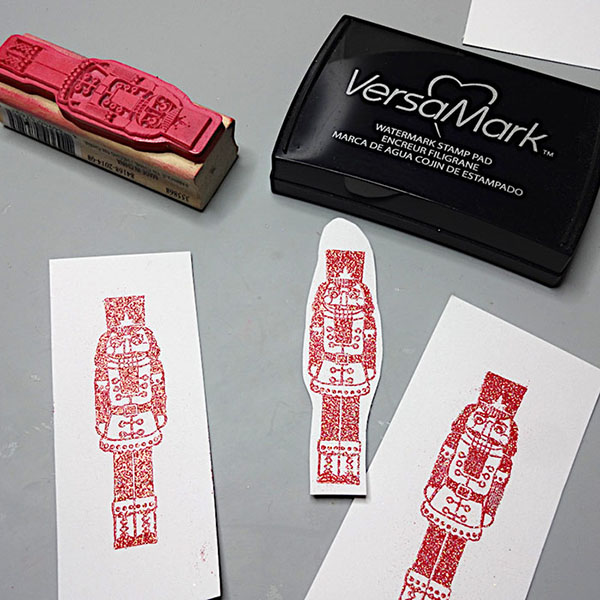
Stamp the nutcracker stamp on white card stock with VersaMark watermark ink pad. Cover with Mboss Valentine embossing powder and heat set. Cut around. Repeat with the Mboss Sparkling Champagne Embossing Powder.
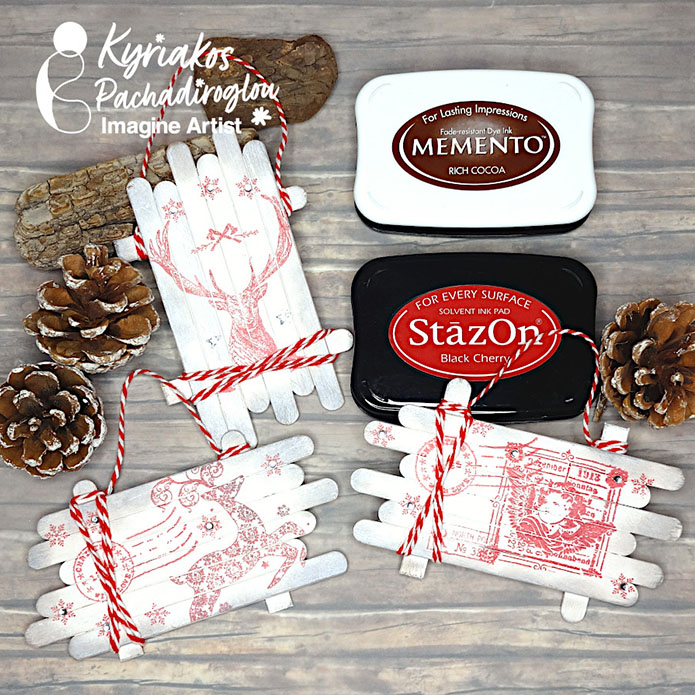
Make wooden sign board style ornaments for your Christmas tree, colored with white All-Purpose ink and stamped Christmas designs with StazOn ink. Simple and easy to make.
Skill: Beginner
Time: 1 Hour
Directions:
Step 1
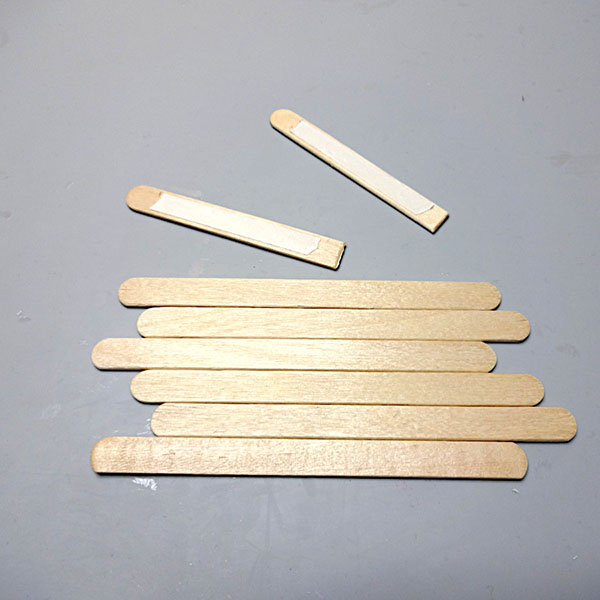
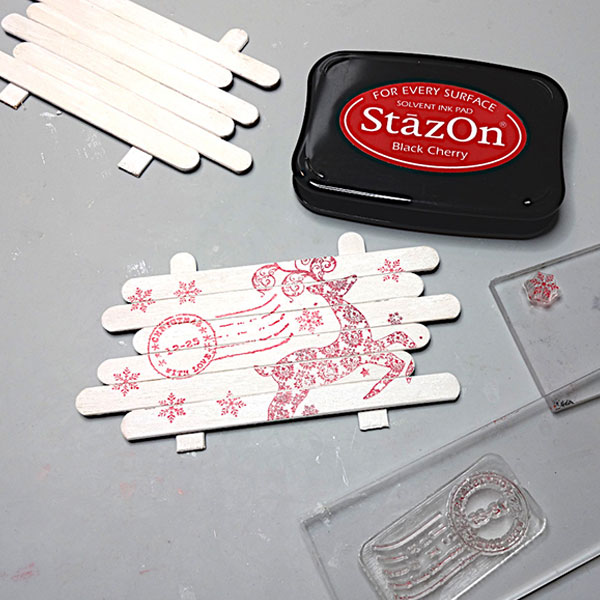
Place 6 wooden sticks next to each other. Cut two wooden sticks a bit longer than the total width of the above six ones. Place Tear It! Tape on the two and attach on the rest and create a sign board.
Step 2
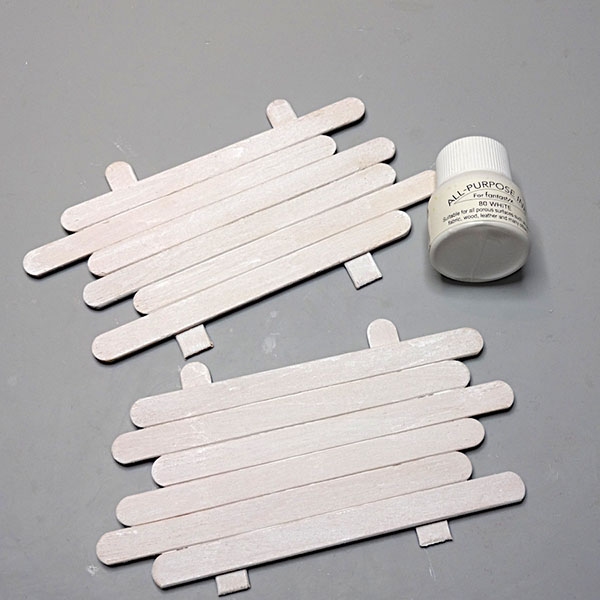
Color the sign boards with white All-Purpose Ink and both sides.
Step 3
Stamp your favorite Christmas stamps using the StazOn Black Cherry ink pad, which will dry quickly and won’t bleed on the wood.
Step 4
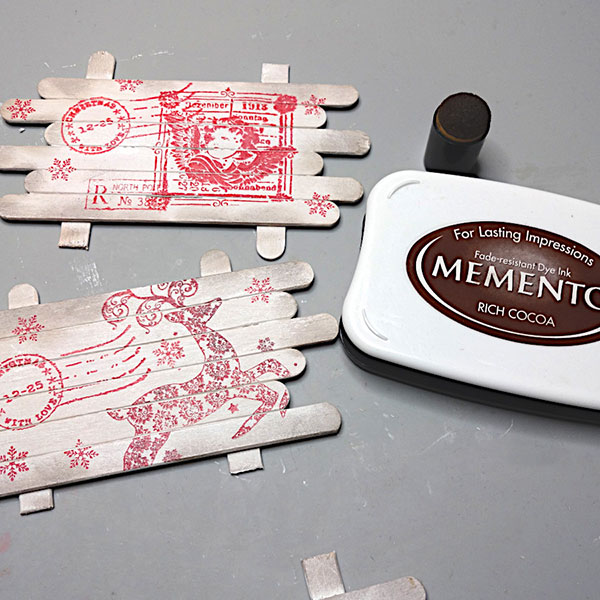
Distress the edges with Memento Rich Cocoa ink pad.
Step 5
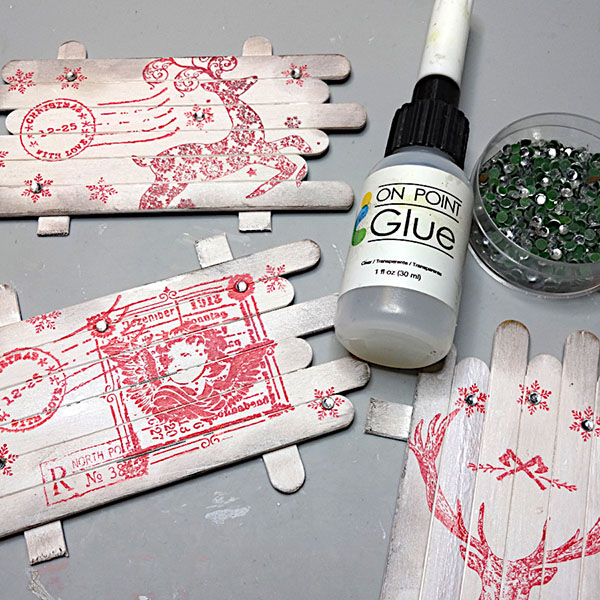
Add rhinestones using the On Point Glue.
Step 6
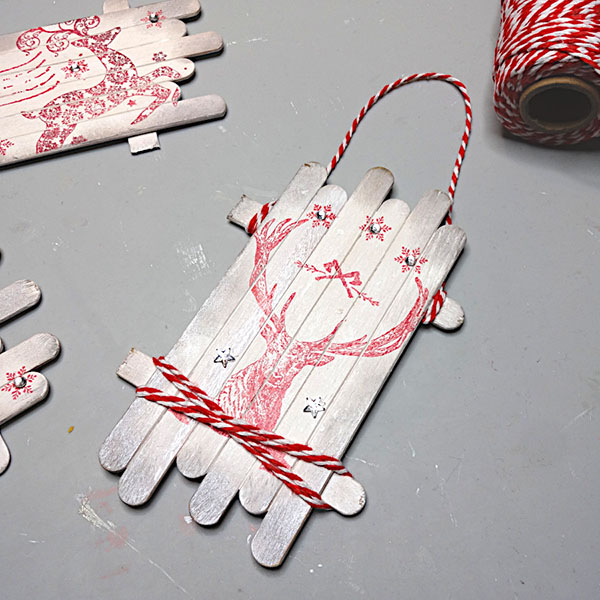
Wrap Baker’s twine on one side and some on the top to hand the ornament.