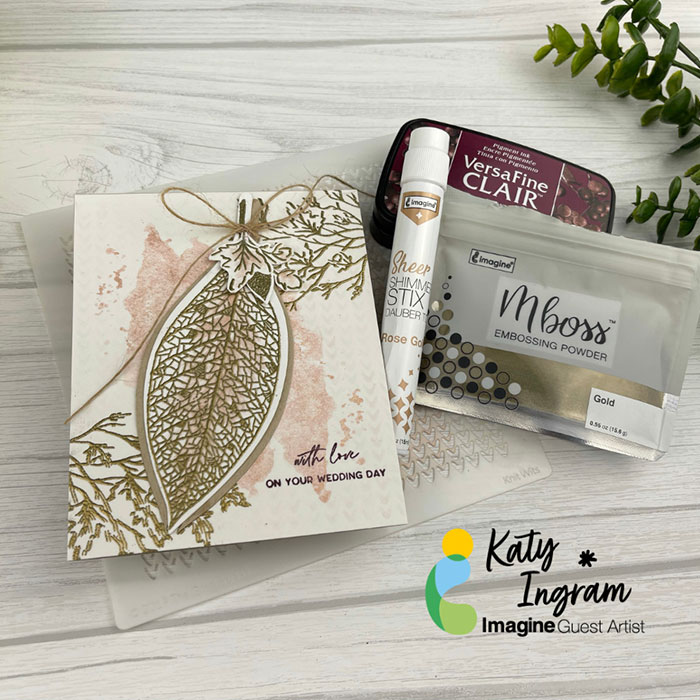
Create an Autumn Themed Wedding Card With Sheer Shimmer Stixs and Delicata Ink

Sept-2021-katy-ingram-autumn-themed-wedding-card-700

By Katy Ingram –

Hello friends! Katy here and for today’s video I have an Autumn themed wedding card for you. I was inspired by a project I saw a couple years ago and I could not wait for fall to roll around so I could show you. I know a long time to wait but, worth it, I think. The Rose Gold Sheer Shimmer Stix and the Delicata Rose Gold ink was perfect to bring this card together. I hope you enjoy.

Thanks For Watching.

Skill: Beginner, Intermediate, Advanced
Time: 30 minutes


Art Supplies:

Imagine

• Delicata Rose Gold Ink• Sheer Shimmer Stix Rose Gold

• MBoss Embossing Powder Gold

• VersaFine Clair Chianti

• On Point Glue

• Tear It! Tape

• VersaMark Ink

Other Products Used:

• The Greetery

  • Pretty Postmark Stamp Set
  • Sentiment Suites – Love Stamp Set
  • Knit Whits Stencil Set
  • Autumn Sketches Stamp Set

• Concord and 9th Lace Leaf Stamp and Die Set

• Strathmore 500 Series Hot Pressed Watercolor Paper

• Neenah Classic Crest 110 lb White Card Stock

• Fun Stampers Journey Oatmeal Card Stock

• May Arts Natural Jute String


Make a Cheery Birthday Card Using Fireworks! Shimmery Sprays

2021-Aug-Neva-Fireworks!-Bday-card-step7

By Neva Cole –

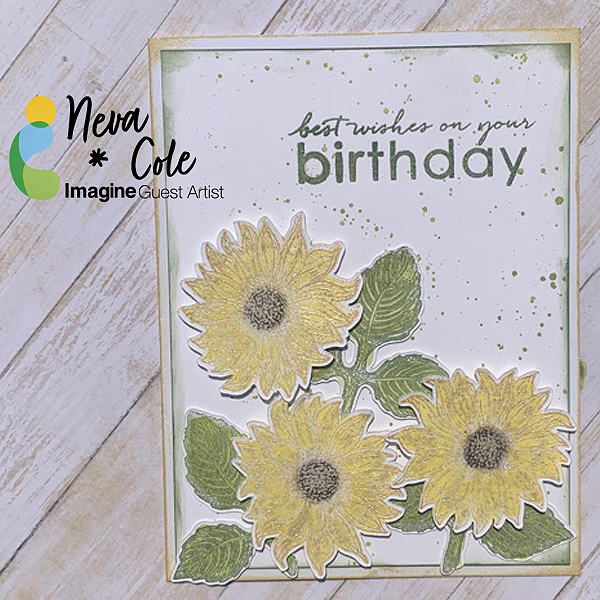
In today’s card making tutorial, I will show you how to use your Fireworks! Shimmery Spray inks in different ways rather than just spraying them!  All of the blooming sunflowers during my travels were the inspiration for this late summer birthday card.  It is very cool that sunflower heads follow the sun throughout the day, and they are always bright and cheery!

Skill:  Intermediate

Time:  1.5 hours

Directions:

2021-Aug-Neva-Fireworks!-Bday-card-Step1

Step 1

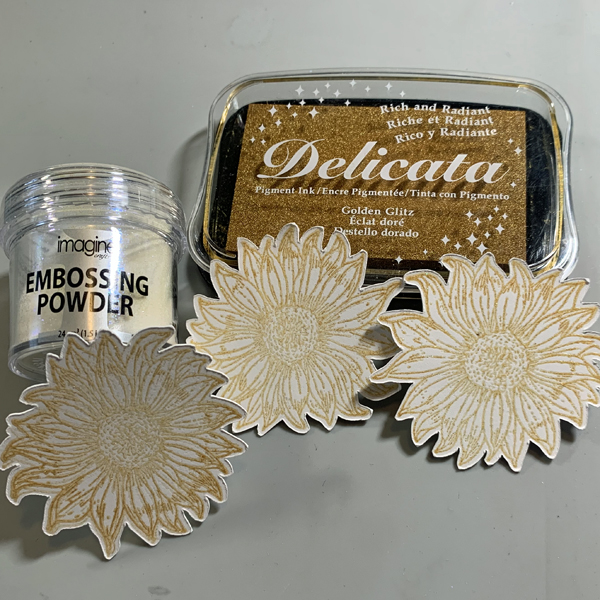
Stamp sunflower image in Delicata Golden Glitz and heat emboss with Iridescent Embossing Powder.  The Delicata Golden Glitz is one of the brightest gold inks, and works best for a sunflower.  Die cut with an electronic die cut machine, or fussy cut with scissors.

2021-Aug-Neva-Fireworks!-Bday-card-Step2
Step 2

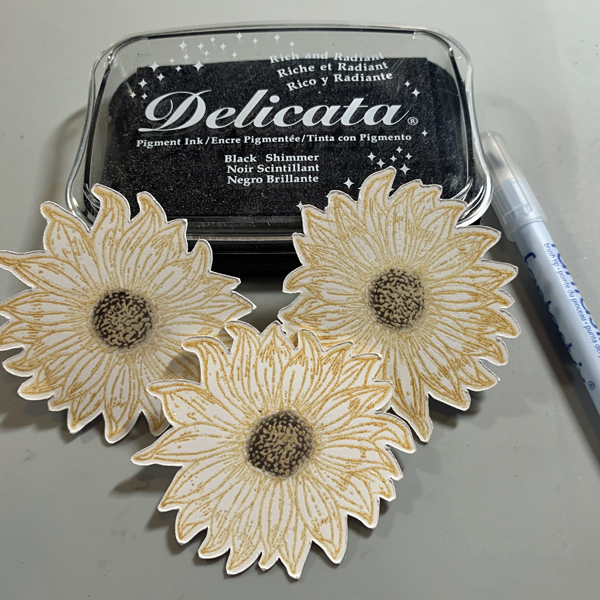
Use a brush tip Fantastix to color in the center of the sunflower with Delicata Black Shimmer.

2021-Aug-Neva-Fireworks!-Bday-card-Step3

Step 3

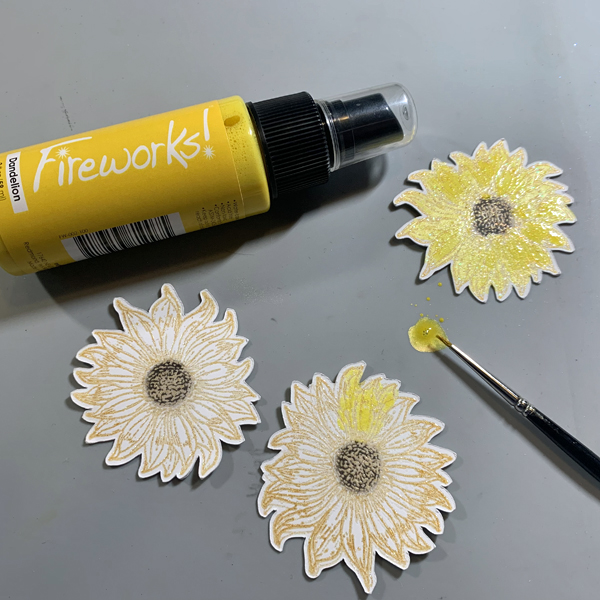
Shake the Fireworks! spray until all of the shimmer is mixed in.  When the spray sits for awhile, the shimmer settles to the bottom and can be seen as a thin layer through the bottle.  Remove the spray lid and tap a bit of Fireworks! on your work mat from the end of the plastic tube.  Use a fine tip paint brush to paint the sunflowers a beautiful iridescent Dandelion Yellow.  Yellow ink is one of the more difficult inks to use, and this method solves that dilemma!

2021-Aug-Neva-Fireworks!-Bday-card-Step4

Step 4

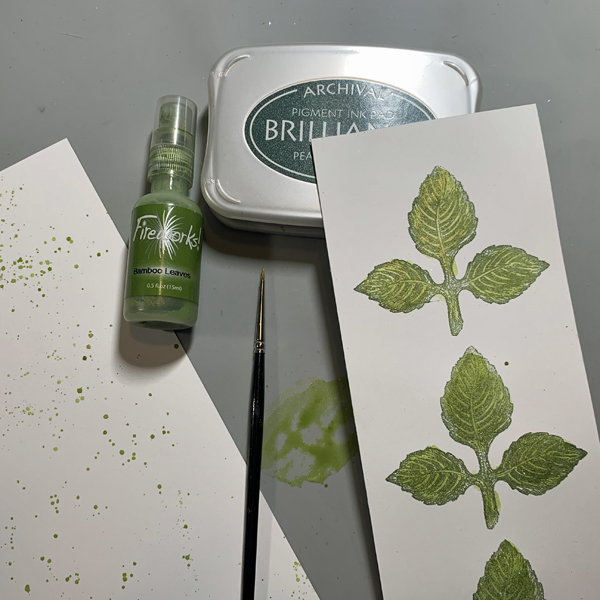
Stamp the leaf image in Brilliance Pearlescent Ivy and heat emboss with Iridescent Embossing Powder.  Using embossing powder helps maintain the original ink color of the image while painting over with Fireworks! spray.  It also allows you to color inside the lines much more easily! Use a fine point paint brush to add Fireworks! in Bamboo Leaves.  Die cut or fussy cut the leaves.

2021-Aug-Neva-Fireworks!-Bday-card-Step5

Step 5

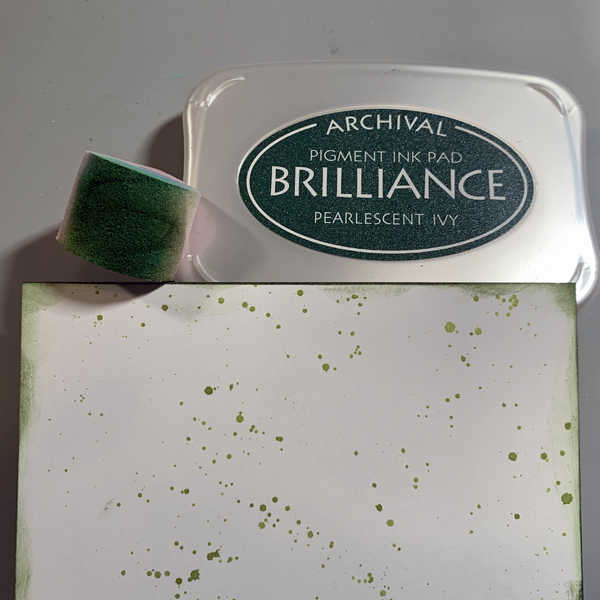
To get a finer sprinkling of more carefully located drops of Fireworks!, use the same paint brush and gently tap over the card stock to create a fine splatter pattern.  When using the spray nozzle, the color is denser on the cardstock.  Finish the edges by inking with an ink blusher and Brilliance Pearlescent Ivy.

2021-Aug-Neva-Fireworks!-Bday-card-Step6

Step 6

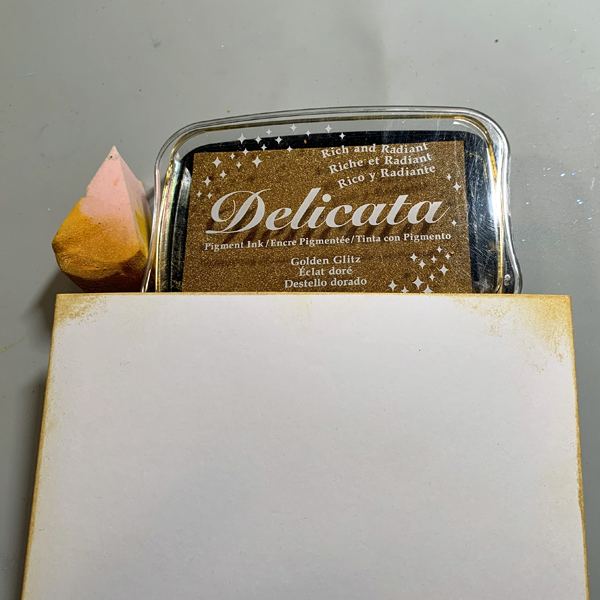
Edge the base card with an ink blusher and Delicata Golden Glitz.  Using inks throughout the card allows for perfect coordination.

2021-Aug-Neva-Fireworks!-Bday-card-step7

Step 7

Position the leaves and sunflowers on the card front to determine the location for the sentiment.  Stamp the sentiment in Brilliance Pearlescent Ivy and heat emboss with Iridescent embossing powder.  Adhere the layers of the card together.  The card front and leaves are adhered with Tear-It! Tape, and the sunflowers are adhered with thin dimensional foam adhesive.

Art Supplies

Imagine
Other
  • Auntie Amy Sunflower image
  • Heartfelt Creations Bold Leaf stamp
  • Technique Tuesday Large Birthday sentiment stamp
  • Fine point paint brush

Make a Beautiful Pink Embossed Card

2021-aug-kyriakos-pink-wish-card-900-wm

By Kyriakos Pachadiroglou

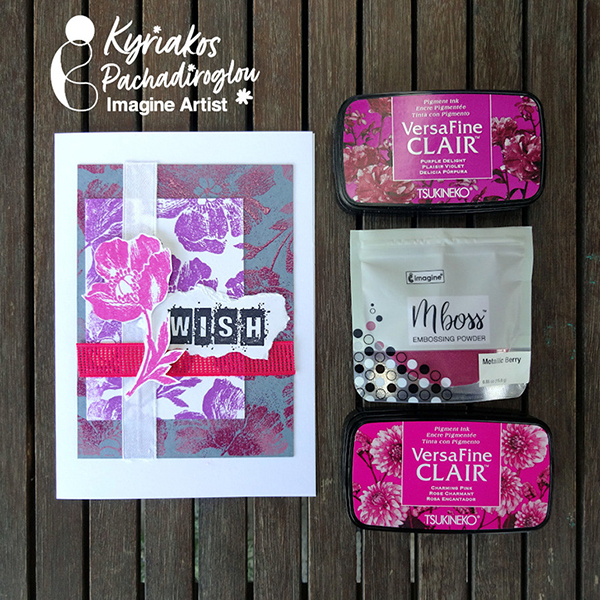
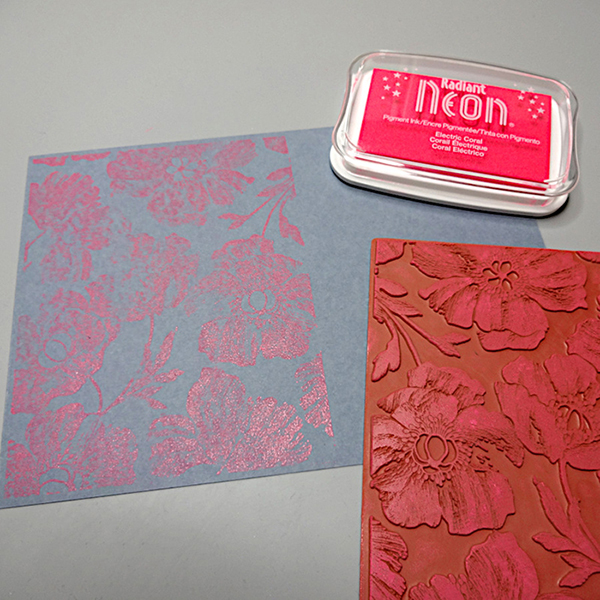
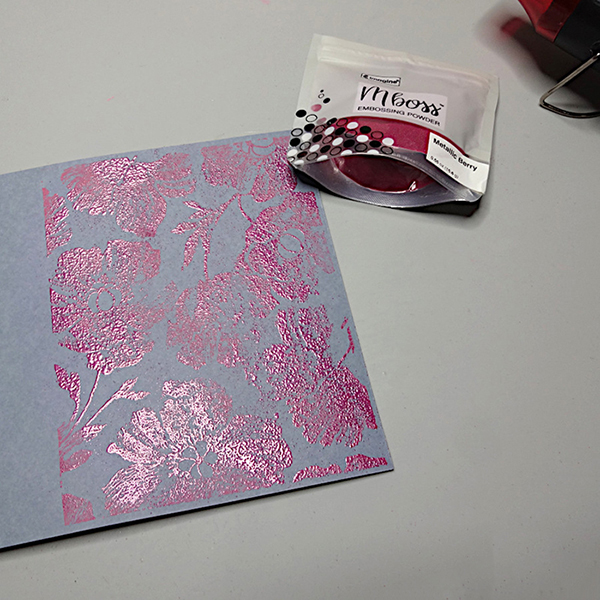
– Stamp with Radiant Neon ink and partially cover with Mboss embossing powder to make a flourish background on a denim color paper. Add layers with the same design, stamped with VersaFine CLAIR inks on white card stock.


Skill: Beginner

Time: 1 Hour


Directions:

2021-aug-kyriakos-pink-wish-card-step1

Step 1

On a 4.5×6 inch piece of the denim color paper stamp the poppy pattern with the Radiant Neon ink. Ink the stamp well and press it firmly on the paper holding it for a few seconds on the paper pressed.


2021-aug-kyriakos-pink-wish-card-step2

Step 2

Sprinkle Mboss Metallic Berry embossing powder (don’t fully cover the pattern), remove the excess and heat set.


2021-aug-kyriakos-pink-wish-card-step3

Step 3

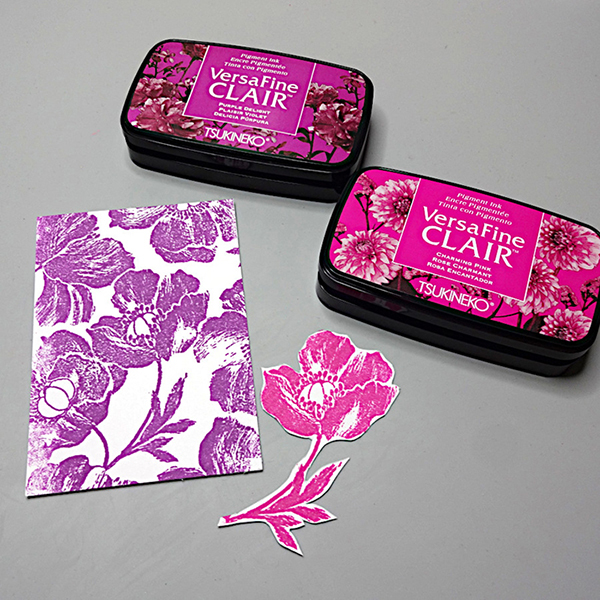
On a 3×4 ¼ inch piece of white card stock, stamp with the VersaFine CLAIR Purple delight positioning the design to the middle left on the paper. Stamp with VersaFine Charming Pink on a second piece of paper and cut along the poppy flower.


2021-aug-kyriakos-pink-wish-card-step4

Step 4

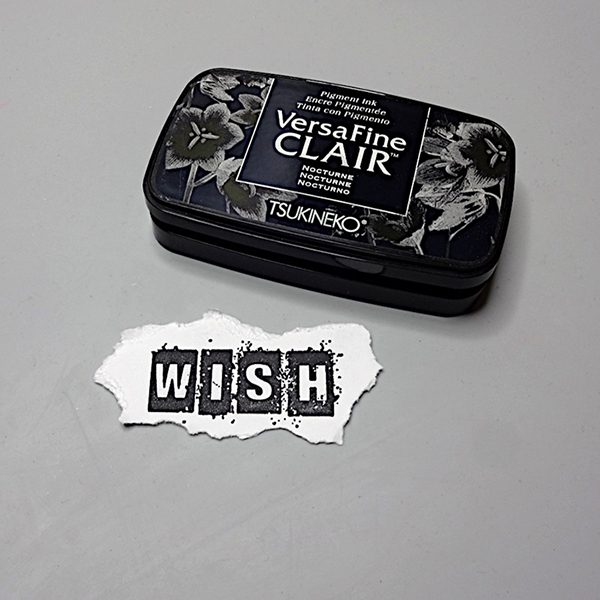
Stamp a wish sentiment with VersaFine Nocturne and tear the paper on all sides.


2021-aug-kyriakos-pink-wish-card-step5
Step 5

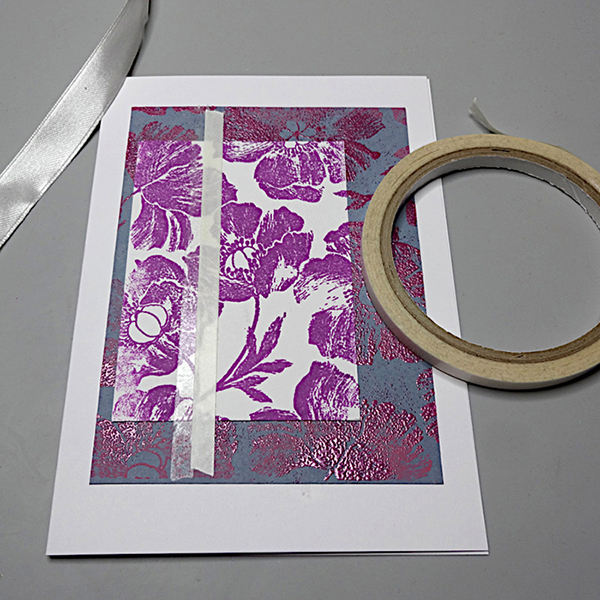
Set the stamped card stocks on a card base with Tear It! Tape and add a layer of it vertically on the left side to set the white satin ribbon. Repeat horizontally for the pink one.


2021-aug-kyriakos-pink-wish-card-step6
Step 6

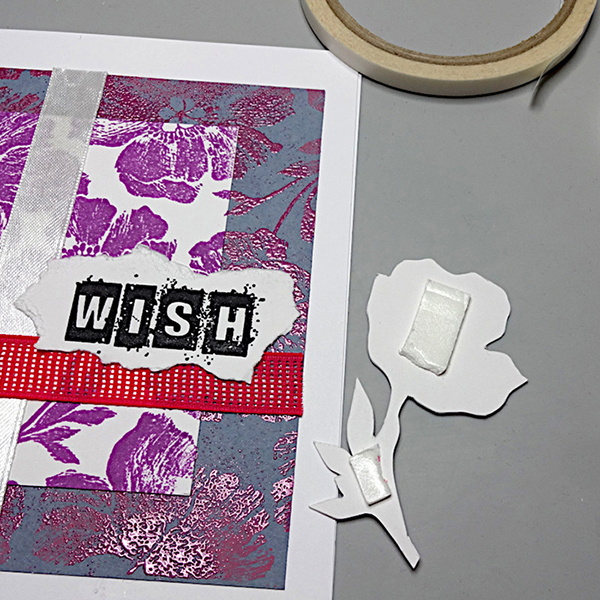
Add foam tape to the back of the flower and set it on the card.


Art Supplies:

Imagine

VersaFine CLAIR – Charming Pink, Purple Delight, Nocturne

Radiant Neon – Electric Coral

Mboss – Metallic Berry

Tear It! Tape


Other

Card stock – white and denim color

Card base

Foam tape

Penny Black – Poppy pattern stamp

White and pink ribbons

Heat tool


Learn the Technique in Creating an Eye-Catching Faux Scratchboarding Card

Faux-13-600

By Alison Heikkila

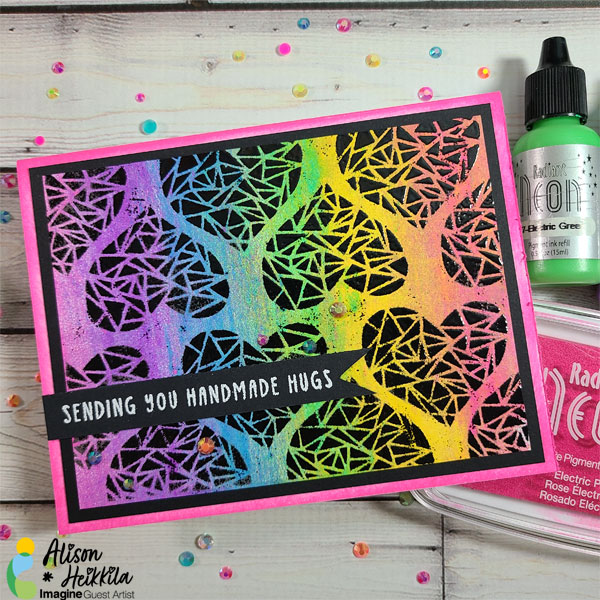
Do you remember Scratch Art? There’s a black piece of heavy cardstock and you use pointy tools to scratch the black away, to reveal colors underneath? Some folks made really incredible art with this technique…I know my kids always enjoyed doing it too. How would you like to recreate that look of scratch art, but in a lot less time? It’s fun, and it gives you another way to use your reinkers.

Skill Level: Intermediate

Time: 20-30 Minutes

Directions:
Faux-1

Step 1

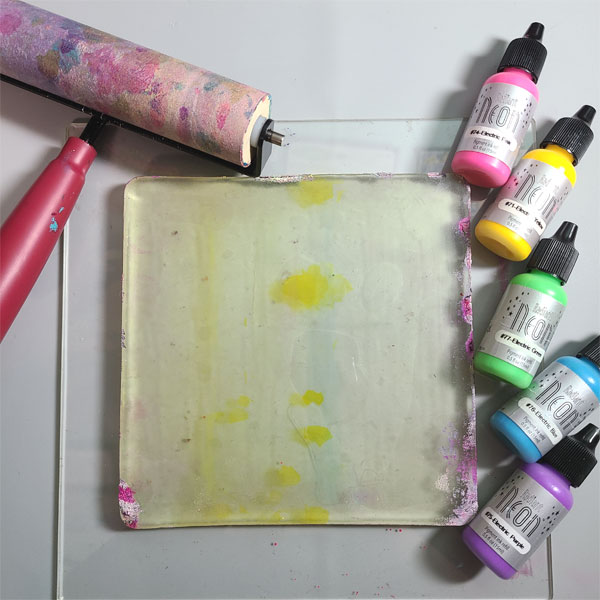
Gather your supplies. You’ll need a gel printing plate (mine is a 6″x6″), reinkers ( I used 5 Radiant Neon colors), a brayer, and some copy paper. You can use heavy weight cardstock if you prefer.
 

Faux-2

Step 2

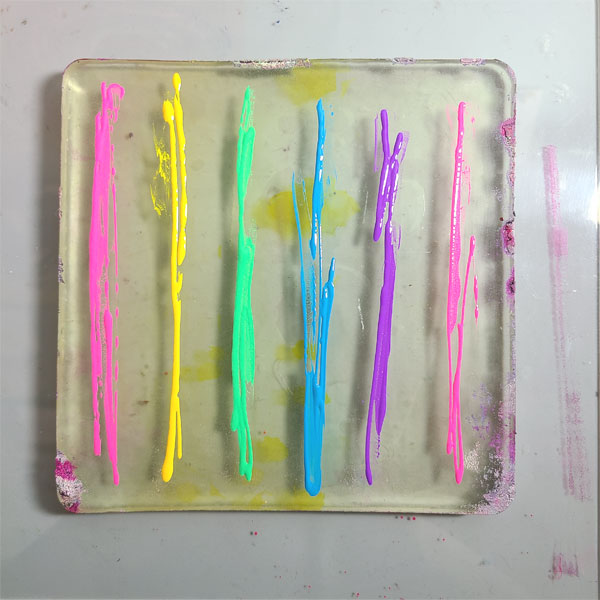
Squirt a small amount of reinkers in lines on your gel printing plate. You don’t need too much. I have a little more than I needed on mine.
 

Faux-3

Step 3:

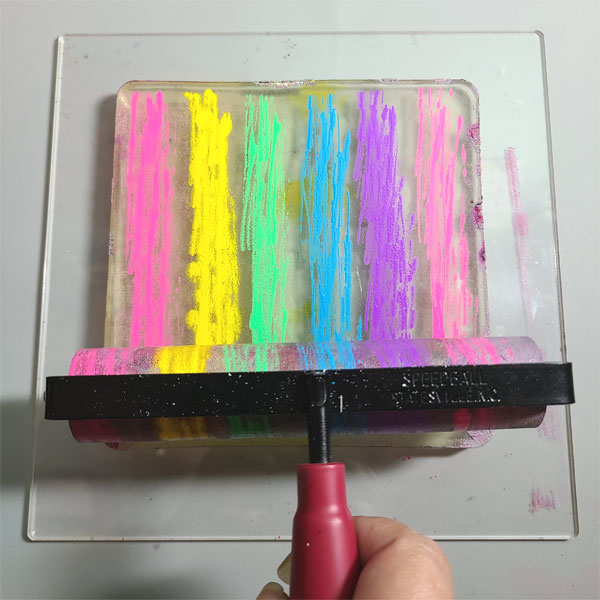
Using a brayer, roll over the ink to get the colors to begin to blend. Try to keep from moving the brayer too much from side to side, as that will have the colors blend, and you’ll lose the distinction of each color.
 

Faux-4

Step 4

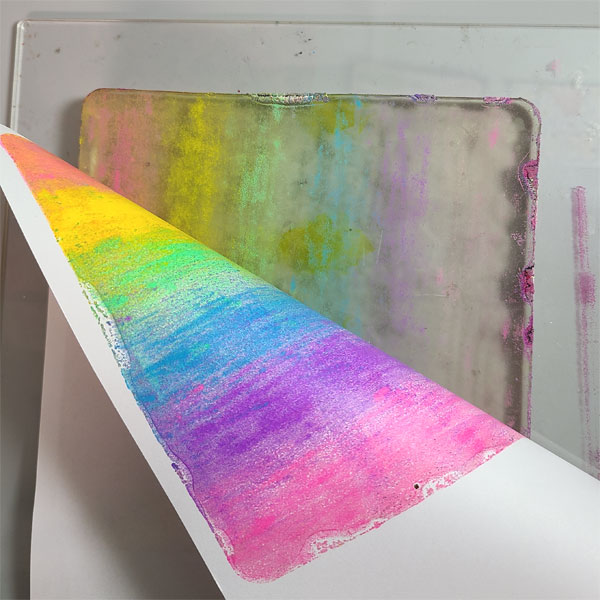
Apply your piece of copy paper to the gel plate, and rub the back of the paper with your hands. Be sure to have contact with the entire surface. Once you think the ink has transferred, slowly peel back the paper. If you see you need to transfer the ink better, place the paper back down and rub the back of it again.
 

Faux-5

Step 5

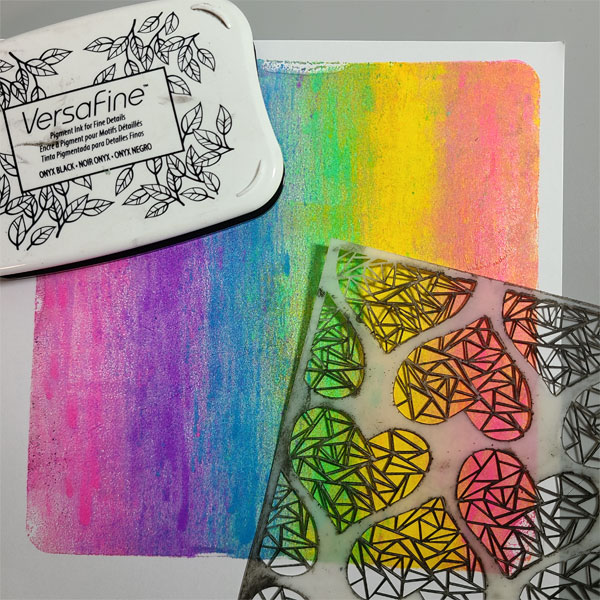
Choose your stencil and grab VersaFine ink in Onyx Black. Once the gel print is completely dry, tape down the stencil on top of the print.
Faux-6

Step 6

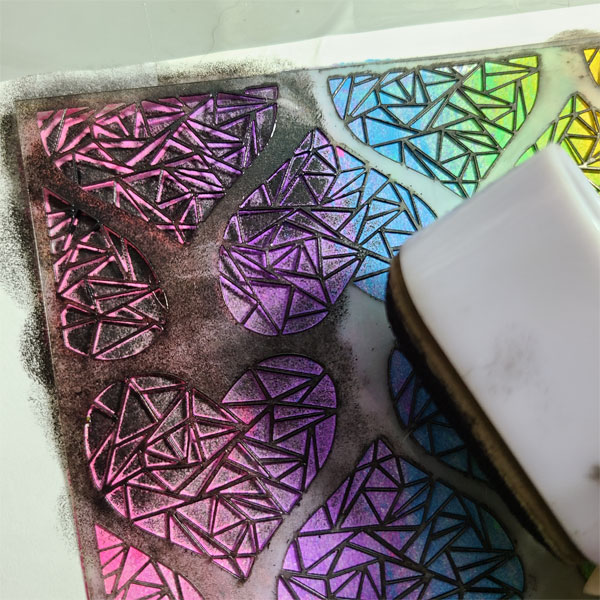
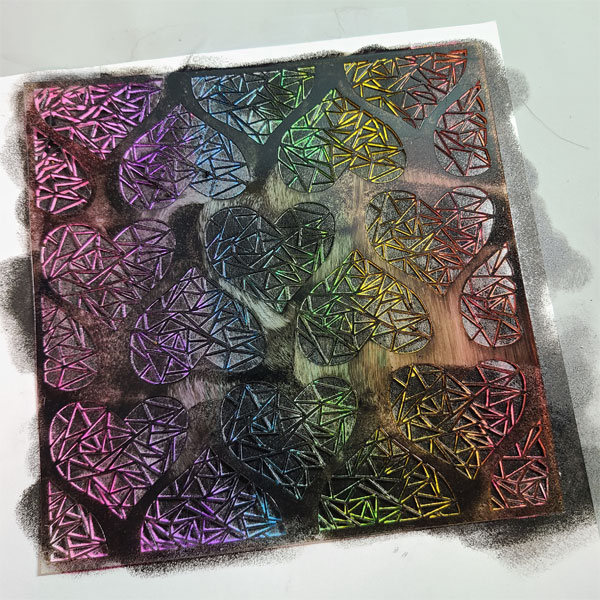
Using an ink dauber, apply a heavy coat of Onyx Black VersaFine all over the gel print. Make sure you don’t move your stencil, and that you get a deep, even coat of ink across the entire area.
Faux-7

Step 7

When the stenciled area is thoroughly covered with ink, remove the stencil.
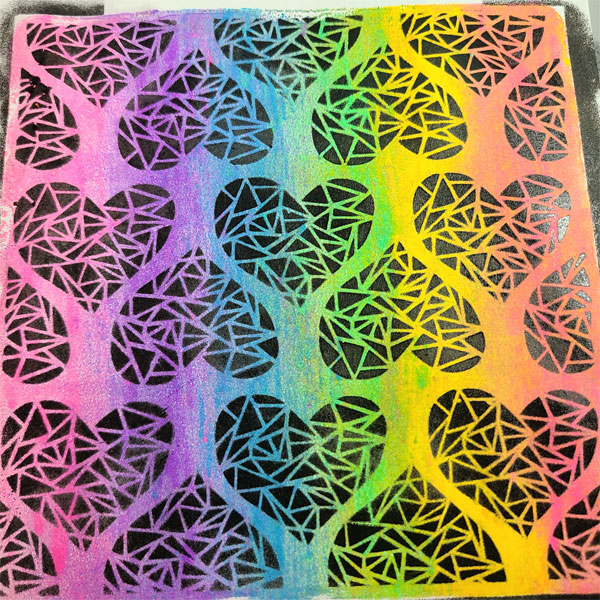
Faux-8

Step 8

Optional- You may choose to leave the background as-is, or to enhance it further with embossing powder. I opted to use black embossing powder to give it some shine. You may also use clear over the black ink. ***Take this a step further and use a different contrasting color altogether!
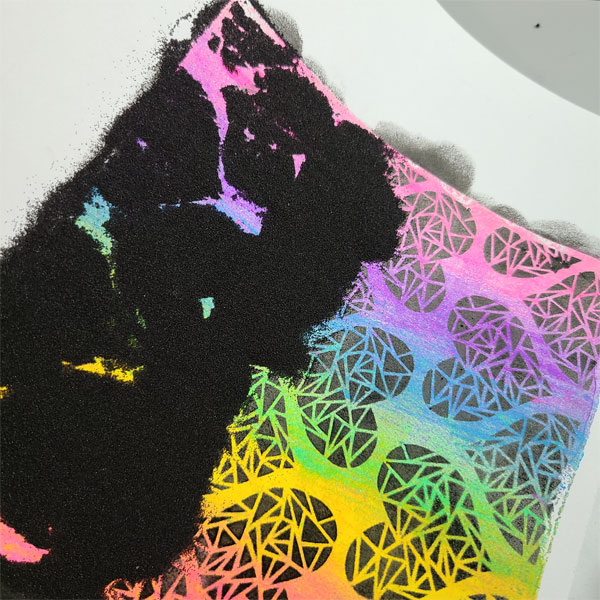
Faux-9

Step 9

Pour the embossing powder all over the print and shake off the excess. If you see stray bits of powder where you don’t want it, use a small, dry brush to swipe it away. Heat the powder with an embossing tool, but please keep in mind that if you used copy paper, the paper heats up quickly.

Step 10

Trim down your background to 3 3/4″ x 5.” This will leave you a nice big strip that yuo can use on a different card another time.

Step 11

Cut a piece of black cardstock to 4 1/4″ x 5 1/2.” Adhere your stenciled piece to the black with the adhesive of your choice.
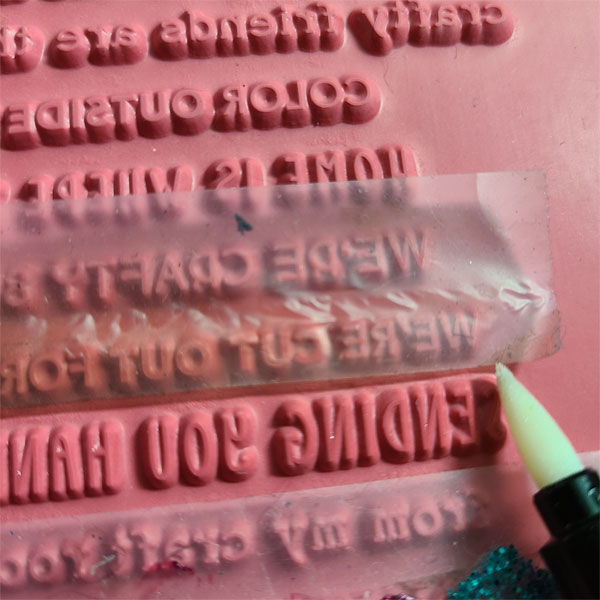
 

Faux-11

Step 12

Ink up your sentiment with VersaMark Ink. The sentiment I chose had many other sentiments with it, but I only wanted to ink up one. I put tape on the sentiment above and below the one I wanted to use, then I used the VersaMarker to ink up the one I wanted. You can use the VersaMark Pad for this too, but the pen is nice and small.

Step 13

Remove the tape and stamp the sentiment on to a strip of black cardstock.

Step 14

Sprinkle white embossing powder on to the sentiment, shake off excess, and heat set.

Step 15

Apply Radiant Neon Ink in Electric Pink to the edges of your (white) card base.

Step 16

Adhere the top layers (including the sentiment) to the card base.

Step 17

Using On Point Glue, adhere flat-backed rhinestones around the sentiment strip.
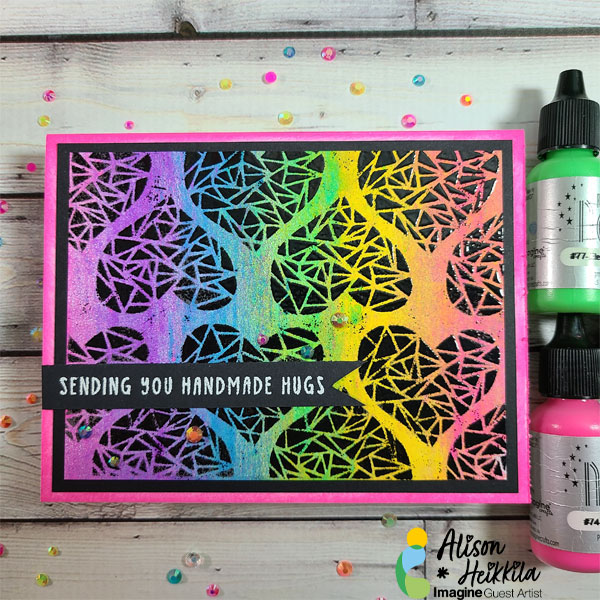
Faux-12

The end result is a fun, eye-catching card that can be used for many occasions. You can experiment with different combinations of reinkers and stencils to get completely different looks.

Art Supplies

Imagine

Radiant Neon Reinkers in Electric Pink, Electric Yellow, Electric Green, Electric Blue, and Electric Purple
Radiant Neon Ink Pad in Electric Pink
Embossing Powder in Black and White
On Point Glue
Sponge Dauber

Other

Sassy & Crafty: Stained Glass Hearts Stencil
Doodles Paper Playground: Neon Flat-backed Rhinestones
Taylored Expressions & Brutus Monroe: Simple Strips- Crafty
Black Cardstock
White A2 Card Base

 

Make a Beautiful Heart-Shaped Plywood Ornament

2021-aug-kyriakos-stamp-on-plywood-600-wm

By Kyriakos Pachadiroglou

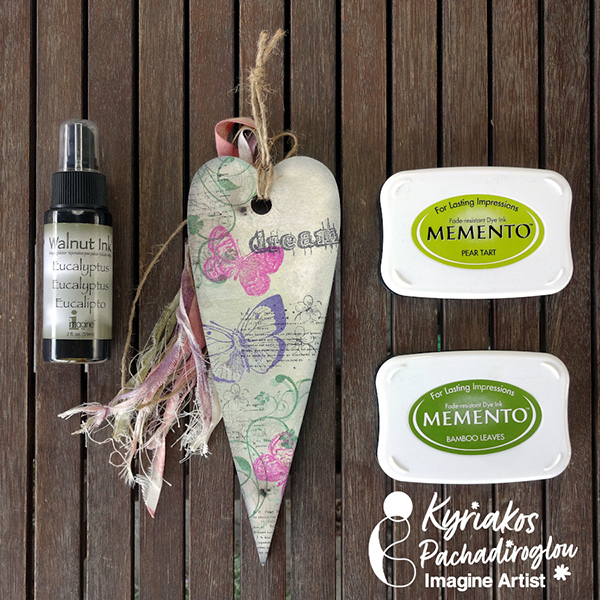
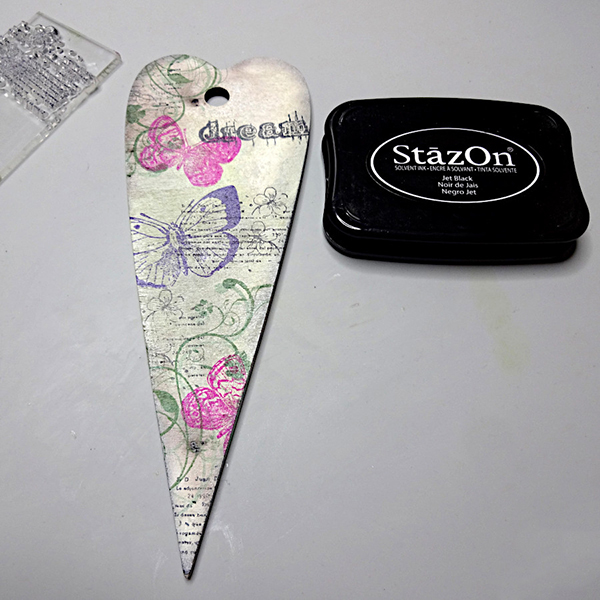
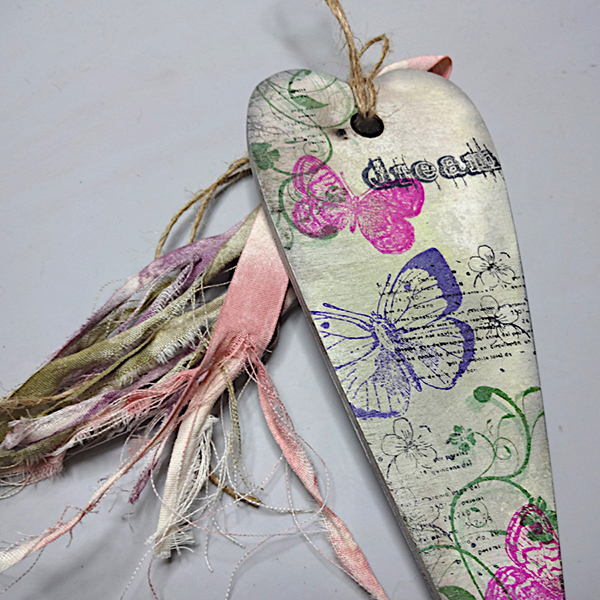
Make a distressed heart-shaped plywood ornament with Walnut Inks. Color with Memento inks for a smooth result and decorate with stamps and StazOn inks for a sharp and bleedless design.


Skill: Beginner

Time: 1 Hour


Directions:

2021-aug-kyriakos-stamp-on-plywood-step1

Step 1

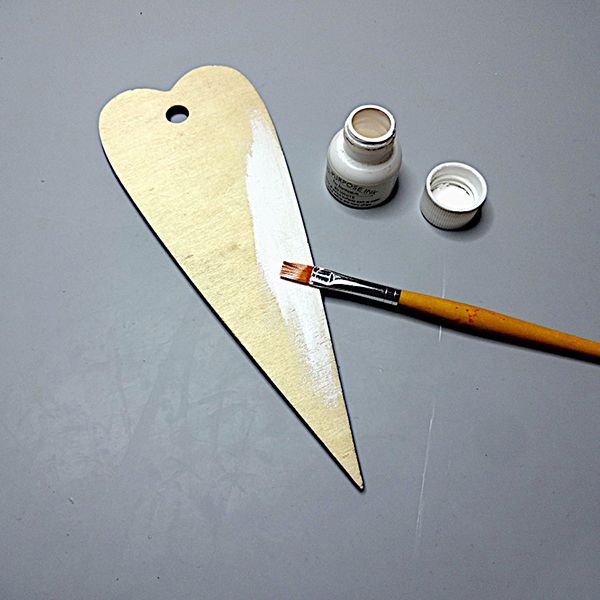
Paint the plywood shape with All-Purpose White ink color. Let it dry well.


2021-aug-kyriakos-stamp-on-plywood-step2

Step 2

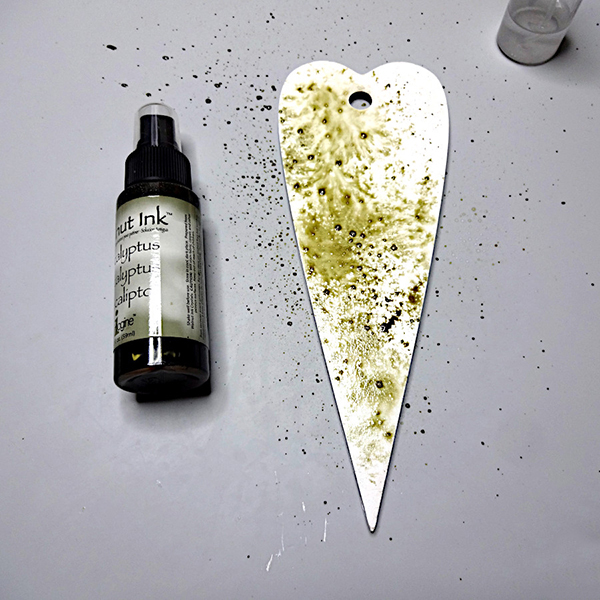
Sprinkle drops of the Walnut Ink Eucalyptus, add very few Walnut Ink Crystals and spray with water to dilute further. Dry well.


2021-aug-kyriakos-stamp-on-plywood-step3

Step 3

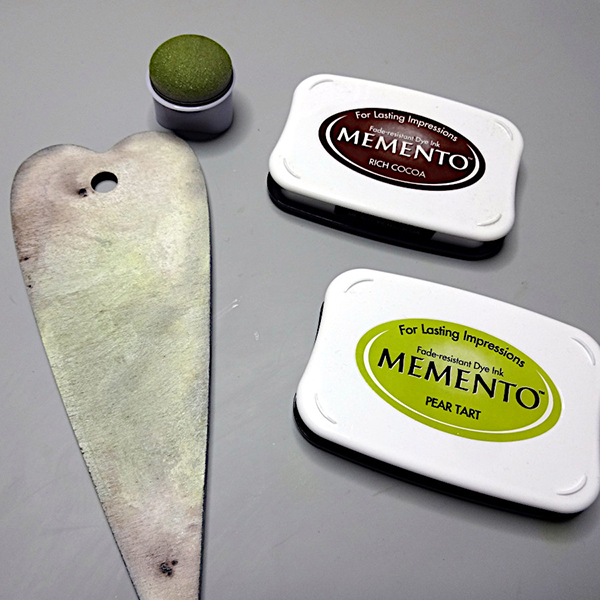
Use a Sponge Dauber to smoothly add color with Memento Rich Cocoa and Pear Tart ink pads.


2021-aug-kyriakos-stamp-on-plywood-step4

Step 4

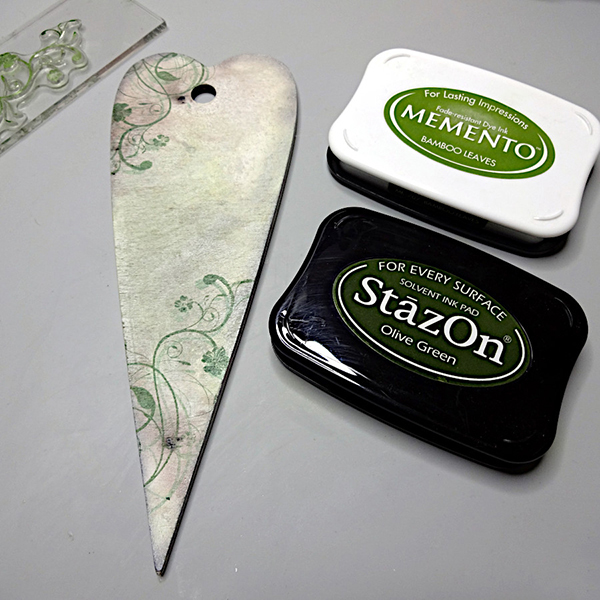
Stamp the foliage first with the Memento Bamboo leaves and then stamp on top, slightly offsetting to the first design, with StazOn Olive Green.


2021-aug-kyriakos-stamp-on-plywood-step5
Step 5

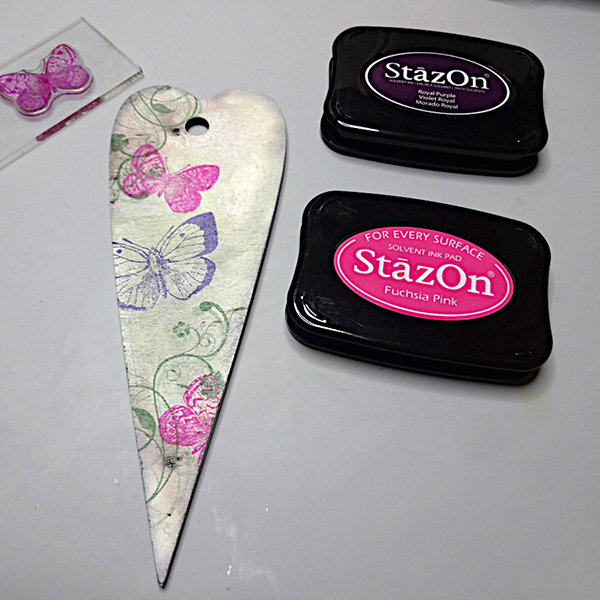
Stamp butterflies with StazOn Fuchsia pink and Royal Purple ink pads.


2021-aug-kyriakos-stamp-on-plywood-step6
Step 6

Add a sentiment with StazOn Jet Black.


2021-aug-kyriakos-stamp-on-plywood-step7

Step 7

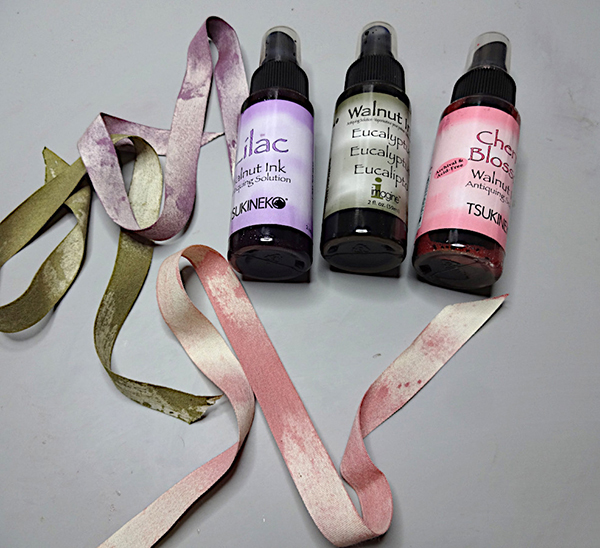
Cut 12″ long pieces of the cotton ribbon and spay with the Walnut Inks Eucalyptus, Lilac and Cherry Blossom. Let them dry.


2021-aug-kyriakos-stamp-on-plywood-step8

Step 7

Tie the cotton ribbons on the heart shape.


Art Supplies:

Imagine

All-Purpose Ink – White

Walnut Ink – Eucalyptus, Lilac, Cherry Blossom

Memento – Pear Tart, Rich cocoa, Bamboo Leaves

StazOn – Olive Green, Fuchsia Pink, Royal Purple, Jet Black

Sponge Daubers


Other

Plywood Heart Shape

Kaisercraft – Tigerlily Stamps

½” Cotton Ribbon


Make a Colorful Card Perfect for Advancing to the Next Grade

2021_Jul_JowilnaNolte_School_1

By Jowilna Nolte 

– I dream in color literally. This was the case the other night when I dreamt about some alcohol ink that wasn’t alcohol ink. And so experimenting started. I used my VersaFine Clair ink pads on Yupo paper. Now technically this will never dry but here is the trick how to create that gorgeous look.

Skill Level: Beginner/Intermediate

Time: 30 minutes

Directions:

2021_Jul_JowilnaNolte_School_step1

Step 1

gorgeous colorful card perfect for advancing to the next grade.

2021_Jul_JowilnaNolte_School_step2
Step 2

I used 200gsm Yupo paper in white. Swipe the first color of ink across the paper once or twice depending on how wide you would like your strip.

2021_Jul_JowilnaNolte_School_step3

Step 3

Now continue with the second and third color of ink.

2021_Jul_JowilnaNolte_School_step4

Step 4

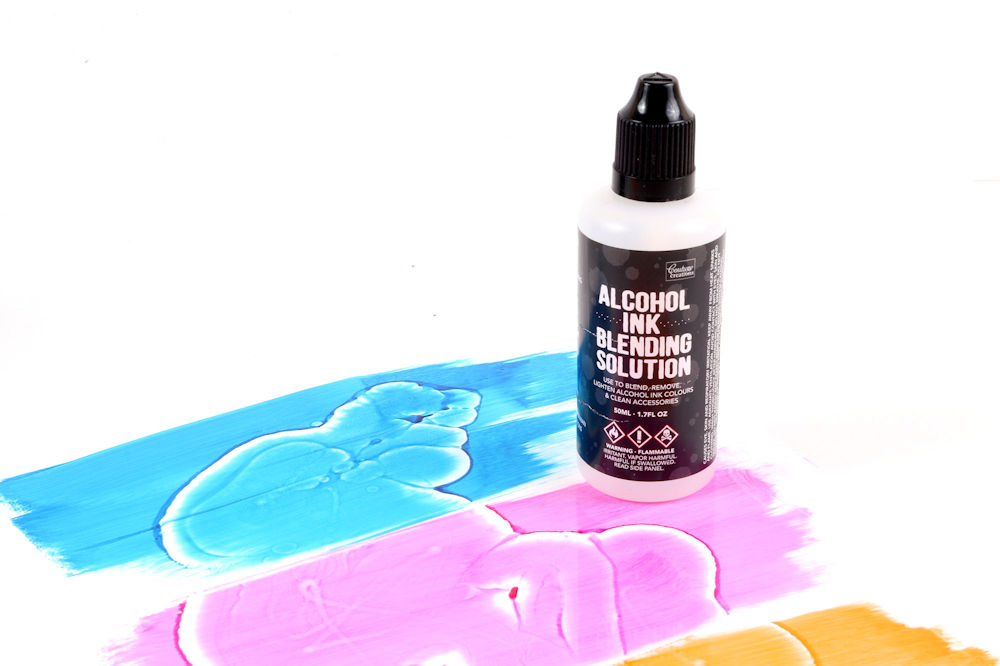
While the ink is still nice and wet use your blending solution and add quite a bit of it onto the ink. Let it sit for a while and then swirl the paper around to mix the colors a bit.

TIP: I also added some into a misting bottle and sprayed the inks to create small little drops of texture on it.

2021_Jul_JowilnaNolte_School_step5
Step 5

Leave to dry. I left mine to dry for a while and still had some thicker areas where the ink pooled that stayed tacky, so I simply used a clear sealant and sprayed that over the paper and left it again. It dried nicely and now all I have to do is use this gorgeous Faux alcohol ink piece of a project.

Trim your panel to fit onto the front of a folded card and adhere the panel using Tear It! Tape.

Add a vinyl decal and stamped sentiment, then finish off your card with a few scattered diamante. And in a few minutes you created this gorgeous colorful card perfect for advancing to the next grade.

Art Supplies

Imagine

VersaFine Clair Paradise
VersaFine Clair Charming Pink
VersaFine Clair Summertime
VersaFine Clair Nocturne
Tear It! Tape
On Point Glue

Other

Yupo paper
Alcohol blending solution
Die-cut: Cricut
Gold vinyl: Cricut
Die-cut machine: Cricut Maker
Embellishments
Stamps: Joy Clair