Easy to Make Christmas Napkin Holders

2021-Dec_19-kyriakos-xmas-table-decoration-main-wide-wm

By Kyriakos Pachadiroglou –

Stamp on Vertigo sheets to make sparkling napkin rings using Mboss Valentine embossing powder. Repeat stamping on white card stock to make little tags to decorate your festive table.


Skill: Beginner

Time: 1 Hour


Directions:

2021-dec-kyriakos-xmas-table-decoration-step1

Step 1

Cut 2 ½ x 5 in pieces of the Vertigo sheets and stamp with VersaMark watermark ink.

Cover with Mboss Valentine embossing powder and heat set.


2021-dec-kyriakos-xmas-table-decoration-step2

Step 2

Use an ink blusher to color around the stamped image with the StazOn Studio Glaze gold.


2021-dec-kyriakos-xmas-table-decoration-step3

Step 3

Stamp stars with the StazOn Black Cherry ink pad.


2021-dec-kyriakos-xmas-table-decoration-step4

Step 4

Punch one hold at the middle left and right long side edges and place satin ribbon.


2021-dec-kyriakos-xmas-table-decoration-step5
Step 5

Stamp the nutcracker stamp on white card stock with VersaMark watermark ink pad. Cover with Mboss Valentine embossing powder and heat set. Cut around. Repeat with the Mboss Sparkling Champagne Embossing Powder. 


Art Supplies:

Imagine

StazOn – Black Cherry

VersaMark – Original

StazOn Studio Glaze – Gold

Mboss – Valentine, Sparkling Champagne

Vertigo Sheet – Pebbles

Ink Blushers

Other

• Nutcracker Stamp

• Heat Tool

• Gold Satin Ribbon

• White Card Stock

• Hole Punch


Create Elegant Heart Embossed Holiday Cards

2021-Lee_Ann_Dec_Blog

By LeeAnn McKinney –

Hi there friends and fellow crafters, LeeAnn here. Today I am making 2 cards using one of my favorite techniques… HEAT EMBOSSING. So for the next 5 minutes please relax, and watch as I make these 2 cards. Actual crafting time was 17 minutes not counting the cutting of the cardstock which I did before turning on the camera.


Art Supplies

Imagine:

• Craft Mat

• Tear it! Tape

• Mboss

• VersaMark Watermark Ink


Other Supplies Used:

• CARD STOCK 8.5 X 11- White- Layering Weight – Gina K Designs

——— https://ldli.co/e/43kgz90 [ ginakdesigns.com ]

• STAMPS- Holiday Tapestry – Gina K Designs

• CARD STOCK 8.5 X 11- Black Onyx- Heavy Weight – Gina K Designs

• CARD STOCK 8.5 X 11- Red Velvet- Heavy Weight – Gina K Designs

• CARD STOCK 8.5 X 11- Blue Denim- Heavy Weight – Gina K Designs


THANKS, You Mean So Much To Me with Imagine Crafts

2021_LeeAnn_Nov_IG

By LeeAnn McKinney –

Hi there friends and fellow crafters, LeeAnn here with a fun Thanks card, using products you might not think about when not using them in the means intended.

I purchased a few (4) Hot Foil Dies a couple months ago, and didn’t have the machine needed to play with them. So I’ve been thinking, and decided to use them like a letter press. I inked up the Fall Leaves with VersaFine Clair Pigment Ink in Tulip Red, Summertime Cheerful, Verdant and Pinecone, taped it to a panel of Mixed Media Cardstock and then did the same with the word “Thanks”, using Delicata Golden Glitz. I used a piece of heavyweight cardstock and rubber embossing pad, on my big shot platform, then added my panel with the foil plates adhered to it and then the regular top plate, ran it through my big shot twice (forward then back) and wow, other than a little over-inking where I tried to cover up with some sequins they turned out amazing. I used On Point Glue to adhere the sequins and Tear It! Tape to adhere the panel to my cardbase. I also heat embossed the secondary part of the sentiment using Mboss Gold Embossing Powder.

Hope you enjoy. Watch until the end and let me know which card you prefer, the card on the left without the sequins or the card on the right with the sequins. Oh, forgot that I used Gold Sheer Shimmer Spritz on my panel as well.

Thanks for watching, have a great day.


Art Supplies

Imagine:


• VersaFine Clair

• VersaMark Watermark Ink

• Paper Delicata

• Mboss

• Craft Mat

• On Point Glue

• Tear It! Tape

• Gold Sheer Shimmer Spritz


Other Products:

• Kraft Cardstock (heat embossed strip)
• Heavyweight Letter Press Cardstock
• Aww-Tumn Embellishment Sequin Mix


How to Make a Spooky Card

Crow-10-600

By Alison Heikkila –

Halloween is a great time to experiment with deeper shades, interesting textures, and unique combinations. Things don’t need to be pretty or perfect…in fact, the weirder and more off-kilter they are, the better! Let’s use a variety of Imagine products to make a spooky card for Halloween.

Skill Level: Beginner to Intermediate
Time: 30 Minutes, including drying time

Directions:

Crow-1

Step 1:

Apply Silvery Shimmer Delicata Ink Refill to a 6×6 gel printing plate and roll out with a brayer.

Crow-2

Step 2:

Lay your stencil on to the gel plate. Using a piece of scrap paper, rub the negative space areas to pick up the ink. Pull the print. You won’t be using this print for this project, but you can save it for another time.

Step 3:

Lift the stencil off of the plate.

Step 4:

Lay a piece of 4″ x 5 1/4″ black cardstock on top of the plate, where the stenciled image is. rub the paper on to the plate firmly, making sure to rub all areas to ensure a clean pull.


Crow-3

Step 5:

Pull the print.

Crow-5

Step 6:

Splatter irRESISTibles Spray in Love Letter on to the gel print. I open the bottle and tap the straw to get nice, big splatters. Let dry.

Crow-4

Step 7:

On a piece of gray cardstock, stamp a solid or silhouette image with VersaMark ink. I used a crow.


Step 8:

Sprinkle Shimmering Night Sky Mboss powder on to the inked image, tap off the excess, and heat set. Then, you can fussy cut the image out.

Crow-6

Step 9:

Die cut your sentiment out of a deep orange cardstock.

Step 10:

Using Tuxedo Black Memento Ink, press the front side of the letters into the pad gently. Memento ink pads have a wonderful texture, which will work perfectly with our creepy card.

Step 11:

On a black A2-sized card base, ink the edges with Black Shimmer Delicata Ink.


Step 12:

Adhere all of your elements on to the card base.


Crow-7

Art Supplies:

Imagine:

• Delicata Ink in Black Shimmer
• Delicata Reinker in Silvery Shimmer
• irRESISTible Spray in Love Letter
• VersaMark Ink
• Mboss in Shimmering Night Sky
• Memento Ink in Tuxedo Black

Other:

Black, Orange and Gray cardstock
Tim Holtz: Crossbones Stencil, Crow Stamp
6×6 Gel Printing Plate
Alphabet Dies

How to Create Fabric Halloween Treat Bags

Blog - Halloween Treat Bags copy

By Annie Collins

– Hello Crafty Friends – Annie here with some fun Halloween treat bags. I used a variety of Imagine Crafts products to create this cute fabric treat bags.

Directions:

Art Supplies:

Imagine

• Mboss Embossing Powder: Black Hologram

• Neon Radiant Amplify Texture

• Fireworks! Shimmery Craft Spray

• On Point Glue

Other:

• Dollar Tree Organza Bags: Golden
• Dollar Tree Googly Eyes: Purple
• Coco & Reno Dies: Witch
• Maker’s Movement Dies: Spider Set
• Studio Calico Mistable Stars
• Mini Maker Die Cutting Machine

How to Make a Simple Fall Tag

Leaf-Tag-Cover-600

By Alison Heikkila –

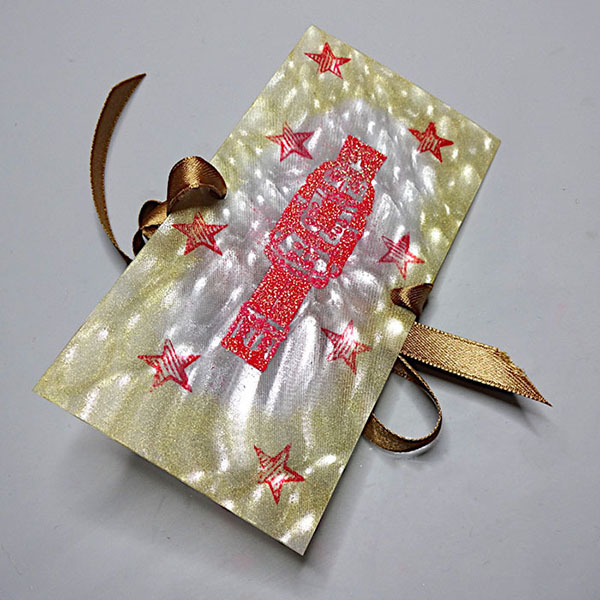
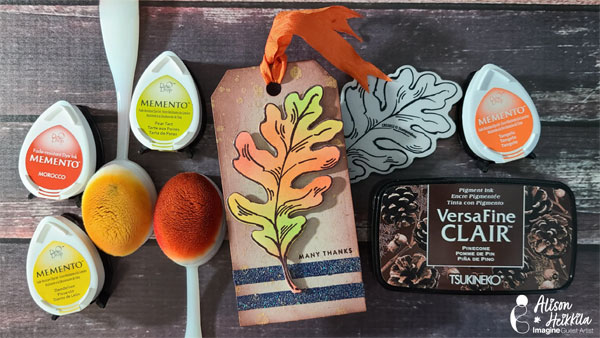
As we approach Autumn, I thought it would be fun to share a way to make a simple tag that can be used for gifts, as a place card, or even attached to a card base. By using a few simple techniques, you can make a bunch of these tags quickly, and save them for when you need them.

Skill Level: Beginner
Time: 15-20 Minutes

Directions:

Leaf-Tag-1

Step 1:

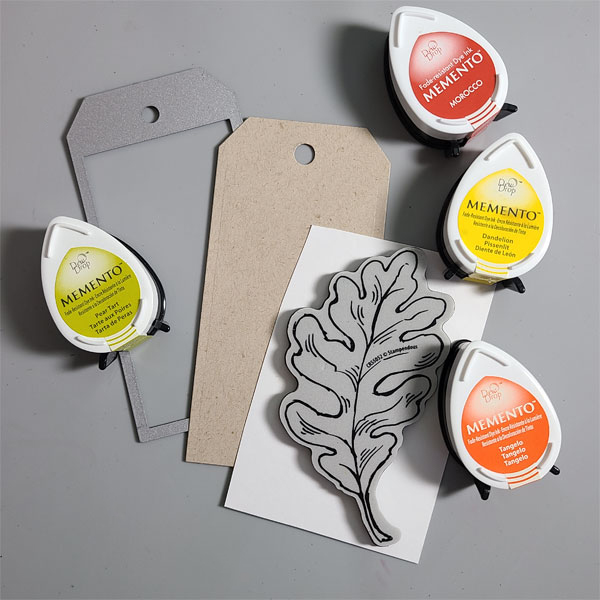
Die cut a tag out of Kraft cardstock. Cut a piece of Bristol Smooth Cardstock that is a little larger than your leaf stamp.

Step 2:

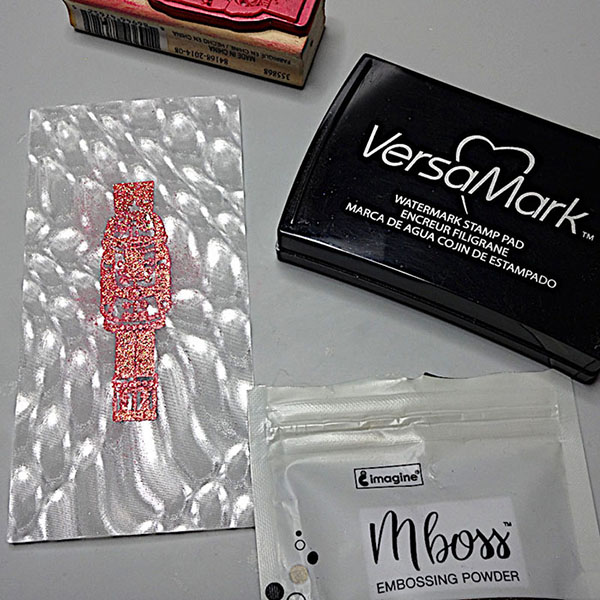
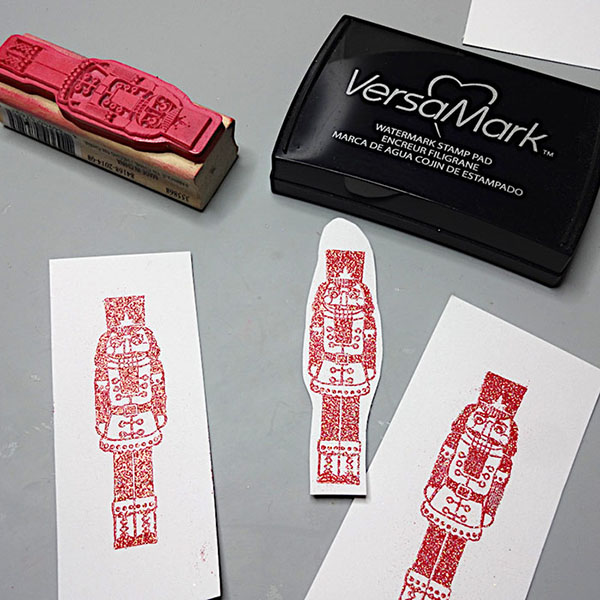
Stamp your leaf with VersaFine Clair Ink in Pinecone.

Step 3:

Apply Clear Mboss Embossing Powder to the leaf, shake off the excess, and heat set.
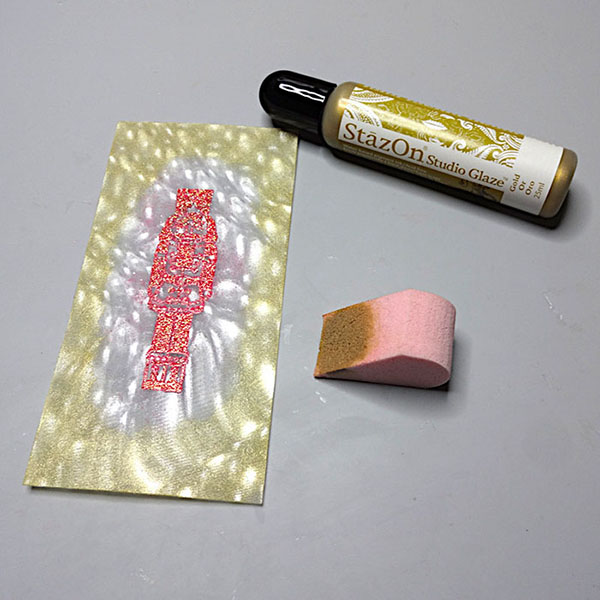
Leaf-Tag-2

Step 4:

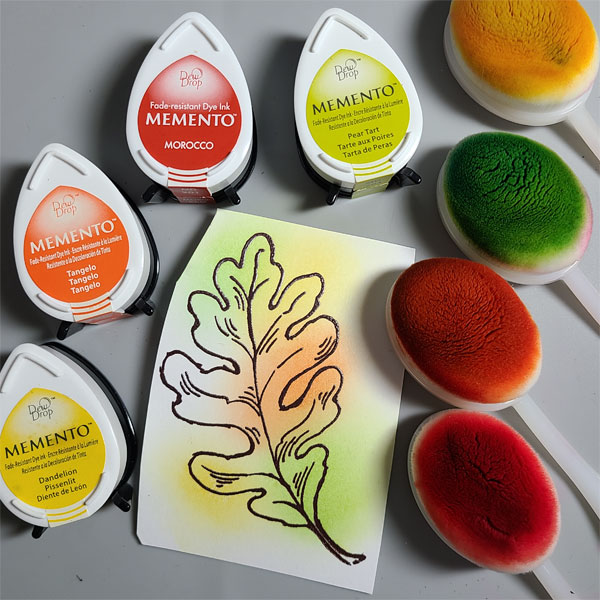
Using Memento Inks in Pear Tart, Dandelion, Tangelo, and Morocco, apply using a blending brush. The colors should fade into each other and cover the entire leaf. The photo above shows the leaf not completely inked.

Step 5:

Die cut the leaf using the coordinating die, or fussy cut it.

Leaf-Tag-3

Step 6:

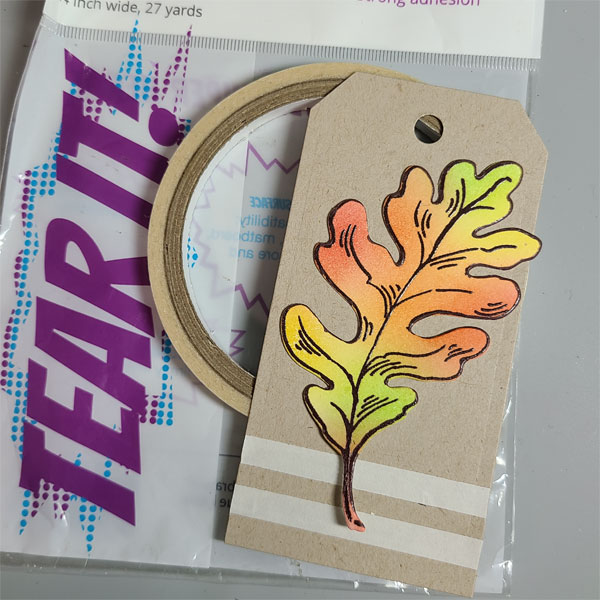
Place the leaf on the tag to help determine where you will add Tear It! Tape. The Tear It! Tape will be used to add stripes of embossing powder. I applied 2 strips.
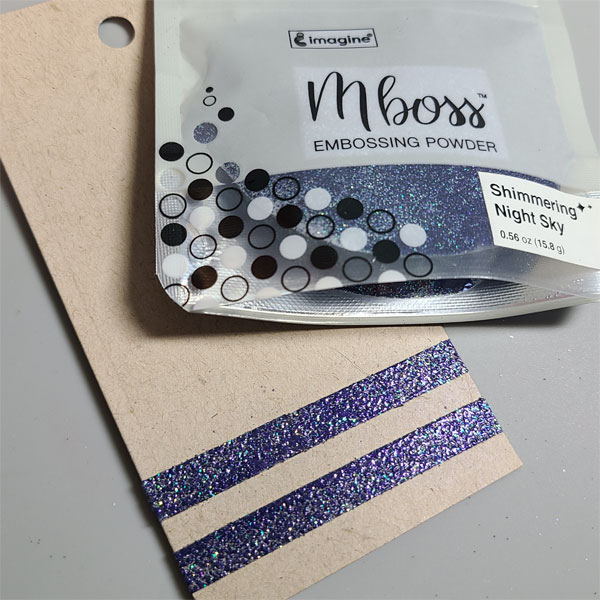
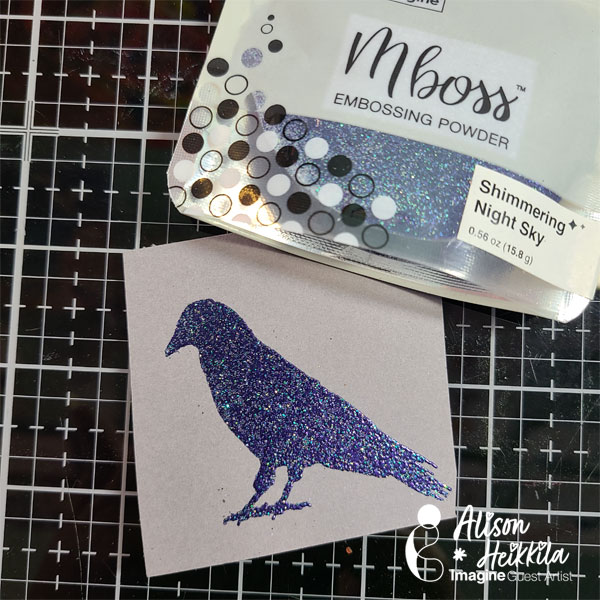
Leaf-Tag-4

Step 7:

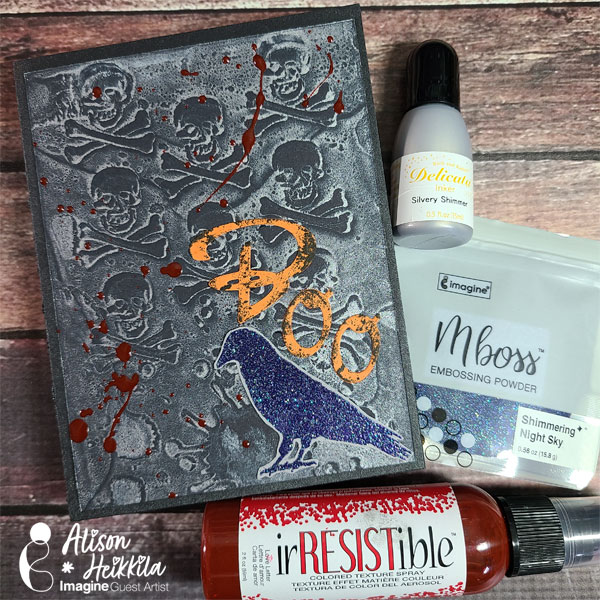
Sprinkle on Shimmering Night Sky Mboss powder on to the Tear It! Tape, shake off the excess, and heat set.
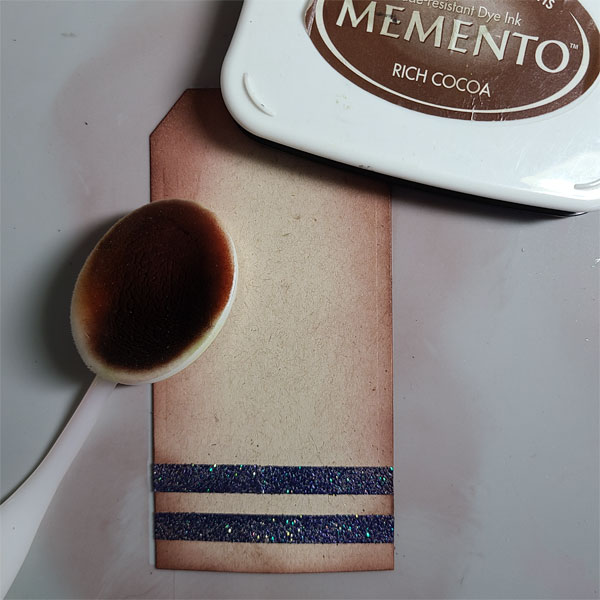
Leaf-Tag-5

Step 8:

Ink the edges of the tag with Rich Cocoa Memento ink and a blending brush. You could also do this step before you add the Tear It! Tape.
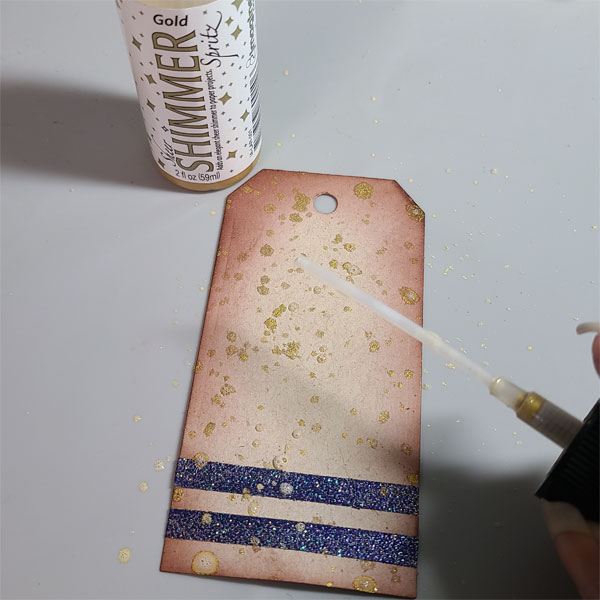
Leaf-Tag-6

Step 9:

Splatter on Sheer Shimmer Spritz in Gold all over the tag. Let dry
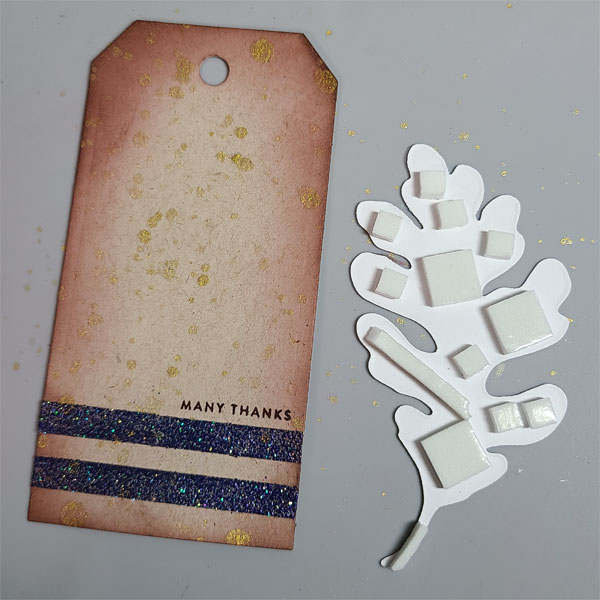
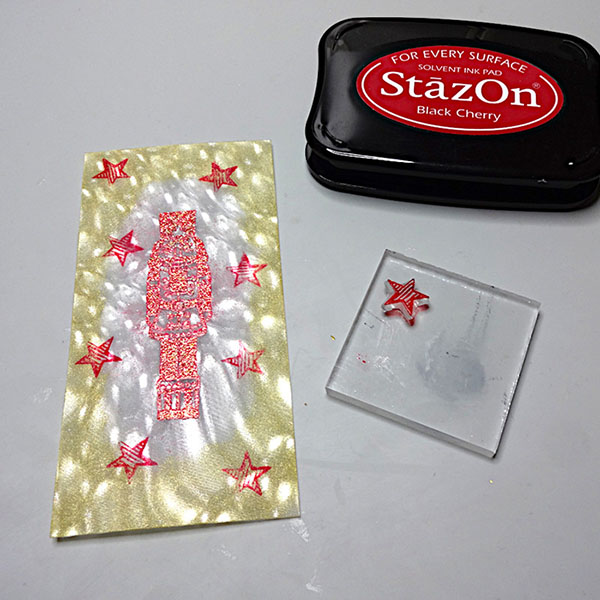
Leaf-Tag-7

Step 10:

Ink a small sentiment with VersaFine Clair Pinecone ink and stamp it on the tag.

Step 11:

Apply foam squares to the back of your leaf to raise it off of the surface of the tag and adhere it.

Step 12:

Add some ribbon or twine to the hole in the tag.

Leaf-Tag-8-600

I think this tag is so pretty and festive. You can easily use different colors of Memento inks or different embossing powder colors to completely change up the look.

Art Supplies:

Imagine:

• VersaFine Clair: Pinecone Ink
• Memento Ink: Pear Tart, Dandelion, Tangelo, Morocco, Rich Cocoa
• Tear It! Tape
• Sheer Shimmer Spritz in Gold
• Mboss Powder in Clear and Shimmering Night Sky

Other:

• Sizzix/Tim Holtz: Framelets Tag Die Set
• Kraft Cardstock
• Strathmore: Smooth Bristol Cardstock
• Stampendous: Jumbo Leaves
• Simon Says Stamp: Tiny Words
• May Arts: Organza Ribbon
• Blending Brushes
• Foam Squares